
Jun (Chün) glaze tests: grid test 1
I knew before starting this endeavor that Jun glazes are notoriously tricky to achieve, but that has never stopped me before! In my initial set of Jun glaze tests I aimed at 12 likely glaze formulations using my local granite, based on glaze analysis and formulations by others. See my last post for more details.
The initial Jun glaze tests were not entirely successful. You never expect to hit the nail on the head first go but when I opened the kiln at first I was disappointed to see what appeared to be 12 celadons. But on closer inspection there were hints of Jun effects where the glaze pooled and was super thick. I was encouraged but also knew I needed to shift my tests significantly.
I went back to the literature and did a lot more reading about Jun glazes. See my last post for the research I did. It is a fairly deep dive into the science of how Jun glazes work.
Matt Blakely’s new book, Rock Glazes Unearthed was particularly helpful, giving practical advice for those looking to make Jun glazes with collected materials. He said that even though many Jun recipes have an alumina:silica ratio of 1:12 it may be necessary to push this higher when using granite as a base material.

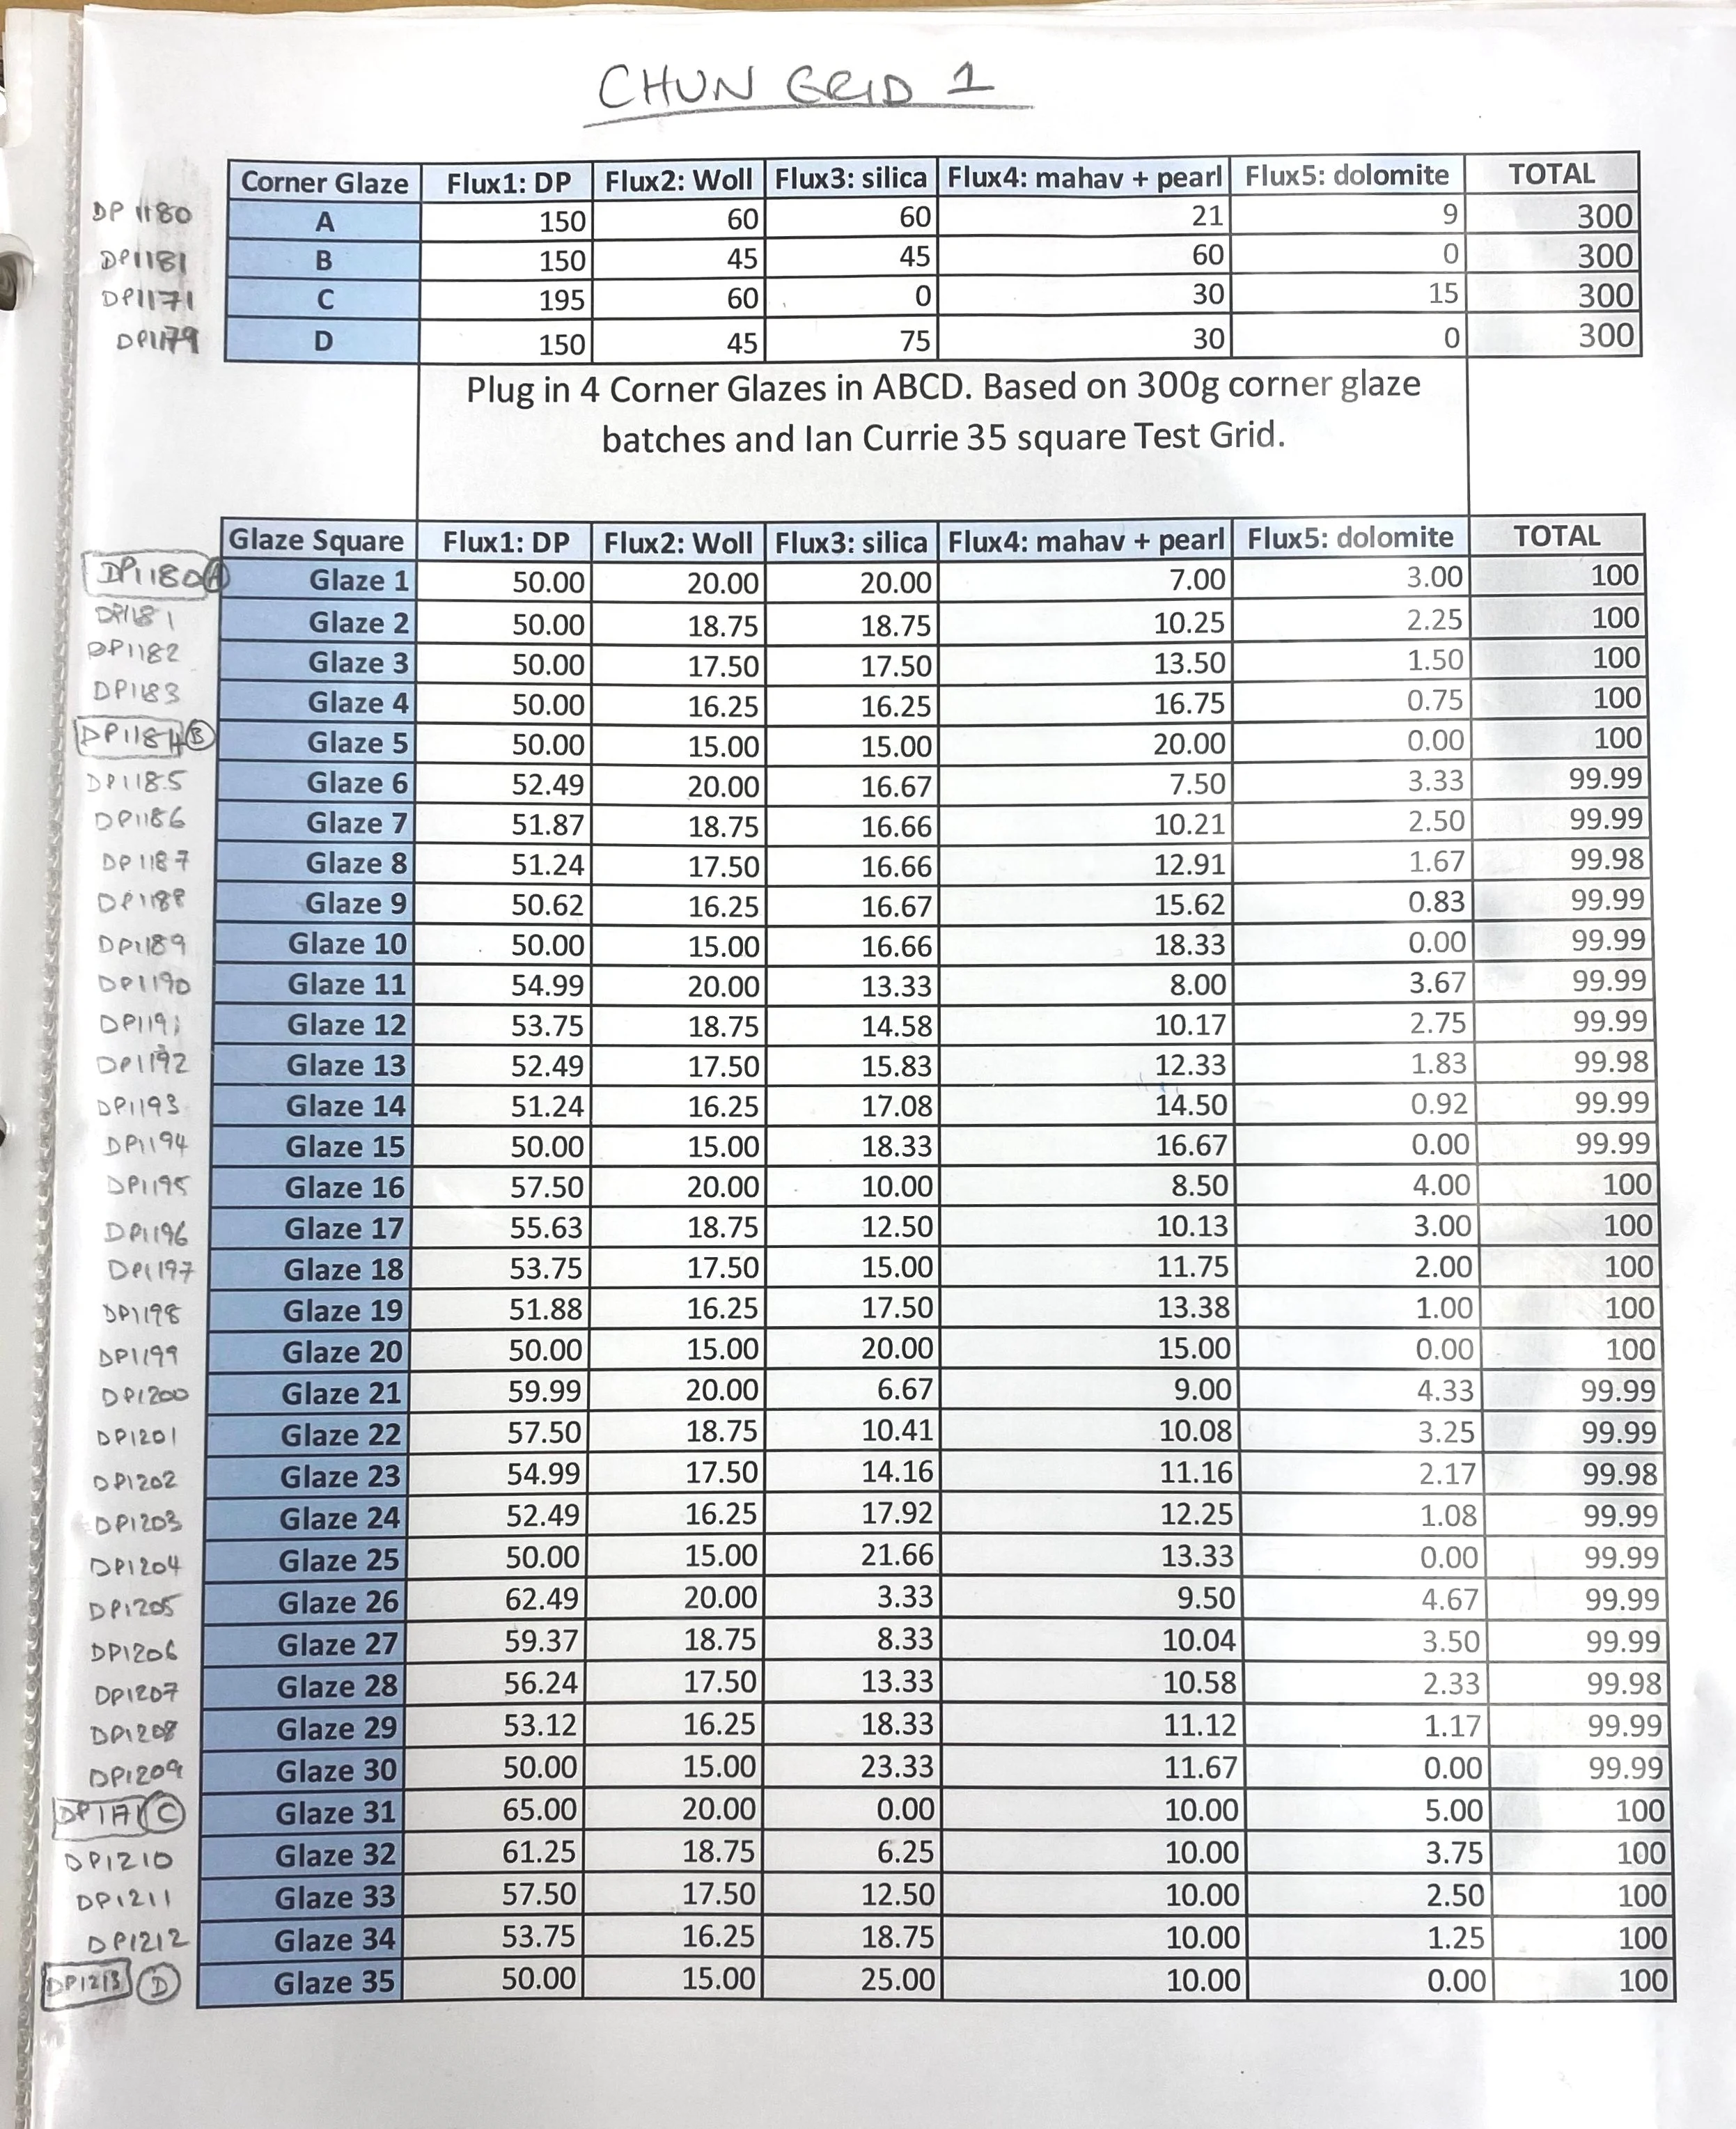
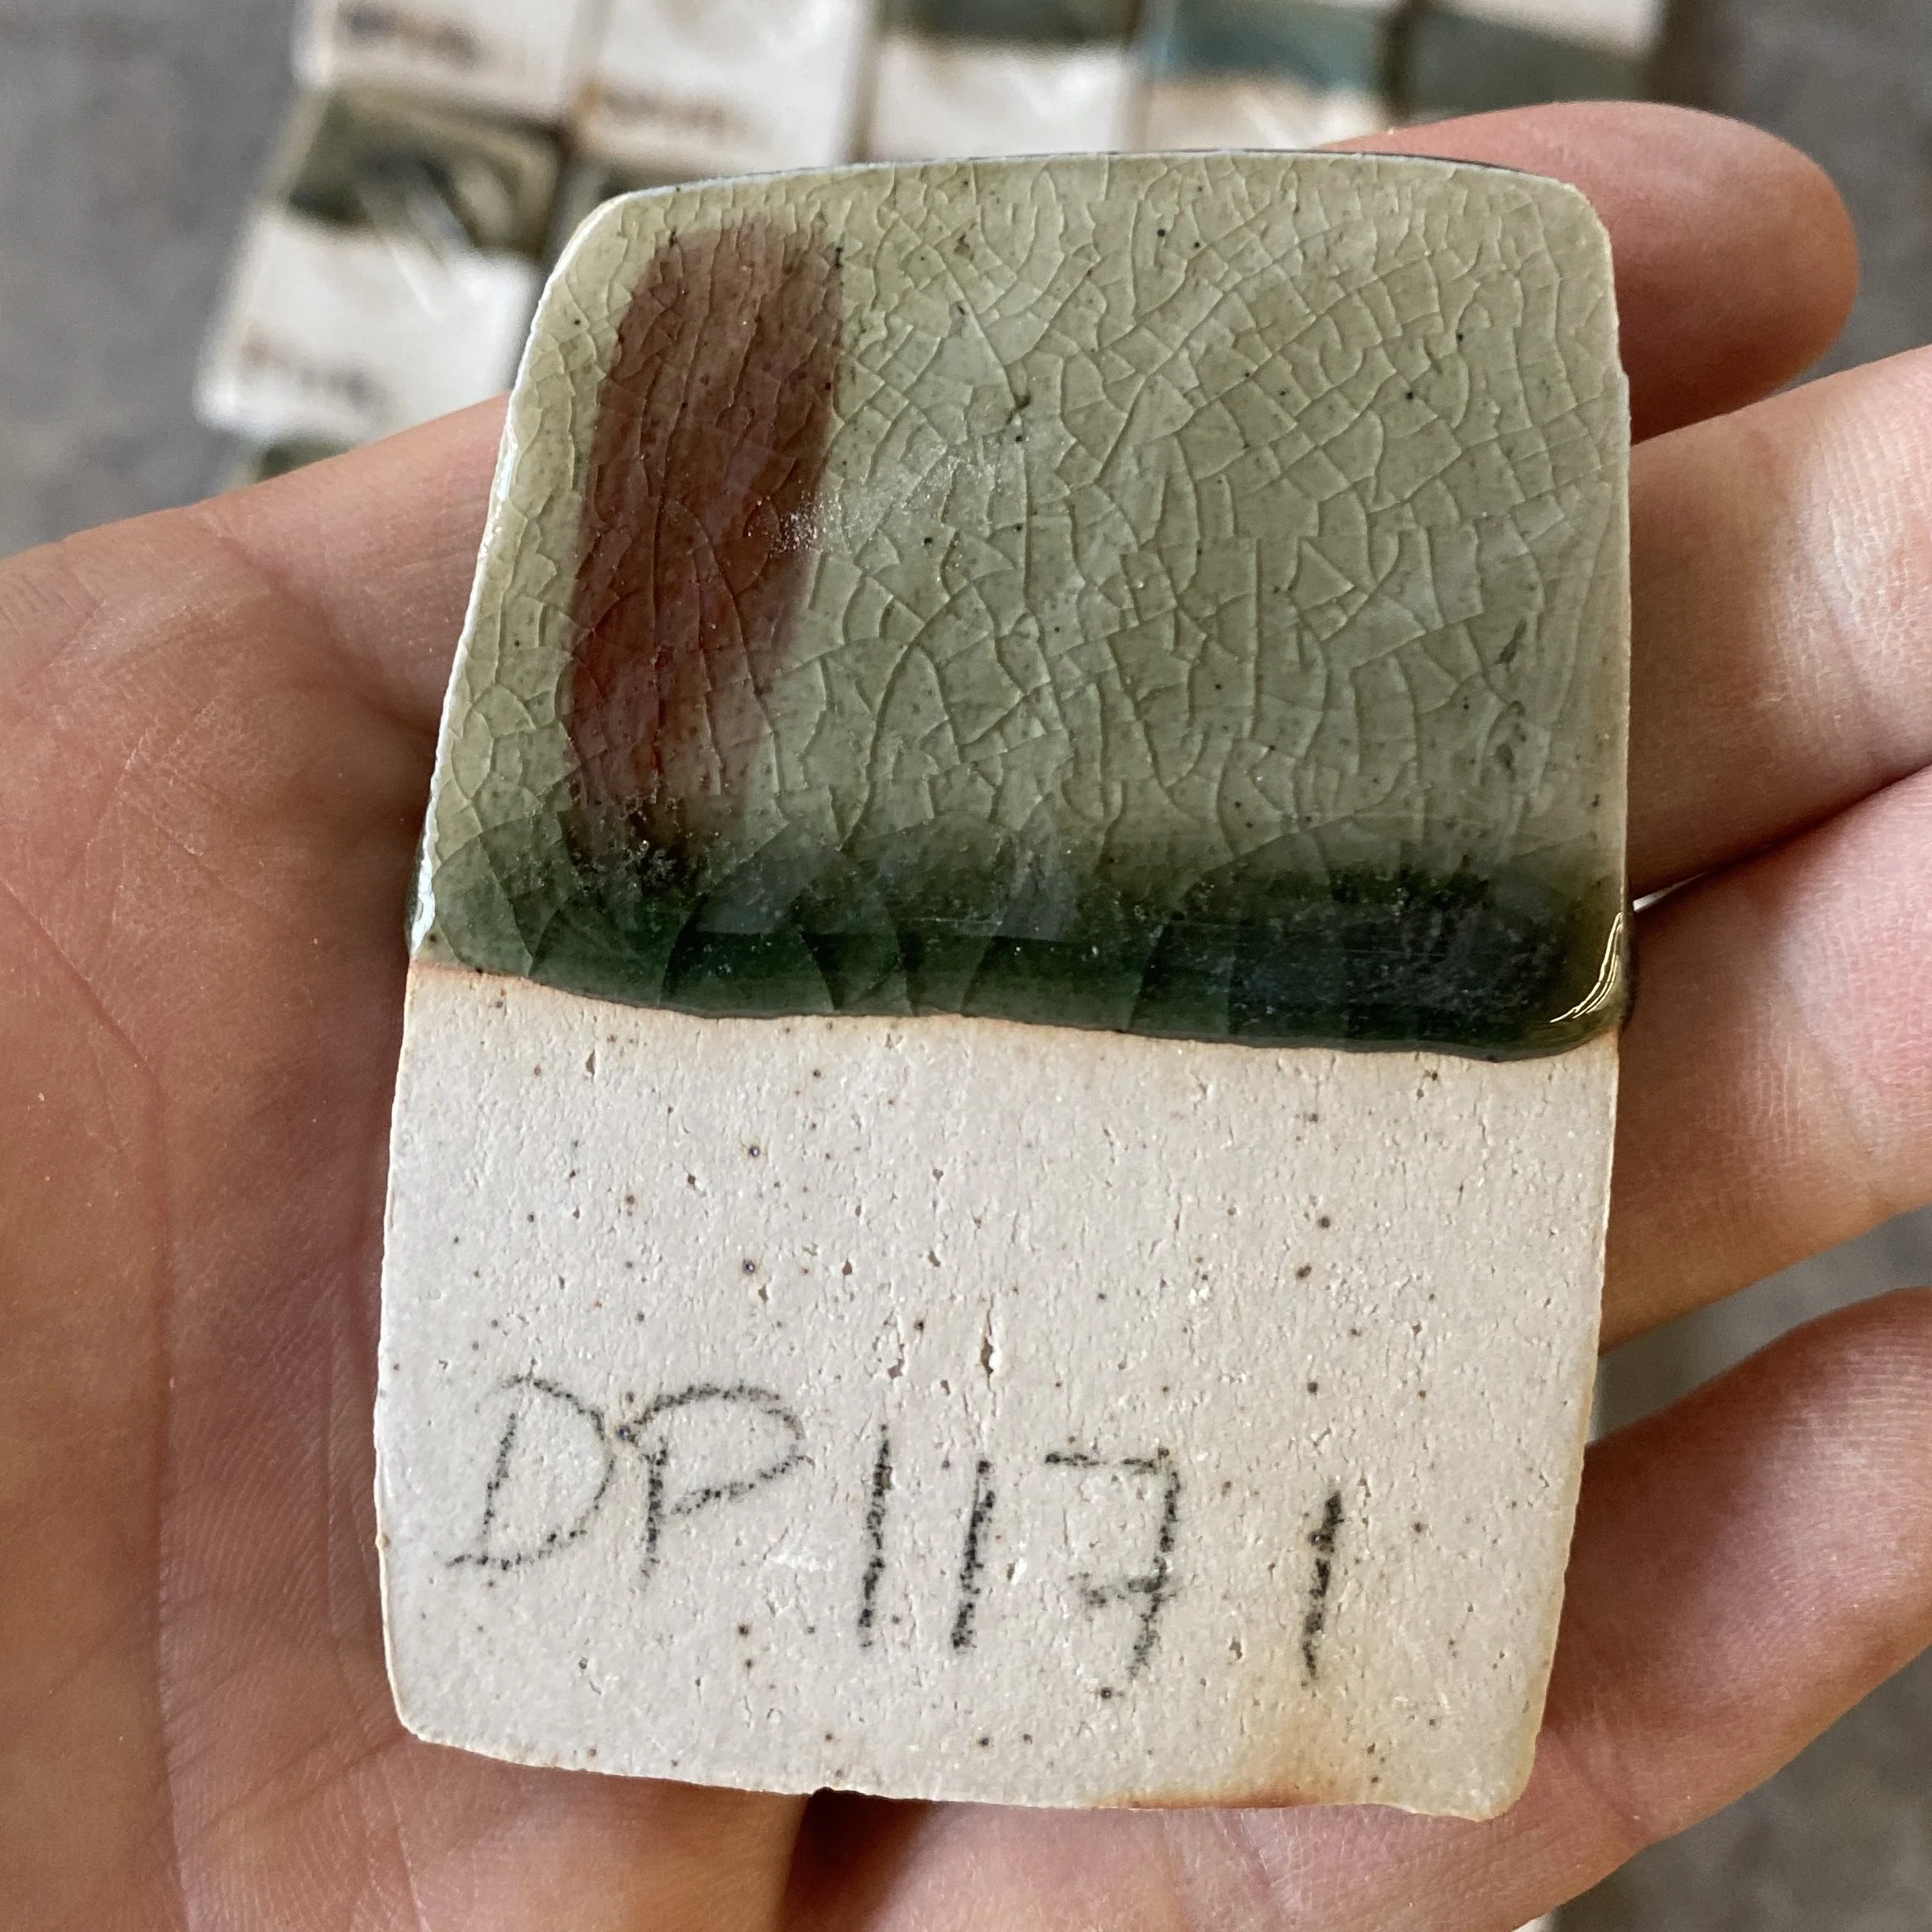
Getting down to business. This shows the tiles and cups laid out ready and the recipes for each of the corner glazes. Slightly confusingly I chose to use one of my previous glaze attempts DP1171 as Corner C. Just to make you aware of that. The other numbers continue increasing in a normal fashion-this is the only odd one out.


I measured out 500 grams of each corner glaze in materials, and then topped them up to 650ml. Each individual test gets 35ml so these measurements ensured I had a bit extra in each corner left over (in case things go wrong).
Corner A = DP1180 (high silica, high calcia corner) S:Al 15.11, R2O:RO 0.2:0.8
50% DP granite
20% Silica
20% Wollastonite
7% Mahavir (potash feldspar)
3% Dolomite
+2% Bentonite
+2% Bone Ash
+1.5% RIO
Corner B = DP 1184 (high potassium corner) S:Al 12.55, R2O:RO 0.4:0.6
50% DP granite
15% Silica
15% Wollastonite
15% Mahavir (potash feldspar)
5% Pearl Ash
+2% Bentonite
+2% Bone Ash
+1.5% RIO
Corner C = DP1170 (lower silica to flux corner, high Mg) S:Al 11.11, R2O:RO 0.21:0.78
65% DP granite
20% Wollastonite
10% Mahavir (potash feldspar)
5% Dolomite
+2% Bentonite
+2% Bone Ash
+1.5% RIO
Corner D = DP1213 (high silica corner, no Mg) S:Al 15.07, R2O:RO 0.29:0.71
50% DP granite
25% Silica
15% Wollastonite
10% Mahavir (potash feldspar)
+2% Bentonite
+2% Bone Ash
+1.5% RIO
{Side note: One issue I found in coming up with my first set of glazes, based on chun cherd analysis from Nigel Wood’s book, was getting a high enough potassium content. My Devil’s Playground granite has some but not as much as needed. I therefore decided to use pearl ash in some recipes. You can see I use it in Corner B here. However… John Neely, my Professor here at Utah State University, told me that Pearl Ash is not a good source of potassium because it is soluble. This means it will move into the clay body, or onto the surface of the glaze… it doesn’t mix in to the glaze like other insoluble glaze materials}
Here is the test grid fresh out of its cone 10 reduction firing…

DP1180-1213
When I got this out of the kiln (still rather toasty) I was thrilled. There looked to be so many successful chun glazes. This grid test is a little deceptive though, simply due to its nature. Each of these grids has a thick layer button of glaze on it (thicker than you would normally glaze a pot, and as the grid is fired flat the glazes can’t really run anywhere. I know from my research that chun effects occur where thick and pooled, so its no surprise that they look so good.
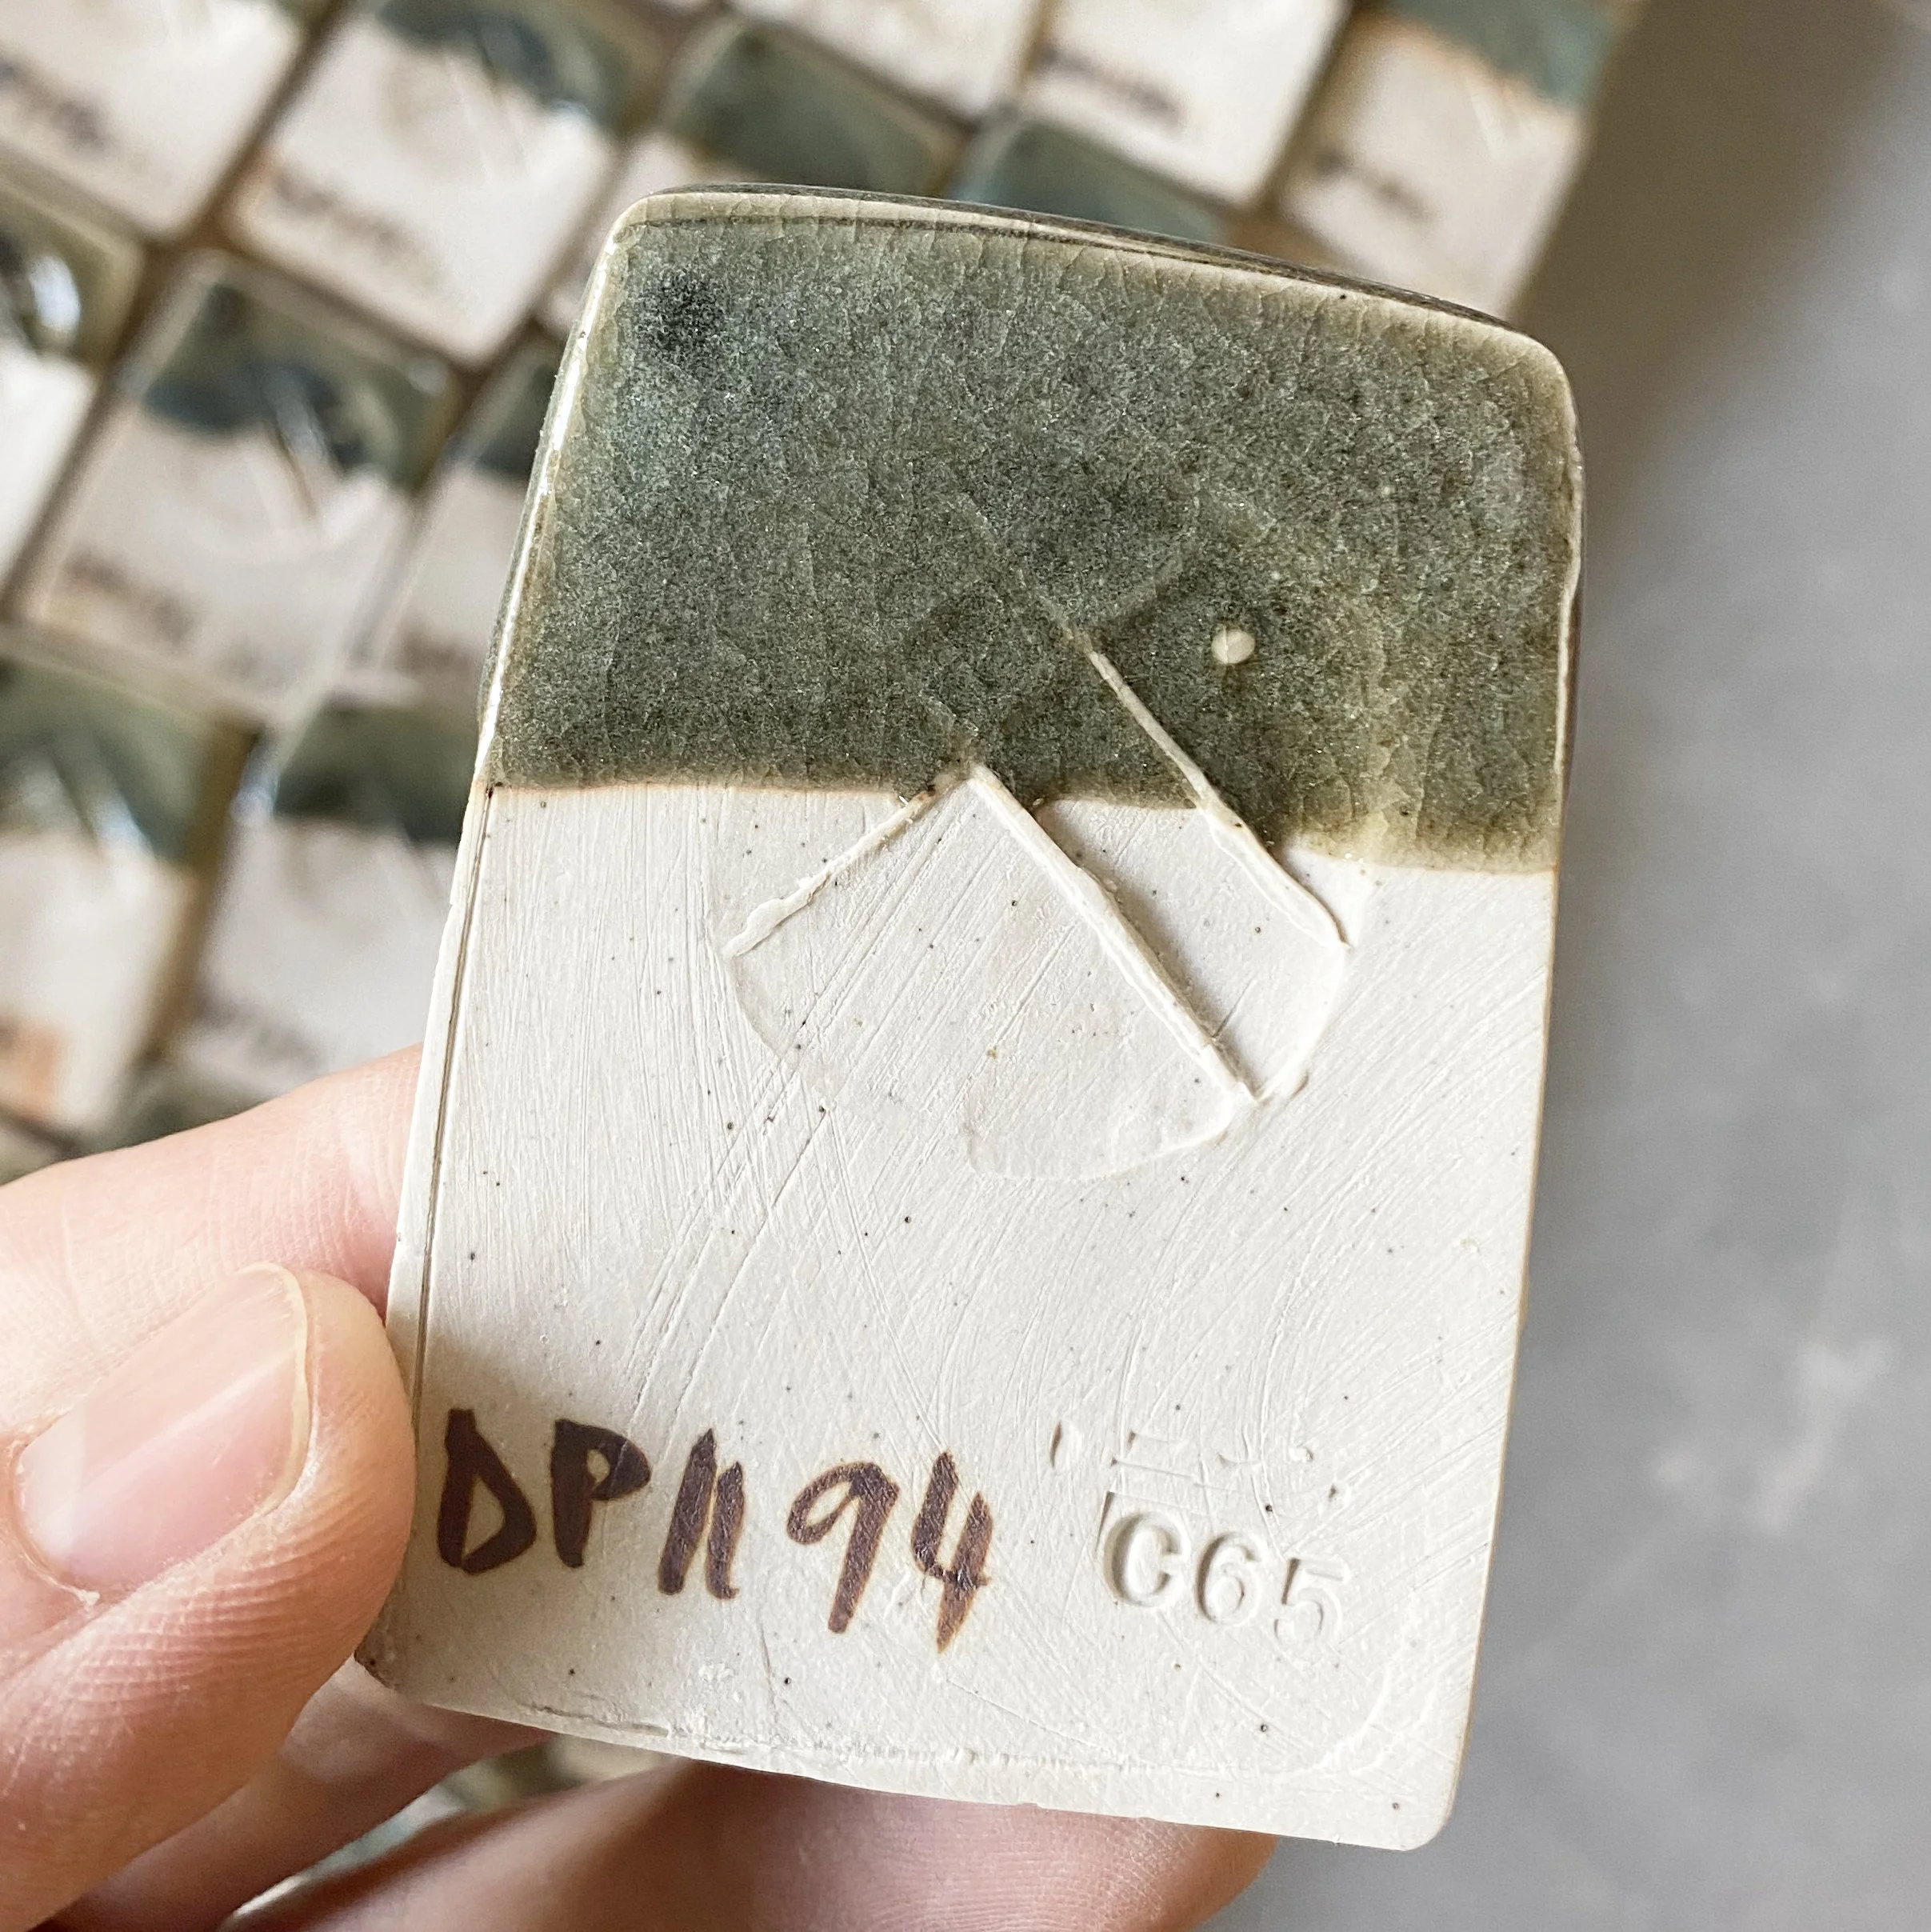
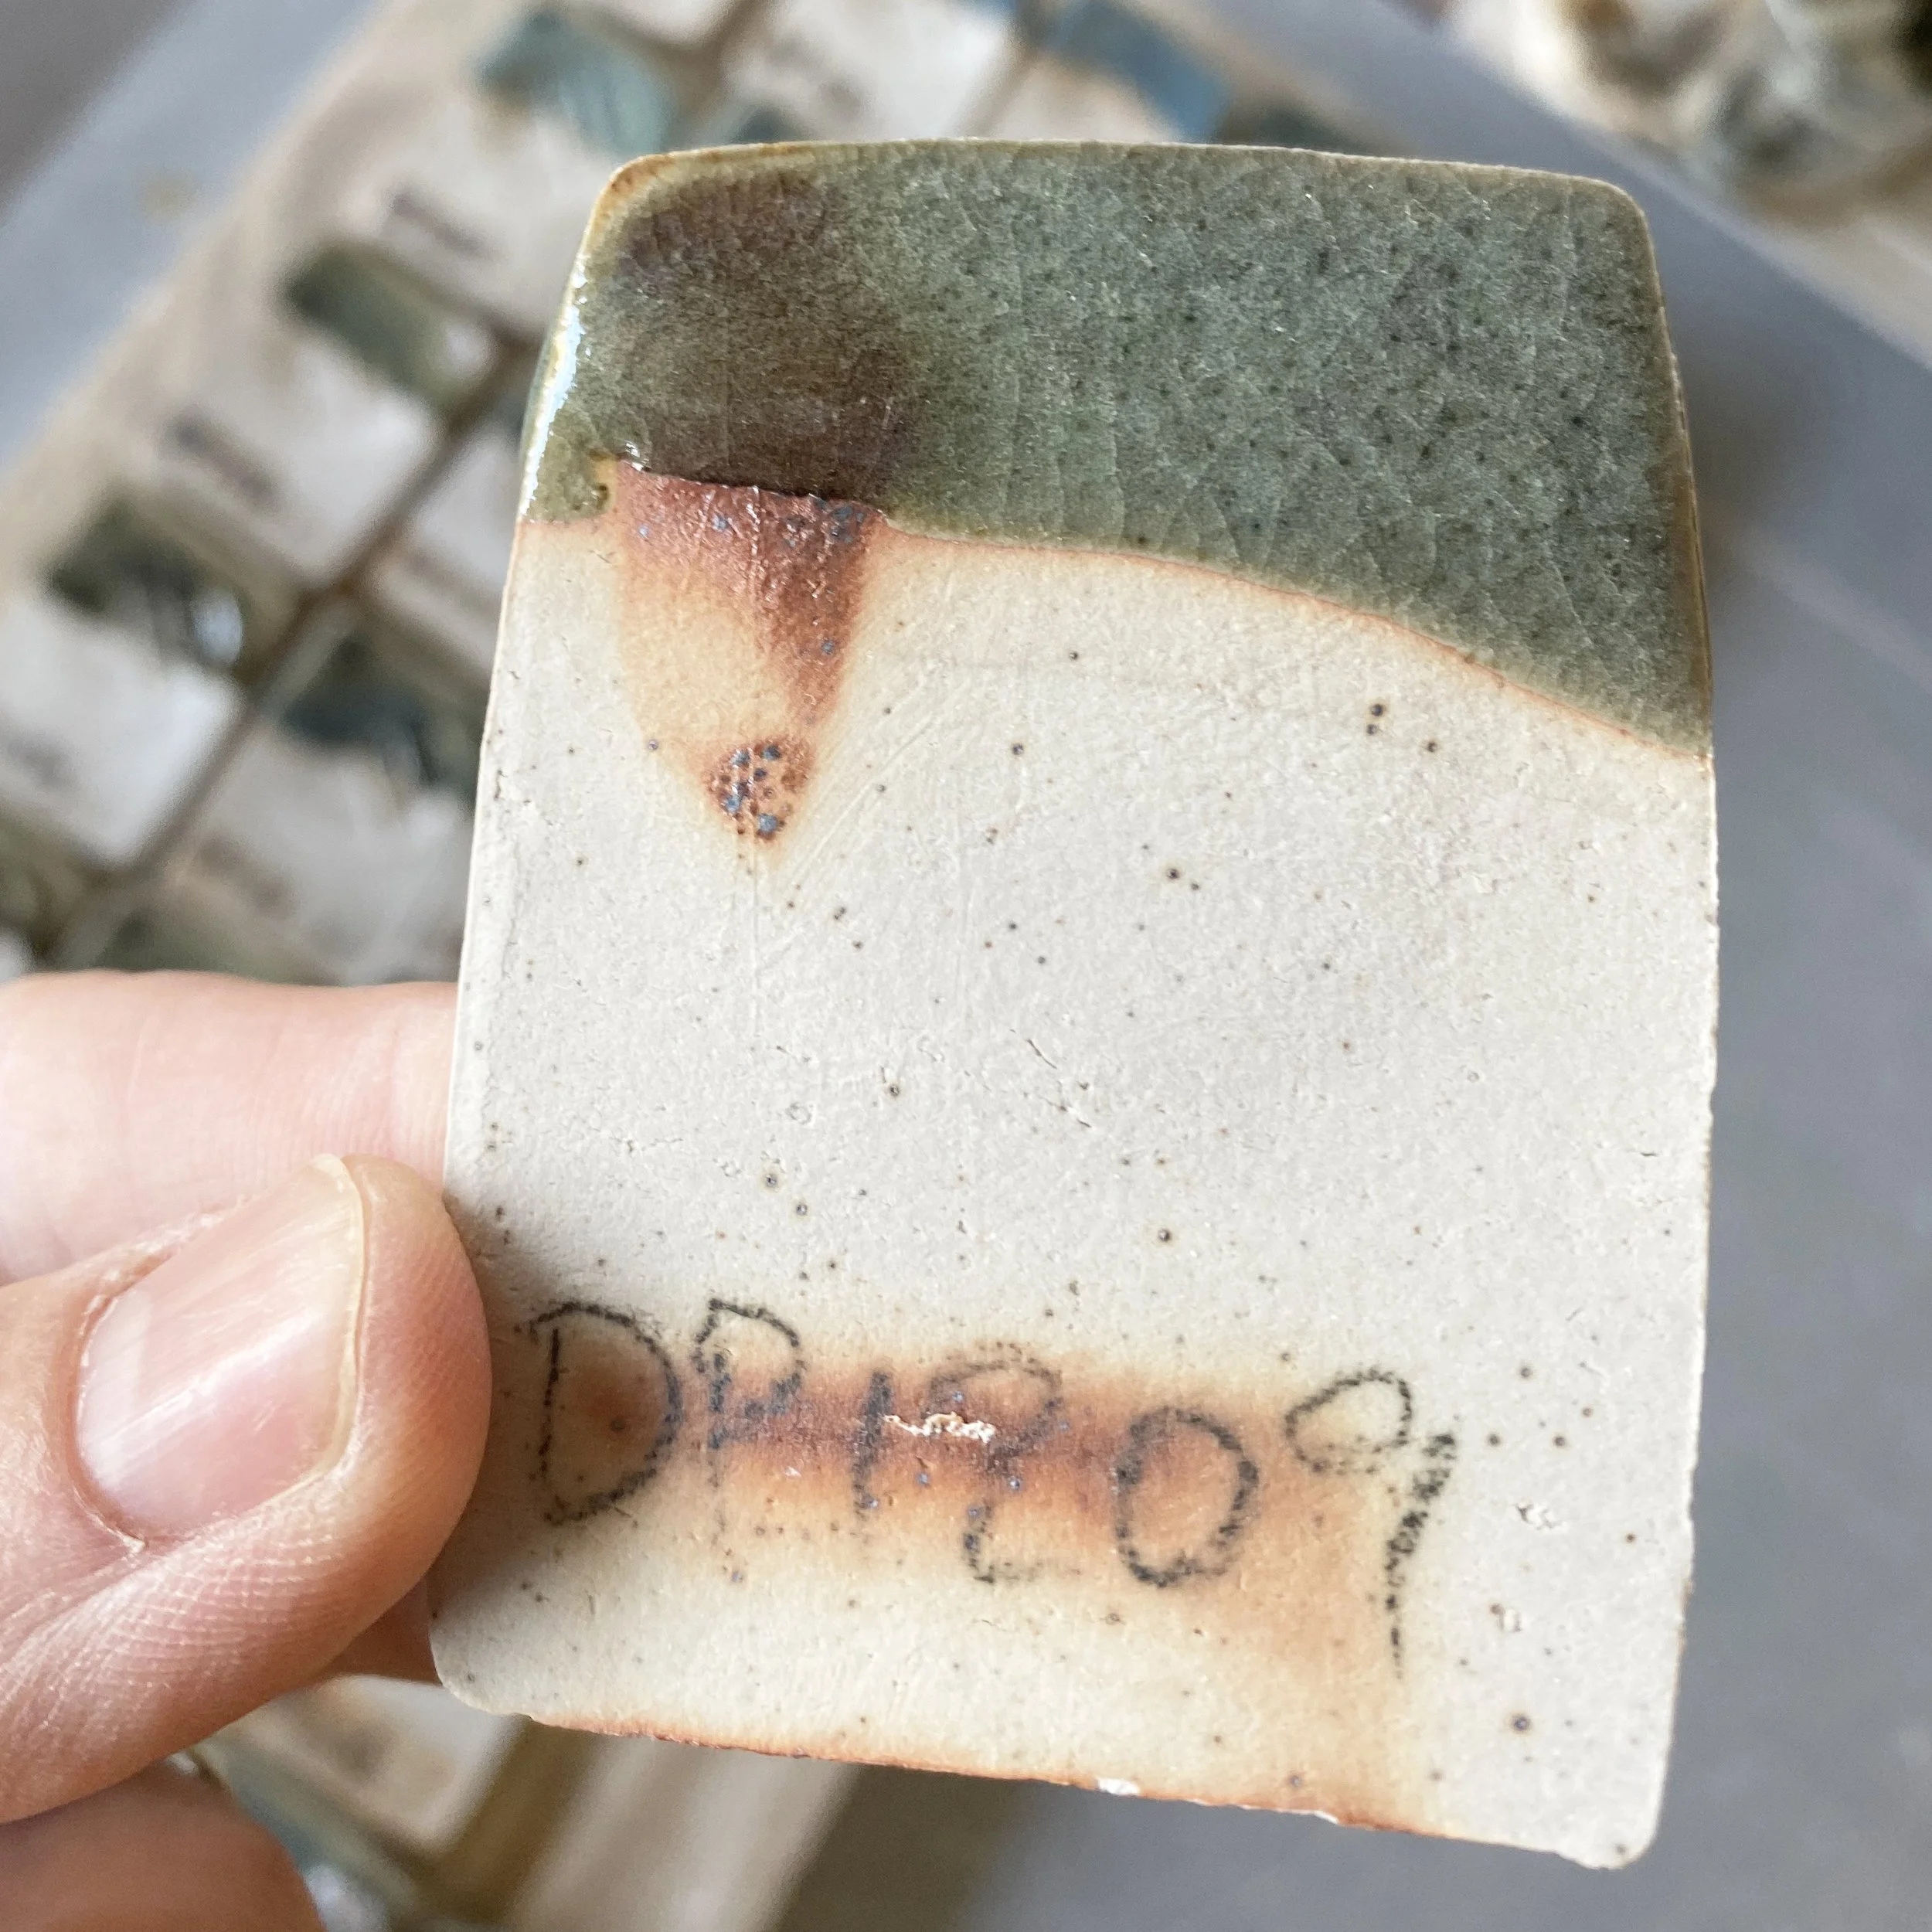
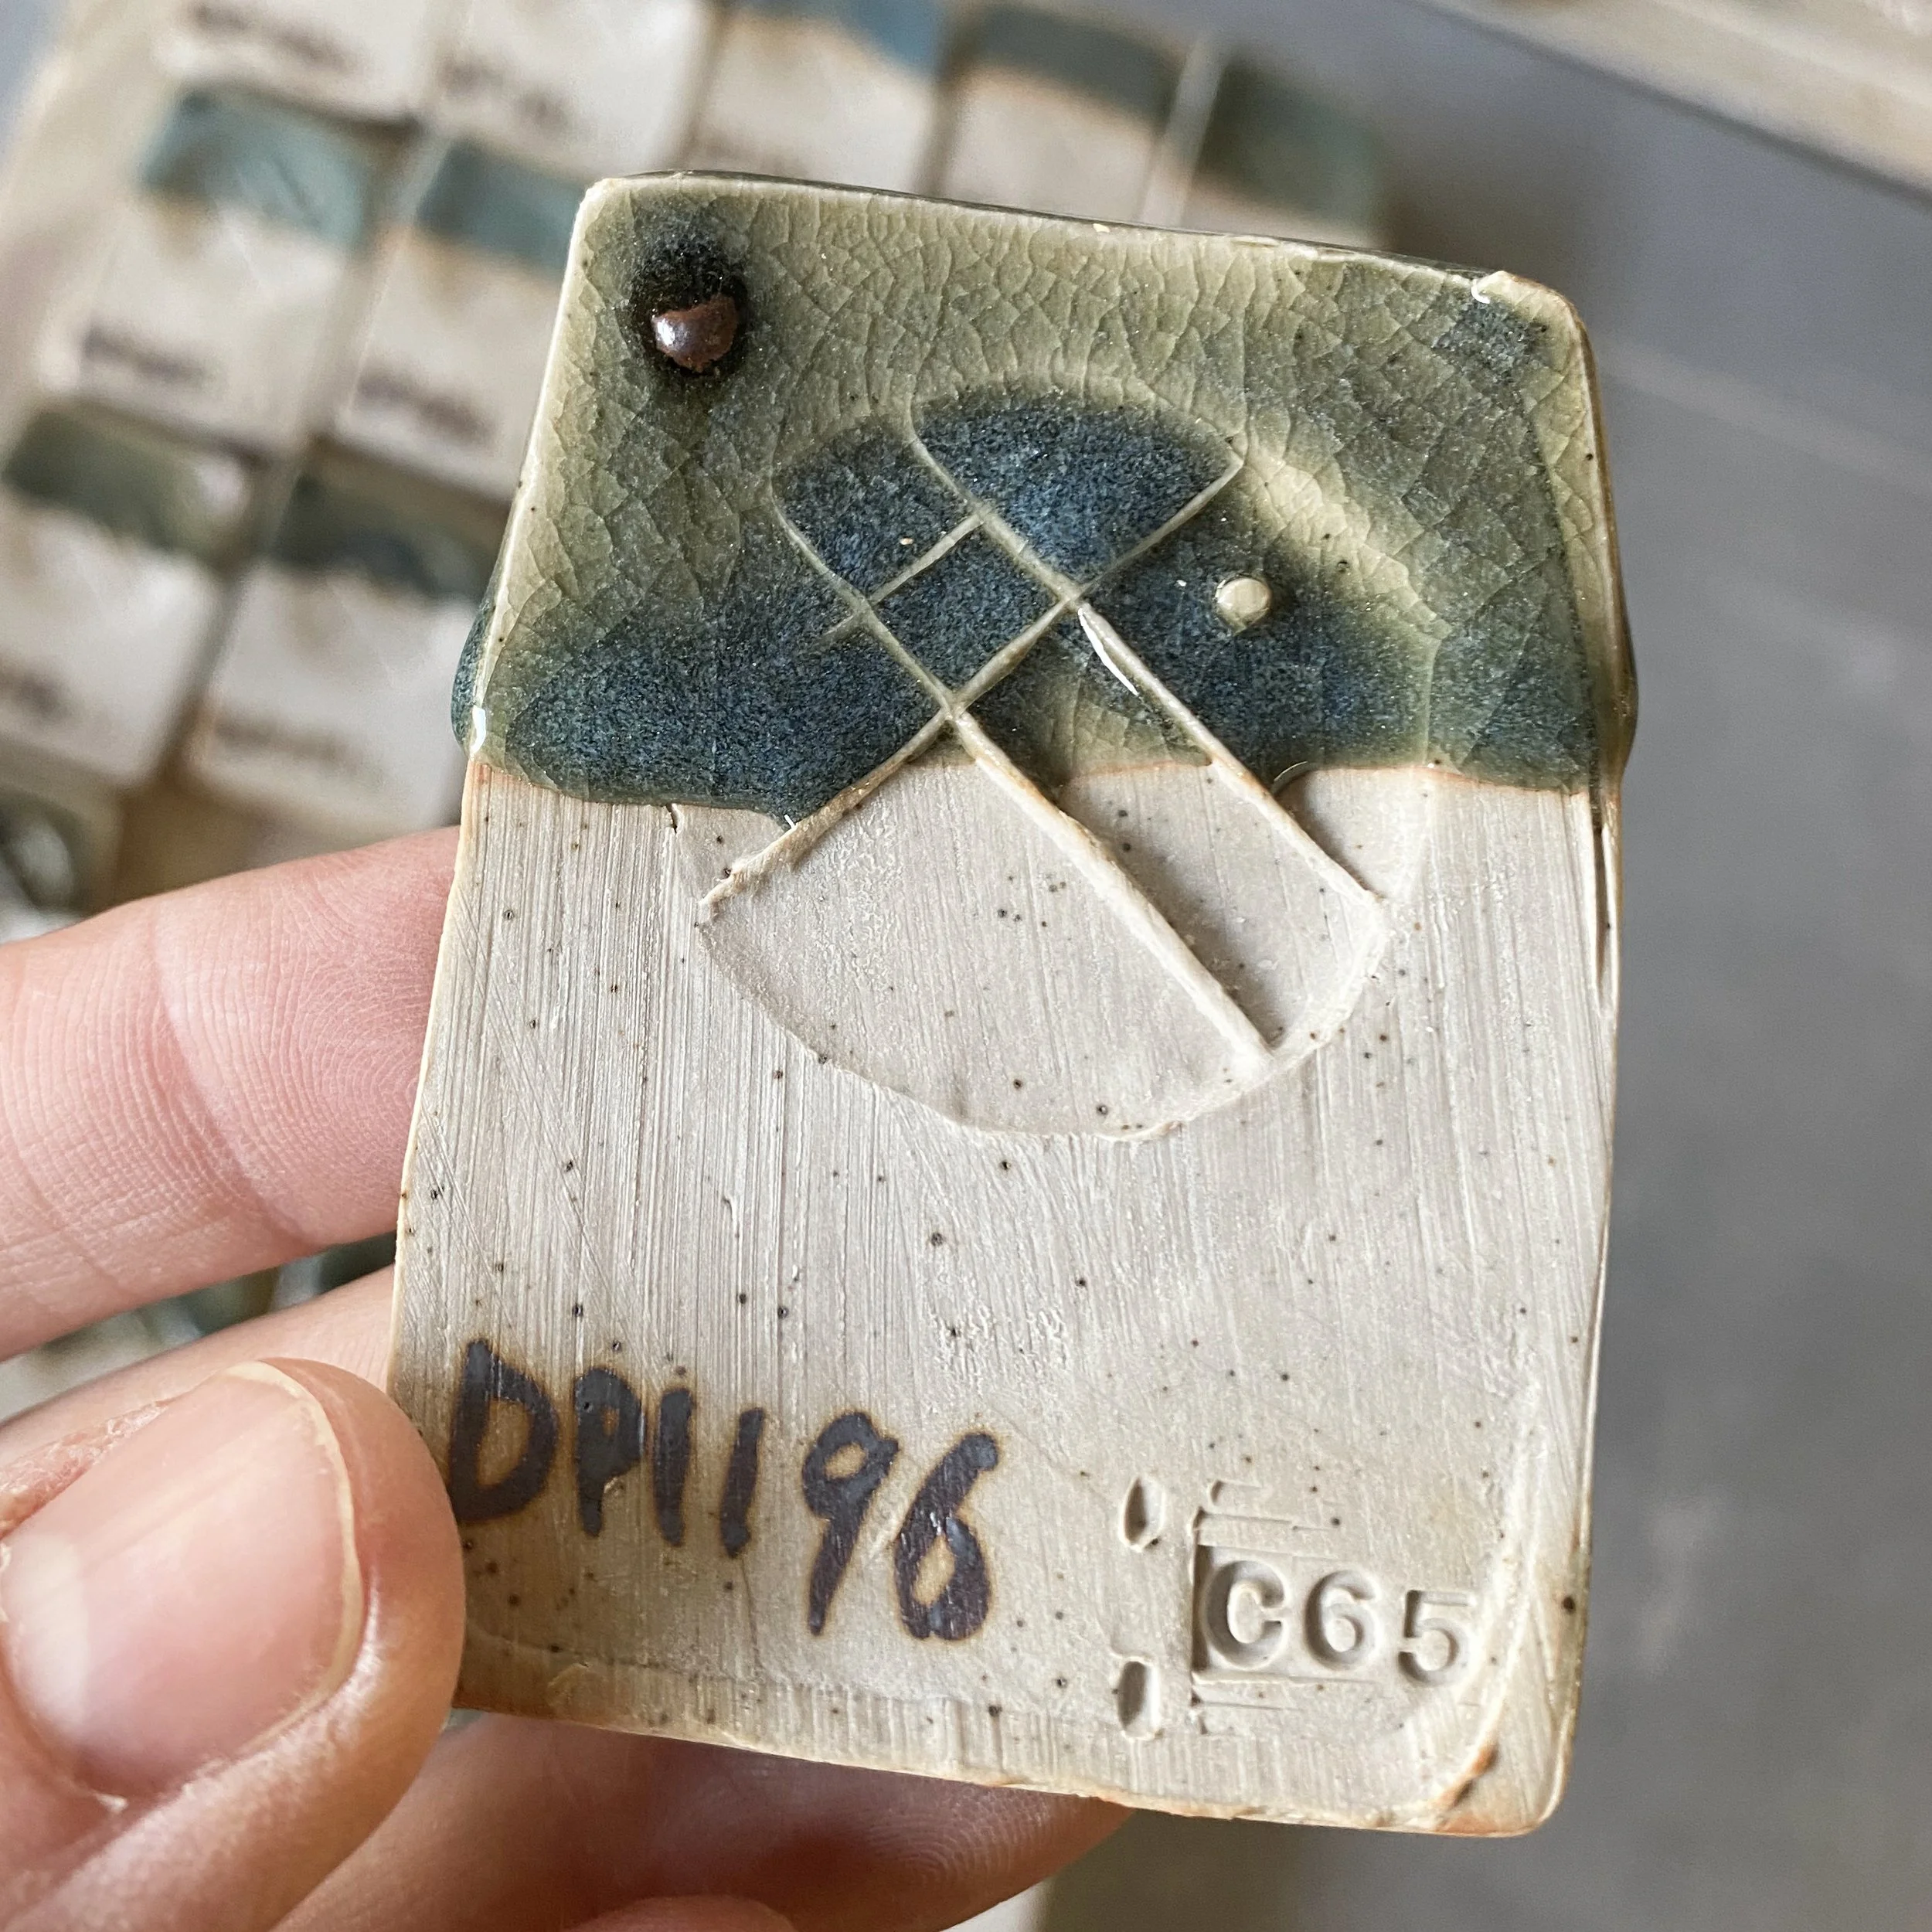
However, I also dipped individual test tiles for each of the grid squares. These were fired vertically so the glaze had a chance to run if it wanted. I double dipped them so the top of each tile had a double thick layer of glaze. You can see them in the backdrop of this photo and then below.


I got much more information from these vertical test tiles. You can click on them to enlarge the image. You can see how much more variation in the glaze grid there are. Not all of the glazes that looked good on the flat grid test came out so well on these test tiles.
By the way, these were all fired to cone 10 in a small test gas kiln. I did a heavy body reduction for an hour and then kept the kiln in reduction to top temp of cone 10 (lessening the reduction as the firing went along to gain temp). No hold at the top and no intentional cooling; ie. they cooled very fast.


On the backside of each test tile I painted a strip of copper carbonate to see its response under the Jun glaze. It was exciting to see some of the colour responses.
The top left of the grid is clearly the most successful (closest to a chun):

Although these two glazes were in the zone too…

Now let’s look into the tests a little more closely (click on any of the images to zoom in).
Moving across the top row of the grid from Corner A to Corner B the glaze gets less chun like. Dp1180 is lighter than 1181 and 1182 but they all exhibit chun effects. DP 1183 and 1184 do not. In terms of the composition change we move towards more potassium and less silica here.


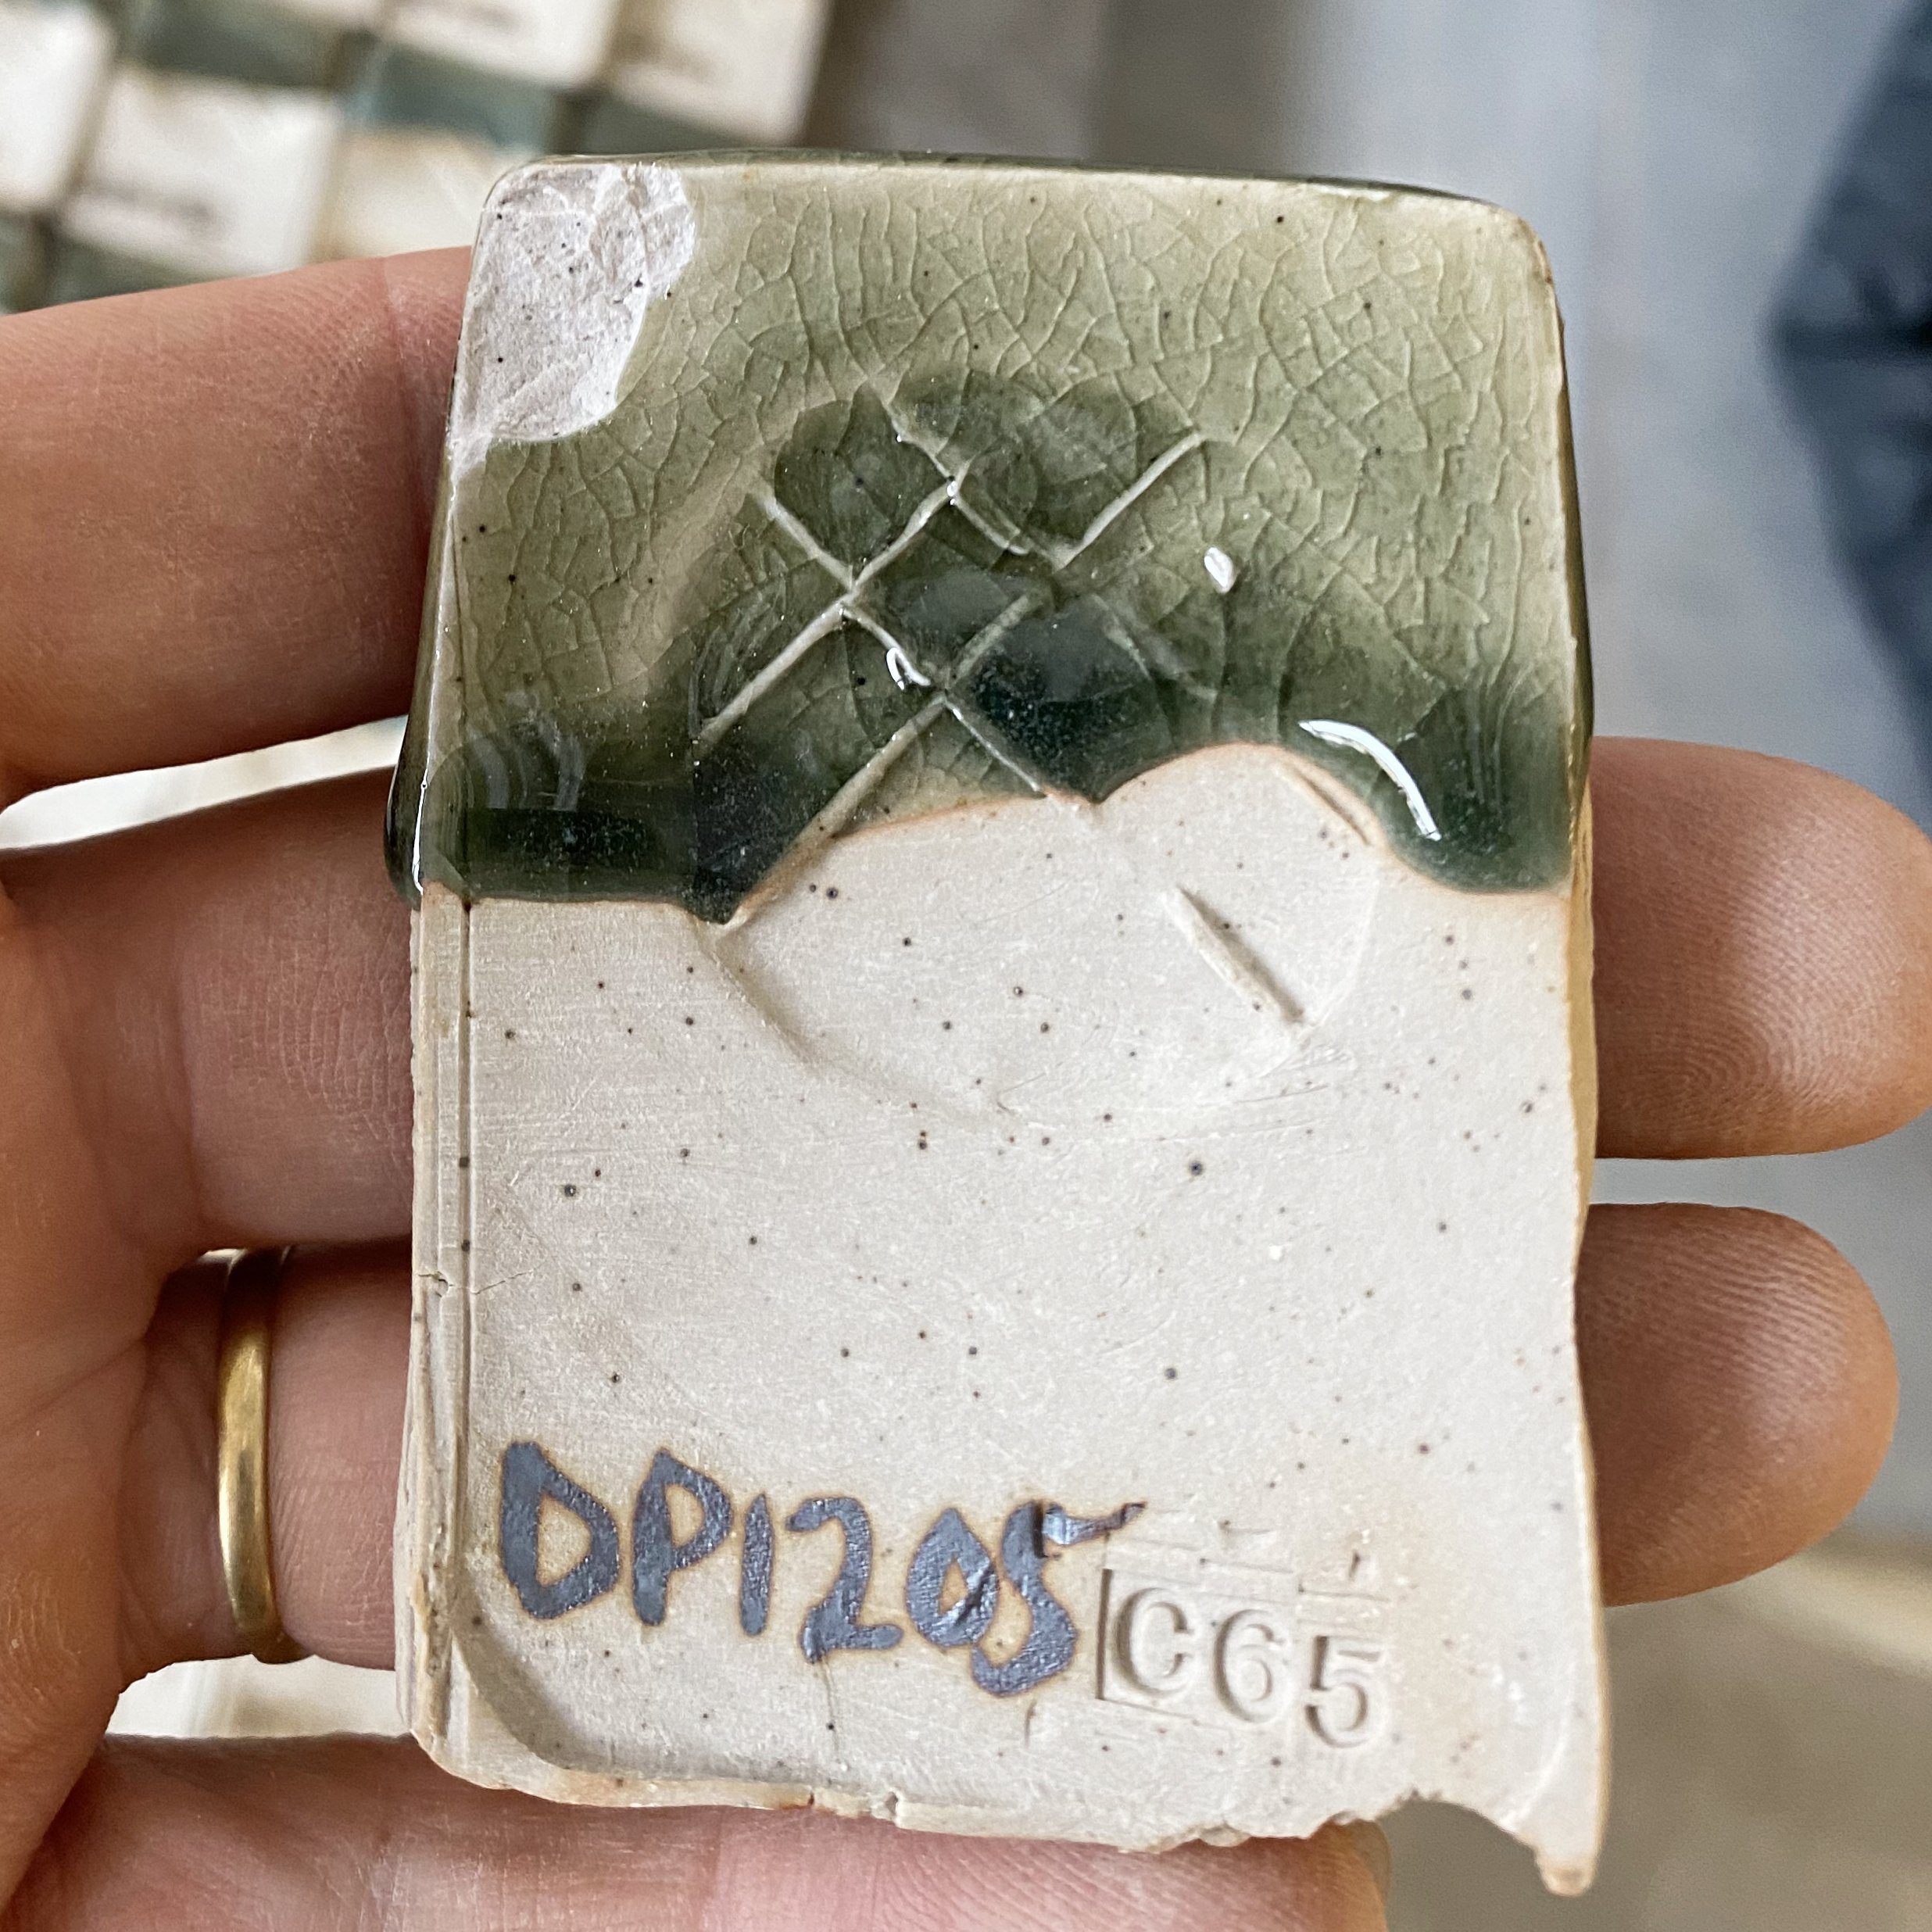
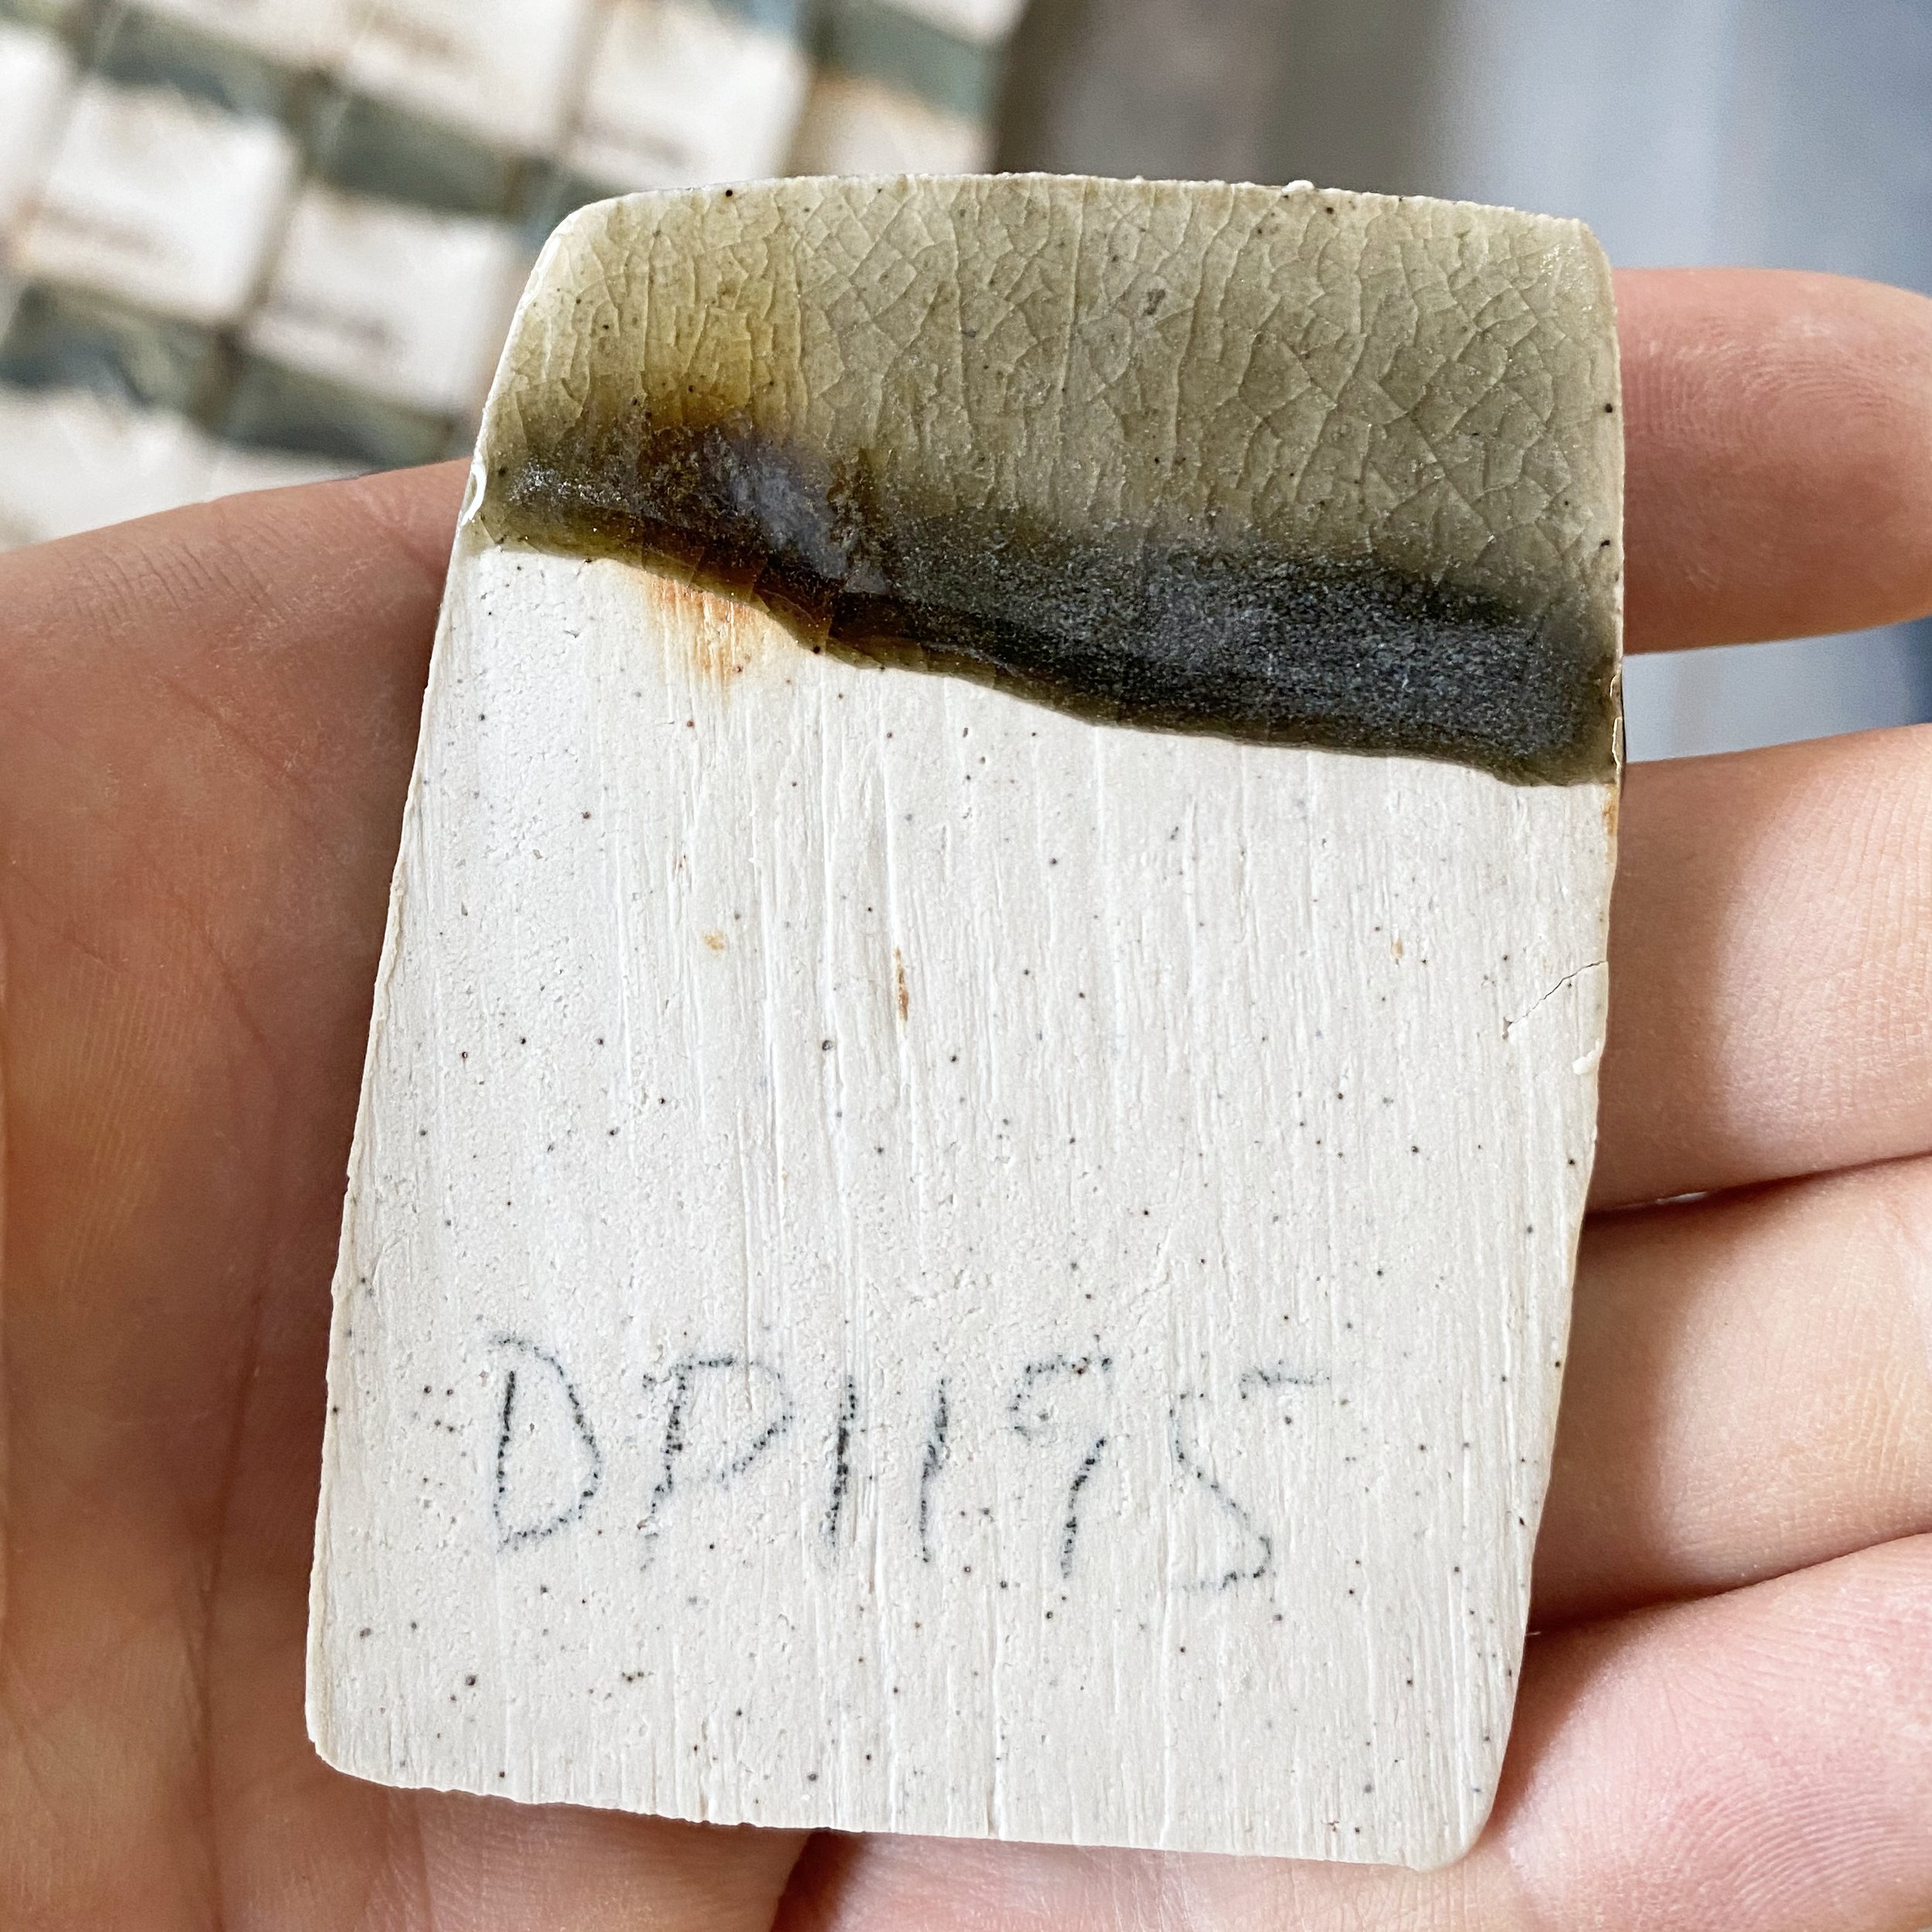
Moving from Corner A to Corner C the glazes get less chun like pretty quickly. Only DP1180 and DP1185 look promising. DP 1190 show some signs. DP 1205 is a full on celadon and looks like it wants to drip, no sign of chun features at all. In terms of composition this line blend moves to lower silica and higher magnesium. Frankly the composition change is not that vast which underlines the pointy that these chun glazes work in a very narrow sliver of glaze composition.
Here is the blend from Corner A-Corner C:


Now let’s look at Corner B to Corner D.


These are all kind of in the zone but not quite. The stand out in this row is DP 1204 (and its cousin next door at DP1203). What is special about DP1204? Lets look at its composition…
DP1204
50% DP granite
15% Wollastonite
21.66% silica
13.33% Mahavir (potash feldspar)
+ 2% Bentonite
+ 2% Bone Ash
+ 1.5% Red Iron Oxide
This is remarkably similar to the composition of the glazes in the top left of the grid that worked; DP1182 or DP1187 ish. This says to me I should do a new grid test where DP 1180 is in the center and I test around it.
Now lets examine Corner C to Corner D.
Neither of these corner glazes is particularly Jun like, interestingly DP1212 in the middle displays the most promise.


For the central area of the grid you can look and see what resulted. The second row up at the top was most promising: DP1186-8. But here are the middle tests laid out. I am trying to document thoroughly. Even the tests that I will not pursue. Click o an image to enlarge it.


Overall the zone in the top left of the grid, DP1180-2 and DP1185-86 were most promising. I will not pick one of these to move forward with at this stage, rather test more. But any of these could work I think. To my eye, if you held a gun to my head right now I would probably go with DP1186 (or DP1182, or DP1180. Don’t make me pick yet! Put the gun down!)
Here is the same grid test in cone 10 reduction compared to a more oxidised cone 11 firing. So different!

You can only really see the Jun effect in the top left corner of the oxidised and hotter grid. This tells me a couple of things. These Jun formulations prefer cone 10 to 11 and they want reduction. It also tells me that I should design my next grid test with DP1180 at the center, and see what happens as I move in various compositional directions… more silica one way, more potassium flux another, more granite another. My suspicion is that this glaze would like even more silica to be a more reliable Jun.
Here are the firing schedules from those two firings with their respective cone packs below them (cone 10 on the left, cone 11 on the right):


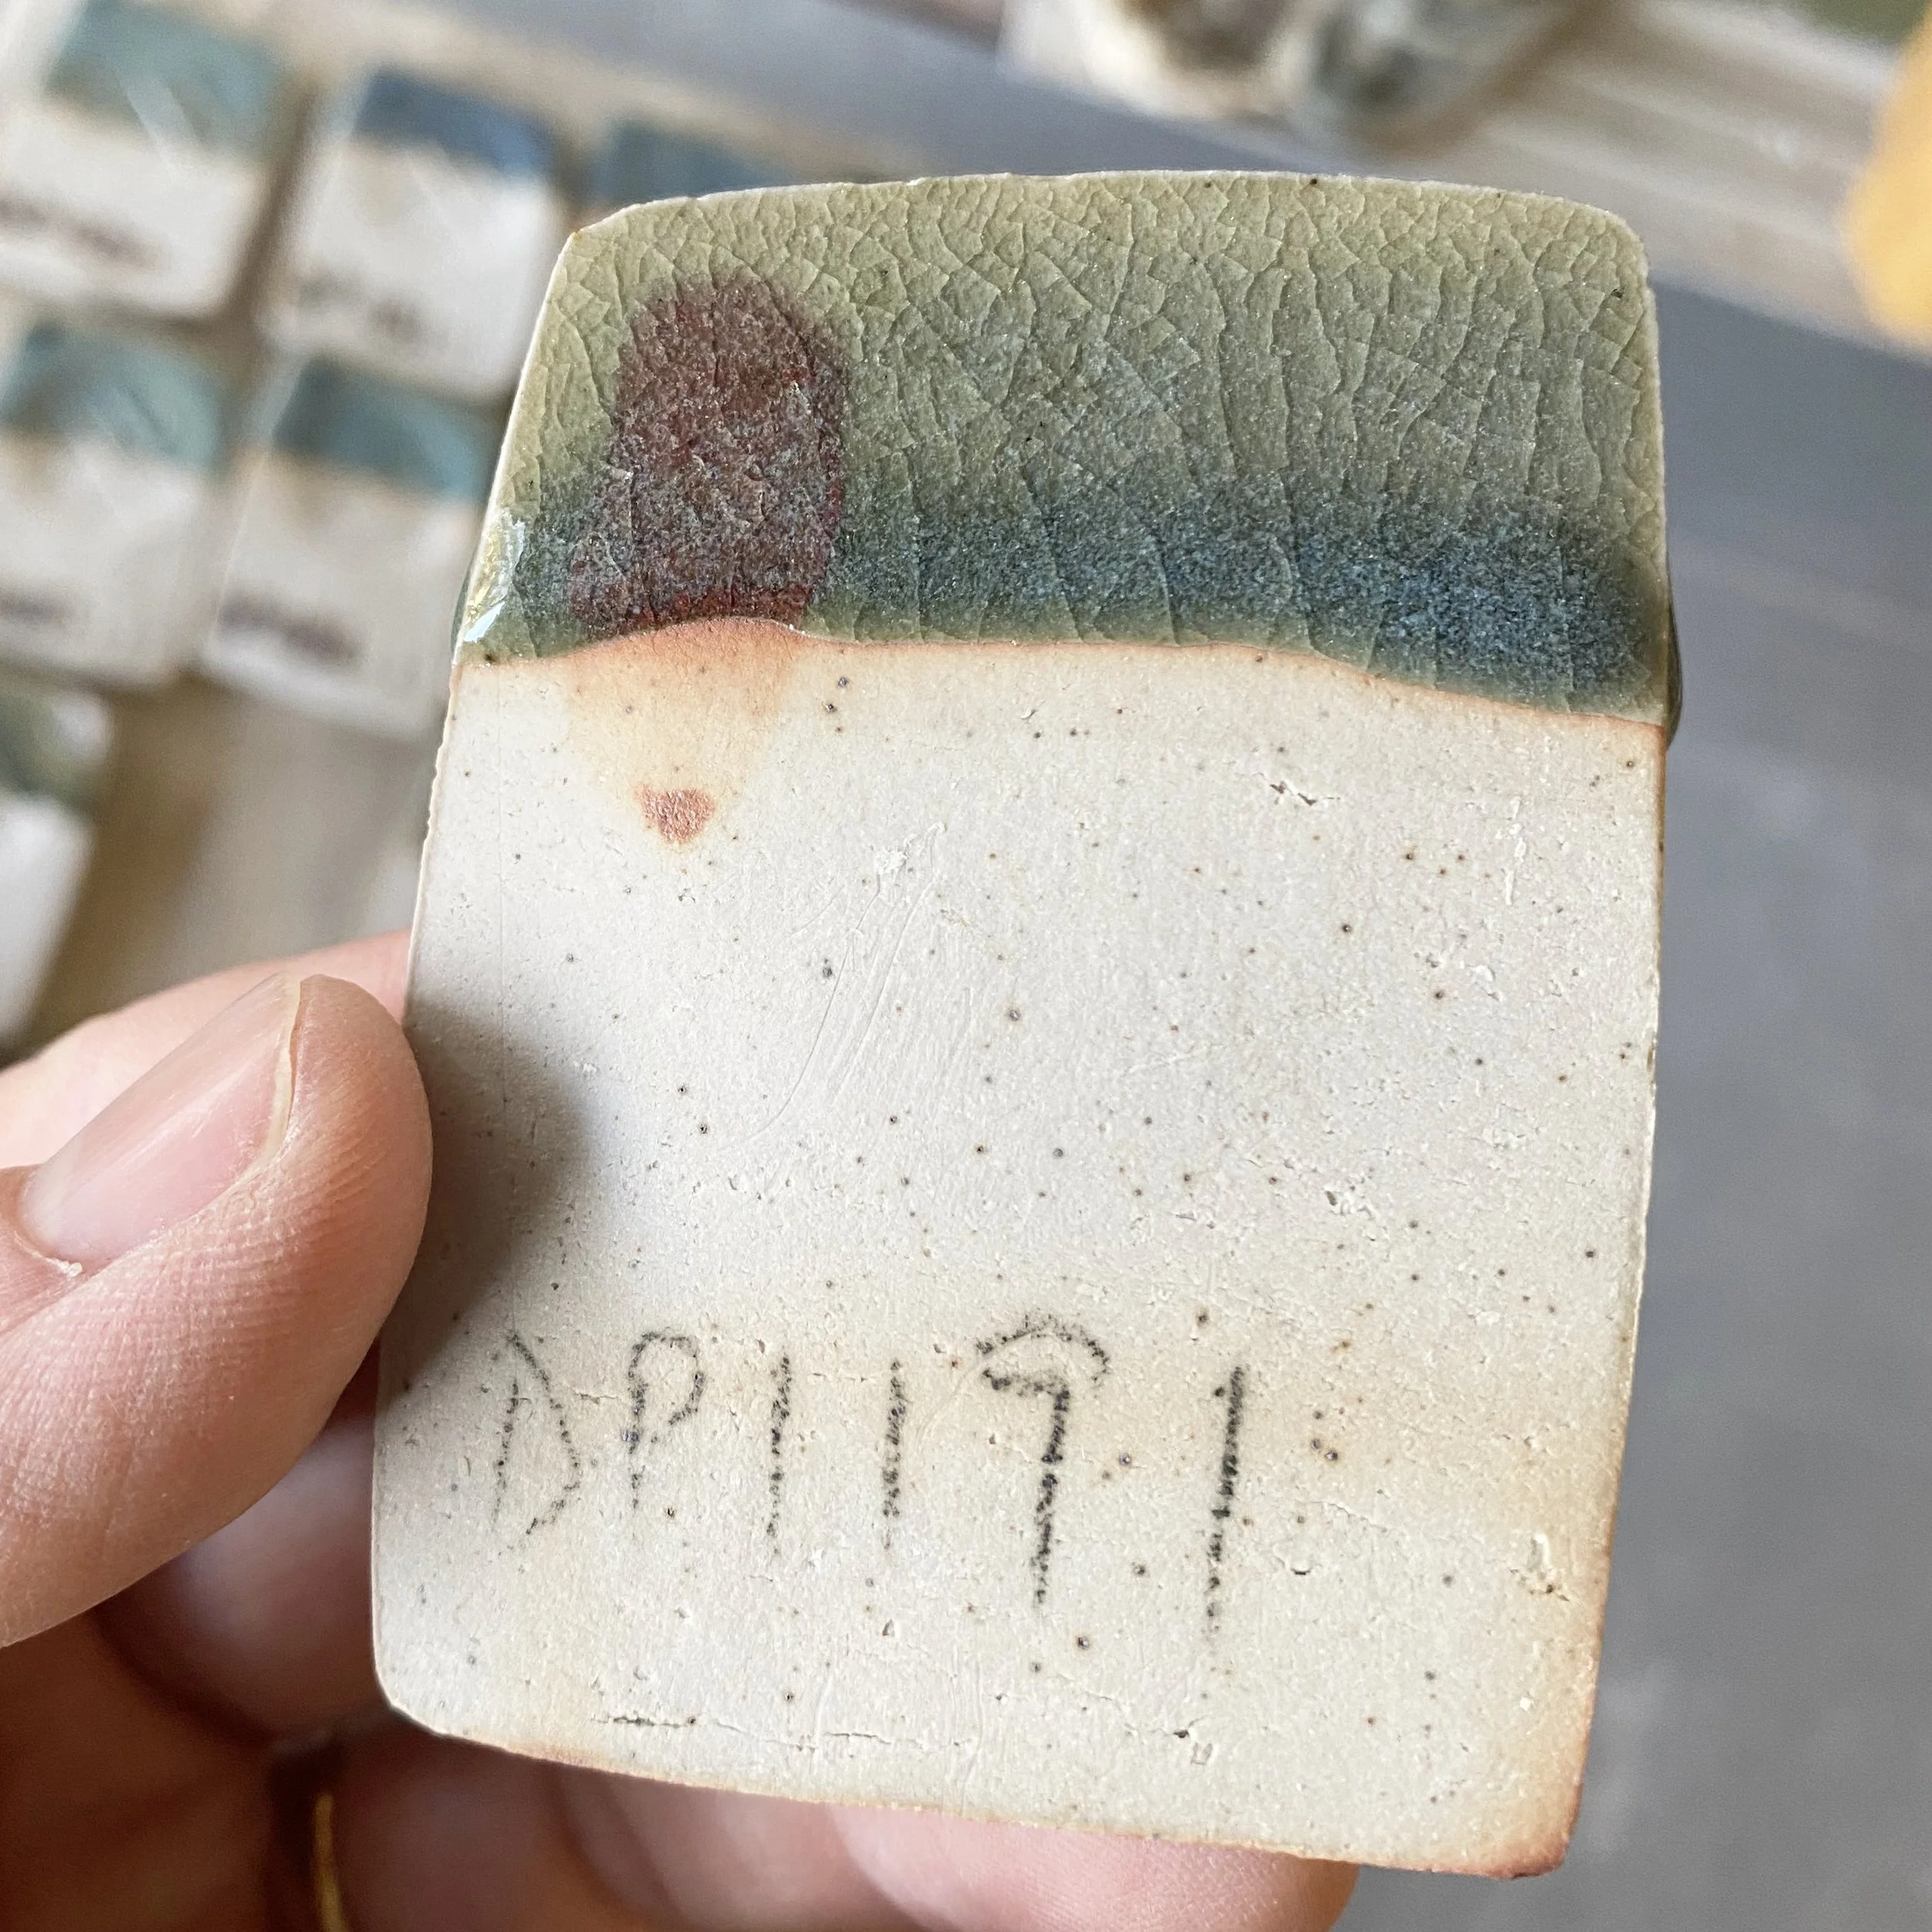
Finally, here’s my little helper in the glaze room at USU (my daughter Juniper: about 21 months old here!), then a bowl glazed with the central glaze in the grid, DP1197. You can see the Jun effect a little but it is still not quite there.


Until the next round of tests! Hope you are having a wonderful day!