
Making Mozzarella in 30 Minutes!
I was making lasagna a week or so ago and realised that I had forgotten to buy mozzarella. I like to top my lasagnas with slices of mozzarella, tomatoes and basil leaves. So, with my sauce simmering away on the stove, I was begrudgingly about to go back to the supermarket. Then I remembered this 30-minute mozzarella recipe I had seen online.
Here are the ingredients:
Your main ingredient is milk, and lots of it, so you want to use the best milk you can lay your hands on. Luckily, I had a gallon of milk in the fridge, and not just any milk. I'd made a special trip to Glendale to go to a Raw Milk dispenser who only parks up at this location for four hours on a Saturday. It seemed all a bit under the radar, down a side street, and you can see why when raw milk dispensers have been closed down in the L.A in the past. People have even been sent to prison over it! However, there was a queue, and the milk was flying out of the truck. I have to say that the milk did not disappoint: it's really rich and tasty. I have read that using raw instead of ultra-pasteurised, homogonised milk gives your cheese more flavour. It stands to reason that if the milk is tastier, the cheese will be, too.

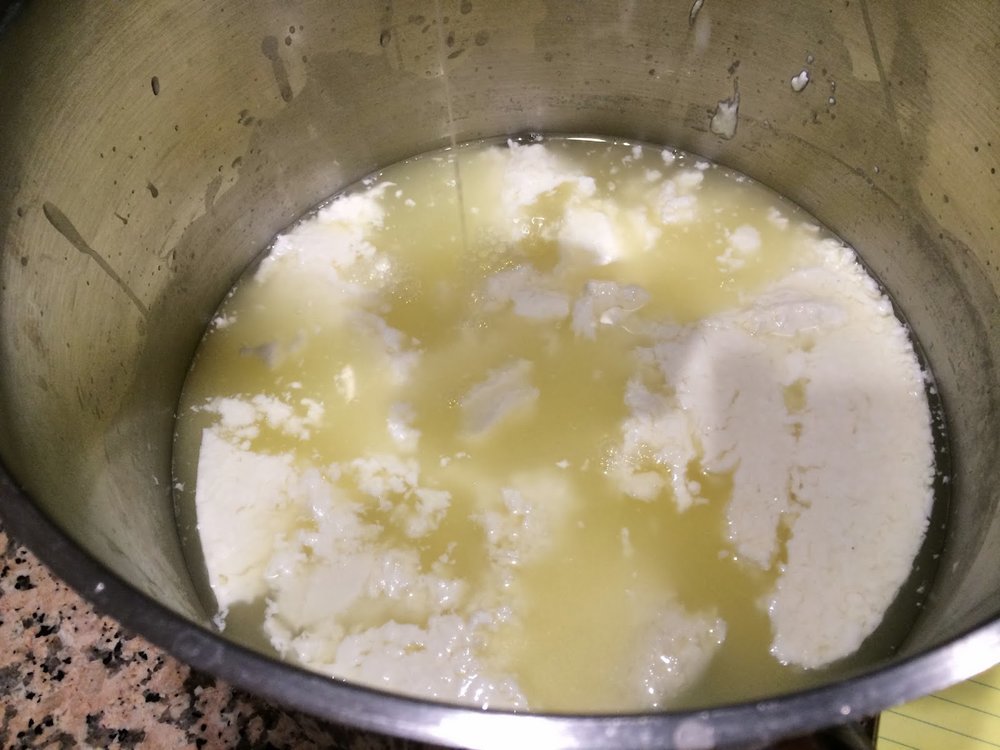
Right so, here's what you do. One gallon of milk goes in the pan. Gently heat to 55° Fahrenheit or 13° Celcius and add the citric acid. A dairy themometer comes in handy here-- again they are cheaply available. Stir well. The curds will start to separate from the whey, as pictured below.
Keep heating gently till you get to 88°F / 31°C. The curds will be curdling before your eyes. It's happening. Cheese is happening! Stir gently whilst the temperature gets up to about 105°F / 40.5°C. Turn off when the curds have started to pull away from the side of the pot and are quite thick.
Now you're supposed to let the rest for five minutes but I couldn't wait and went straight ahead to straining them.
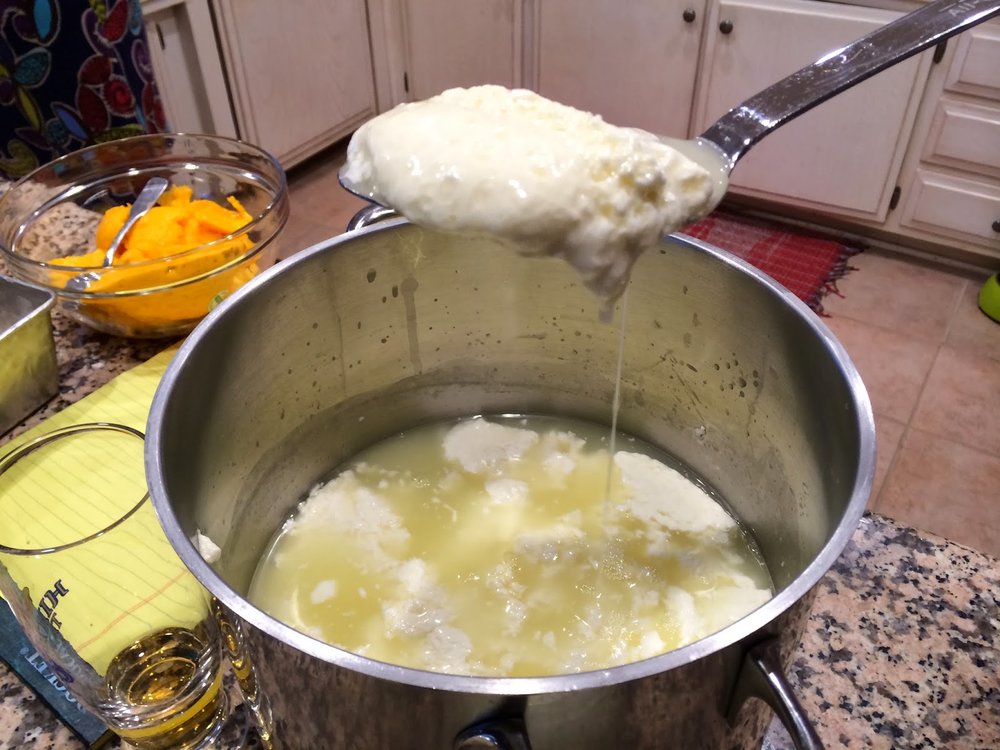
Well, actually I had my dad strain them whilst I read out the further instructions and stirred my sauce.

This can be done with a holey spoon. After straining you end up with a gloopy, yet almost cheese-like substance.

Time for the marigolds. The next step gets pretty hot.

Oh yeaaah. Once you have donned the gloves, put the curds in the microwave for 60 seconds. Press them after this, and tip out the runny whey. Then I added a generous few pinches of truffle salt. Pure extravagance. But you can use normal salt too. Then fold over the curds and pop back in the microwave for another 30-40 seconds.

Fold over and press again, tipping off the whey once more.

Do this once more. Microwave for 30-40 seconds, fold, tip off. Then comes the fun bit; stretching your mozzarella.

You can see that I can barely believe what I am doing here.


Magic. This stuff stretches like crazy.

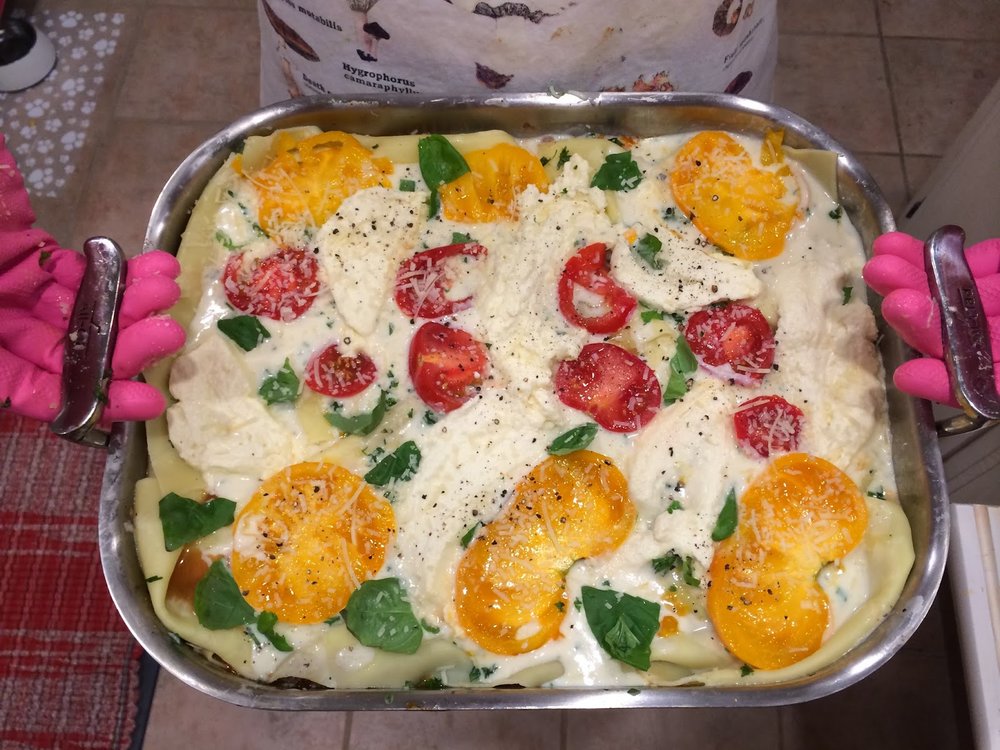
Boom. Done. There it is. Mozzarella. 30 minutes. Here's the lasagna awaiting another layer of pasta and its toppings:

Lauren's parents' dogs were pretty excited about it too.
Slicing it up. Still very warm. Obviously had to taste some and found it to be very palatable indeed, very fresh.

Close up:

Here are the ingredients:
- 1 gallon Milk, not ultra-pasteurized
- 1 1/2 tsp. Citric Acid powder, dissolved in 1/4 cup room-temperature water
- 1/4 tsp. Liquid Rennet or 1/2 tablet Rennet, dissolved in 1/4 cup room-temperature water
- 1 tsp. Cheese (Flake) Salt or Kosher Salt
Your main ingredient is milk, and lots of it, so you want to use the best milk you can lay your hands on. Luckily, I had a gallon of milk in the fridge, and not just any milk. I'd made a special trip to Glendale to go to a Raw Milk dispenser who only parks up at this location for four hours on a Saturday. It seemed all a bit under the radar, down a side street, and you can see why when raw milk dispensers have been closed down in the L.A in the past. People have even been sent to prison over it! However, there was a queue, and the milk was flying out of the truck. I have to say that the milk did not disappoint: it's really rich and tasty. I have read that using raw instead of ultra-pasteurised, homogonised milk gives your cheese more flavour. It stands to reason that if the milk is tastier, the cheese will be, too.
Right so, here's what you do. One gallon of milk goes in the pan. Gently heat to 55° Fahrenheit or 13° Celcius and add the citric acid. A dairy themometer comes in handy here-- again they are cheaply available. Stir well. The curds will start to separate from the whey, as pictured below.
 |
Now you're supposed to let the rest for five minutes but I couldn't wait and went straight ahead to straining them.
Well, actually I had my dad strain them whilst I read out the further instructions and stirred my sauce.
This can be done with a holey spoon. After straining you end up with a gloopy, yet almost cheese-like substance.
Time for the marigolds. The next step gets pretty hot.
Oh yeaaah. Once you have donned the gloves, put the curds in the microwave for 60 seconds. Press them after this, and tip out the runny whey. Then I added a generous few pinches of truffle salt. Pure extravagance. But you can use normal salt too. Then fold over the curds and pop back in the microwave for another 30-40 seconds.
Fold over and press again, tipping off the whey once more.
Do this once more. Microwave for 30-40 seconds, fold, tip off. Then comes the fun bit; stretching your mozzarella.
You can see that I can barely believe what I am doing here.
Magic. This stuff stretches like crazy.
Boom. Done. There it is. Mozzarella. 30 minutes. Here's the lasagna awaiting another layer of pasta and its toppings:
Lauren's parents' dogs were pretty excited about it too.
 |
| This is Mimi. Sniff sniff. |
 |
| And this is Zooey. Sniff sniff, lick lick. |
On to the lasagna!
Close up:
And into the oven for 45 minutes.
 | ||||||||||||
End result: The mozzarella was a little lost in the lasagna, mixing with all the other flavours, but it was delicious so I won't complain. I'll definitely be repeating it, and trying different cheeses out in the near future.
Playing with Porcelain
Over the last few weeks I have been spending some time working at Berman Ceramic Arts, a studio/school in North Hollywood, L.A. They have a wide array of clays available, so I thought I'd try my luck with porcelain.
When I tried throwing with porcelain a year or so ago it was very difficult. It was so buttery! I found bits coming off in my hands, wobbles that could not be fixed and the whole experience quite frustrating. This time round was different. I was able to throw with it fairly easily, as if it were a stoneware clay. It was still buttery but in a more satisfying way. You have to be much more light with it but can really stretch it thin.
I sat down to the wheel and thought, shit, what should I try to make?

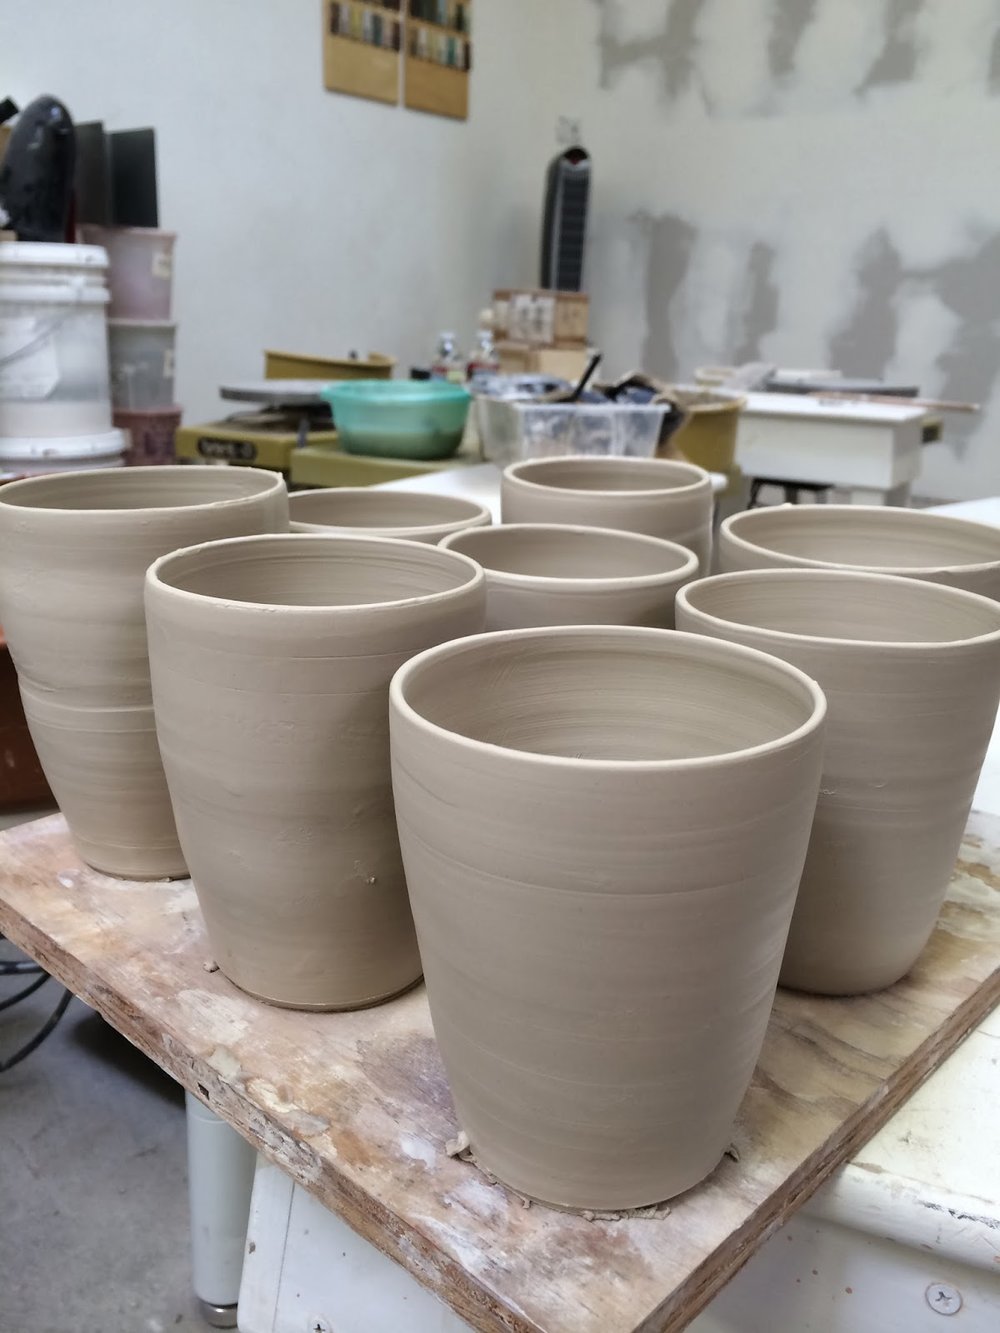
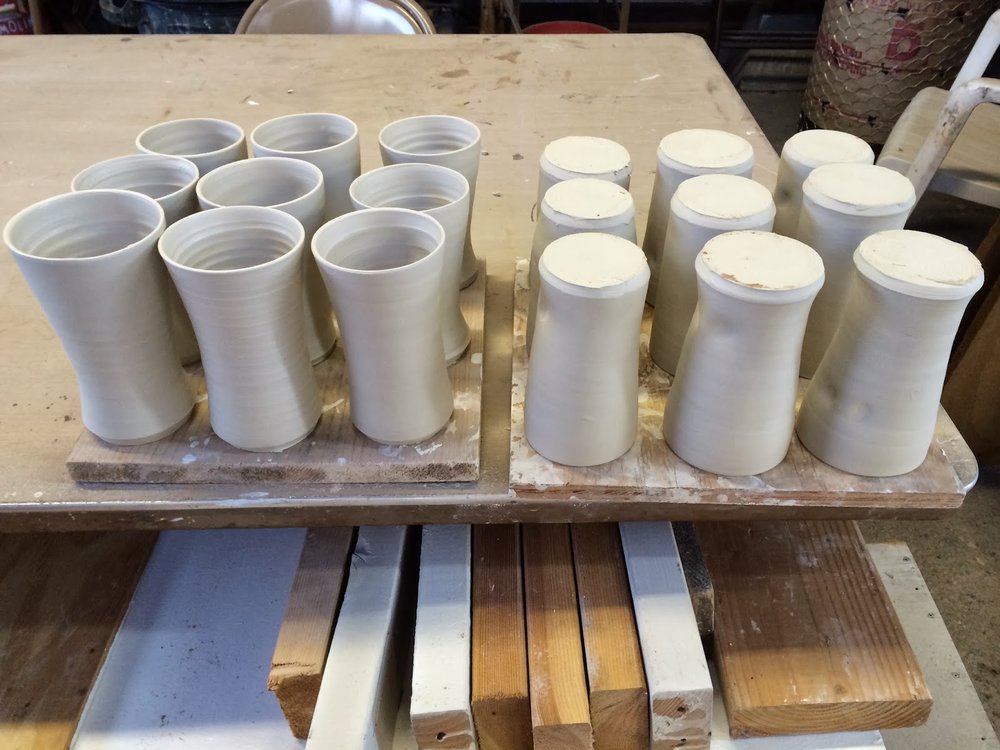
The last forms I was making at Winchcombe were beakers and handled beakers... basic cylinders with 8oz clay. I enjoyed throwing them at the time and felt like it would be good to get back in the zone with a batch of them. So, weighed out a bag of balls and set to it. I didn't throw to a stick, but tried to get them similar by pushing the clay as far as it would go. As I threw and got more confident with the clay, the beakers got taller.


When they had dried out a bit I thought they looked a tad boring, so decided to put a dimple in one. I did this with my thumb and first finger, simply pinching the wall of the cup. I liked it, so put another dimple on the cup, on the other side and higher up.

Examining it I thought it was a good alteration, adding character and making the cup more interesting to hold. So I dimpled all of them.


I left some weight in the first batch of them and trimmed a foot in them. Trimming porcelain is much trickier than I am used to. You have to get them at exactly the leather hard stage. When they are too wet it is impossible with globs and gloops coming off, smudging around your trimming tool. Too dry and you run often go through the bottom. After this experience I decided to try to throw the finished form on the wheel and forget about trimming.


Before I stacked them up on the racks to be biscuit fired, I added my little moose stamp. This moose is called Pomple and is very special to me. He is a tiny lead moose, originally intended to be making his mark on the world being squashed against paper in a printing press. I made a couple of books with him at Reed College when I was on exchange there, but he has since been gracing my pots with his presence. I think he prefers the soft impact of clay.
When I tried throwing with porcelain a year or so ago it was very difficult. It was so buttery! I found bits coming off in my hands, wobbles that could not be fixed and the whole experience quite frustrating. This time round was different. I was able to throw with it fairly easily, as if it were a stoneware clay. It was still buttery but in a more satisfying way. You have to be much more light with it but can really stretch it thin.
I sat down to the wheel and thought, shit, what should I try to make?
The last forms I was making at Winchcombe were beakers and handled beakers... basic cylinders with 8oz clay. I enjoyed throwing them at the time and felt like it would be good to get back in the zone with a batch of them. So, weighed out a bag of balls and set to it. I didn't throw to a stick, but tried to get them similar by pushing the clay as far as it would go. As I threw and got more confident with the clay, the beakers got taller.
When they had dried out a bit I thought they looked a tad boring, so decided to put a dimple in one. I did this with my thumb and first finger, simply pinching the wall of the cup. I liked it, so put another dimple on the cup, on the other side and higher up.
Examining it I thought it was a good alteration, adding character and making the cup more interesting to hold. So I dimpled all of them.
I left some weight in the first batch of them and trimmed a foot in them. Trimming porcelain is much trickier than I am used to. You have to get them at exactly the leather hard stage. When they are too wet it is impossible with globs and gloops coming off, smudging around your trimming tool. Too dry and you run often go through the bottom. After this experience I decided to try to throw the finished form on the wheel and forget about trimming.
I played around with various forms, from wide ones, to triangular ones, to more rounded ones, to tall convex ones. I was searchng for the perfect cup/tumbler/beaker shape by altering them a little each time and examining the results.
 |
The inside of a particularly wide one. |
But alas, I still don't know which form I prefer. I need to see some of them fired and use them. One of the biggest challenges was figuring out the base of them; trying to make them attractive straight off the wheel. I ended up cutting a sharp angle with a wooden tool and using a twisted wire. The only clean up needed then was a damp sponge wiped around the base.
The last batch I made had a little more clay and I tried to stretch the clay high rather than round. The round ones appeal to my eye, or at least they did for a while, but are more difficult to hold. These convex ones are nicer to hold, but I am not sure whether I prefer the shape.
Before I stacked them up on the racks to be biscuit fired, I added my little moose stamp. This moose is called Pomple and is very special to me. He is a tiny lead moose, originally intended to be making his mark on the world being squashed against paper in a printing press. I made a couple of books with him at Reed College when I was on exchange there, but he has since been gracing my pots with his presence. I think he prefers the soft impact of clay.
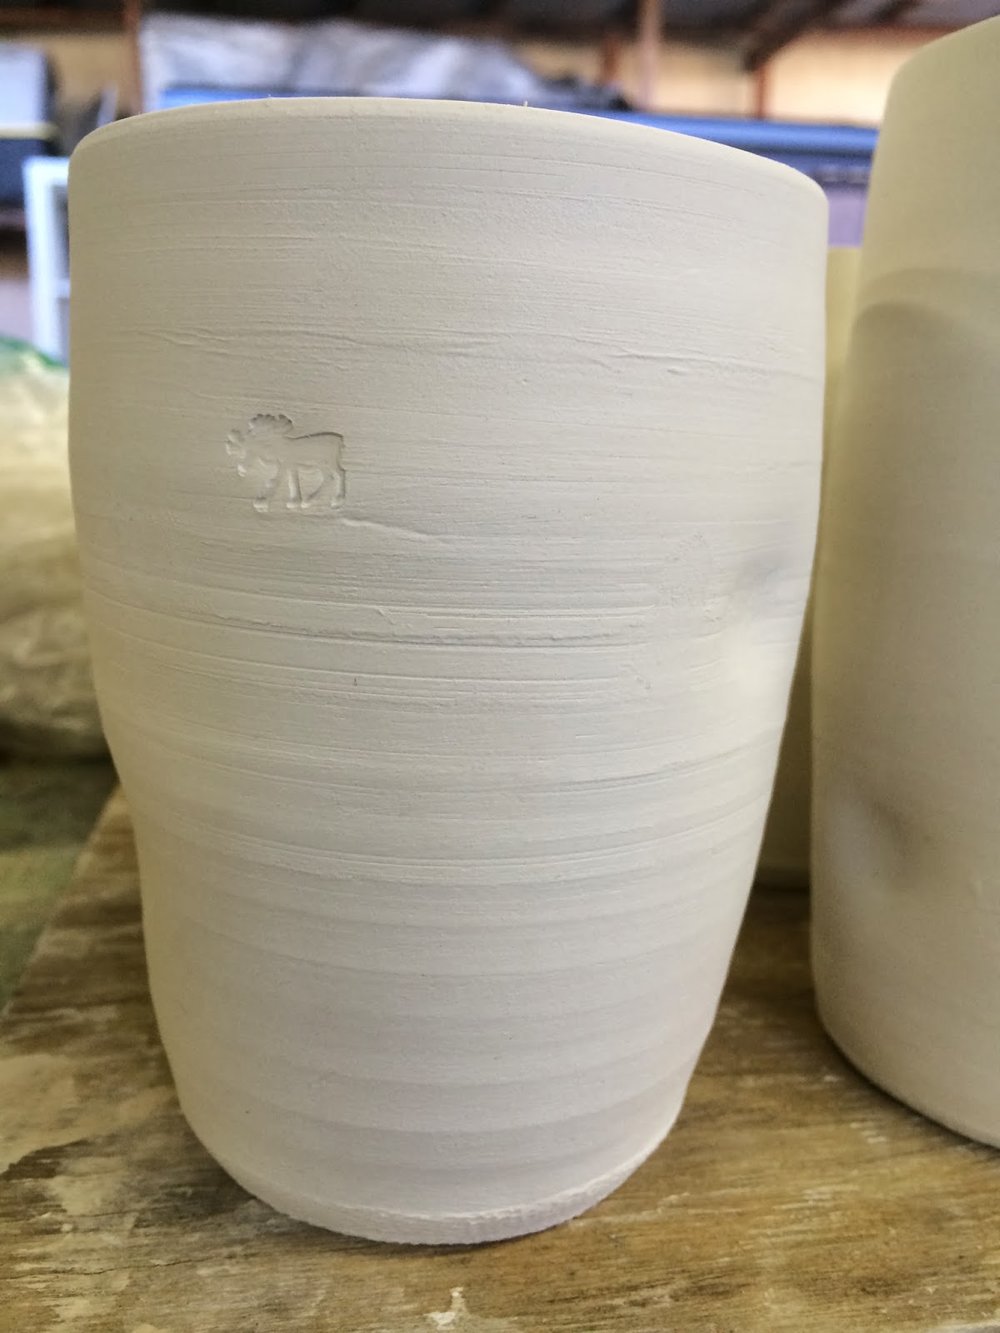 |
| Pomple! |
 |
| Pomple, up close. |
John Colbeck Kneeding and Wedging Clay at La Meridiana
Taking and watching these two short videos are how I learnt how to prepare clay. John Colbeck is an experienced ceramicist who teaches at La Meridiana every year. He has written many books including this one on throwing.
And this one on materials.
If you have to mix clays of different consistencies, colours, or just want to thoroughly mix some old clay then wedging is the way forward. John said if you follow this cutting, turning and bashing technique twenty times then the clay should be ready. Sometimes it doesn't take a full twenty times, sometimes more.
I spent my mornings at La Meridiana spiral kneeding before breakfast, as Michael Cardew suggests is the way to learn. The problem was that I was doing it all wrong before watching John; the lump of clay would inch away, riding along the bench, getting away from me. Taking the following two videos, watching them repeatedly and practicing allowed me to get them. Spiral kneeding should not tire you out, it is all about using your body weight to press down, not your arms. John makes it look as easy, as it should be.
Pietro Madelena Demonstrating the Fundamentals of Throwing Pots
This is Pietro Madelena. Pietro is mad, quite clearly mad, but in the best way possible.
He started the Ceramics School, La Meridiana in 1981. Here is a link to the website: http://www.lameridiana.fi.it/. They run one and two week courses on all manner of ceramic practices, throughout the year.
On one of my last days at La Meridiana I asked Pietro to do a throwing demonstration. He obliged and here's the result. It cuts out at the end, as my memory disk ran out of space, but in the seven or so minutes Pietro covers the basics of centering, opening and pulling on a wheel.
His control of the clay is marvelous. In particular, the technique of using the webbing between his middle fingers, to keep the lip compressed and centered, is brilliant. Pietro told me this was a traditional Italian technique which has been in use for thousands of years. I have been practicing it myself and found it to be very useful.
Next up I will be posting a couple of videos of John Colbeck preparing clay for the wheel.
Museo Regionale della Ceramica, Deruta, Italia
After a quick coffee stop we headed to the museum of regional ceramics in Deruta.
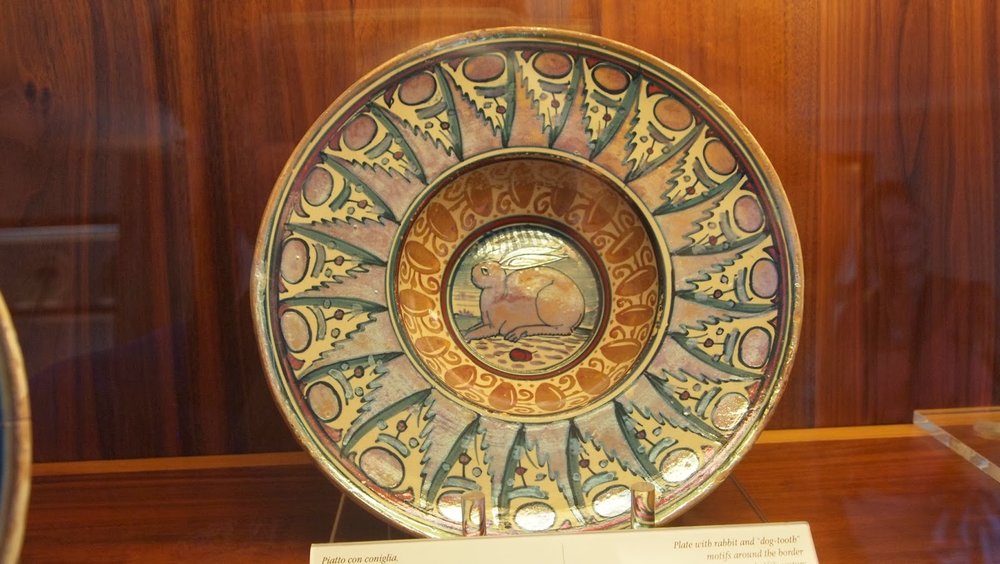
There were a vast array of pots here, on many levels. The museum felt a bit like a labyrinth, with all sorts of pots on display. My favorites, and the ones I mostly pictured, were the older pots. Some of the designs are so cartoonish and ridiculous.
On to the ceramica!


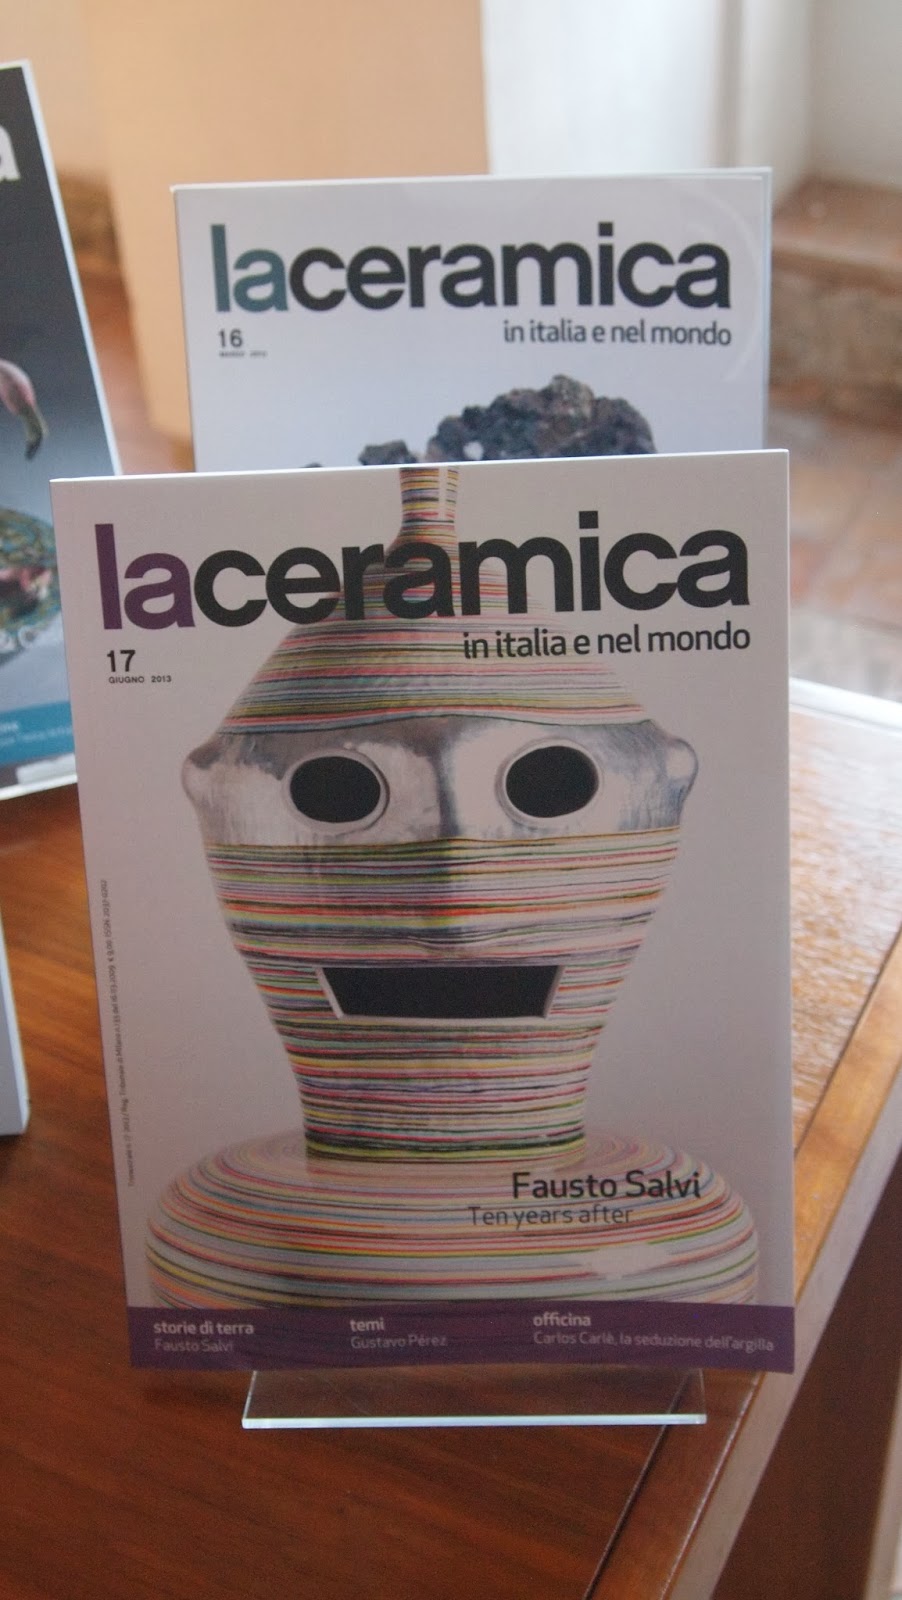
They also had some more modern pots:

After Deruta we headed to Assissi where they are mad about religion rather than pots.

Here are a couple of sample pics from the gift shop of one of the churches.
It was time to clean the statues too, something I didn't realise went on at all. No pictures allowed of course.

And finally, as a counterpoint to the pots and the relics, here is a meaty street shop window.
There were a vast array of pots here, on many levels. The museum felt a bit like a labyrinth, with all sorts of pots on display. My favorites, and the ones I mostly pictured, were the older pots. Some of the designs are so cartoonish and ridiculous.
 |
| Outside the cafe: a serious game of cards on a serious table top. |
On to the ceramica!
 |
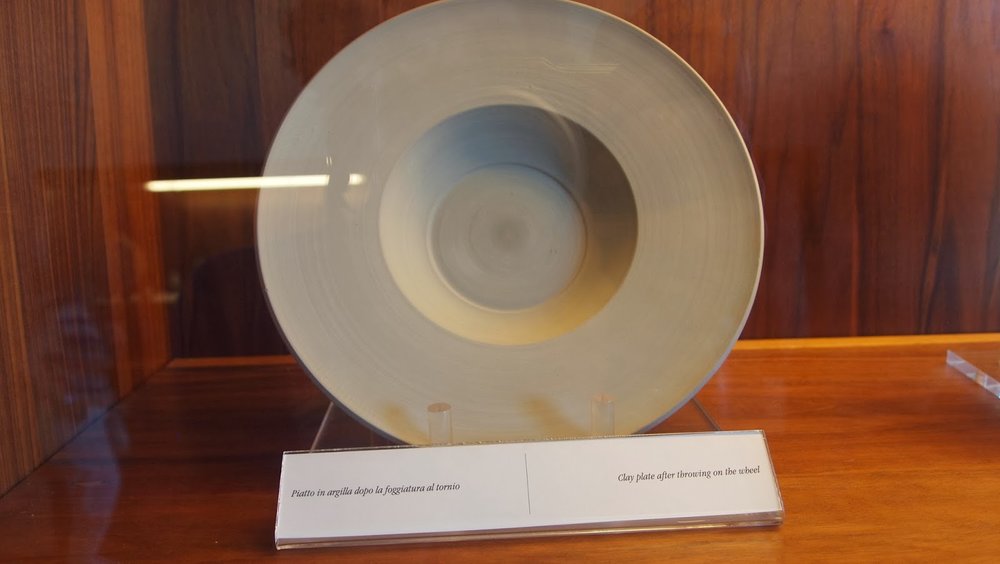 |
| Blank dish, same shape as the decorated on above. |
 |
| Another blank on display. |
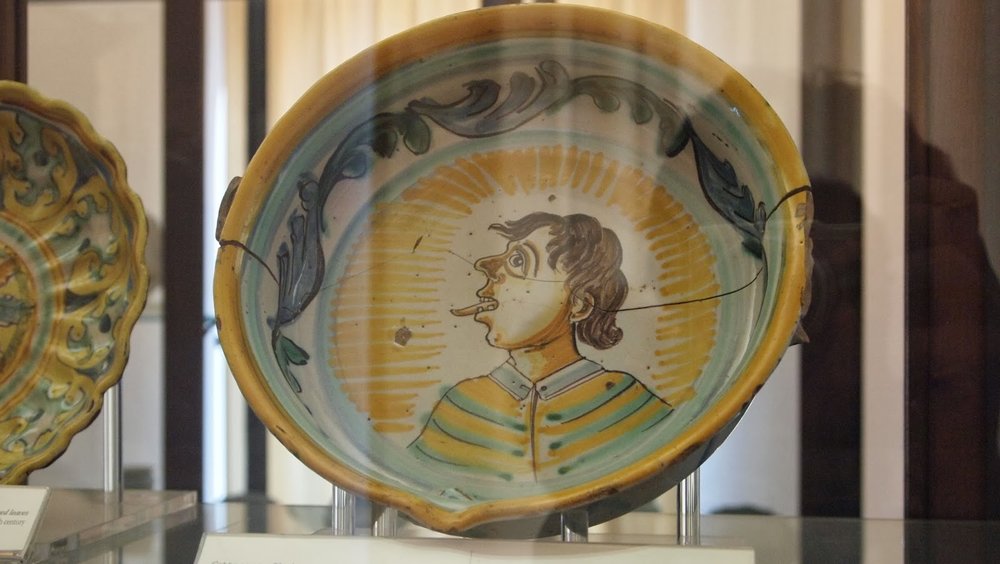
 |
| What a nose! |
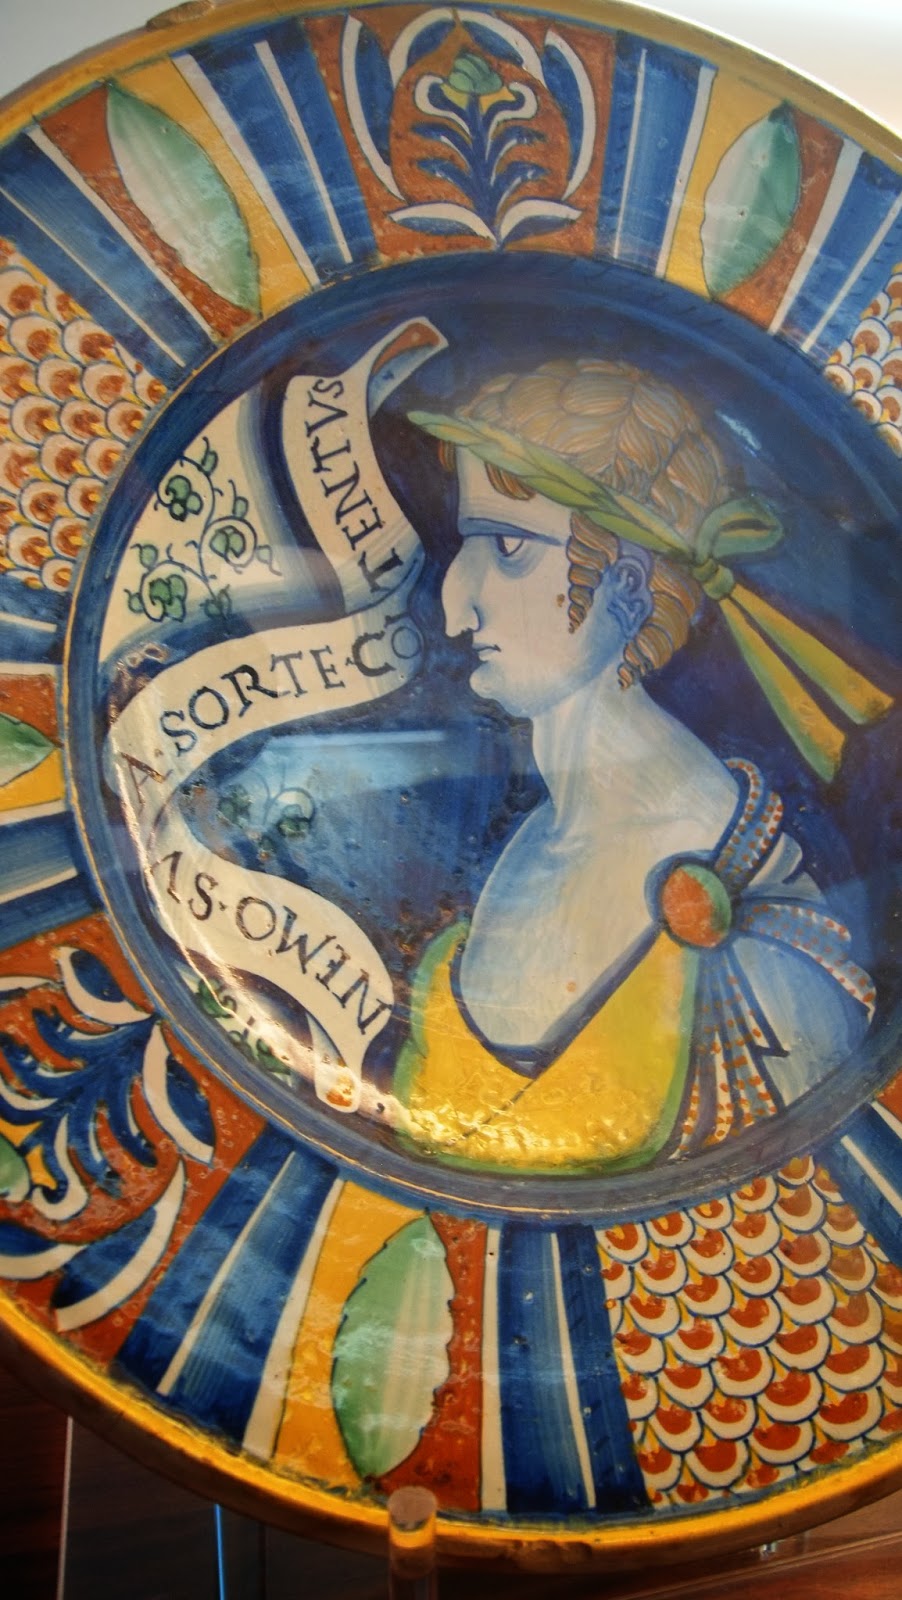
 |
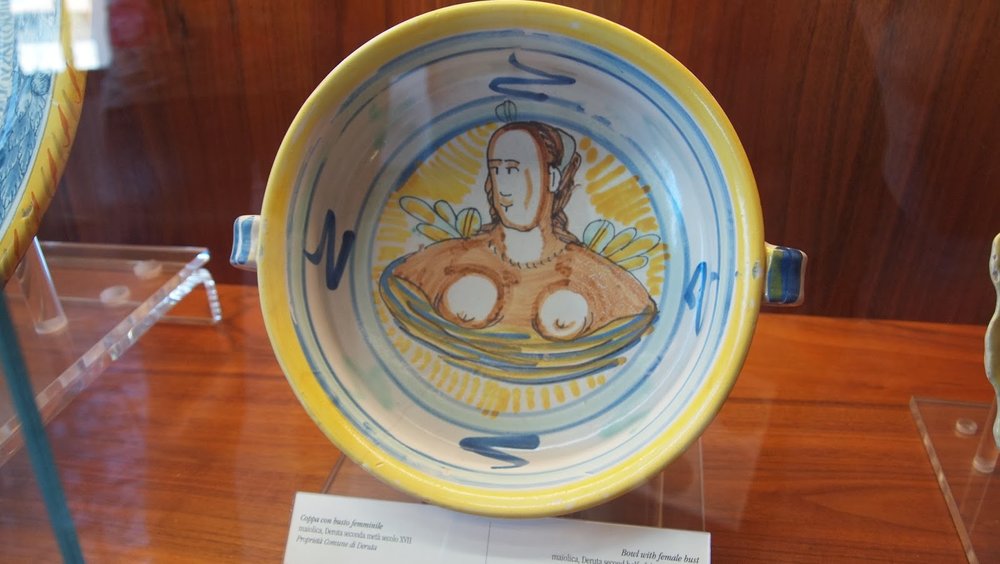 |
| There are no words. What was she thinking? What was the potter thinking? |
 |
| Umbria, 14th Century. |
 |
| Yes! |
They also had some more modern pots:
 |
Here are a couple of sample pics from the gift shop of one of the churches.
 |
| Tasteful. |
 |
| Four hundred an ten euros! |
And finally, as a counterpoint to the pots and the relics, here is a meaty street shop window.
 |
| Lots of wild hog products. |
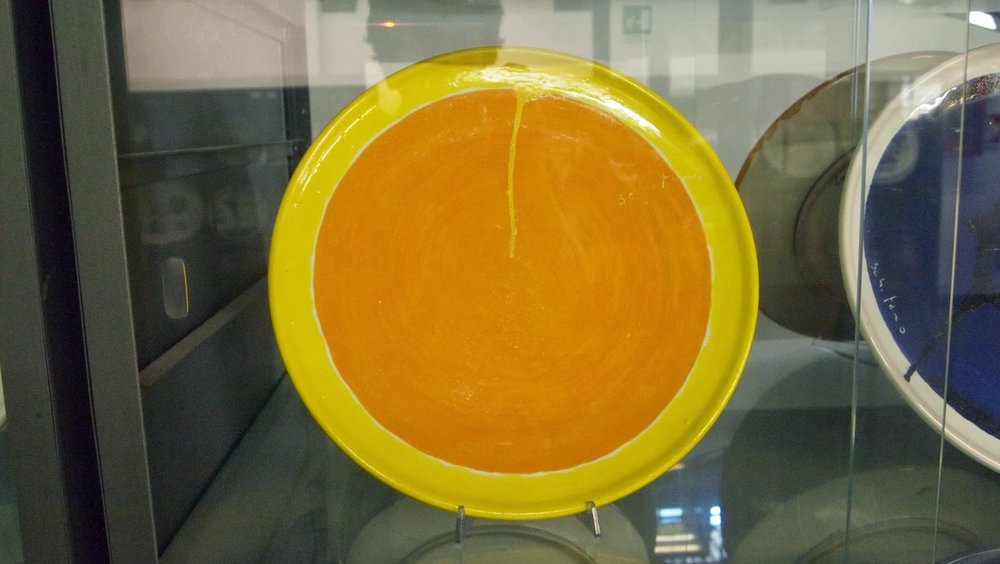
Day dreaming around Deruta, Italia
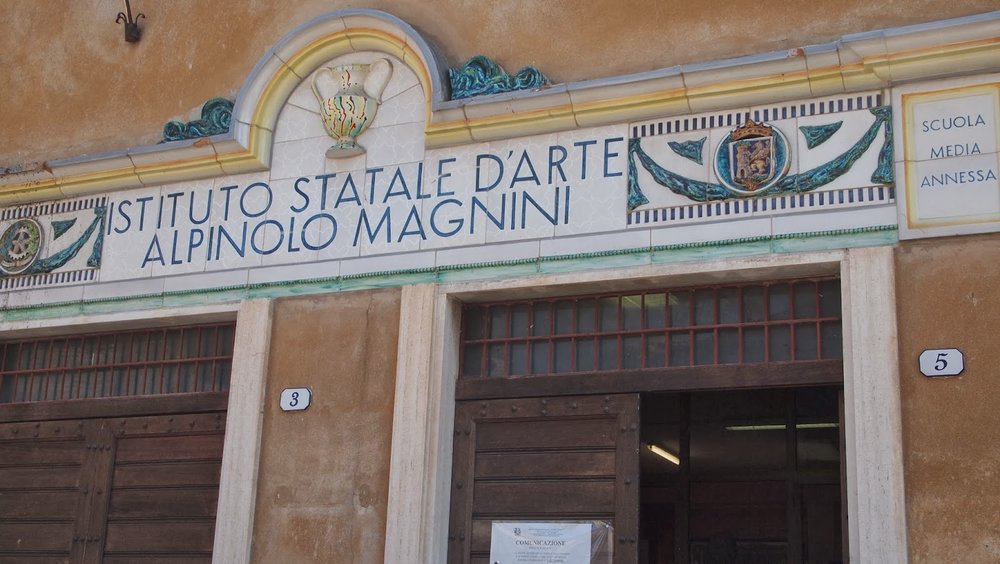
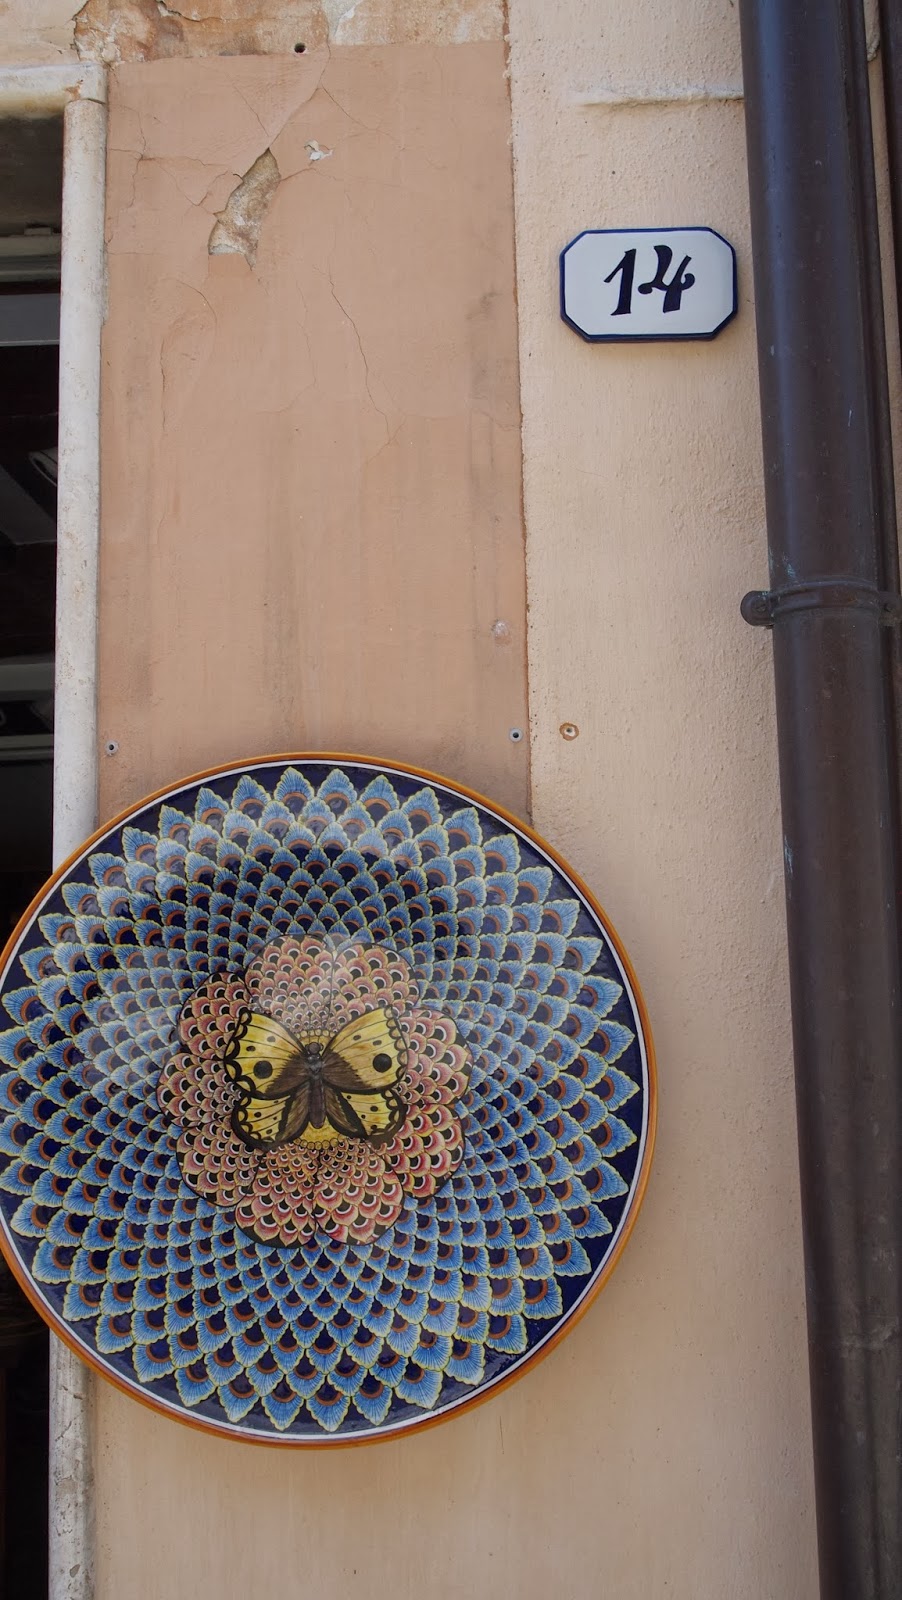
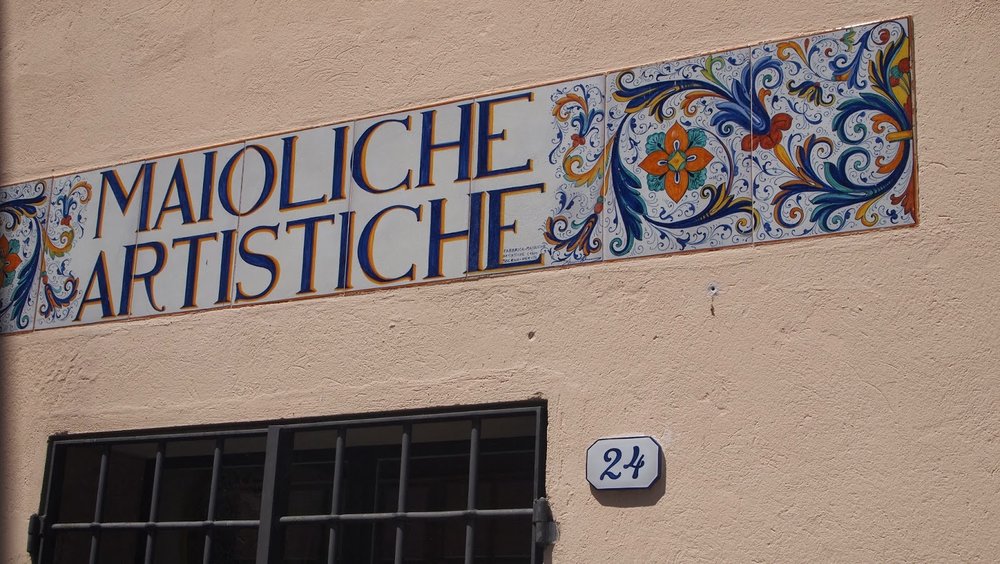
One day, during the majolica course at La Meridiana, we went on a trip to Deruta: about two hours south-east of Certaldo. This town is all about majolica. They have been beavering away at it since the early middle ages. I had never seen anything like it: around every corner and on every wall there seemed to be ceramics.
Our first stop was at a traditional workshop where they still produce Deruta ceramics, as they have for hundreds of years. This was the workshop of Antonio Margaritelli. Only he and an assistant work there now. He told us sadly that his sons were not interested in learning the art and was worried that his knowledge would be lost. This is happening to a certain extent with the Murano Glass Blowers too, with it being a close-knit family business with the latest generation growing away from the craft.
You can see how enthused Antonio is by the pots. Unfortunately he spoke very fast, and in Italian, so without our our wonderful guide Francesca (Pietro Madelena's daughter) to translate, we would have been stuck. He described the whole process, including the final part of their firing, where they introduce small amounts of wood to bring out the metallic lustre finishes on some of the work. I had never heard of this in a gas kiln before.
I actually failed to take any pictures of the front of their pots, but below are lots which we saw while we walked dreamily around the streets of Deruta.


My next post will be of pots at the Regional Museum of Ceramics in Deruta.
Our first stop was at a traditional workshop where they still produce Deruta ceramics, as they have for hundreds of years. This was the workshop of Antonio Margaritelli. Only he and an assistant work there now. He told us sadly that his sons were not interested in learning the art and was worried that his knowledge would be lost. This is happening to a certain extent with the Murano Glass Blowers too, with it being a close-knit family business with the latest generation growing away from the craft.
You can see how enthused Antonio is by the pots. Unfortunately he spoke very fast, and in Italian, so without our our wonderful guide Francesca (Pietro Madelena's daughter) to translate, we would have been stuck. He described the whole process, including the final part of their firing, where they introduce small amounts of wood to bring out the metallic lustre finishes on some of the work. I had never heard of this in a gas kiln before.
 |
| Antonio enthusing by his kiln. |
 |
| Look at the spout on that jug! |
 |
| This is a teapot. |
 |
| This is how a teapot pours. See. |
 |
| This was Antonio's assistant. He admitted she did most of his best work. I have never seen a steadier hand. |
 |
| Antonio showed us how to take a normal cheap paint brush and slice it with a pair of scissors to make it into a very fine brush fit for his work. |
 |
| Organised chaos: tools, paints, brushes, half finished work etc. |
 |
| The back of one of their pieces (they use this traditional pattern on the back of most of the work). |
I actually failed to take any pictures of the front of their pots, but below are lots which we saw while we walked dreamily around the streets of Deruta.
My next post will be of pots at the Regional Museum of Ceramics in Deruta.