
Pot Pictures from the Montelupo Museum in Tuscany.
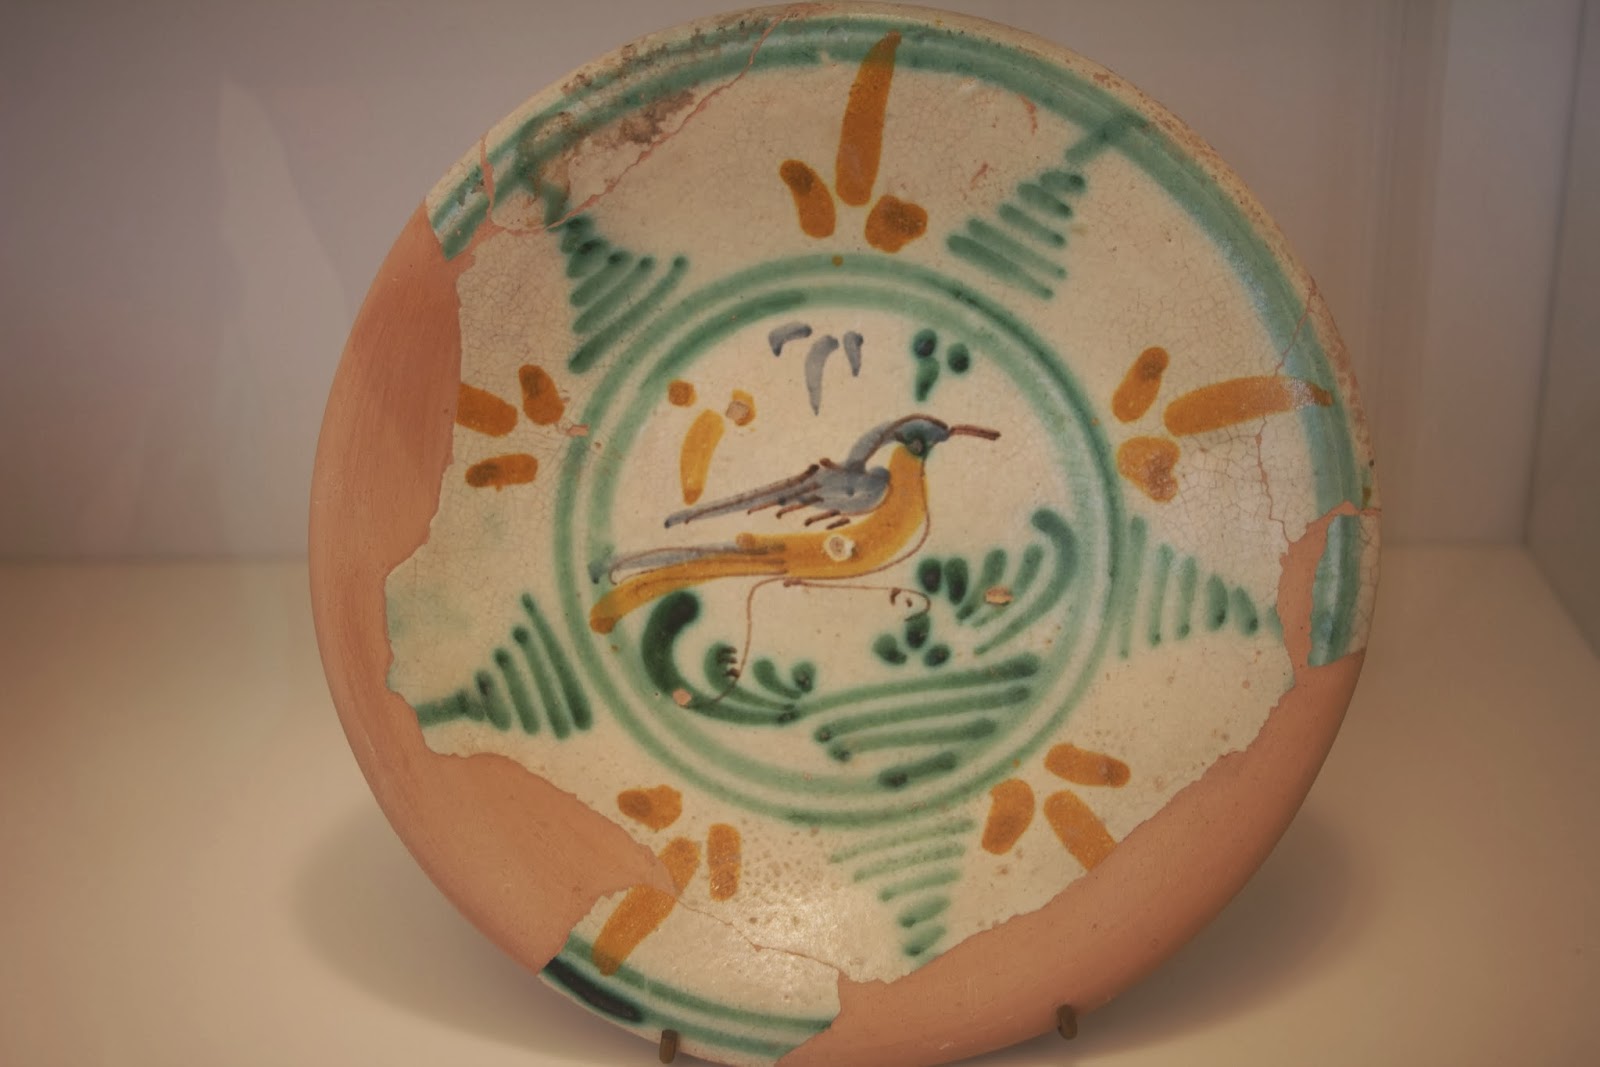
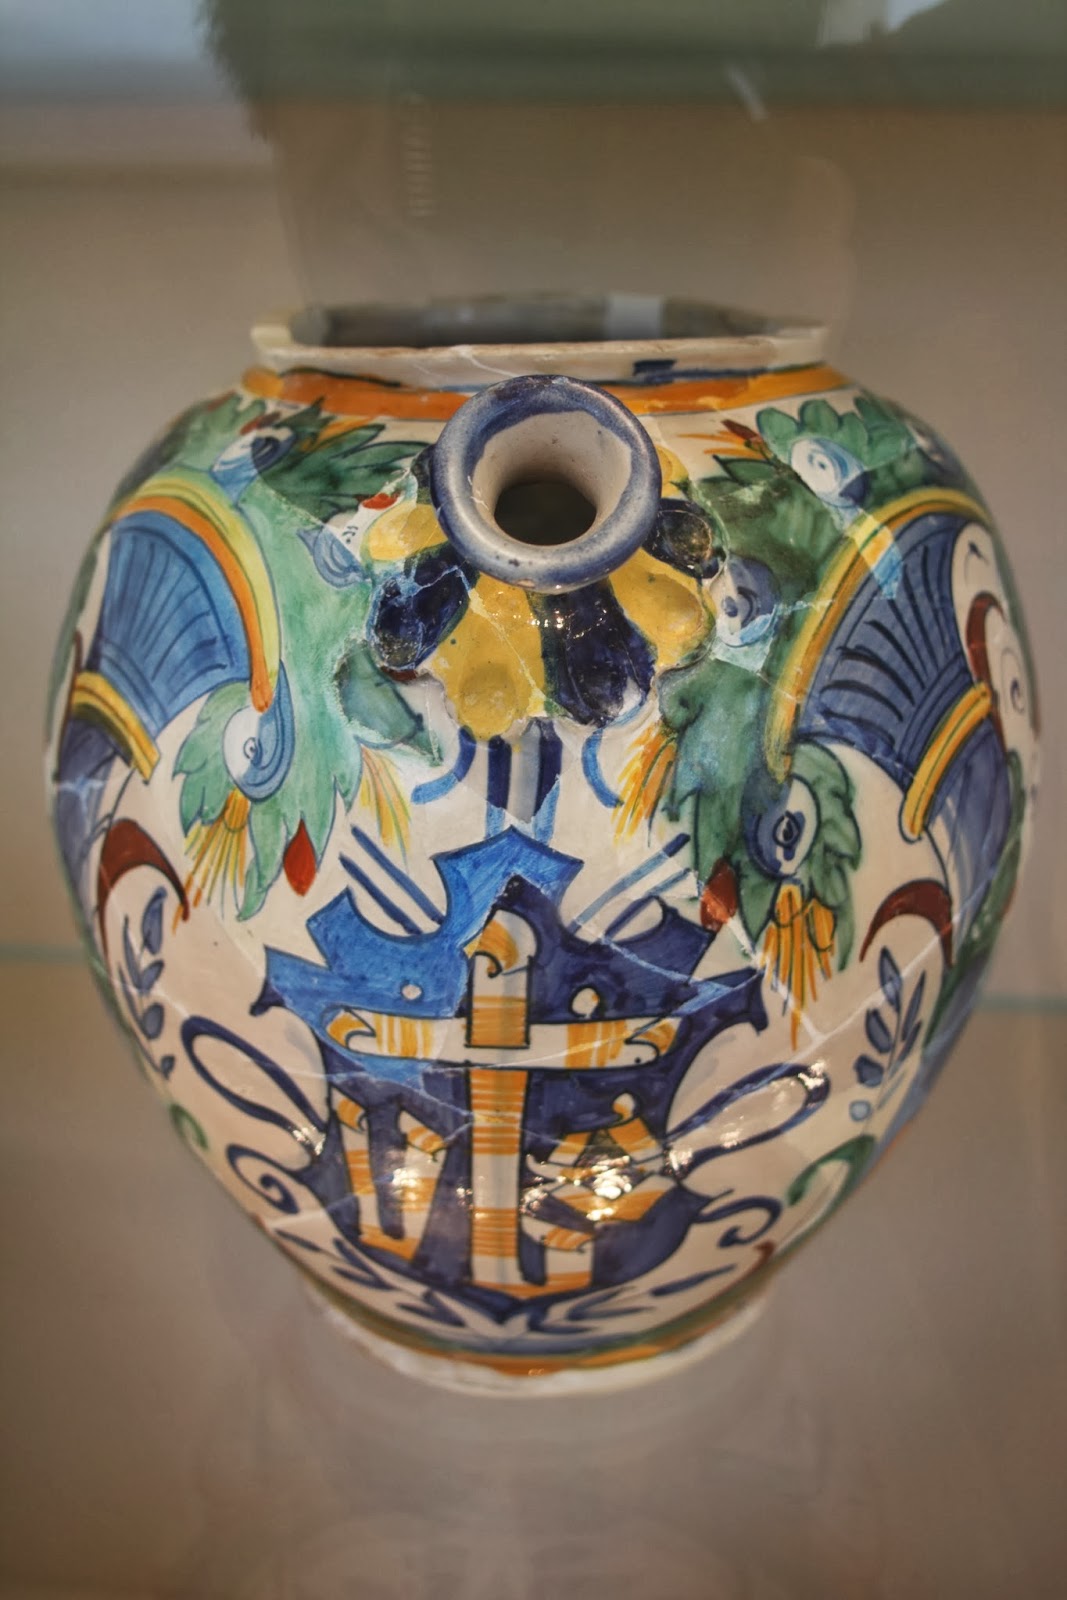
What I found was that some of the pots were very gaudy, but many were not. Many were actually very charming, striking me as similar to early slipware pottery in England: the copper green colour on some of them in particular. You can see that they were thrown quickly in a lot of cases and were by no means a polished product. I love the muddier examples, the ones where the background majolica glaze is thin and you can see that lovely terraforte clay through it. As many of them are quite old you see the wear and tear on them as they have been used as functional items. Especially the jugs, I love some of the jugs. The shape of the spout really appeals to me, as does the full belly... not so sure about the fluted bases on some of them though.
Many of them are quite amusing too: caricatures of people and animals. It was a touch tricky to photograph them due to the shiny-ness of the cases so you will have to excuse the glare on some of them. They are in no particular order.


 |
| I tried to emulate this snail on a pot myself. |


 |
| I love the energy of this plate, the lines have so much energy and the soft copper green. Mmm, i could eat off that. |
 |
| This one too. |
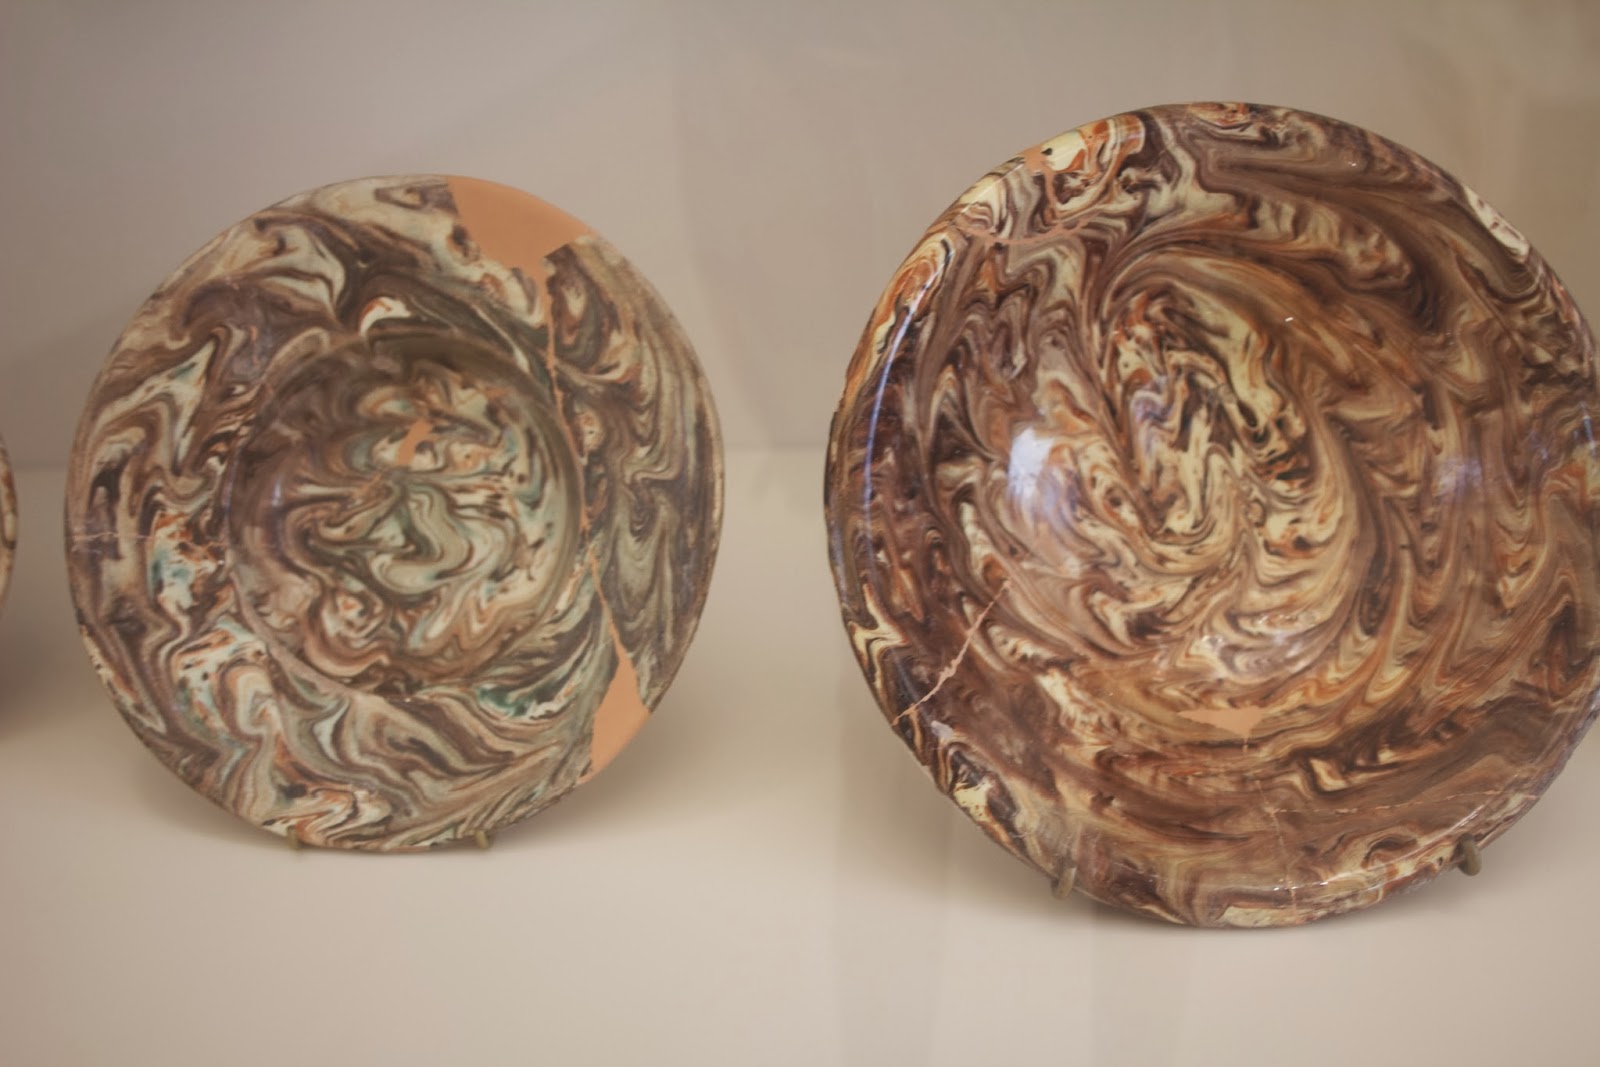 |
| Jiggled bowls... SLIPWARE! |


 |
| This one is much more modern; the white really gleams. This is what you see in most shops around Tuscany (especially in Montelupo). |


Not all of the pots at the museum were traditional however. The sculpture below is in the contemporary part of the museum and represents the throw-away Indian chai cups. It was done by Terry Davies who I got the chance to meet. He is a lovely chap and an excellent potter who achieves very interesting textures effects on his pots. Terry was born in England and trained as a production potter but now lives and works in Italy. Here's a link to his website: http://terrydavies.it/home/

The works name is: "ceramica d'uso abuso e riuso" which roughly translates to used, abused and re-cycled ceramics.
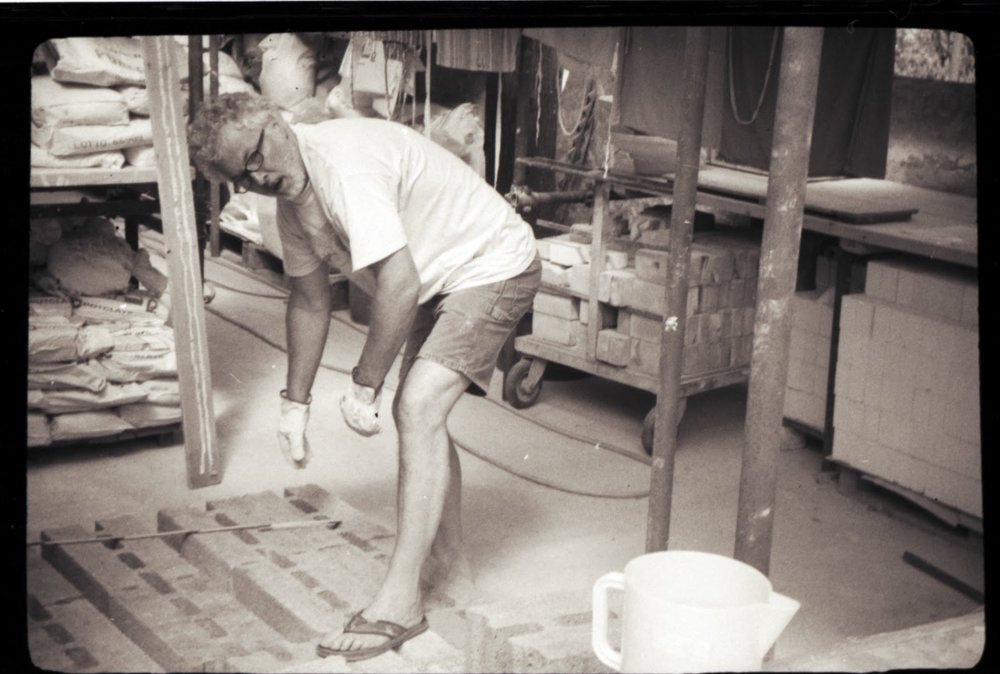
Black & White Photographs from La Meridiana International Ceramics School, Italy
Whilst I was there I took quite a few pictures with various film cameras. The pictures remained exposed but not dealt with until recently. I used the cupboard under the stairs at my parents house as a dark room to get the film onto spools. The cupboard is very small, full of; coats, umbrellas, shoes, files, bottles of various home brews, shoe cleaning materials, wrapping paper, the ironing board. You name it, its probably in there. It was hot, stuffy and generally not a very comfortable experience.
I developed them on the kitchen table with newspaper laid out to protect the table cloth from the chemicals. I wore a pair of marrigolds-bright yellow rubber gloves, to protect my hands. A few months ago I managed to burn my hands quite badly in the dark room by not being careful with the chemicals... sloshing them about without any gloves on. So now I am more careful.
Once developed, I hung them up on a make shift line over the kitchen sink (well, my dad actually hung the line). They looked pretty decent holding them up to the light, but you can't really tell if they are any good until they are scanned.
This takes place the day after developing and is by far the dullest part of the process. Waiting for the scanner, saving them as different files etc etc. Computers! But now they are all scanned and some of them came out alright. Many did not, but that was to be expected. The best pictures were those taken on a KII camera that I bought it at a little street market in Florence. The KII is a Klein, which is an Italian camera based on the Leica. It is pictures below:


The reason I have such comprehensive pictures of it is that I managed to leave it at Pisa airport. It was round my neck before I went through the body scan, so took it off and placed it in a tray all on its own. Never to be seen again. Although I am thinking about trying to get FedEx to pick it up for me.
 |
| The barn where I had my kick wheel... in the left attached bit. |
 |
| A view through the vines. |
 |
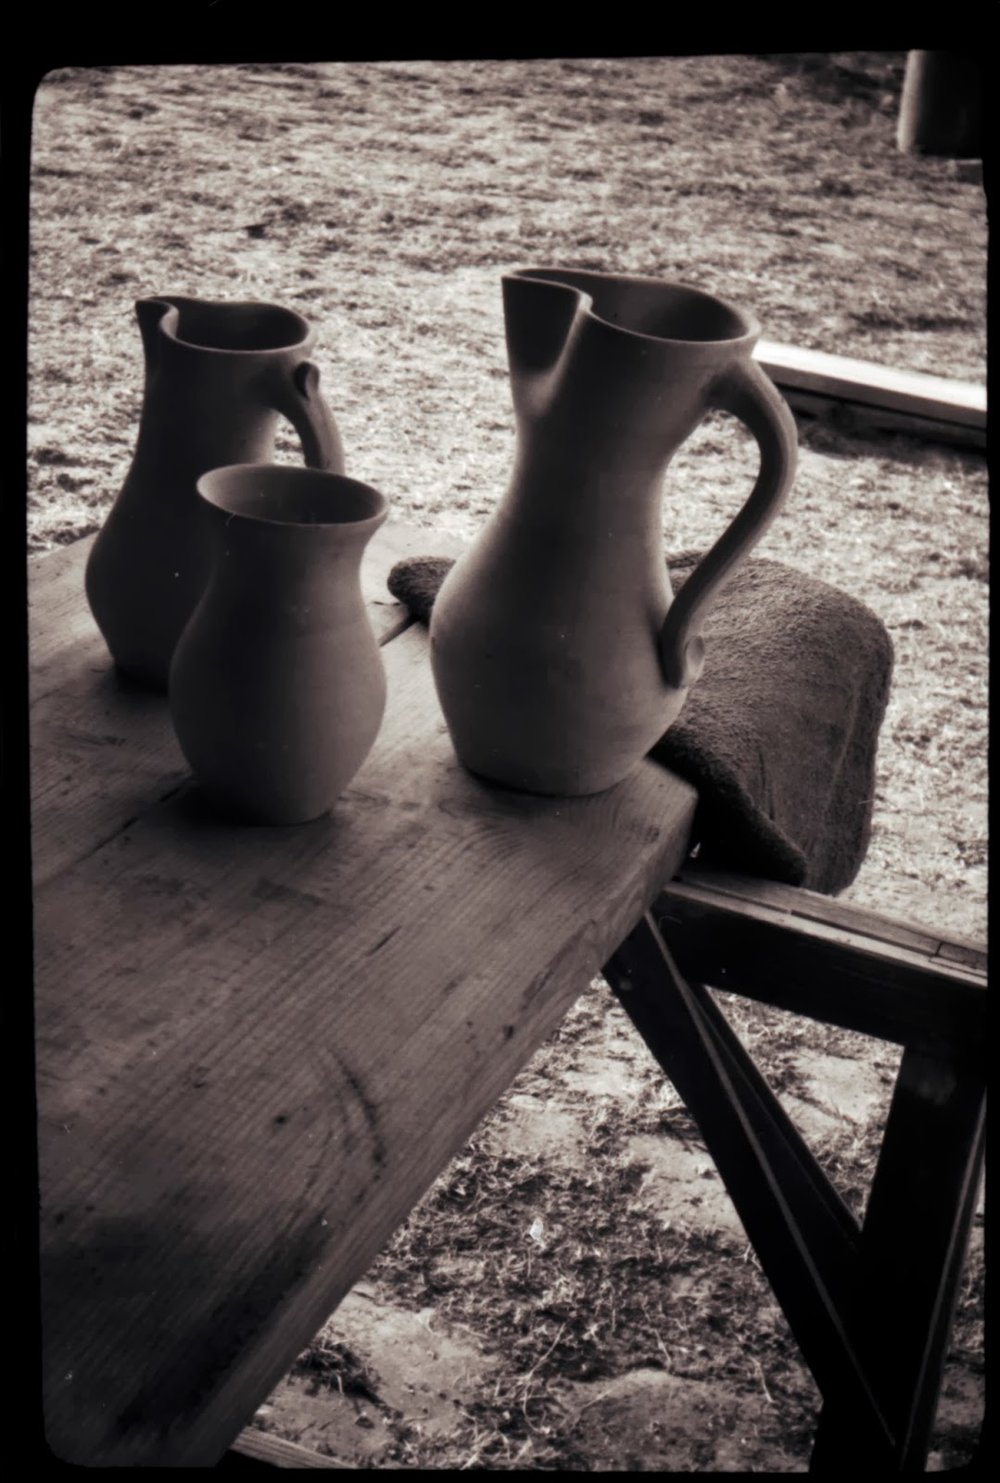
| Two of my jugs. Shapely but you wouldn't want to pick them up or pour with them. |
 |
| This is Rina, the other ceramics assistant, posing in an alleyway. |
 |
| My kick wheel, complete with mounds of trimmings. |
 |
| Lauren by the sign to the school. |
 |
| Lauren grasping a bottle of water n a scorching walk in the Tuscan countryside. |
 |
| My room. |
 |
| Pietro Madelena (who set up the school in 1982) laying the foundation of a soda kiln. |
 |
| Two of my fired pots with Clay and Glazes for the Potter by Daniel Rhodes |
 |
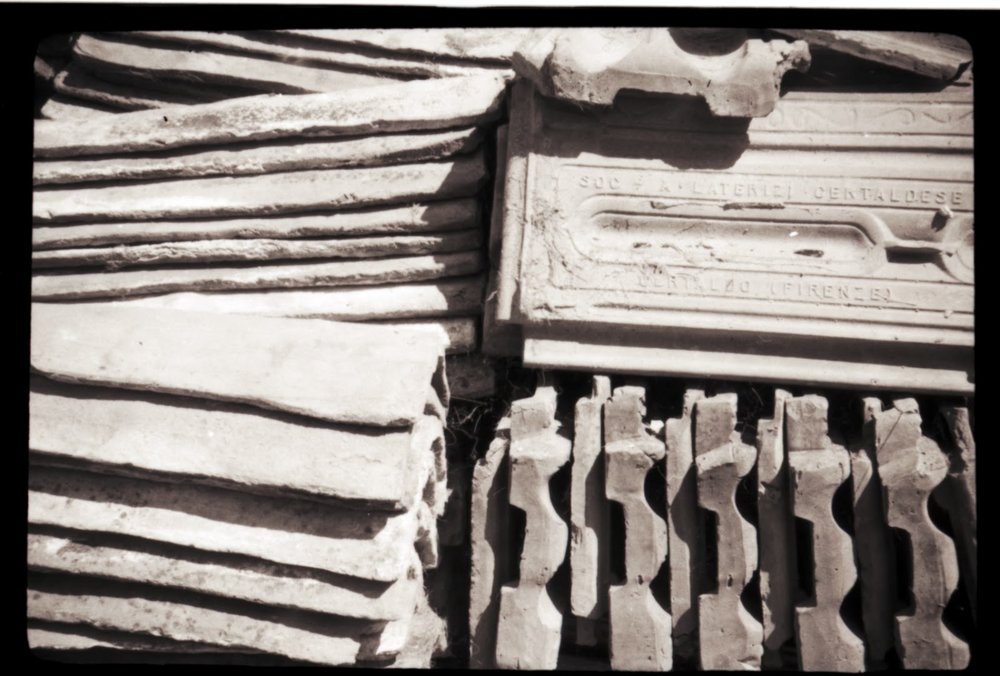
| Roofing tiles |
 |
| Grape vines. |
 |
| Nook Squiggle I |
 |
| Nook Squiggle II |
 |
| The view from the balcony. |
 |
| Different roofing tiles |
 |
| Pietro's outside flower sculpture. These were brilliant colours and moved in the wind. |
 |
| Two friendly monks I met. |
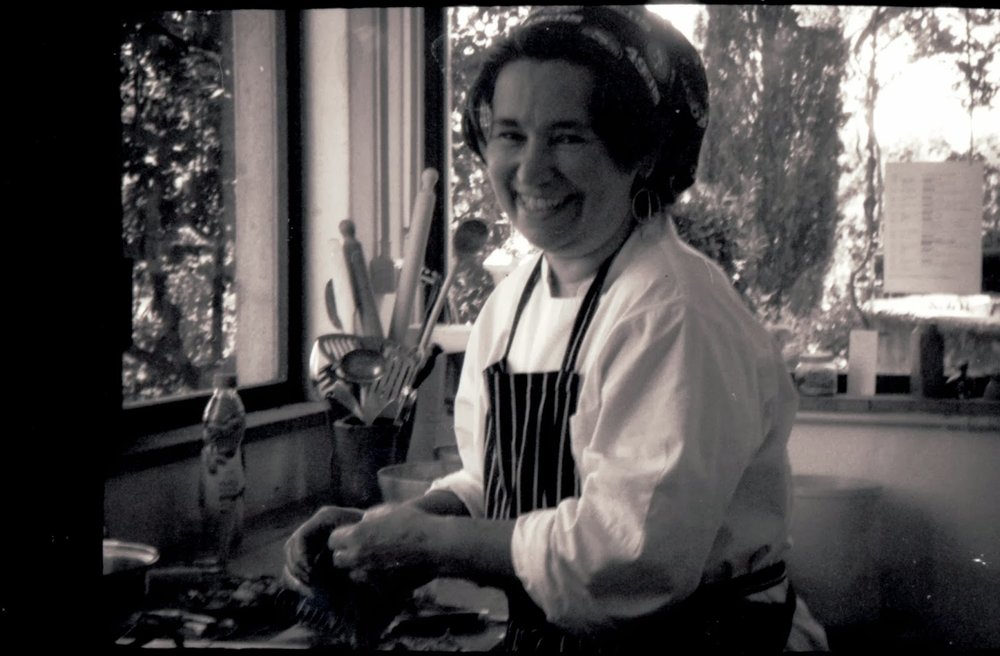 |
| Luccia the master chef. |
 |
| Charlie the dog. Charlie is a really lovely dog who is quite unabashedly addicted to biscuits. |
 |
| Close up grapes. |
 |
| The smaller pot closest the camera was made by Mark Hewitt. It was my example jug shape (without spout or handle obviously), that I tried unsuccessfully to emulate. |

 |
| The fields disappearing on the way to Certaldo train station. |
 |
| Certakdo train station. |
 |
| My bags. Far too full of pots and pasta. |
Elderberry Wine
HAPPY NEW YEAR! To start off 2014 I thought I would write a post on elderberry wine making. A piece rather than a pot.
This year's elder trees were laden with berries. It was a bumper crop. Sometime in autumn, I'm not sure exactly when, Lauren and I went picking near the GWR station (Gloucestershire Warwickshire Railway) in Winchcombe. Within half an hour we had a basket that was almost too heavy to carry. This was the easiest part of the whole operation. This wasn't all of them actually-- we had a bag full too.
The next part is removing the berries from their stalks. This sounds easier than it is. You have to do each one individually. Some people do this with a fork but I found it quicker by hand. This took us several hours. We watched a film whilst doing it but by the end Lauren was pretty fed up with removing tiny berries from stalks. I advise you try to find some small children to help you.
The next step is finding a large container to start the wine in. I borrowed a large pancheon from Matt for this purpose. This is what they used back in the olden times rather than plastic brewing buckets. The only disadvantage with old pots such as this pancheon is that they were glazed on the inside with lead.
The issue with lead glazes is that some of the lead can eek out into whatever you are cooking or brewing. This is especially the case if you are using acidic materials such as fruit juice. I figured that since this pancheon has been in use for over two hundred years, all of the dangerous lead had already leaked out. Who knows? Its especially hard to say as lead poisoning only comes on late in life. On that note, its time to throw the elderberries in!
Next comes water. As water is the main component of the wine, you want to try to use the best possible supply... spring water or distilled water. I did not have access to either so went with tap.
Next comes the fun bit. Squishing the berries! Some people use a block of wood or a potato masher, but I figured feet were the best option. Don't worry-- I did wash them thoroughly before stepping in. It helps if you are completely naked but I didn't want to scandalise the world with pictures of that, hence the towel. It was pretty cold and raining too.
Squish.
 Squish.
Squish.
Squish the berries this until they are all broken up and your feet look bloody; approximately eight minutes.
Before covering this and leaving to sit for 24 hours, remove a cup of the juice/berries. This is to make a yeast starter. Put it into a container with a teaspoon of sugar and a packet of wine yeast. This should make the yeast happy, activating it and getting it used to the idea of elderberries as a food source. After the initial 24 hours its time to transfer the mixture into a brewing bucket with the yeast and other ingredients (pectolase, tartaric acid, nutrient and vitamin B1). The recipe I used is at the end of this post. I increased the quantities as my glass jar holds 4.5 gallons.
A week later it was time to decant the liquid into my huge glass jar. This was not particularly easy. The elderberries had all mushed up and has to be sieved out. Our method was to pass the pulpy liquid through a sieve and then a muslin bag. This was very messy but worked okay. You can see the system in action here:


The only problem being the significant amount of sediment left in the bottom. To combat this I let it settle and then racked the wine off into a bucket and then back into the glass jar. I did this twice to try to end up with a clearer finished product.
Now all there is left to do is wait. I am not entirely sure how long I should be waiting, perhaps a year, perhaps longer, but I can say it was tasting pretty decent before I left England. Four and a half gallons of undrinkable wine would not be ideal.
Here is a picture of the elderberry wine in storage... in a shed in the garden. In the background (bottom right) you can can see a wonderful Tim Hearn cider jar which he gave me a couple of years ago, and above it on the chair is my Dad's whisky barrel. This is full to the top with gorgeous amber liquid (45 litres of it), soon to be bottled.

Here is the recipe I worked from. The people at theinfoco.com are very nice and sent me this recipe for free! They also have a book available to purchase of over a hundred recipes.
This year's elder trees were laden with berries. It was a bumper crop. Sometime in autumn, I'm not sure exactly when, Lauren and I went picking near the GWR station (Gloucestershire Warwickshire Railway) in Winchcombe. Within half an hour we had a basket that was almost too heavy to carry. This was the easiest part of the whole operation. This wasn't all of them actually-- we had a bag full too.
 |
| Pick yourself a basket full of elderberries! |
The next part is removing the berries from their stalks. This sounds easier than it is. You have to do each one individually. Some people do this with a fork but I found it quicker by hand. This took us several hours. We watched a film whilst doing it but by the end Lauren was pretty fed up with removing tiny berries from stalks. I advise you try to find some small children to help you.
 |
| The set up. |
The issue with lead glazes is that some of the lead can eek out into whatever you are cooking or brewing. This is especially the case if you are using acidic materials such as fruit juice. I figured that since this pancheon has been in use for over two hundred years, all of the dangerous lead had already leaked out. Who knows? Its especially hard to say as lead poisoning only comes on late in life. On that note, its time to throw the elderberries in!
 |
 |
 |
 | ||
 |
 | |
 |
| Squishing complete! |
A week later it was time to decant the liquid into my huge glass jar. This was not particularly easy. The elderberries had all mushed up and has to be sieved out. Our method was to pass the pulpy liquid through a sieve and then a muslin bag. This was very messy but worked okay. You can see the system in action here:
The only problem being the significant amount of sediment left in the bottom. To combat this I let it settle and then racked the wine off into a bucket and then back into the glass jar. I did this twice to try to end up with a clearer finished product.
Now all there is left to do is wait. I am not entirely sure how long I should be waiting, perhaps a year, perhaps longer, but I can say it was tasting pretty decent before I left England. Four and a half gallons of undrinkable wine would not be ideal.
Here is a picture of the elderberry wine in storage... in a shed in the garden. In the background (bottom right) you can can see a wonderful Tim Hearn cider jar which he gave me a couple of years ago, and above it on the chair is my Dad's whisky barrel. This is full to the top with gorgeous amber liquid (45 litres of it), soon to be bottled.
Here is the recipe I worked from. The people at theinfoco.com are very nice and sent me this recipe for free! They also have a book available to purchase of over a hundred recipes.
Elderberry Wine
Ingredients
4 lbs of Elderberries
4 lbs of Elderberries
3 lbs Sugar
Burgundy Wine Yeast
Additives
1 Tsp Pectolase
2 Tsp Tartaric Acid
1 Vitamin B1 Tablet (3mg) 1 Tsp Yeast Nutrient
1 Tsp Pectolase
2 Tsp Tartaric Acid
1 Vitamin B1 Tablet (3mg) 1 Tsp Yeast Nutrient
Campden Tablets
Method
First make a yeast starter with the juice from a handful of berries, 1 teaspoon of sugar and a cup of
cold water in a clean wine bottle. Add the yeast and plug the bottle with cotton wool. Leave for 24
hours.
Meanwhile, fork the elderberries from the stalks into a plastic bin and crush with a piece of wood. Add 5 pints of water and a campden tablet. Cover and leave for the same 24 hours.
Add the sugar, the additives and the yeast starter. Stir to dissolve the sugar and ferment on the pulp for 4 days, stirring twice a day.
Strain off into a gallon jar and fit an air lock. Top up with cold water when fermentation dies down.
Ferment to dryness (about 1 month) or an SG of 1000 or less. Rack into another jar, top up with water and refit air lock.
This wine requires a minimum of 6 months maturing and after this point it can be sweetened if required with between 1⁄4 lb and 1⁄2 lb of sugar per gallon, adding a little at a time and tasting.
This Is Another Free WineMaking Recipe From TheInfoCo.com – WineMaking@TheInfoCo.com
Black & White Photographs of Winchcombe Pottery
Last night I developed some black and white films. This one was a medium format film (120), shot just before leaving Winchcombe, with my grandads Rolleilex Magic 1. Admittedly there are more pictures of Boots than pots but he is much more photogenic!
 |
| Display up in the shop. |
 |
| The glazing room, full to the rafters with bisquit pots. |
 |
| Kiln shelves and pots ready for firing. |
 |
| John in action, glazing a plate. |
 |
| The team, post tea time. |
 |
| This one is a bit sharper, even though I look quite special. |
 | ||
| Boots. |
 |
| Much love for Boots. |
 |
| Great cat. |
 |
| Brian England, Winchcombe shoe repairer extraordinaire, with his pal Boots. If you need any shoes repairing, Brian is the man. he has saved several of my pairs from oblivion. |
 |
| Lauren with her favorite plastic meerkat. |
 |
| Mike in transit with wood for fire in the workshop. |
"100 Days of India"
The Christmas edition of my blog comes in the form of a project that
Lauren and I are doing. In February we are going to India for four and a
half months. During our trip we will be taking lots of photographs,
both film and digital, which will end up as a photography book.

There will be 100 pictures with 100 words of accompanying description for each pic, and the book will be printed in a limited edition run of 100 copies. All the materials for the book will be sourced in India; from the cloth for the covers to the paper and ink.

If you are interested and would like to help fund the project then we would be very grateful. Below is a link to our kickstarter page where you can see a video of us talking about it and what rewards are on offer for helping to back the project. But be warned, the video is fairly cringe worthy.
There will be 100 pictures with 100 words of accompanying description for each pic, and the book will be printed in a limited edition run of 100 copies. All the materials for the book will be sourced in India; from the cloth for the covers to the paper and ink.
If you are interested and would like to help fund the project then we would be very grateful. Below is a link to our kickstarter page where you can see a video of us talking about it and what rewards are on offer for helping to back the project. But be warned, the video is fairly cringe worthy.
http://www.kickstarter.com/projects/100daysofindia/100-days-of-india
Pit Firing in the woods at Winchcombe Pottery, PART 2
When I came back to check on the pit the next day I found the pots too hot to pick out. The embers were still very hot. So, after burning my hands a little I decided to take a break and get some gloves. As I did so I remembered my crayfish trap. Checking it also requires gloves.
I had been using the trap for a while. It was gifted to me by Calvin who runs the nursery next to the pottery. He had had it lying around for years so let me have it. I cleaned it and lowered it into the Isbourne asap. I placed it down by the waterfall that Mike had constructed back in the 1970's (this was in order to use hydro electric energy to power the pottery, but it never got up and running).
I figured that those little crayfish would come flying down the waterfall and be so confused and turned around that they'd bumble right into my trap. The first couple of weeks were dry though. No evidence of any crayfish. Matt reported having spotted some in the river and I'd hear of a restaurant owner with a trap, so I figured it was just a matter of time.
A couple of days before the pit firing I found a pheasant on the road. A fresh kill, it was still warm. So I made it into a stew with cider, red cabbage, potatoes, leeks and carrots. The stew was good but I was most excited about the entrails and grizzly bits. I put these in a plastic bag inside the trap as bait. What self respecting crayfish could resist a fresh pheasant carcass?
So, I went to check it that day, whilst the pit was still slightly smoking. I couldn't believes luck! There they were, not one, but four beautiful crayfish. Big ones too.
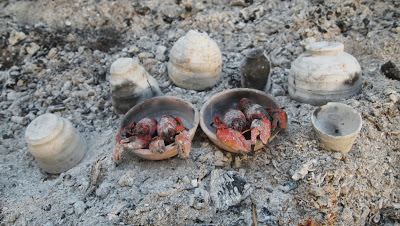
I scooped them out, dropped them into a metal bucket and whisked them off to the pit. I dug out all the whole pots and in the process churned up the embers. Some of them were still glowing orange. I tipped the bucket up and in they went, covered with more coals.
In a matter of minutes they were done… blushing bright red, fizzing and spitting from the fire. Out they came for a picture show with the pots and then rapidly into the shack to be served up on fresh bread with a simple marie-rose sauce and glass of cider. Lovely. From the river to my tummy in under 30 minutes.
In terms of the results of the firing I was a tad disappointed. I got good blacks and whites, mostly whites, but not much of anything else… a few splashes of pink and brown but nothing really spectacular. The salt props remained unchanged. I don't think it was hot enough for them to come into play really. It was a fun experiment though, and the char grilled crayfish really were excellent. Far better than just boiling them.
In a matter of minutes they were done… blushing bright red, fizzing and spitting from the fire. Out they came for a picture show with the pots and then rapidly into the shack to be served up on fresh bread with a simple marie-rose sauce and glass of cider. Lovely. From the river to my tummy in under 30 minutes.
 |
| In the pit. |
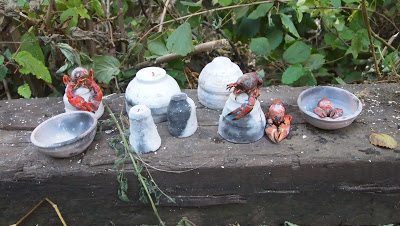 |
| Pose for the camera. |
 |
| Look at those claws! |
 |
| Fresh out of the oven. |
 |
| Seriously good feasting. |
In terms of the results of the firing I was a tad disappointed. I got good blacks and whites, mostly whites, but not much of anything else… a few splashes of pink and brown but nothing really spectacular. The salt props remained unchanged. I don't think it was hot enough for them to come into play really. It was a fun experiment though, and the char grilled crayfish really were excellent. Far better than just boiling them.