
All About Ceramics Crazing: Why Glazes Craze And How To Avoid Crazing
At the Hewitt Pottery we have been developing some glazes using local granites with a high felspatic content. The glazes are beautiful and sparkly but we have experienced some issues with crazing, so during our recent snowstorm, I spent some time reading through books and looking online to see what I could glean. I wanted to share the sum of what I have learned here in three sections: 1) Why is crazing a concern?, 2) Why causes crazing?, and, 3) What can we do to eliminate crazing?
1) Why is crazing a concern?
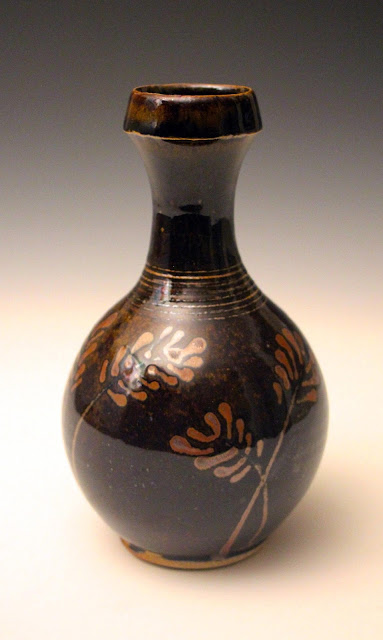
Crazing can be an attractive feature of a pot and is often called "crackle" when intentionally used, such as on this tea bowl: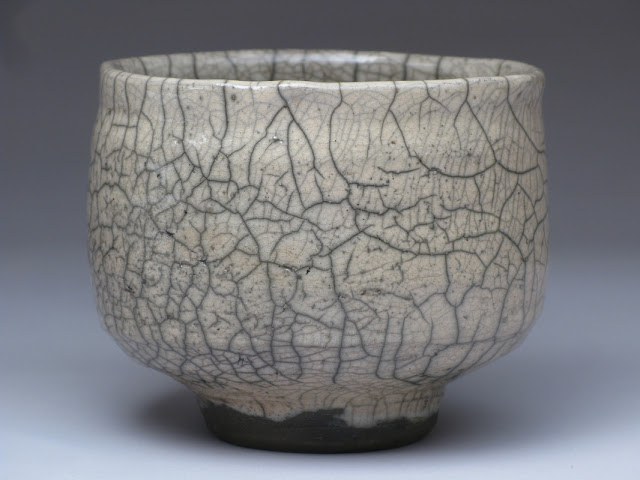 |
| Intentional crazing, or "white crackle" glaze, on a tea bowl by Richard Brandt. |
There are reasons why crazing is not ideal for functional pottery, however. Crazed pots may leak if the clay body is not totally vitrified, and potentially be unsanitary as bacteria can grow in the cracks. Structurally, crazing is also an issue as Michael Cardew points out in Pioneer Pottery, (p. 84), "It has been proved that glaze fit has a major effect on strength."
Cardew describes an experiment (recorded by Bettany and Webb in the British Ceramic Society's publication Transactions. Vol 40, p. 316), in which rods of porcelain are treated three different ways: some are left unglazed, some are dipped in a crazing glaze, and some in a sound glaze. The results after firing showed the comparative strengths of the rods in the proportions 40 : 100 : 160 (crazed : unglazed : sound). The results indicate that "vitreous ware with a non-crazing glaze may be three to four times stronger than ware which is crazed." Furthermore, a properly glazed pot will have a greater resistance to thermal shock. As a potter engaged in producing functional pottery, strength and resistance to thermal shock are important qualities, especially when one considers the competition of industrially produced wares.
The ideal, as Daniel Rhodes puts it in Clay and Glazes for the Potter (p. 255), for maximum durability and fit, "a glaze should be in slight compression over the body." See the kitten sweater below... it should be just a little bit snug for optimal cuteness.
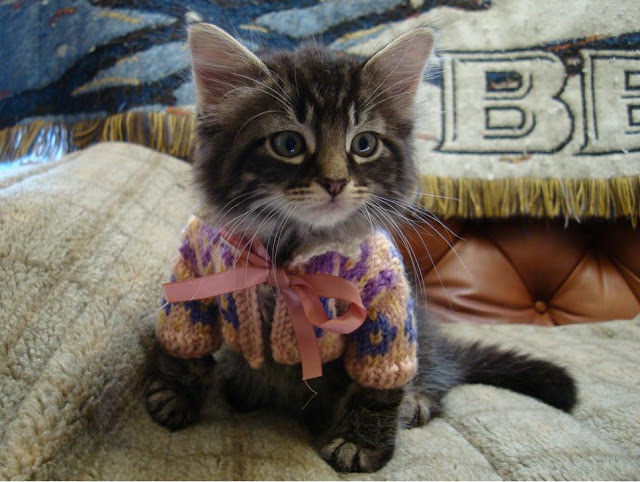 |
| This is Mango (not our cat, unfortunately). |
2) What causes crazing?
John Colbeck (Pottery Materials, p. 61) says, "Crazing occurs when, on cooling, a body does not shrink more than the glaze." In other words, the glaze shrinks more than the body. It's as if Mango the kitten jumped into a tumble drier wearing her knitted sweater; the sweater would likely shrink more than her body and it would be quite a squeeze. This analogy doesn't totally work... but I wanted to include a picture of a cat in a sweater.If you have a glaze that shrinks less than the clay body, then you can experience shivering, although this is more rare than crazing. {Side note from Michael Cardew on the difference between these defects: "It is always easy to tell the difference between shivering and crazing. Sometimes mild shivering may look like crazing, but the cracks are not on the surface of the glaze only; they can be seen right through the body" (p. 86).}
Crazing is not related to the shrinkage rate of the clay. As Rhodes points out (p. 255), all of the shrinkage happens when the wares are heating up. During the firing, whilst the pots are red hot and the glazes are still wet and molten, they fit the pots perfectly. It is upon the cooling of the kiln and the contraction of the wares that cracks form. The key point is that "some materials expand more when heated, and therefore contract more when cooling." This is called the coefficient of expansion. He goes on to say, "The cause of crazing, then, is always to be found in a high coefficient of expansion (and therefore contraction) in the glaze relative to the expansion of the body." I have copied out Rhodes' list (from English and Turner) of the expansion coefficients of some common materials used in ceramics:
SiO2 .05
Al2O3 .07
B2O3 .66
Na2O 4.32
K2O 3.90
PbO 1.06
ZnO .07
CaO 1.63
MgO .45
BaO 1.73
We can see from this list that oxides vary wildly in their coefficients of expansion: "Silica expands less than one eighteenth as much as sodium. Clay, being made up of alumina and silica, has a medium expansion; but some glazes, especially those high in soda, may have a high expansion" (p.255). So it's clear that your clay body and glazes will vary in their coefficients of expansion depending on the differing oxides present in them. Going into the science of this a bit deeper, we arrive at the formation of a substance called cristobalite.
A Bit About Cristobalite:
John Colbeck explains (p. 62):
- "Crazing needs to be considered in relation to clay bodies as well as glazes. The important factor to remember here is the role of cristobalite. Cristobalite, a crystalline form of silica, undergoes a contraction about 22°C (far below the temperature where glazes are molten). Cristobalite is formed quite slowly, at temperatures above 1,020°C, from the free silica which exists in bodies. It is not found in glazes because the free silica, whether high or low, react with fluxes to form the glaze solution. Thus bodies in which cristobalite has developed contract at 220°C as they cool, where glazes do not. It is this contraction of bodies which helps in the prevention of crazing by putting the cooling glaze under compression. Thus to diminish the tendency of a glaze to craze, any steps which assist the formation of cristobalite."
This leads nicely on to the important bit -- how to adapt glazes to reduce or eliminate crazing.
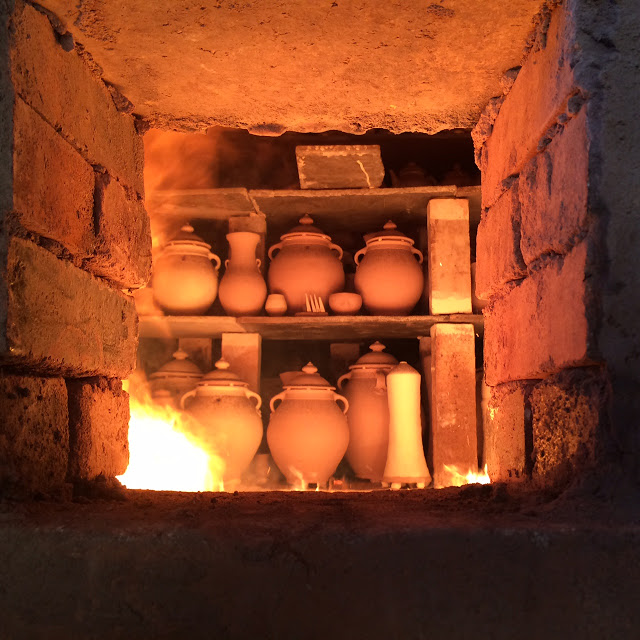
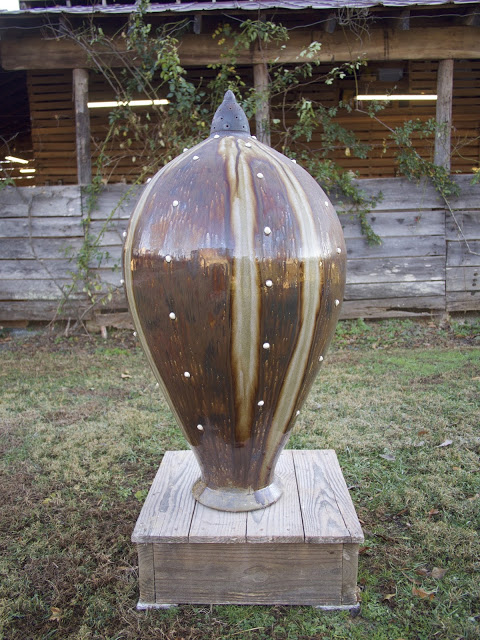
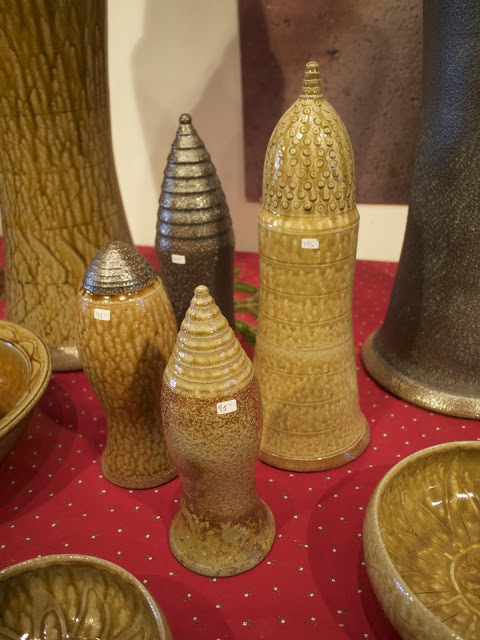
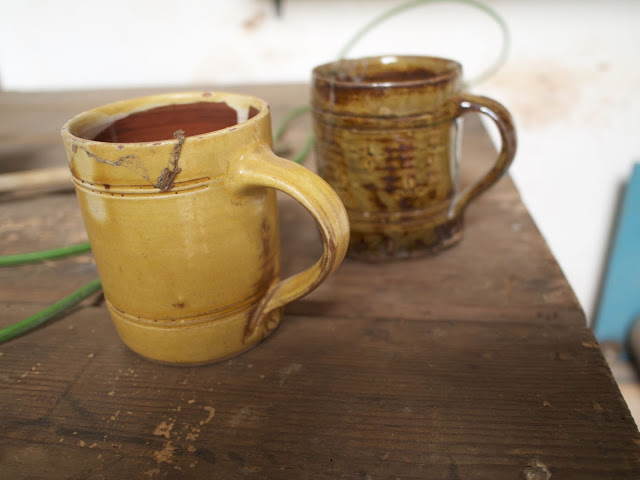
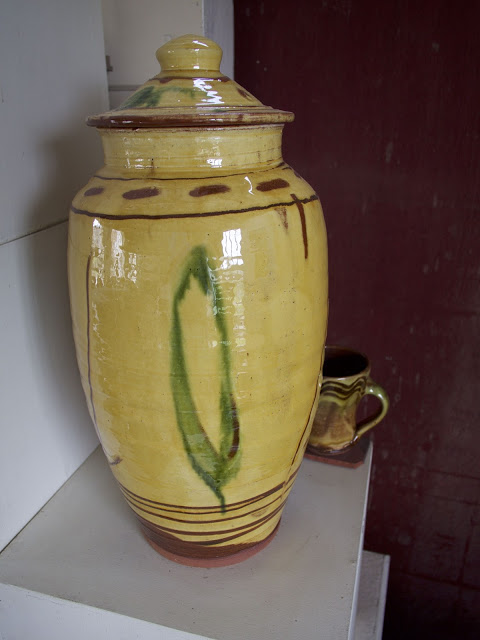
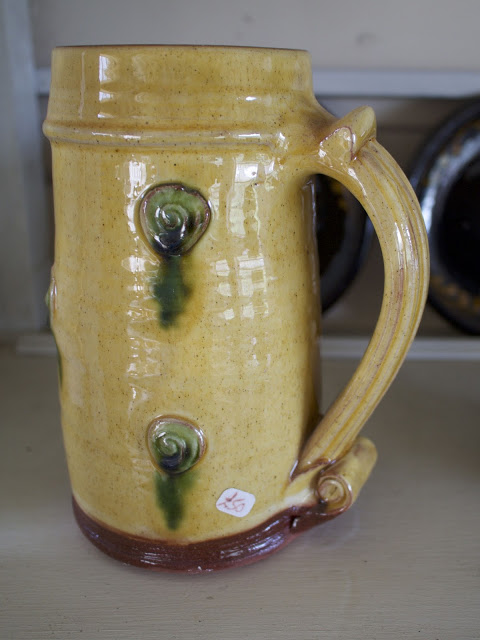
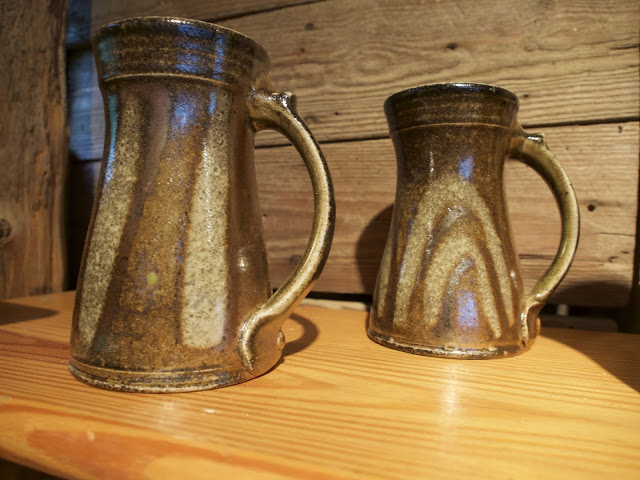
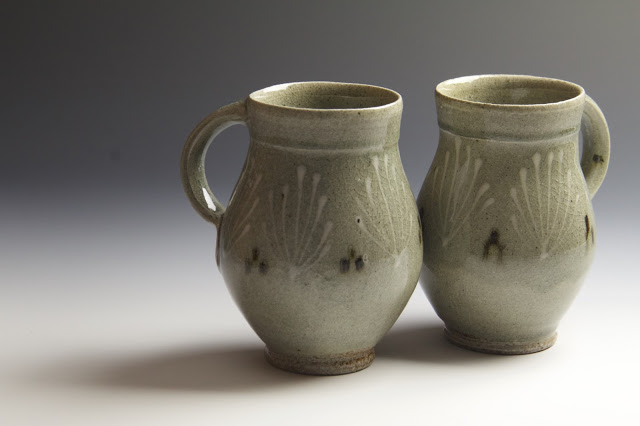 |
| Two of my mugs from firing 96 at the Hewitt Pottery. If you look closely, you can see the crazing. |
3) What can we do to eliminate crazing?
Adapting your clay body:Conventional wisdom suggests that adding silica to your clay body is the first port of call. Cardew says you can increase silica in either body or glaze, but that it tends to be more effective in the body.
Colbeck says you can assist the formation of cristobalite by adding silica to the body because this "will increase the free silica in it which is available to form cristobalite" (p. 62).
Rhodes agrees but warns, "bodies that contain more than about 25% of silica may be hard to fire without dunting or cracking." Conversely, bodies with "less than about 10% of silica... may be expected to be difficult to fit with glazes" (p. 256). There is clearly a sweet spot to be found with the amount of silica, and subsequently cristobalite, in your clay body. In A Potter's Book, Bernard Leach recommends 5-15% cristobalite in a body. He says this is enough to produce the cristobalite squeeze, "which exerts a centripetal compression on a glaze which tends to prevent crazing" (p.176). He notes that cristobalite can be cheaply acquired as powdered silica-brick waste.
Leach goes on, "the addition of powdered flint is usually the first alteration to a body to prevent crazing, but more important than an increase in quantity is a decrease in the particle size of silica." This is something that none of my other sources mentioned, but it is worth considering. He also mentions the option of increasing the cristobalite content using talc as "it acts as a catalyst and assists the transformation of silica" (p. 176). He also makes a distinction over vitrification; "in non-vitrified bodies the amount of flux should be increased and in non-vitrified bodies the reverse is true. Finally, in bodies which contain ball clay and china clay, the former should be increased, the latter decreased" (p. 177).
This advice is all well and good if you have the option of changing your clay body easily and testing it extensively, but many potters do not have this luxury. Changing the formulation of the glaze may be an easier option, or the only option.
Adapting your glaze:
The aim here is to reduce the coefficient of expansion of the glaze (to stop it contracting as much on cooling). This means adding oxides with low coefficients of expansion and decreasing some of the materials with higher coefficients of expansion. As Rhodes points out, this can be tricky "without altering the maturing temperature or appearance of the glaze" (p. 255). He recommends:
1) increasing the silica
2) decreasing the feldspar
3) decreasing materials containing potash/soda
4) increasing the boric oxide
5) increasing the alumina
Leach also recommends increasing the silica content and possibly borax or raw boracalite (B2O3), and/or decreasing the alkaline content of the glaze.
Thinning down the glaze may also help reduce or eliminate crazing; as Colbeck says "thick layers of glaze are always more prone to crazing than thin" (p.62).
The website/database Digital Fire has some excellent articles on the subject. It recommends decreasing the potassium oxides and sodium oxides present in your glazes: these are typically found in potash feldspar, soda feldspars, nepheline syenite and frits. The issue with reducing your these is that the glaze may be less inclined to melt, so then you have to add some more flux and these adjustments may alter the look of the glaze. Digital Fire also recommends increasing your magnesium oxide. Talc and dolomite are excellent sources of MgO and purportedly effective at high temperatures, (for cone 6 you may want to use frits like Fusion F69 or Ferro 3249). They show one test where an addition of 10% talc helped eradicate crazing.
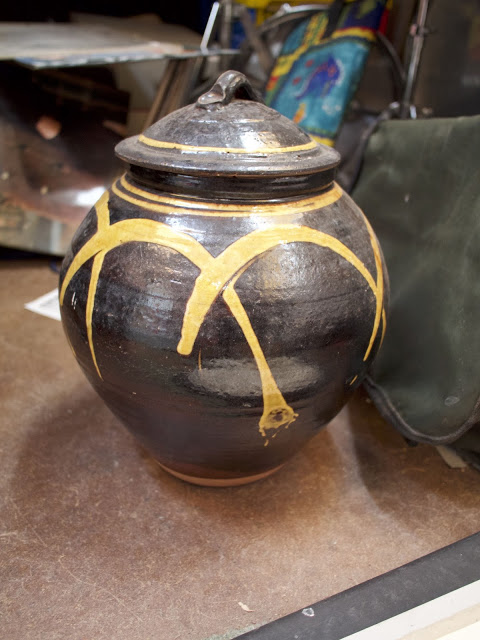
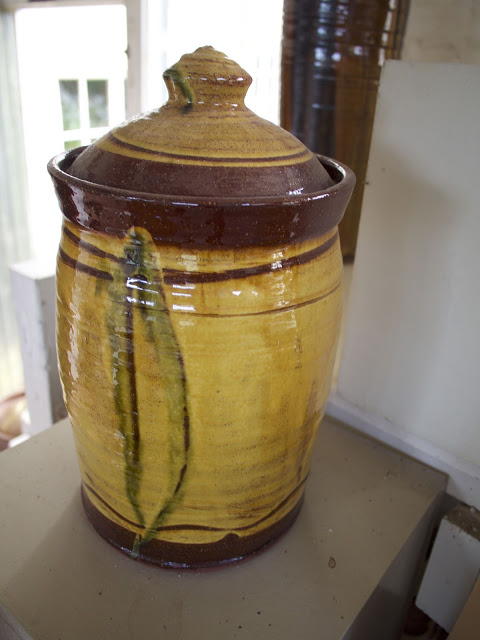
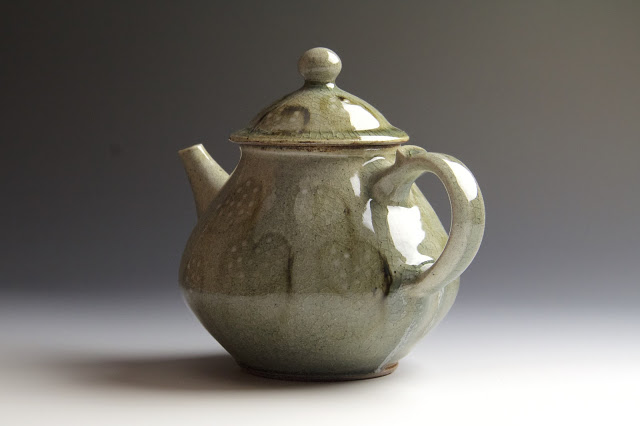 |
| One of my teapots from Firing 96 at the Hewitt Pottery. The crazing is particularly obvious where the glaze is thick around the lid. |
Final notes:
You can tell how much your glaze does not fit your body by looking at the cracks: a network of lots of small cracks means you have greater stress than a few larger cracks. It is easier to fix the latter as you might expect.Rhodes also posits that over firing can cause crazing, "if the firing has proceeded to the point where the free silica in the body has entered into glassy melts with the other materials, it does not go through any crystalline change upon cooling and so does not lose volume and put the glaze into compression" (p. 256).
Another issue can be removing pots from the kiln whilst they are still too hot: the kiln must be under 200°C. The heat shock of opening the kiln too soon or even putting wares atop of an oven/stove can induce crazing.
This post has been about primary crazing, but there is also such a thing as secondary crazing. This can happen with bodies which are not fully vitrified. Colbeck says porous bodies can "subsequently absorb water, causing the body to expand fractionally" (p. 62) which can craze a previously uncrazed glaze, months or even years after coming out of the kiln.
I don't want to end on a downer, but Daniel Rhodes does say that in glazes with a high content of "soda or potash in the form of feldspars, frits or raw alkalines," it may be "impossible to correct crazing without completely altering the character of the glaze" (p. 255). Our celadon glazes do contain a very high proportion of feldspar so the exercise could be tricky. It is worth a shot though -- especially if you have the ability to adjust your clay body as we do. I plan to test various methods and see what works best.
I hope some of this was helpful. Like a wise karate master from the movies, I leave you with these simple words...
Glaze on. Craze off. Glaze on. Craze off. Glaze on. Craze off.
Cardew, Michael. Pioneer Pottery. London: A. & C. Black, 2002.
Colbeck, John. Pottery Materials: Their Composition, Preparation and Use. London: Batsford, 1988.
Leach, Bernard. A Potter's Book. London: Faber and Faber, 1945.
Rhodes, Daniel. Clay and Glazes for the Potter. Third ed. N.p.: Krause Publications, 2000.
Firing 96, Mark Hewitt Pottery. Firing and Kiln Opening.
It was an unusually mild but blustery morning when I arrived at the kiln at 5.30am. Stillman and his brother Leavitt had taken the night shift, which ran from midnight until then. Their job was to maintain a reducing atmosphere in the kiln and not worry too much about heat gain: by limiting the amount of air entering the kiln, oxygen is pulled out of the pots and glaze materials. There still needs to be enough oxygen for the wood to burn, though, so it's a tricky balance of blocking the kiln up whilst not letting it stall out. Reduction tends to make for nice deep colors rather than pasty ones.
When I arrived the pyrometer read about 2100°F. Black smoke emanating from the chimney and piles of ashes halfway down the kiln suggested that the boys had done a good job. Side stoking helps to keep the reduction throughout the kiln rather than just up at the front near the firebox. Mark and I took over whilst the brothers Browning-Howe went off to nap. We continued reducing for a few hours before opening the air up some and going for temperature gain.
It took us a while to get the cones moving, but once we did the progress down the kiln was pretty fast. By midday we had a full team out helping. Joe Sink in the firebox, Matt Hallyburton and I side stoking one side, Mark and Stillman working the other. We had to be vigilant watching for sparks or lit leaves flying around as the wind was quite strong. Nothing calamitous happened but the conditions were potentially dangerous.
By 3pm we were salting the kiln, catapulting 150lbs of salt throughout the kiln with a leaf blower. By 4pm we were opening up the stoking holes to crash cool the beast and peek inside at the orange glowing pots. This crash cooling helps the glazes set and avoids any crystallization. By about 6pm we clammed up all the stoke holes and set to waiting.
A week goes by whilst we bite our nails.
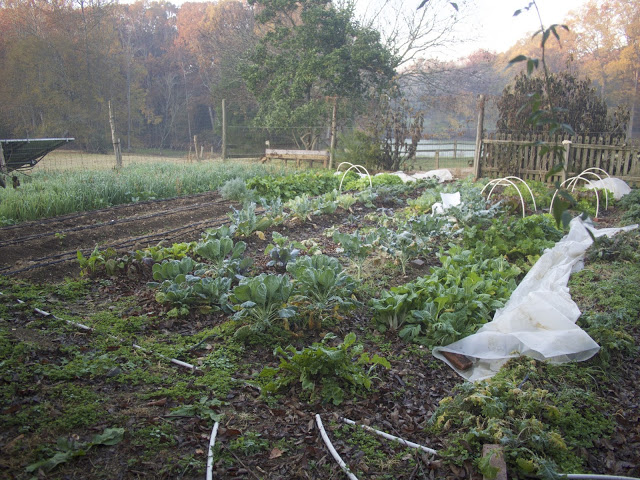
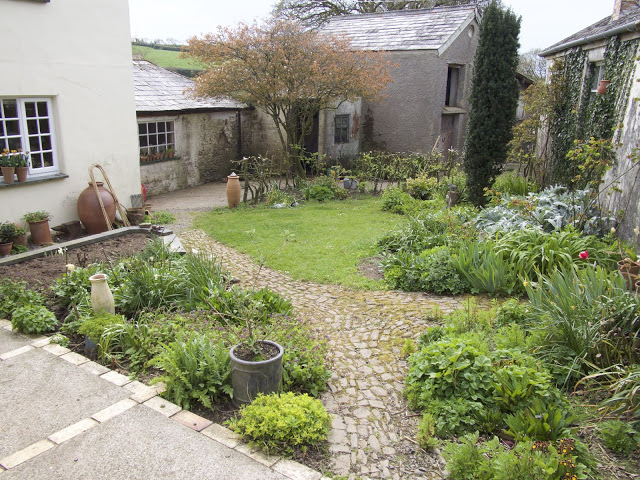
Here's a picture of the vegetable garden in the frosty early morning to provide a little pause here. Its not a great photo so you probably can't tell all thats in there: garlic, rapini, winter peas, buckwheat, rye, collards, sprouts, broccoli, cauliflower, beets, chard, lettuce, kale, tat-soi, turnips, carrots and I'm sure to be forgetting something.
Opening the kiln was a pleasure. We got it nice and hot, and reduced, front to back. The ash glazes came out deeper and more golden than I have seen in my year-and-a-half at the pottery so far. The EPK slip was dark and ate up the salt nicely, and we got lots of wood ash drips at the front. Our new glaze made from local granite was a bit of a mixed bag; it looks fantastic when really hot, but matte in cool spots. Now we know for the future and can pack accordingly. It was an excellent firing; Mark said it could be one of the best ever. So, like a vintage of wine, we shall remember 96 as one of the rather fine ones. Below are pictures of some of the pots on the first morning of the kiln opening. Enjoy.
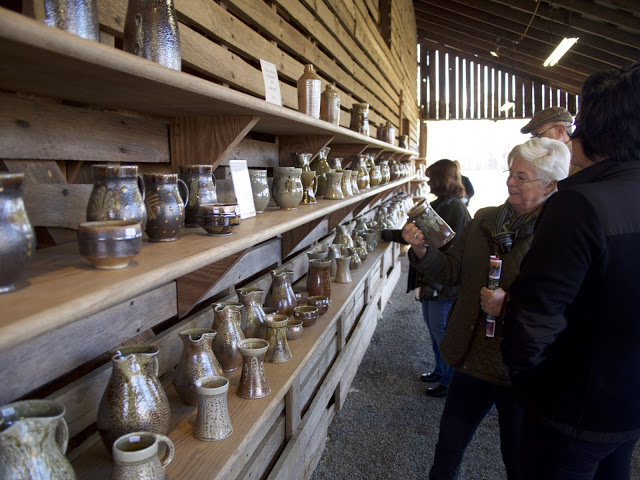
Into the inner barn...
And now some of mine and Stillman's pots...
Roll on 97.
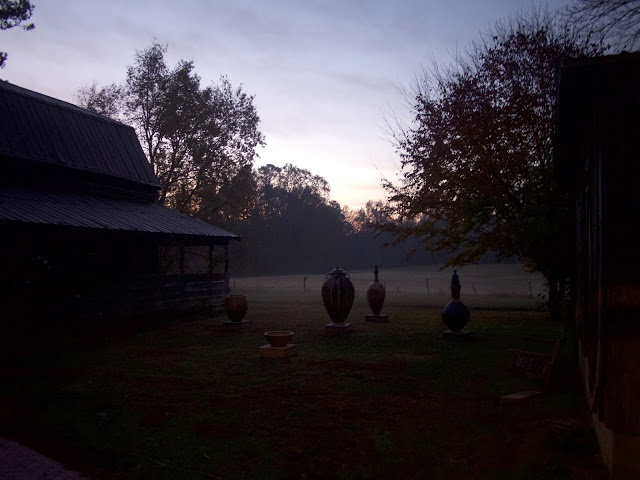 |
| Daybreak at the pottery |
When I arrived the pyrometer read about 2100°F. Black smoke emanating from the chimney and piles of ashes halfway down the kiln suggested that the boys had done a good job. Side stoking helps to keep the reduction throughout the kiln rather than just up at the front near the firebox. Mark and I took over whilst the brothers Browning-Howe went off to nap. We continued reducing for a few hours before opening the air up some and going for temperature gain.
 |
| Early glow from stoke hole 1. |
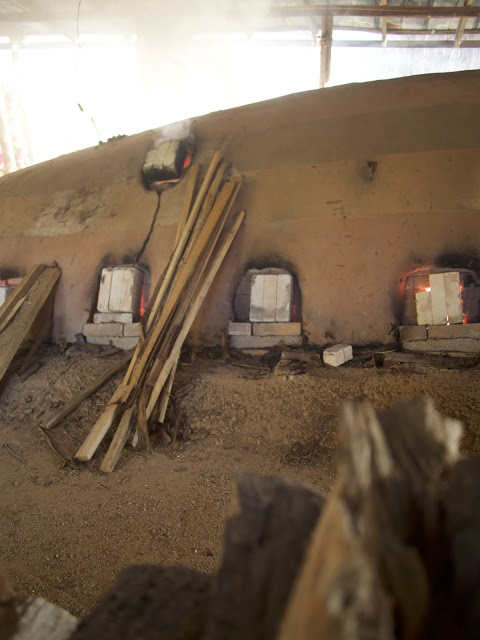 |
| Stoking wood prepared, resting on the kiln. |
It took us a while to get the cones moving, but once we did the progress down the kiln was pretty fast. By midday we had a full team out helping. Joe Sink in the firebox, Matt Hallyburton and I side stoking one side, Mark and Stillman working the other. We had to be vigilant watching for sparks or lit leaves flying around as the wind was quite strong. Nothing calamitous happened but the conditions were potentially dangerous.
 |
| Joe stoking the firebox around midday. |
 |
| Matt side stoking. |
 |
| Buckets of clamming (a mix of floor sweepings, clay, and sand) with which we seal the kiln. |
 |
| Early on in the firing (top picture) and right at the end when we opened up to cool fast (bottom picture). |
A week goes by whilst we bite our nails.
Here's a picture of the vegetable garden in the frosty early morning to provide a little pause here. Its not a great photo so you probably can't tell all thats in there: garlic, rapini, winter peas, buckwheat, rye, collards, sprouts, broccoli, cauliflower, beets, chard, lettuce, kale, tat-soi, turnips, carrots and I'm sure to be forgetting something.
 |
| The plastic sheeting is to cover tender buttercrunch and other greens from the frost. |
 |
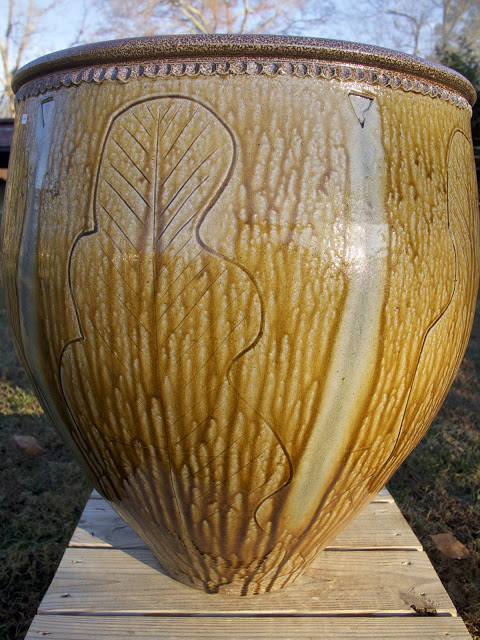
| Mark Hewitt 120lb planter, 2016. Close up of the ash glaze over incised floral decoration. |
 |
| A few announcements before letting in the customers this morning. |
 |
| The remaining big pots (some had already sold). |
 |
| Big pot, Mark Hewitt. Ash glaze over manganese slip with glass drips. |
 |
| Big pot, Mark Hewitt. Ash glaze over incised floral motifs, stamped neck, manganese slip finial. |
 |
| Big pots, Mark Hewitt. Mixture of lilac slip and yellow glaze decorations. |
 |
| Close up of the neck on one of Mark's big pots; ash glaze with glass decoration. |
 |
| Monster planter, Mark Hewitt. Manganese slip lines, white glaze dots, and glass runs. |
 |
| Ash glaze 120lb planter, Mark Hewitt. |
 |
| Considering a large platter. We fired these underneath the main stacks of pots: some got covered in ashes |
 |
| These pots were simply slipped and accented with glass. The salty atmosphere of the kiln made them shine! |
 |
| Close up of one of Mark's bowls: there is a really beautiful quality to this glaze. |
 |
| One of Mark's ash glazed cereal bowls. |
 |
| Sweet plate-- I like the drips peeking out over the rim. |
 |
| Mostly ash/alkaline glazed pots by Mark. |
 |
| 10 gallon vase, Mark Hewitt. Ash glaze over incised zigzagging lines, blue glass on shoulder, manganese slip neck. |
 |
| Grave markers, Mark Hewitt. |
 |
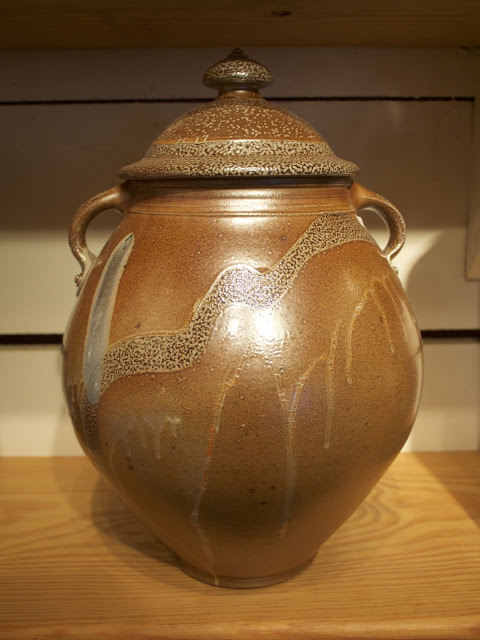
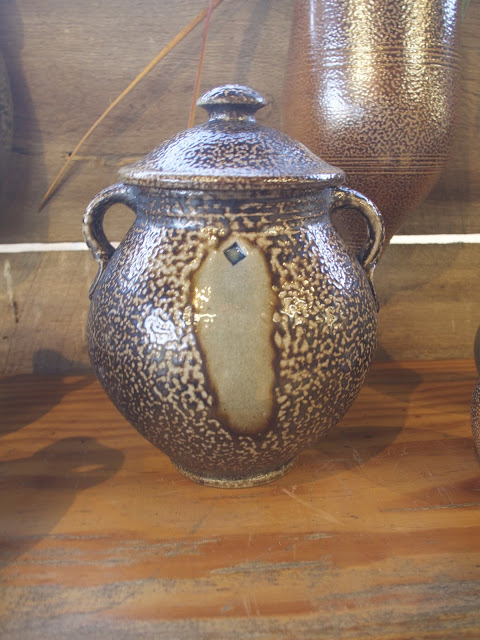
| Canister jar, Mark Hewitt. EPK slip. |
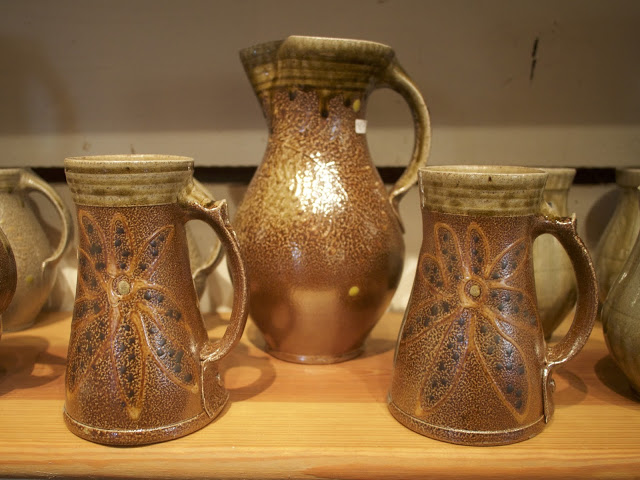 |
| Tankards (and pitcher), Mark Hewitt. Slip trailed decoration. |
 |
| Cookie jar (7lb), Mark Hewitt. EPK slip. |
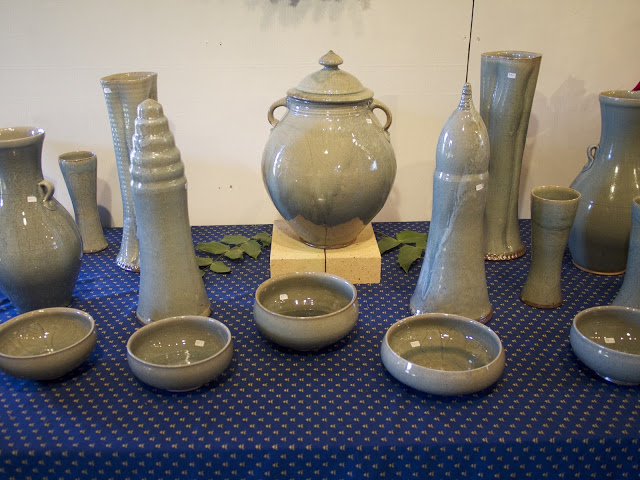 |
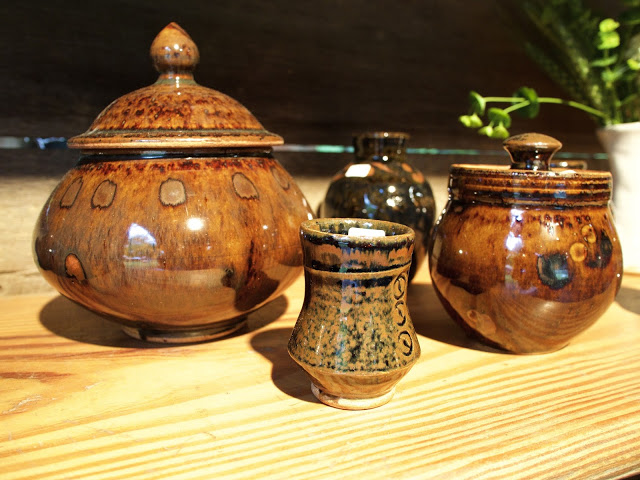
| Various of Mark's pots with our new local granite celadon. |
 |
| A couple of shelves of my pots. |
 |
| Tumblers. Stillman Browning-Howe. Slip trailed decoration. |
 |
| Small 3/4lb cruet, Hamish Jackson. I am really into these; definitely have to make more next time. |
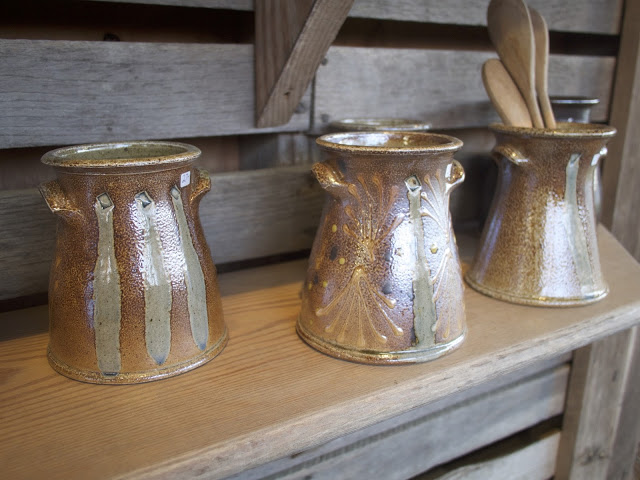 |
| Spoon holders, Hamish Jackson. |
 |
| Teapot, Hamish Jackson. My first teapots at the Hewitt Pottery! My favorite things to make by far... so much to go wrong but I love them. Mark is very particular about them too: they have to be light with low bellies, high handles, and sharply upturned spouts. |
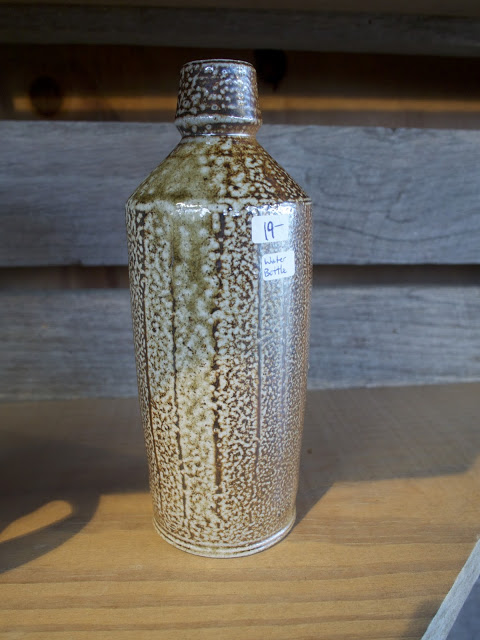 |
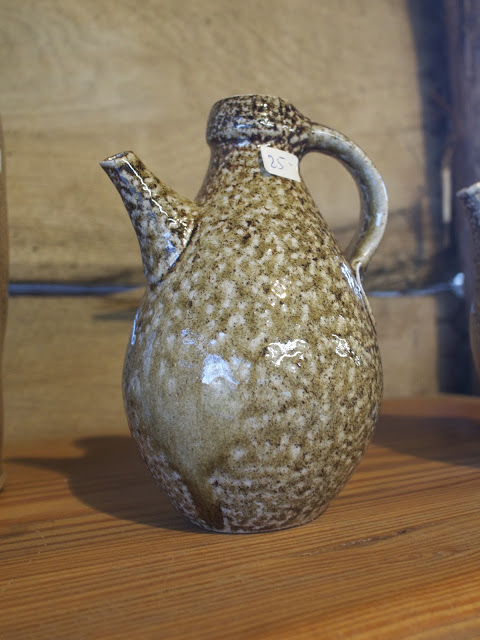
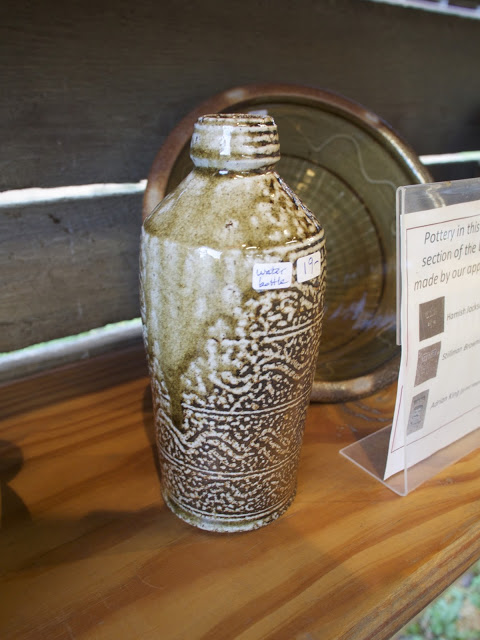
| Water (or beer) bottle. Hamish Jackson. |
 |
| Cookie jar, Hamish Jackson. Black slip dimpled by heavy salting with blue glass drip. |
 |
| Considering one of my tankards. |
 |
| Tankard, Hamish Jackson. My first attempt at doing these curly handles -- quite fun. |
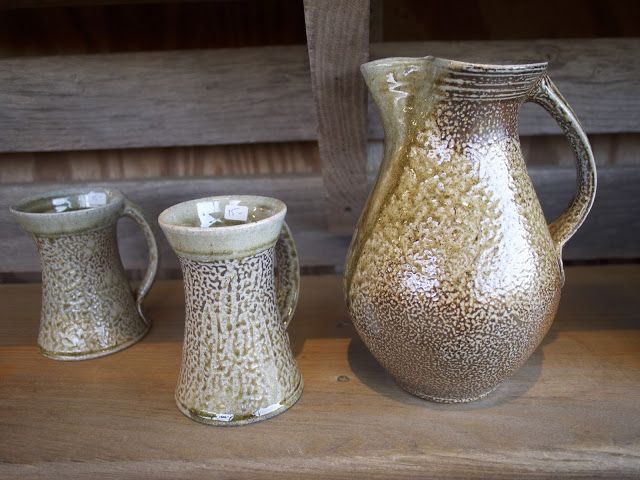 |
| One of my pitchers and a couple of mugs. I am not happy with the shape of any of these, really, but especially not the pitcher; it needs a fatter belly, and a tighter, longer neck. |
 |
| Mixing bowl, Hamish Jackson. Slip trailed decoration. |
 |
| Wall vases/pockets, Hamish Jackson. I like making these; especially as they remind me of bees. |
 |
| Some of mine and Stilly's mixing bowls. |
 |
| Bottle, Hamish Jackson. Nice firing on this bottle: plenty of salt and lots of wood ash collected on the shoulder which melted down. |
 |
| Ginger jar, Stillman Browning-Howe. It was great watching Stilly get into making his first ginger jars; his enthusiasm is infectious. Some of them, like this one, came out really nicely. |
 |
| Cookie jar, Hamish Jackson. This was glazed with our granite celadon + 1% ochre. |
 |
| Flower pot, Hamish Jackson. Slip trailed decoration. |
 |
| Much interest at this table -- some bargains to be had. |
 |
| Jar, Adrian King (former apprentice); still up for grabs! |
 |
| Mark rockin' out in the kiln. We put a disco ball up for all those who needed a break from the riotous christmas shopping. |
 |
| Nice chap clutching one of Stillman's jars and heading for the checkout (or the disco kiln?). |
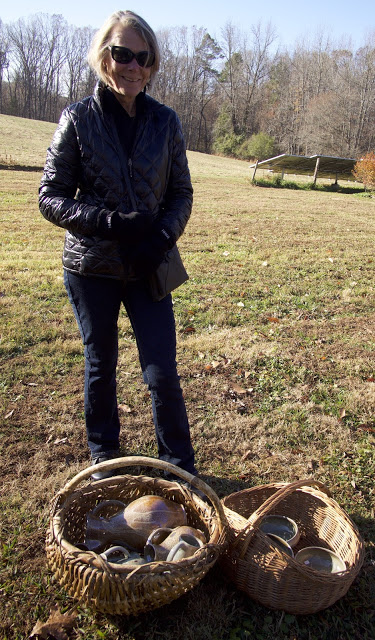 |
| This lady came prepared with not one but two baskets. |
 |
| 96 done. |
Visit to Svend Bayer's Pottery in Sheepwash, Devon, England
It was a fine spring day in May when my wife Lauren and I visited Svend Bayer's pottery in Devon; the bluebells were in full force. Visiting Svend was a must on my trip to England. I knew of his work and that he had been one of Michael Cardew's apprentices, but Mark Hewitt's admiration convinced me that I needed to go.
Beginning in 1969, Svend spent three and a half years working with Cardew, and afterwards worked at Brannam's as a production thrower. Brannam's was earthenware pottery manufacturing mostly flower pots and pitchers at that time. In a conversation with Lucy Birtles (published in Ceramics Monthly, March 1995), Svend said this was valuable experience: "having to make 120 pots a day, all exactly the same, instead of the 20 I'd been used to making." Cardew famously said Svend was his best pupil and a "force of nature." Receiving such a stunning compliment from Cardew was uncommon.
In his time after working with Cardew, Svend's pots became simpler and less ornamented. Cardew said that form was of utmost importance: 90% of the success of a pot was its form. Despite this proclamation, Cardew still utilised many decorative techniques, just as I am being trained in at the Hewitt pottery. As Mark says, though, and as I have observed at kiln openings, often the decoration sells the pot despite the form (and as an apprentice, some of my forms don't hit the perfect pitch, so nice decoration is pretty important)!
Later in this post, I have photos of Svend's current work and a few examples of pots he made whilst apprenticing at Wenford Bridge. The primary difference is that his pots have moved away from the decorative techniques of Cardew. Svend mostly uses the wood firing process to decorate his pots, rather than techniques such as slip trailing, slip combing, or sgraffito. His pots have gained a simplicity and purity that is hard to express in words and without one of his pots in hand. Svend says: "shape and form are all-important. Kilns, glazes, decoration must never take over--they are only there to help." He goes on, "To me, throwing has always come first. Wood firing has occupied another pinnacle" (p. 49, Ceramics Monthly, March 1995). I think this is a large part of the power of Svend's pots: form resolutely comes first.
Visiting Svend's gallery was wonderful. The simplicity and economy of forms surprised me... he does not make a great variety of pots, but those he does make are very well made. They feel good, with a reassuring heaviness. His knobs, rims, and handles are all chunky; not just to be practical but also because they add to the generosity of the pots. His handles appear to truly grow out of the body of his pots, something I am always aiming for. The curves of his forms are deliberate yet dainty... satisfying to behold and to hold. His pots make you want to squeeze them. We could have spent our plane ticket home multiple times over if we had bought all the pots we wanted.
Svend has built, torn down, and rebuilt over twenty kilns on his property in Devon. Sometimes they only got fired once before being re-configured. He said he'd learnt something new every time he built and fired a new kiln. This is a level of commitment to wood firing that many potters do not possess. Most people build a kiln and work with it even if it doesn't fire quite right. The time, energy, and money to tear down a kiln and rebuild it is huge. Svend invests in this experience, just as he does in the protracted firings which give the pots their complex surfaces. Form comes first but firing is also crucial. His tremendously neat wood stacks represent his work ethic and methodology.
Without further ado, here are my snaps from the day:
In the workshop...
Into the gallery...
Beginning in 1969, Svend spent three and a half years working with Cardew, and afterwards worked at Brannam's as a production thrower. Brannam's was earthenware pottery manufacturing mostly flower pots and pitchers at that time. In a conversation with Lucy Birtles (published in Ceramics Monthly, March 1995), Svend said this was valuable experience: "having to make 120 pots a day, all exactly the same, instead of the 20 I'd been used to making." Cardew famously said Svend was his best pupil and a "force of nature." Receiving such a stunning compliment from Cardew was uncommon.
In his time after working with Cardew, Svend's pots became simpler and less ornamented. Cardew said that form was of utmost importance: 90% of the success of a pot was its form. Despite this proclamation, Cardew still utilised many decorative techniques, just as I am being trained in at the Hewitt pottery. As Mark says, though, and as I have observed at kiln openings, often the decoration sells the pot despite the form (and as an apprentice, some of my forms don't hit the perfect pitch, so nice decoration is pretty important)!
Later in this post, I have photos of Svend's current work and a few examples of pots he made whilst apprenticing at Wenford Bridge. The primary difference is that his pots have moved away from the decorative techniques of Cardew. Svend mostly uses the wood firing process to decorate his pots, rather than techniques such as slip trailing, slip combing, or sgraffito. His pots have gained a simplicity and purity that is hard to express in words and without one of his pots in hand. Svend says: "shape and form are all-important. Kilns, glazes, decoration must never take over--they are only there to help." He goes on, "To me, throwing has always come first. Wood firing has occupied another pinnacle" (p. 49, Ceramics Monthly, March 1995). I think this is a large part of the power of Svend's pots: form resolutely comes first.
Visiting Svend's gallery was wonderful. The simplicity and economy of forms surprised me... he does not make a great variety of pots, but those he does make are very well made. They feel good, with a reassuring heaviness. His knobs, rims, and handles are all chunky; not just to be practical but also because they add to the generosity of the pots. His handles appear to truly grow out of the body of his pots, something I am always aiming for. The curves of his forms are deliberate yet dainty... satisfying to behold and to hold. His pots make you want to squeeze them. We could have spent our plane ticket home multiple times over if we had bought all the pots we wanted.
Svend has built, torn down, and rebuilt over twenty kilns on his property in Devon. Sometimes they only got fired once before being re-configured. He said he'd learnt something new every time he built and fired a new kiln. This is a level of commitment to wood firing that many potters do not possess. Most people build a kiln and work with it even if it doesn't fire quite right. The time, energy, and money to tear down a kiln and rebuild it is huge. Svend invests in this experience, just as he does in the protracted firings which give the pots their complex surfaces. Form comes first but firing is also crucial. His tremendously neat wood stacks represent his work ethic and methodology.
Without further ado, here are my snaps from the day:
 |
| Bluebells in the woods beside Svend's cottage. |
 |
| Bluebells! |
 |
| The first of Svend's current kilns. |
 |
| Inside the kiln. |
 |
| Wood to be cut. |
 |
| Svend's other kiln. |
 |
| View from the chimney. |
 |
| Nice stack. |
 |
| Love the stoke holes. |
 |
| Pile of broken pots and test rings near the kiln shed. |
 |
| Shells used to place pots on in the kiln. |
 |
| Svend's large pots sitting out in the garden. |
 |
| View from the other end. |
 |
| Nice ash drips on this one |
 |
| Close up of one of Svend's big jars. |
 |
| Gnarly jar by Charles Bound. |
 |
| Svend's cottage with a freshly thatched roof. |
 |
| Svend and Lauren, humoring me for a photo. |
 |
| Big pots sitting out to dry in the middle of the workshop. If this was my studio I'm sure I would accidentally bash one of these. No doubt. |
 |
| Pots glazed and ready to be fired. |
 |
| Medium sized pots ready to be fired. |
 |
| Handled bowls drying out. |
 |
| Upside down bowls drying out. |
 |
| Bowls. Glazed inside only. |
 |
| Slip decorated serving bowls. |
 |
| Freshly handled pitchers. |
 |
| The new clay Svend was trying out when we arrived. |
 |
| One of Svend's kick wheels with two large balls of clay ready to be thrown. |
 |
| Pitchers resting on another of Svend's kick wheels. |
 |
| Postcards hanging up in Svend's studio. |
 |
| One of Svend's sculptures in progress. |
 |
| Honey jar. |
 |
| Glazed vases ready for firing. Love the symmetry in this picture. |
 |
| Closer view of one of Svend's unfired large pots. |
 |
| Nice lug handles on these large jars. |
 |
| Significant handles. |
 |
| Jugs from above. The ridges in the handles are obvious from this angle. |
 |
| Vases. Svend Bayer. |
 |
| Nice crackle glaze on this vase. Svend Bayer. |
 |
| Large lidded jar. Svend Bayer. |
 |
| I like the handles on this pot. |
 |
| Rows of bowls and honey jars. I was quite tempted by the jars. I love the galleries on them. |
 |
| Beautiful surface on this jar. |
 |
| Jugs with just the inside glazed. |
 |
| Nice fat jugs. Great big bellies and handles on these. |
 |
| Vases fired on their sides, on shells. |
 |
| Bowls with handles-fantastically ergonomic pots--holding them just makes you want to eat soup out of them or cereal or whatever. And to see them lined up on hooks in your kitchen. I may have to be making some based on this idea. |
 |
| Closer pic of the handled bowls. |
 | ||||
This was my favorite of Svend's handled bowls but unfortunately it was already sold.
|


 |
| A few of Svend's flattened sculptures. Super dramatic fired surfaces. |
 |
| Black teapot that nearly came home with us. |
 |
| Beautiful big jar. It looked lovely illuminated by the light streaming in from the window. |
 |
| Sweet little lidded bowl. |
 |
| Plates and bowls. |
 |
| Platter. Svend Bayer. |
 |
| Pitcher. Svend Bayer. |
 |
| Honey pot. Svend Bayer. This one nearly came home with us. Such a lovely shape. |
 |
| Some of the sold wares, set to one side. |
 |
| Teapots made by Svend during his apprenticeship with Michael Cardew. |
 |
| Scraffito coffee pots (Wenford Bridge). |
 |
| Lidded pot. Svend Bayer (Wenford Bridge). |
 |
| Salt shaker with twist on lid. Svend Bayer (Wenford Bridge). |
 | |
|
 |
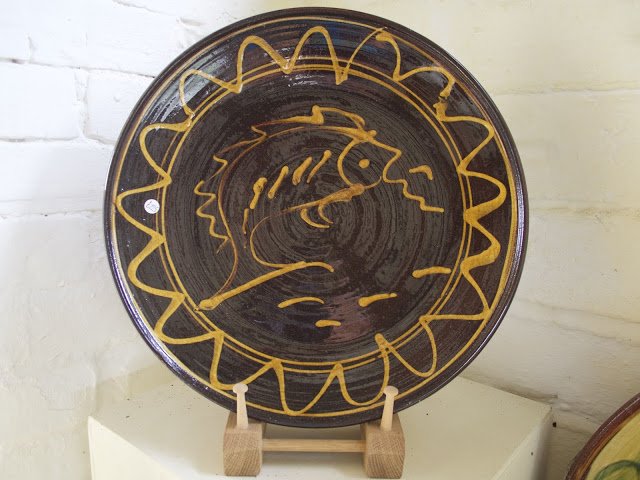
| Fish plate. Svend Bayer (Wenford Bridge). I love the jauntiness of their back bones. It almost looks like they've just been hooked! |
 |
| Classic slip trailed decoration. Svend Bayer (Wenford Bridge). |
 |
| Baking dish. Svend Bayer (Wenford Bridge). I'm a sucker for this classic Cardew decoration. |
Firing 95, Mark Hewitt Pottery. Firing and Opening.
I remember thinking in July that this summer in North Carolina had not been as hot as last year, but the last few weeks have proved me wrong. I'm beginning to appreciate it when people talk about the 'sultry south.' It has been stupidly humid and 90+ degrees for weeks now. Not ideal conditions for firing a giant salt kiln. The weather wasn't too bad during the loading, but we had a hot one for the final day of firing. We stuck it out, drank gallons of water, and all survived, taking a couple of days off during the cool down to recover. When we opened up the kiln the results were very pleasing, especially at the front of the kiln where we heavily reduced the pots.
The pictures start out with ones from inside the kiln during unloading and then switch to pics of pots in the barn just before and during the sale. The sale was on this past weekend, but also this upcoming weekend if you missed it (September 3rd and 4th, Saturday 9-5 and Sunday noon-5).
The pots always look best when you get them unloaded and out in the sun.
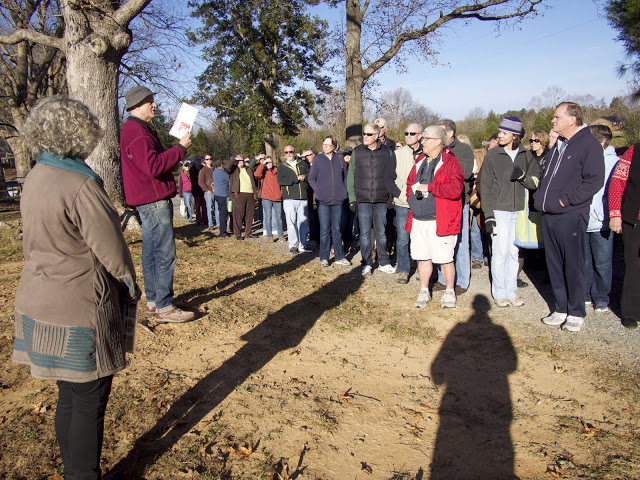
The sale! On Saturday morning there were more people than I have ever seen at a kiln opening. It was nice to see plenty of fresh faces who had never been out to the pottery.
The pictures start out with ones from inside the kiln during unloading and then switch to pics of pots in the barn just before and during the sale. The sale was on this past weekend, but also this upcoming weekend if you missed it (September 3rd and 4th, Saturday 9-5 and Sunday noon-5).
 |
| The front stack of the kiln. |
 |
| Nice ashy pots in the front stack. Mark's is in front, and Adrian's jug hiding behind the prop. |
 |
| Mark starting to unload the second stack. |
 |
| Nice wood ash drips on this pitcher. |
 |
| One of my bottles, fired on its side. |
 |
| These shelves were at the top of the first stack and got extremely hot. Our wadding wasn't big enough on these bowls, so they stuck down tight with all the ash and salt n the atmosphere. |
 |
| Stillman unloading pots. |
 |
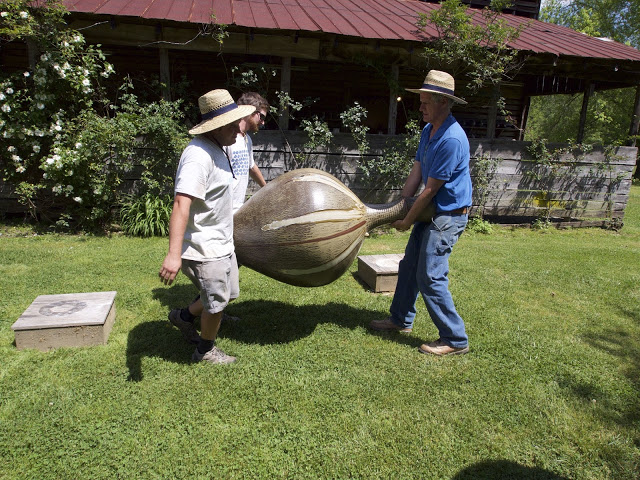
| One of Mark's big pots. This one weighs around 350lbs. Not so easy to get in and out of the kiln! |
 |
| Some of Mark's pots ready to go up to the workshop. |
 |
| Salty upside down mugs. |
 |
| Pots from the mid section of the kiln -- my canister jars and Mark's vases/pitcher. |
 |
| More of my canister jars and a couple of Stillman's juice cups. |
 |
| Big pots in the middle of the kiln. |
 |
| Fat jars about to come out. |
 |
| Some of my planters on the top shelf and one of Stilly's honey jars. |
 |
| This was a shot glass made with some raw clay brought to us by Dustin Fowler. Lovely dark clay which he assured us was cone 12 clay. It was not. Some of them warped and melted much more than this even. |
 |
| One of the cone packs from near the back of the kiln. Cone 12 starting to go down. |
 |
| Mark's massive jar out in the sun. "Enough." Mark Hewitt, 2016. |
 |
| Big pots all lined up for cleaning. |
 |
| My favorite big pot of the cycle. Mark Hewitt, 2016. |
 |
| Mark Hewitt ash glaze planters from the back of the kiln. |
 |
| Mark Hewitt planter. Close-up of the ash glaze. |
 |
| Oak leaf incised decoration with ash glaze over the top. |
 |
| Mix of mine and Stillman's pots. |
 |
| One of my whisky flasks. |
 |
| A few of my water bottles. These were a lot of fun to make. I can't wait to have enough to bottle a whole batch of beer. |
 |
| One of my two-part vases. Ash glaze. |
 |
| Couple of tankards and a vase. |
 |
| Bud vases and a whisky flask. |
 |
| Spotty canister jar. |
 |
| My blurb, up in the barn. |
 |
| Couple of different shaped vases -- I had fun adding the tops to them and like how the one on the left turned out. |
 |
| Some of my wall pockets, hung up and ready for the sale. |
 |
| The two large pots here were made by Adrian before he flew the nest. |
 |
| One of Stillman's custard cups. |
 |
| One of my custard cups. |
 |
| One of my sawanaky's. I'm happy how fat I managed to get this one. |
 |
| Tea set made by Adrian. |
 |
| Rice bowls made by Adrian. |
 |
| Display of Stillman's work. |
 |
| One of Stillman's custard cups. I like the loopy decoration. |
 |
| Stillman's blurb. |
 |
| The pots look so good in the sun. |
 |
| Stillman's custard cups. |
 |
| One of my sushi platters. |
 |
| A few of my tankards and one of Stillman's jars. |
 |
| Various canister jars. |
 |
| One of my favorite canister jars. This one got a nice firing: slightly buried in ash at the bottom of the kiln. |
 |
| Another pleasing canister jar. |
 |
| Some of Mark's vases and a wig stand on the right. |
 |
| Pitchers and jar by Mark Hewitt. |
 |
| Nice ash glazed jar and mugs by Mark Hewitt. |
 |
| Baluster jugs by Mark Hewitt. |
The sale! On Saturday morning there were more people than I have ever seen at a kiln opening. It was nice to see plenty of fresh faces who had never been out to the pottery.
 |
| The line of people walking down to the barn. |
 |
| The crowds arrive. |
 |
| Chun glazed dinnerware by Mark Hewitt. |
 |
| Some of Mark's ash glazed bowls. |
 |
| More of Mark's flatware. |
 |
| Ash glaze and blue glass! |
 |
| Some chilies from the garden garnishing the shelves. |
 |
| A customer checking out some of Stillman's bowls in the sun. |
 |
| Me taking a picture of someone else taking a picture of someone looking at a pot. |
 |
| Close up of the handle and script on Mark's largest jar (titled: "Enough"). |
 |
| Floral decoration with flowers. |
 |
| This lady was happy with her new Mark Hewitt pitcher. |
 |
| I particularly like the decoration on the back of it. |
 |
| Close up of the neck of one of Mark's big pots. |
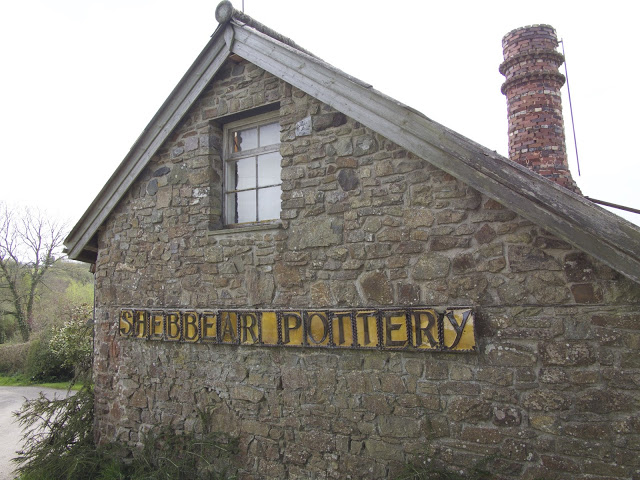
Visit to Clive Bowen's Pottery (Shebbear Pottery), Devonshire, UK, May 6th 2016.
I have long admired Clive's pots; I became aware of his work whilst I
was at Winchcombe Pottery. Over the past year here in North Carolina,
Mark has often mentioned Clive in the
studio, so paying him a visit was a high priority on our trip to
England. Luckily he also lives within five miles of Svend Bayer, who we
also visited, and who will be the next victim of this blog.
A bit of history on Clive: Clive studied etching and painting at Cardiff College of Art and then began an apprenticeship at Yelland Pottery under Michael Leach in 1965. He also did some work at Wenford Bridge in the early '70s, and threw some pots at Brannam Pottery. Since 1971, Clive has been working from Shebbear Pottery. He has not signed his pots since the early '70s, but he does not need to: the red Fremington earthenware clay body, warm lead glazes, and loose slip decoration make his pots unmistakable.
It was a grey English day in May when Lauren and I visited Shebbear
Pottery. I had written to Clive and Rosie from the states and arranged
our visit in advance, so we were lucky enough to have lunch at the
Bowens'. As Rosie whipped up a storm, we went out for a ramble around the
workshop and to the greenhouse to pick salad greens.
When we walked in to the workshop the energy was
immediately apparent. There were boards of pots stacked up, decorated
and ready to be glazed. I wish we could have seen Clive at work but the
evidence of his labor was all around us. He makes a wide range of pots,
from bowls to mugs to storage jars to vases and large umbrella pots.
Clive's forms are strong--a product of his early immersion in the
Leach/Cardew school--but it is his decoration that I find most alluring.
The pots feel so alive and fresh.
The American folklorist Henry Glassie (who has written many books about craft all over the world and taken a particular interest in pottery) visited the Hewitt Pottery a couple of months ago, and I mentioned that I would be visiting Shebbear. His eyes lit up. Henry is in the process of writing a book about Mark Hewitt and his former apprentices, and had been over to see Clive and Svend, among other people and potters, as part of his research. He admired Clive's work and said that he understood the decoration in terms of jazz: Clive's love of jazz directly feeds into his decoration. I can see where Henry is coming from; Clive's sliptrailing and wiping seem so spontaneous. It's clear that Clive is decorating at speed: there is no way you can decorate with that fluidity if you are moving slowly or thinking too much. It seem to me that each pot is an improvisation on a theme, with similar motifs and movements repeated but in slightly differing ways, with the form determining some of the perimeters for the motion.
Clive's kiln is a magnificent beast. It
is based on Cardew's kiln from Wenford bridge, with a large circular
chamber leading to a bottle chamber. You fire off the first chamber
getting it to top temperature before moving onto the bottle chamber. The
bottle acts as the chimney and pre-heats on account of the fire in the
first chamber. These two chambers have the potential to hold a
great many pots, so Clive has never actually fired them both together,
preferring to simply use the bottle as a chimney and stack the circular
chamber. I have never seen a kiln like this and would be fascinated to
help fire it sometime. The kiln room was much more enclosed than the
kiln sheds I am used to seeing around North Carolina. It felt cozy, with
shelves full of old pots and store cupboards full of yet more pots, and
an upper gallery which allowed a bird's eye view down over the kiln.
Here are some of marvelous pots from inside the house.
Saving the best bit til last, here are some pictures from the gallery that is attached to the house.
In case there weren't enough photos here or you would like to snag one of Clive's pots, here's a link to his website: http://www.clivebowen.co.uk/Clive_Bowen.html
A bit of history on Clive: Clive studied etching and painting at Cardiff College of Art and then began an apprenticeship at Yelland Pottery under Michael Leach in 1965. He also did some work at Wenford Bridge in the early '70s, and threw some pots at Brannam Pottery. Since 1971, Clive has been working from Shebbear Pottery. He has not signed his pots since the early '70s, but he does not need to: the red Fremington earthenware clay body, warm lead glazes, and loose slip decoration make his pots unmistakable.
 |
| We've arrived! |
 |
| The courtyard at the centre of Clive and Rosie's house, workshop, and kiln shed. |
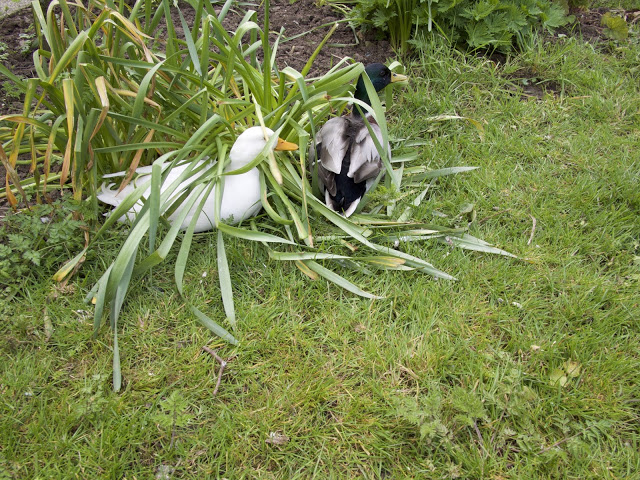 |
| The two resident ducks. |
The American folklorist Henry Glassie (who has written many books about craft all over the world and taken a particular interest in pottery) visited the Hewitt Pottery a couple of months ago, and I mentioned that I would be visiting Shebbear. His eyes lit up. Henry is in the process of writing a book about Mark Hewitt and his former apprentices, and had been over to see Clive and Svend, among other people and potters, as part of his research. He admired Clive's work and said that he understood the decoration in terms of jazz: Clive's love of jazz directly feeds into his decoration. I can see where Henry is coming from; Clive's sliptrailing and wiping seem so spontaneous. It's clear that Clive is decorating at speed: there is no way you can decorate with that fluidity if you are moving slowly or thinking too much. It seem to me that each pot is an improvisation on a theme, with similar motifs and movements repeated but in slightly differing ways, with the form determining some of the perimeters for the motion.
 |
| Where the magic happens. |
 |
| View from Clive's wheel. |
 |
| Boards of pots waiting to be fired. |
 |
| Clive had decorated this pot on the morning we arrived. |
 |
| Big pots. I really like the shape of the middle one. |
 |
| Decorated pots ready to be fired. |
 |
| Bowls. |
 |
| Proud jug (or pitcher, depending which side of the Atlantic you are on). |
 |
| Bowls; the shape reminds me of Cardew's rose bowls. |
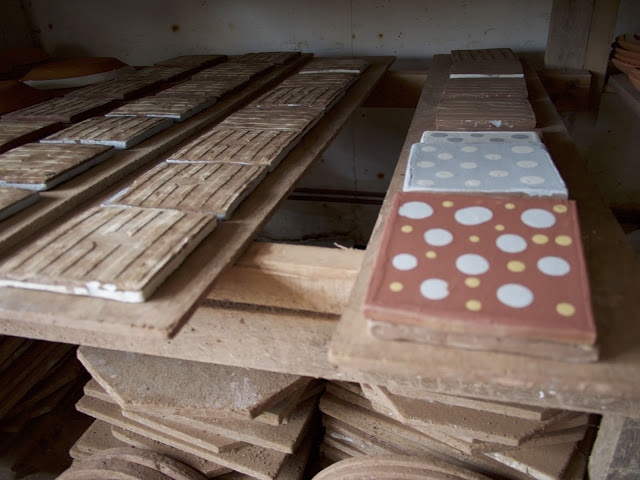 |
| Tiles out to dry. |
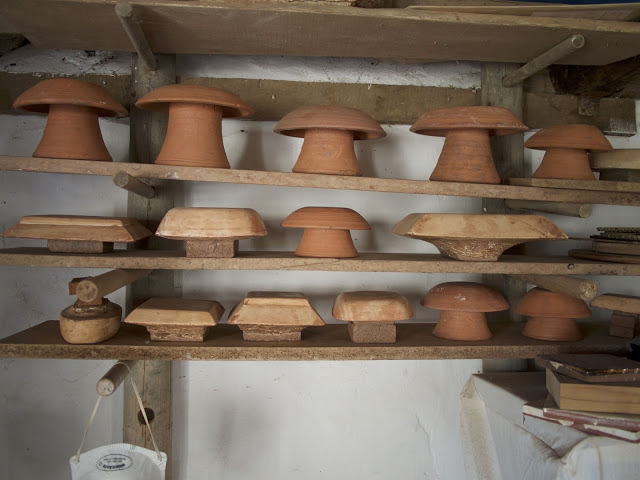 |
| Clive uses these to make slumped molded dishes with slabs of clay. |
 |
| Sieves. |
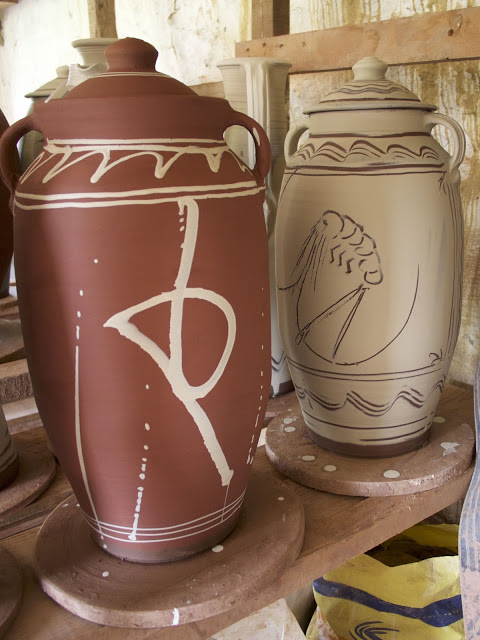 |
| Another couple of large jars. |
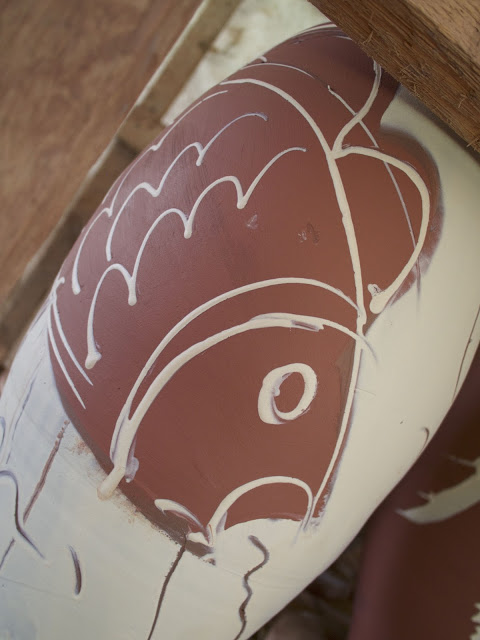 |
| Fish! |
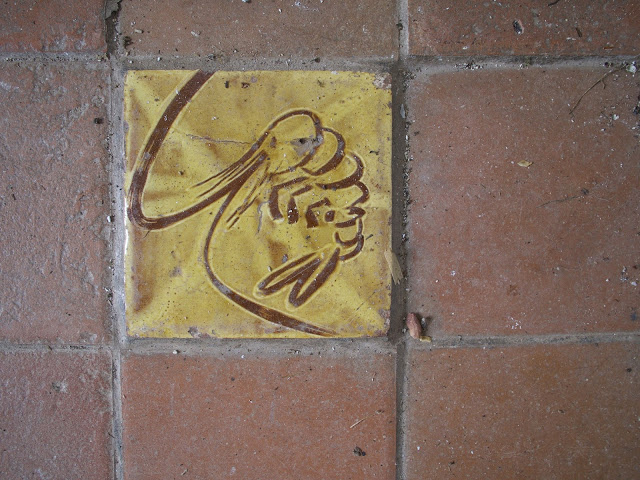 |
| Prawn tile amidst the normal ones. |
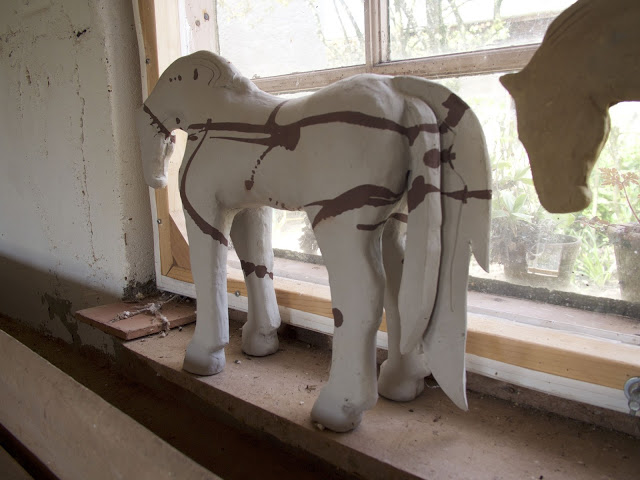 |
| Horse sculpture by Clive's daughter. |
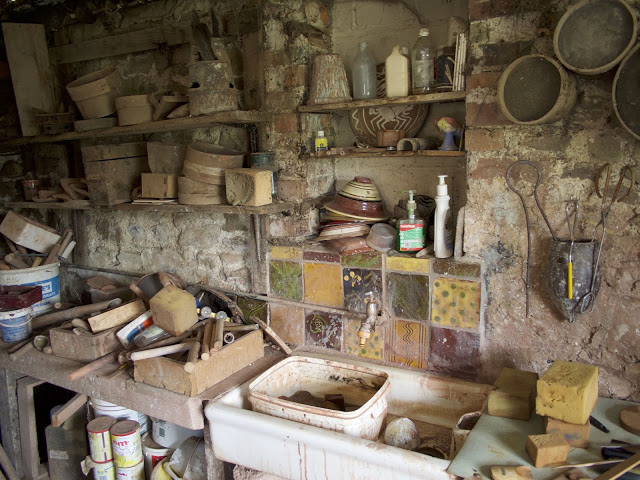 |
| Sink, tools, and tasty tiles. |
 |
| View out of the back door to the studio. |
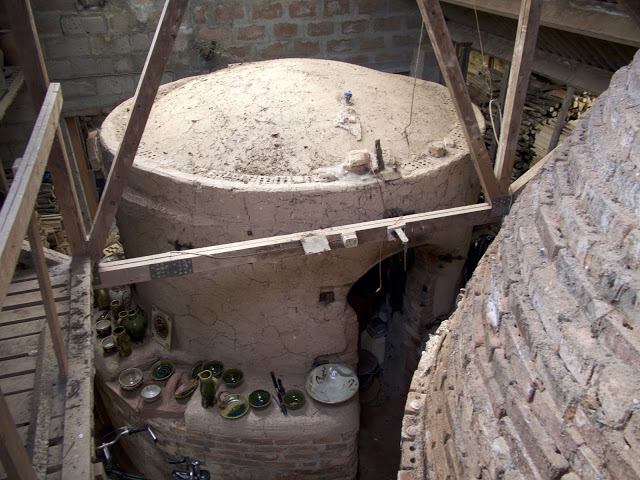 |
| View down the circular chamber of Clive's kiln. You can see the bottle neck in the right edge of the photo--the chambers connect underground. |
 |
| The bottle chamber of Clive's kiln. |
 |
| Looking down on Lauren and Clive beside the kiln. |
 |
| Some of Clive's saggars. Most of his work is fired in these to prevent ash hitting the pots. |
 |
| Kiln furniture and saggars. |
 |
| Firing wood. |
 |
| Some pots that Clive made on a recent trip to Japan. |
 |
| Platter made by Clive in Japan. |
 |
| Fish tile. Clive Bowen. |
 |
| Clive describing some of the beauties. Top left is a salt glazed pot from Jugtown in Seagrove, North Carolina. |
 |
| The mug in the background is a Michael Cardew. |
 |
| Clive's collection of little teabowls, waiting for a bespoke cabinet to house them. |
 |
| This pot was made by Clive and fired just down the road in Svend Bayer's kiln. |
 |
| Lovely jar by Clive. I really like the way the handle sits on top of the domed lid. |
 |
| Plate made by Jo; one of Clive's kids. |
 |
| The jar on the left was made by a potter who stayed with them for a while. Excellent chattering pattern. |
 |
| Large goblet by Michael Cardew, I like the lug handles and classic decoration. |
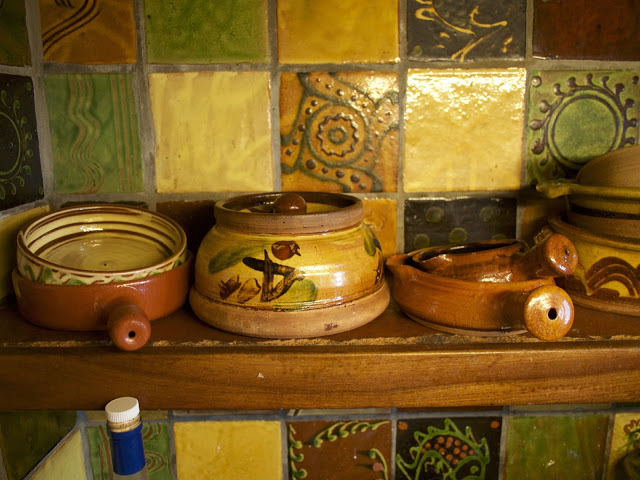 |
| Casserole dishes and baking pans above the stove top. |
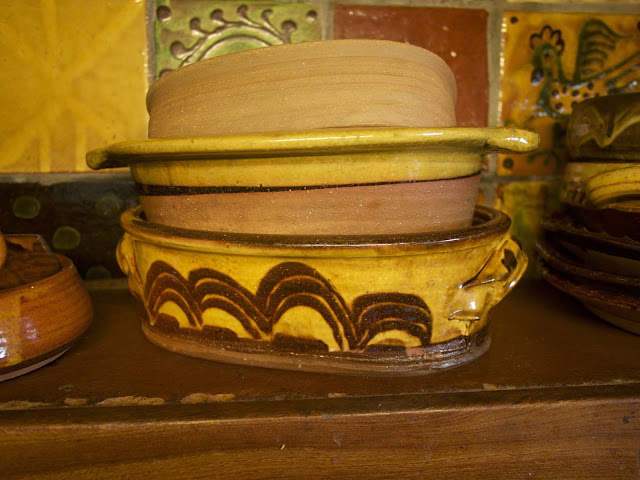 |
| Baking dishes in the Bowen kitchen. |
 |
| I can see a chicken in this. |
 |
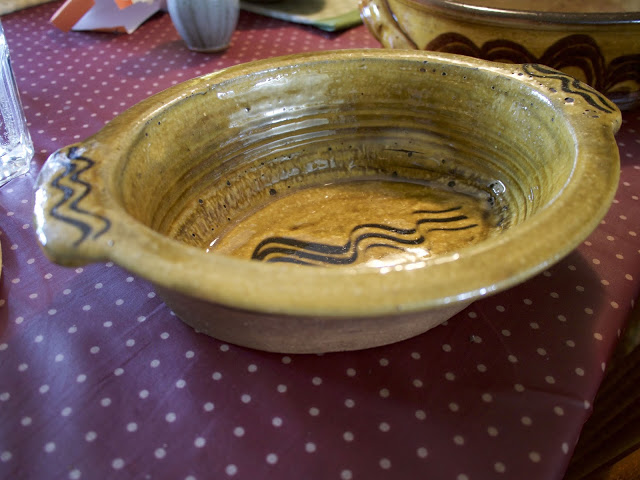
| Nice little functional serving or cooking dishes. I want to make some similar to these. |
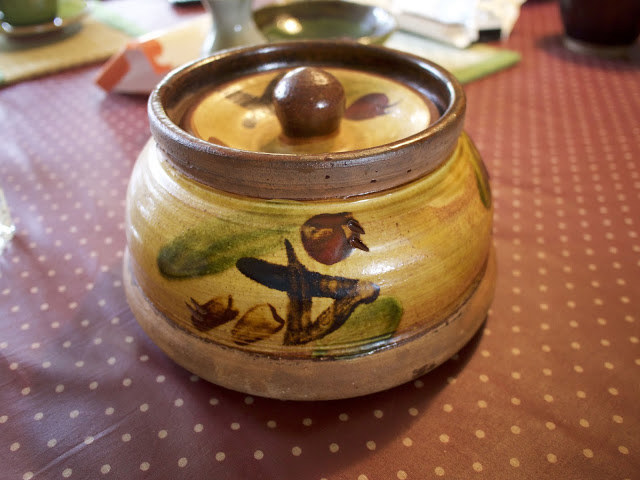 |
| Sweet little casserole dish made by a visiting Norwegian potter to Shebbear. |
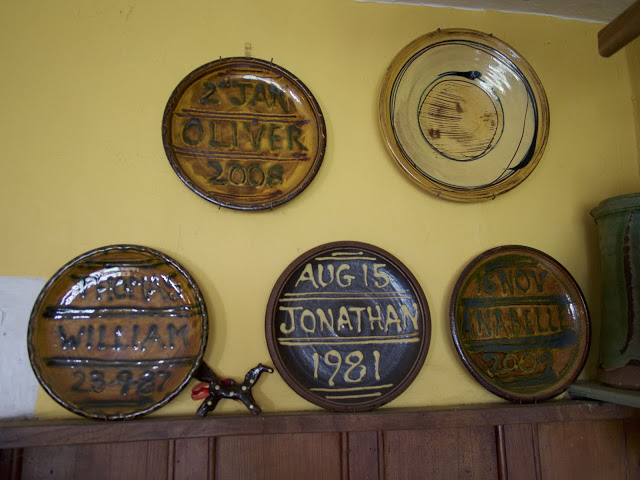 |
| Plates that Clive made to commemorate the births of some of his kids. |
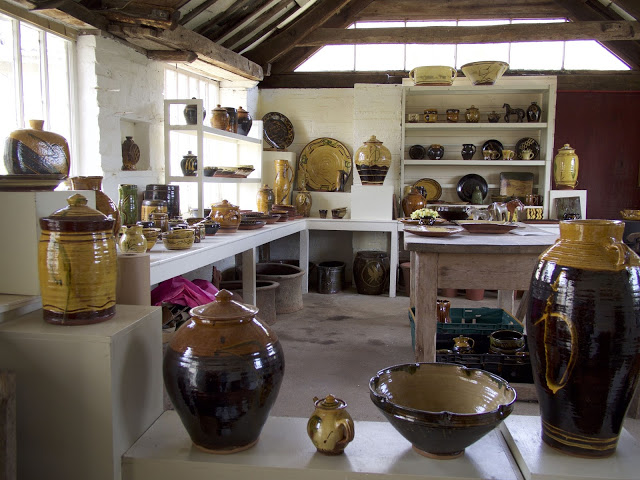 |
| Wide view of Clive's gallery space. |
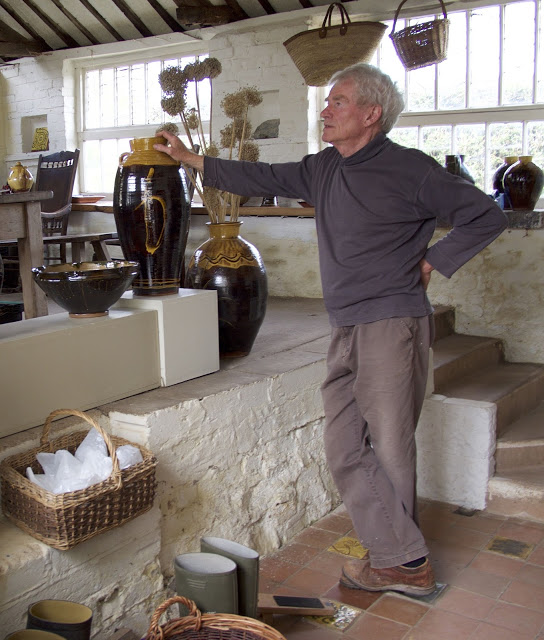 |
| Clive in the gallery talking to Lauren. |
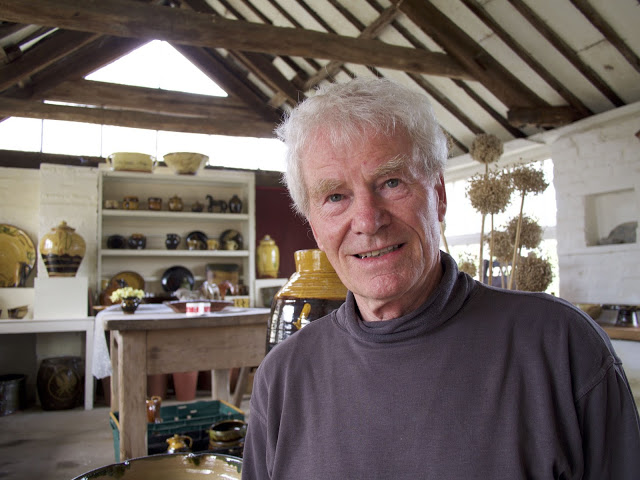 |
| Clive Bowen. Potter at large. |
 |
| Large jar with substantial knob. Clive Bowen. |
 |
| Storage jar. Clive Bowen. |
 |
| Slump molded dish. Slip trailed decoration. Clive Bowen. |
 |
| Bowls. Clive Bowen. |
 |
| Tankard. Clive Bowen. |
 |
| Large chesty storage jar. Slip trailed decoration. Clive Bowen. |
 |
| Platter. Slip trailed fish decoration. Clive Bowen. |
 |
| The teapot we came away with. It has been in constant use since we got back to North Carolina and I can report that it pours perfectly and holds almost enough to fill my tea flask. |
In case there weren't enough photos here or you would like to snag one of Clive's pots, here's a link to his website: http://www.clivebowen.co.uk/Clive_Bowen.html
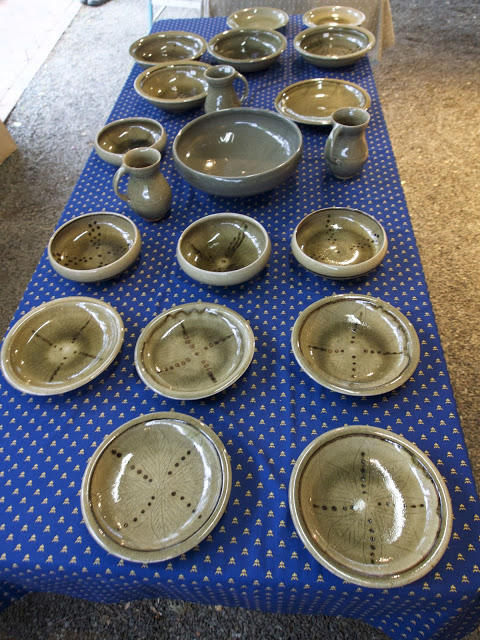
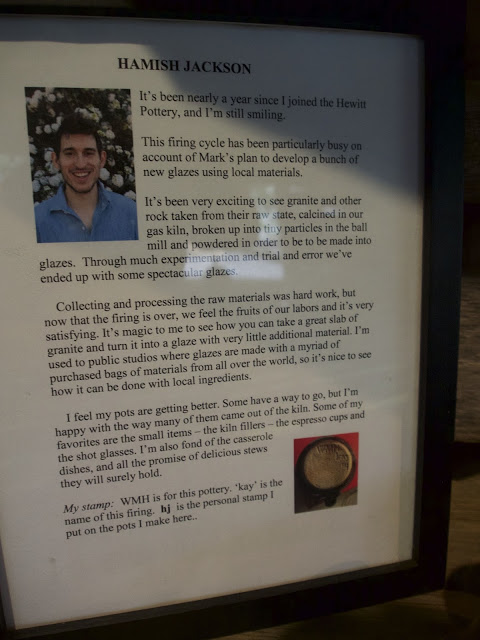
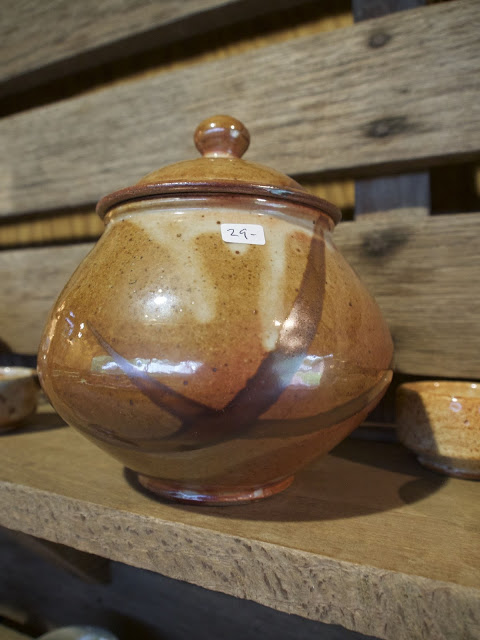
Mark Hewitt Pottery Spring 2016 Kiln Opening, Firing Kay
Our recent visit to England has somewhat slowed down my bloggering activities but now I have so much material and so many pictures to share. During our two week trip we were able to visit Svend Bayer, Clive Bowen, the pottery and museum at St Ives, and the Sainsbury's Centre (which has an amazing collection of Lucie Rie and Hans Coper pieces). Oh and an exhibition of Michael Cardew's pottery in Chipping Camden. I have my work cut out! But first I should put up some pics from our recent kiln opening.
This was a particularly exciting firing as the kiln was mostly filled with experimental glazes made using local materials. It was also Adrian's last firing as an apprentice at the Hewitt pottery. The firing went very smoothly and our expectations were mostly met by the results. The celadons and tenmokus were particularly dazzling, whilst the shinos proved a little trickier; some came out fantastically but others crawled. Overall we had some lovely results and a good sale. People responded well to the new glazes. At the end of the post I have included some pictures of my pots taken at Adrian's house with his flowtone backdrop. Personally I prefer seeing pots with a natural background such as a barn door or a grassy knoll, but in order to build a portfolio I am trying to document in a more professional manner.
And now on to the pictures I took using Adrian's flowtone background. Getting the light/highlights just right is an art I have yet to master but I think the results are alright. I would appreciate any feedback on the pics if you have any advice or suggestions.
This was a particularly exciting firing as the kiln was mostly filled with experimental glazes made using local materials. It was also Adrian's last firing as an apprentice at the Hewitt pottery. The firing went very smoothly and our expectations were mostly met by the results. The celadons and tenmokus were particularly dazzling, whilst the shinos proved a little trickier; some came out fantastically but others crawled. Overall we had some lovely results and a good sale. People responded well to the new glazes. At the end of the post I have included some pictures of my pots taken at Adrian's house with his flowtone backdrop. Personally I prefer seeing pots with a natural background such as a barn door or a grassy knoll, but in order to build a portfolio I am trying to document in a more professional manner.
 |
| Big pot by Mark Hewitt. This one is called "Mr Softie" |
 |
| Empty kiln (apart from all the wads!) |
 |
| Big pot by Mark Hewitt. I love the shape of this one. |
 |
| Detail of the glass drip on this pot. |
 |
| This one sold before the sale began. |
 | ||
Big pot by Mark Hewitt
|

 |
| Marbled plate by Mark Hewitt. |
 |
| Two part vase by Mark Hewitt. Regretting not snapping up this one-it was a super second. |
 |
| Some little espresso cups I made. |
 |
| Adrian and Patrick Rademaker (visiting up from Florida) stole my camera and blessed me with this picture of themselves, plus ruder versions! |
 |
| Tableware by Mark Hewitt. |
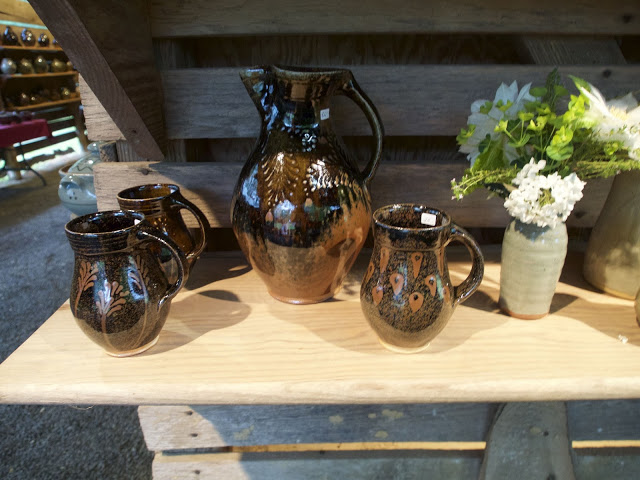 |
| Jug/pitcher and mugs by Adrian King. |
 |
| We have to write a little something for each kiln opening. Here's mine. |
 |
| Droopy bellied sawanaky with shino glaze. |
 |
| Cider jar/jug by Adrian King. |
 |
| Celadon teapot by Adrian King. |
 |
| White glazed vase with finger wiped decoration by Adrian King. |
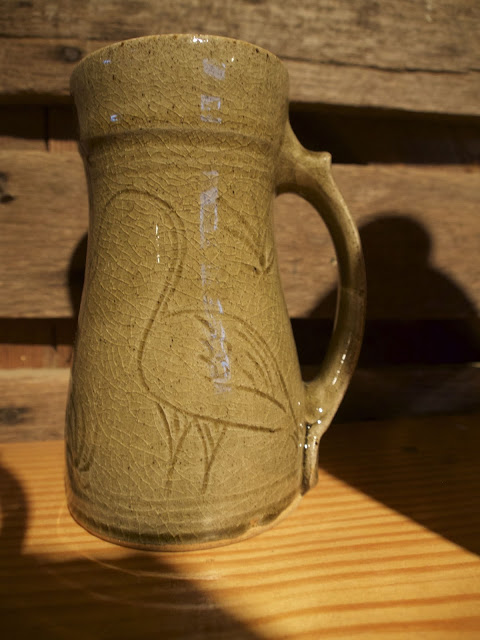 |
| Heron scraffito tankard by Adrian King. |
 |
| Two carbon trapped shino tankards by Adrian King. |
 |
| Vase/wine vessel by Mark Hewitt. Ash glaze. |
 |
| Celadons! Oh glorious celadons, by Mark Hewitt. |
 |
| Big fat jar by Mark Hewitt. Tenmoku glaze. |
 |
| Tableware by Mark Hewitt. |
 |
| Nice tenmoku jar by Mark Hewitt. |
 |
| Two part vases by Mark Hewitt. |
 |
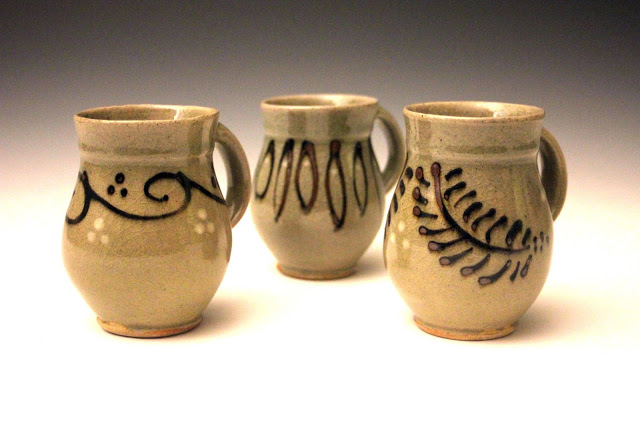
| A couple of my mugs. They have gone up from $9 to $15 this firing! Quite the increase! |
 |
| Rows of my pots. |
 |
| Casserole with lizard scraffito decoration. |
 |
| The full inscription reads "Bernie is boss." If I could vote in the elections here it would definitely be for Bernie! |
 |
| Display of my pots before the punters arrived. |
 |
| Shooter, sawanaky and honey jar hanging out together. |
 |
| Two of my tumblers. I like how the one on the right curves in at the top: I was aiming for this torpedo like shape. |
 |
| Covered dish by Adrian King. You can use the lid as a bowl to eat from too. |
 |
| I met this lovely lady at La Meridiana whilst she was on Mark's course. It is fun to catch up at kiln openings! |
 |
| Some of Adrian's platters. |
 |
| A rather handsome umbrella stand by Mark Hewitt. |
 |
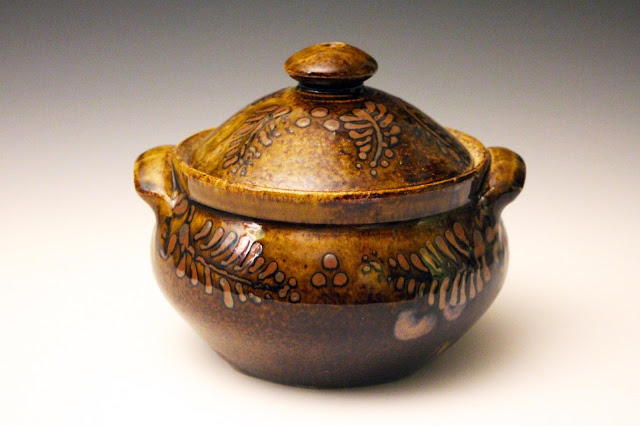
| A couple of my smaller casserole dishes. |
 |
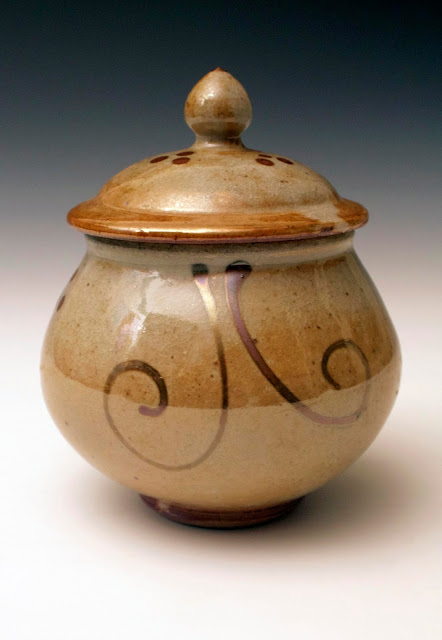
| Two part vase, celadon glaze. |
 |
| Two part vase, tenmoku glaze over red slip decoration. |
 |
| Sawanaky jar, shino gaze over red slip decoration. |
 |
| Sawanaky jar, celadon glaze over red slip banding and scrafitto marks. |
 |
| Vase, celadon glaze over red slip banding. |
 |
| Two part vase, tenmoku glaze over red slip decoration. |
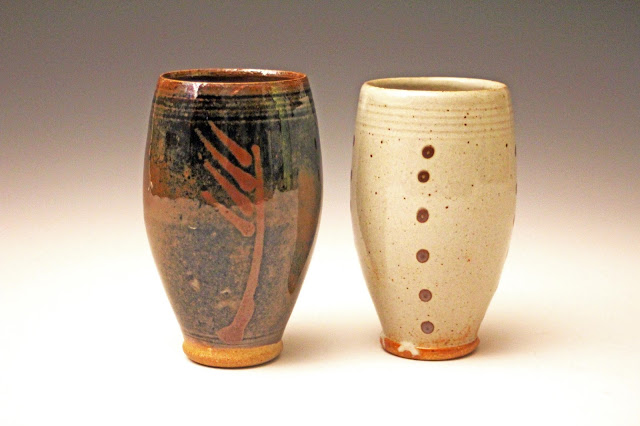 |
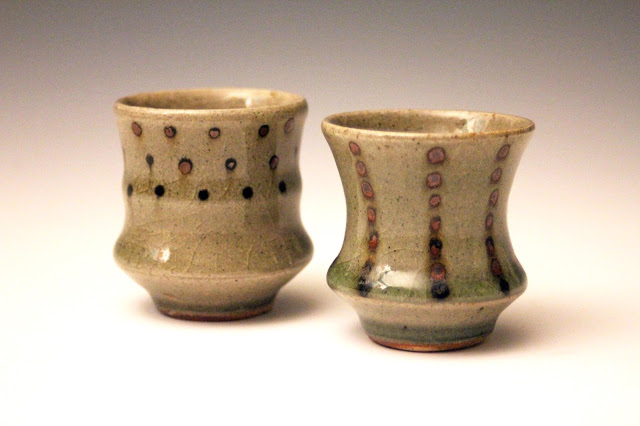
| Tumblers, tenmoku on the left, shino on the right |
 |
| Barrel mugs, celadon glaze over red and white slip decorations. |
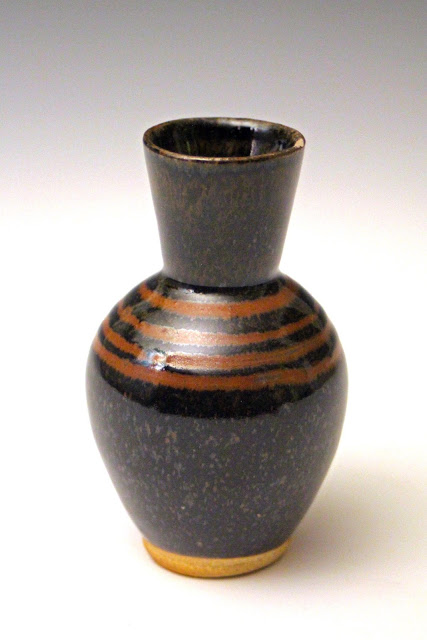 |
| Small bud vase, tenmoku glaze. |
 |
| Shot glasses/shooters, celadon glaze with red slip dots under. |
 |
| Large casserole dish, celadon glaze over red slip dots and lines. |
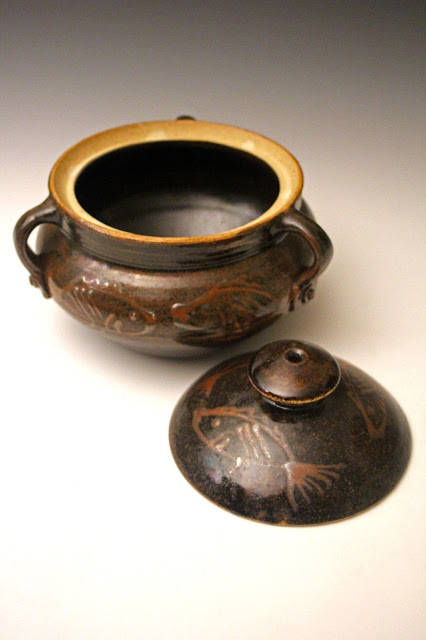 |
| Large three handled casserole with fish decoration, tenmoku glaze. |
 |
| Small casserole dish, albany slip over red slip decoration. |