
Promising jun (chün) glaze results
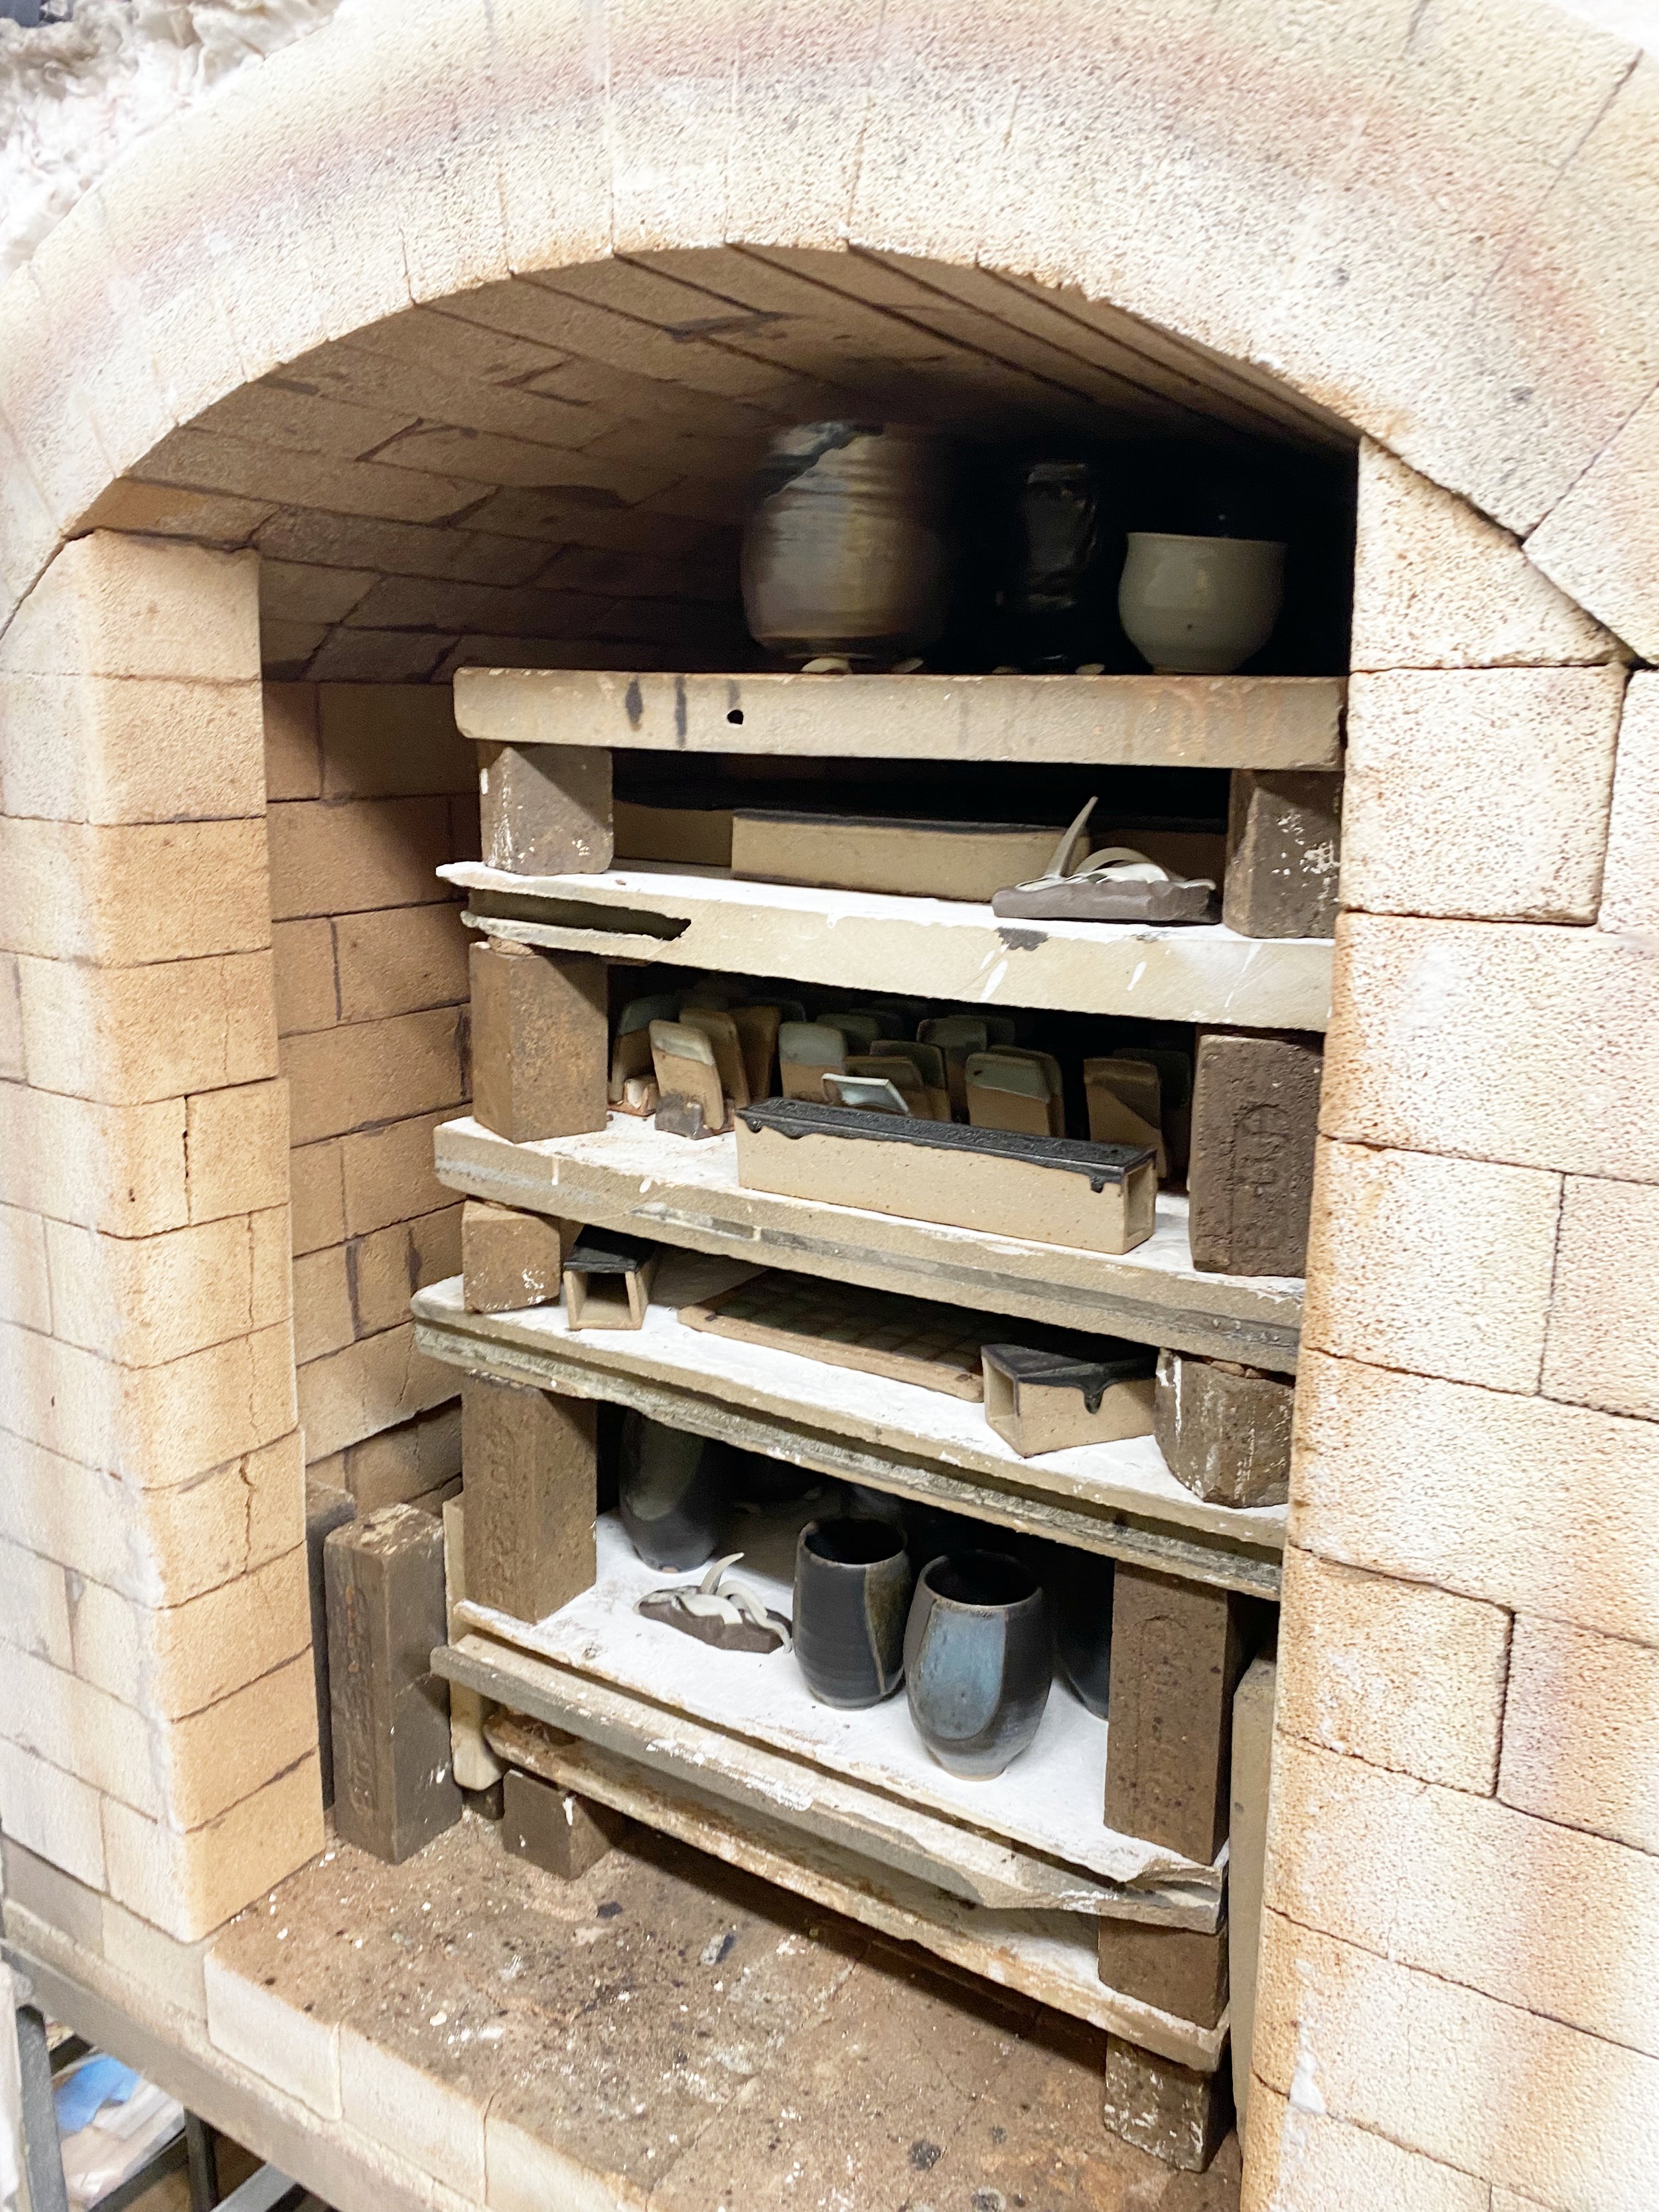
I was worried that this firing was not going to yield any successful results because I accidentally over-fired the kiln.
Cone 10 was just starting to melt, so I adjusted the settings (opened the damper a bit) and walked away, thinking it would probably be done in a half hour or so. Normally I set an alarm on my phone to remind me to check back, but this time I did not. Then I became engrossed in making pots and forgot all about the kiln.
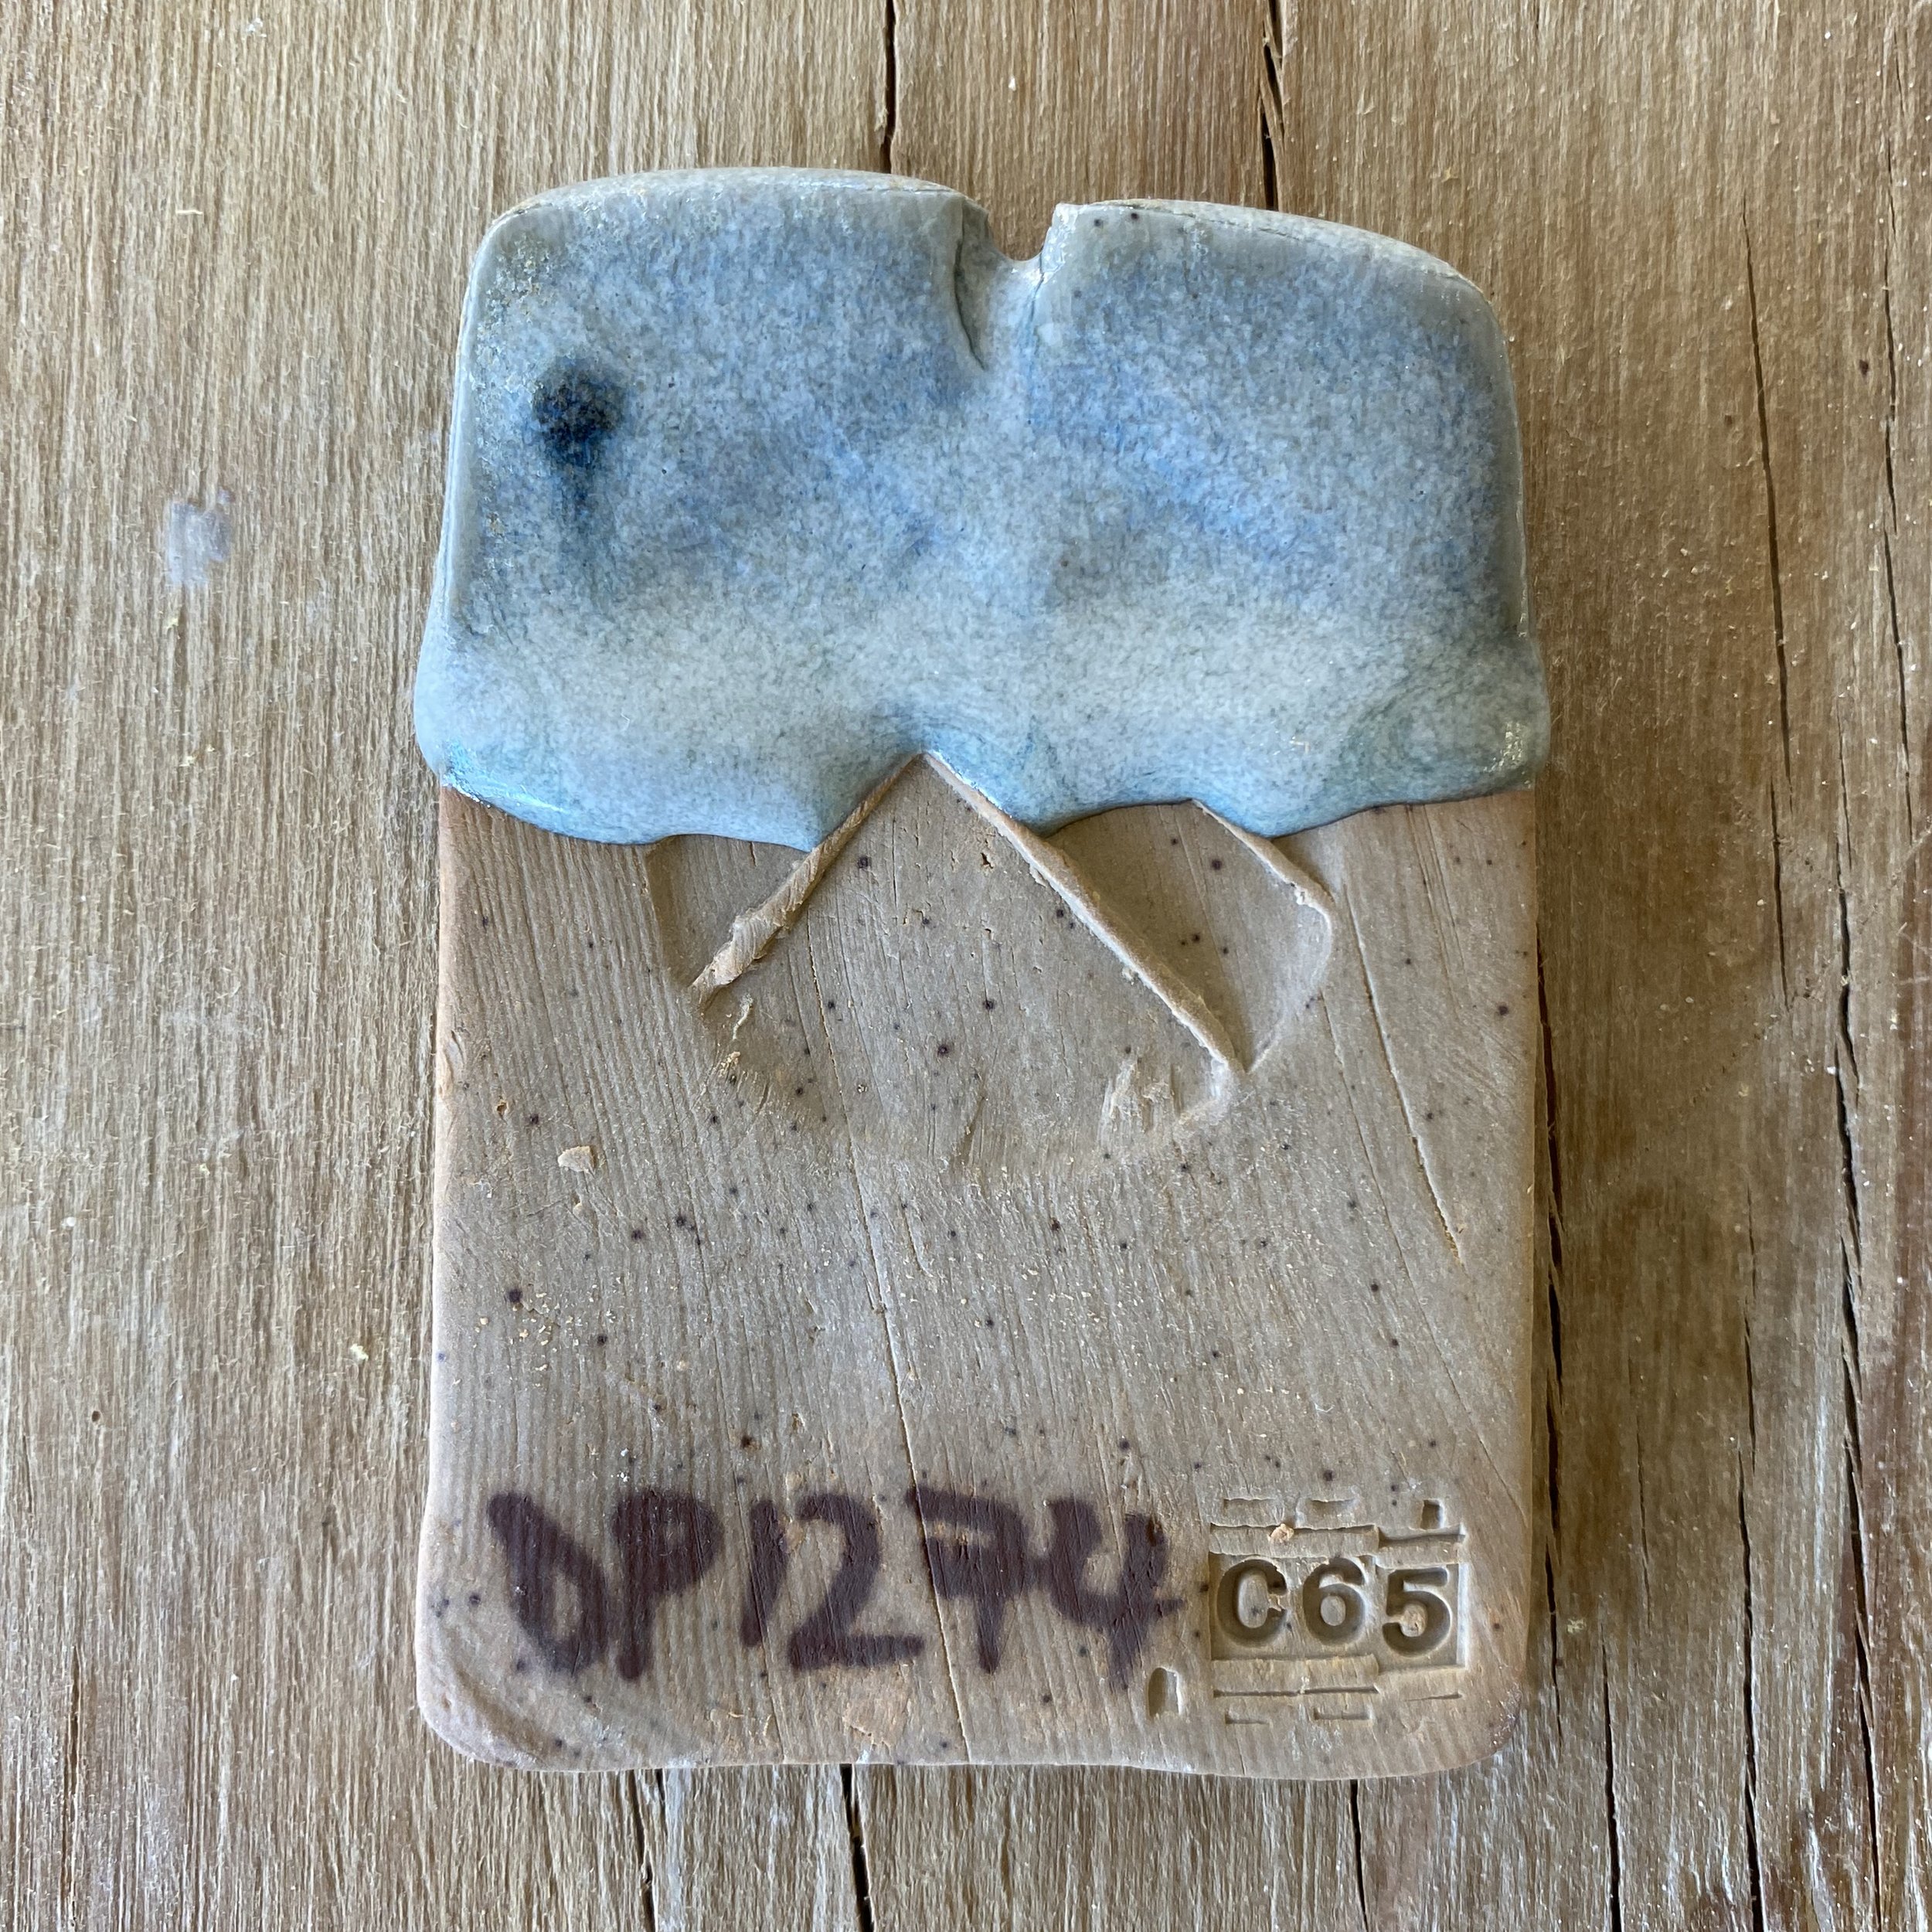
I remembered about an hour and a half later. Ran over to the kiln. Found the pyro reading 2357 (way hot). Didn’t even check the cones, I knew it was too hot. Turned the gas and air off as quickly as possible. With a sigh, I pulled out the peephole to check the cones. My regular cone packs read 011, 3, 5, 7, 8, 9, 10, 11. Cone 11 is normally my safety cone. I try to fire cone 10 down and cone 11 just strating. Well, there was no evidence of any cones left standing. Cone 11 was down. Like way down. Flat. So I figure it was probably cone 12 in there.
Exhibit a:

I walked away cursing myself. Mindfulness!!!! I had a lot of tests in the kiln, and was really hoping for some answers, especially with the jun glazes.
Anyway, when I opened the kiln, I found it was actually pretty good. I was shocked. Not many of the glaze tests ran. I have been working toward more stable jun and tenmoku glazes so this was actually a really good test. Especially for firing them in a wood kiln with all that extra flux.


Sometimes mistakes work out! In the cups you see here, I tested various methods of applying copper carbonate to the jun glaze. I love the old Song Dynasty pots that have swathes of purple on them.

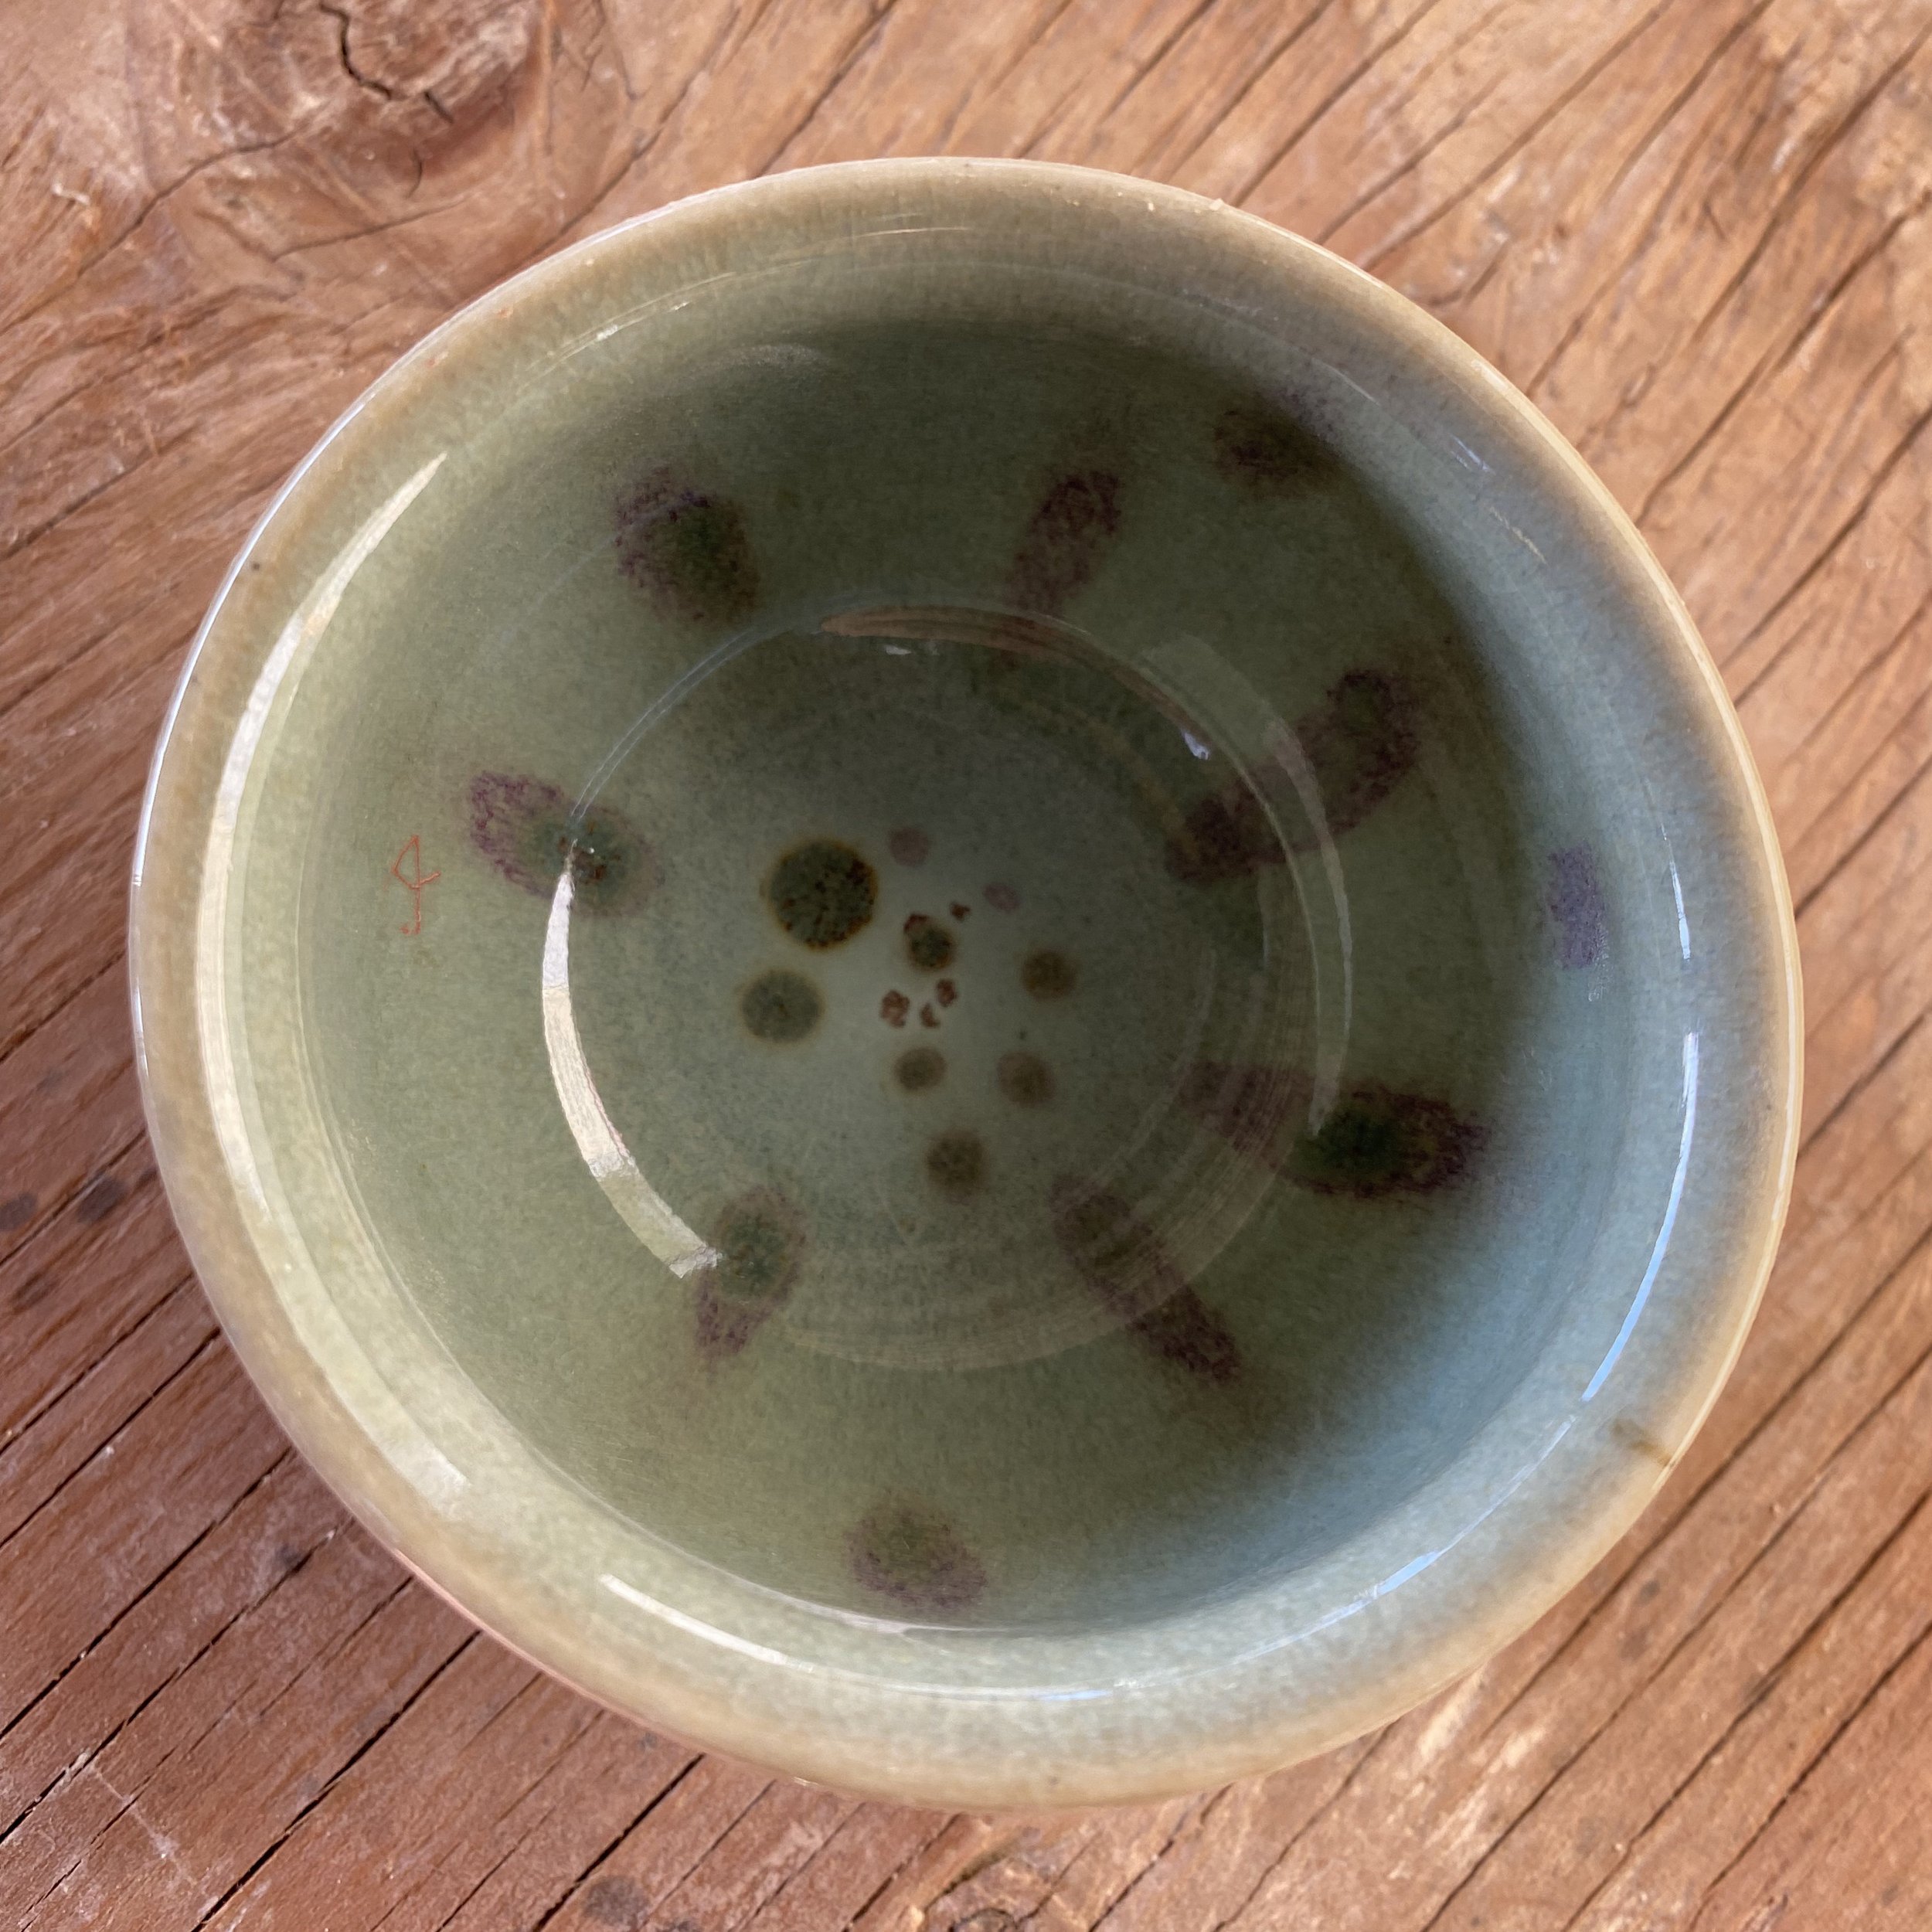


These photographs aren’t the best, but overall, the best results were from copper carbonate sprayed on the outer surface of a thick jun glaze.
I basically just mixed the copper carbonate with a small amount of bentonite and water until it was a glaze-like consistency before applying. I noticed that it was way easier to overdo it with a brush than spraying. If you get too much copper on there, it turns the area green.
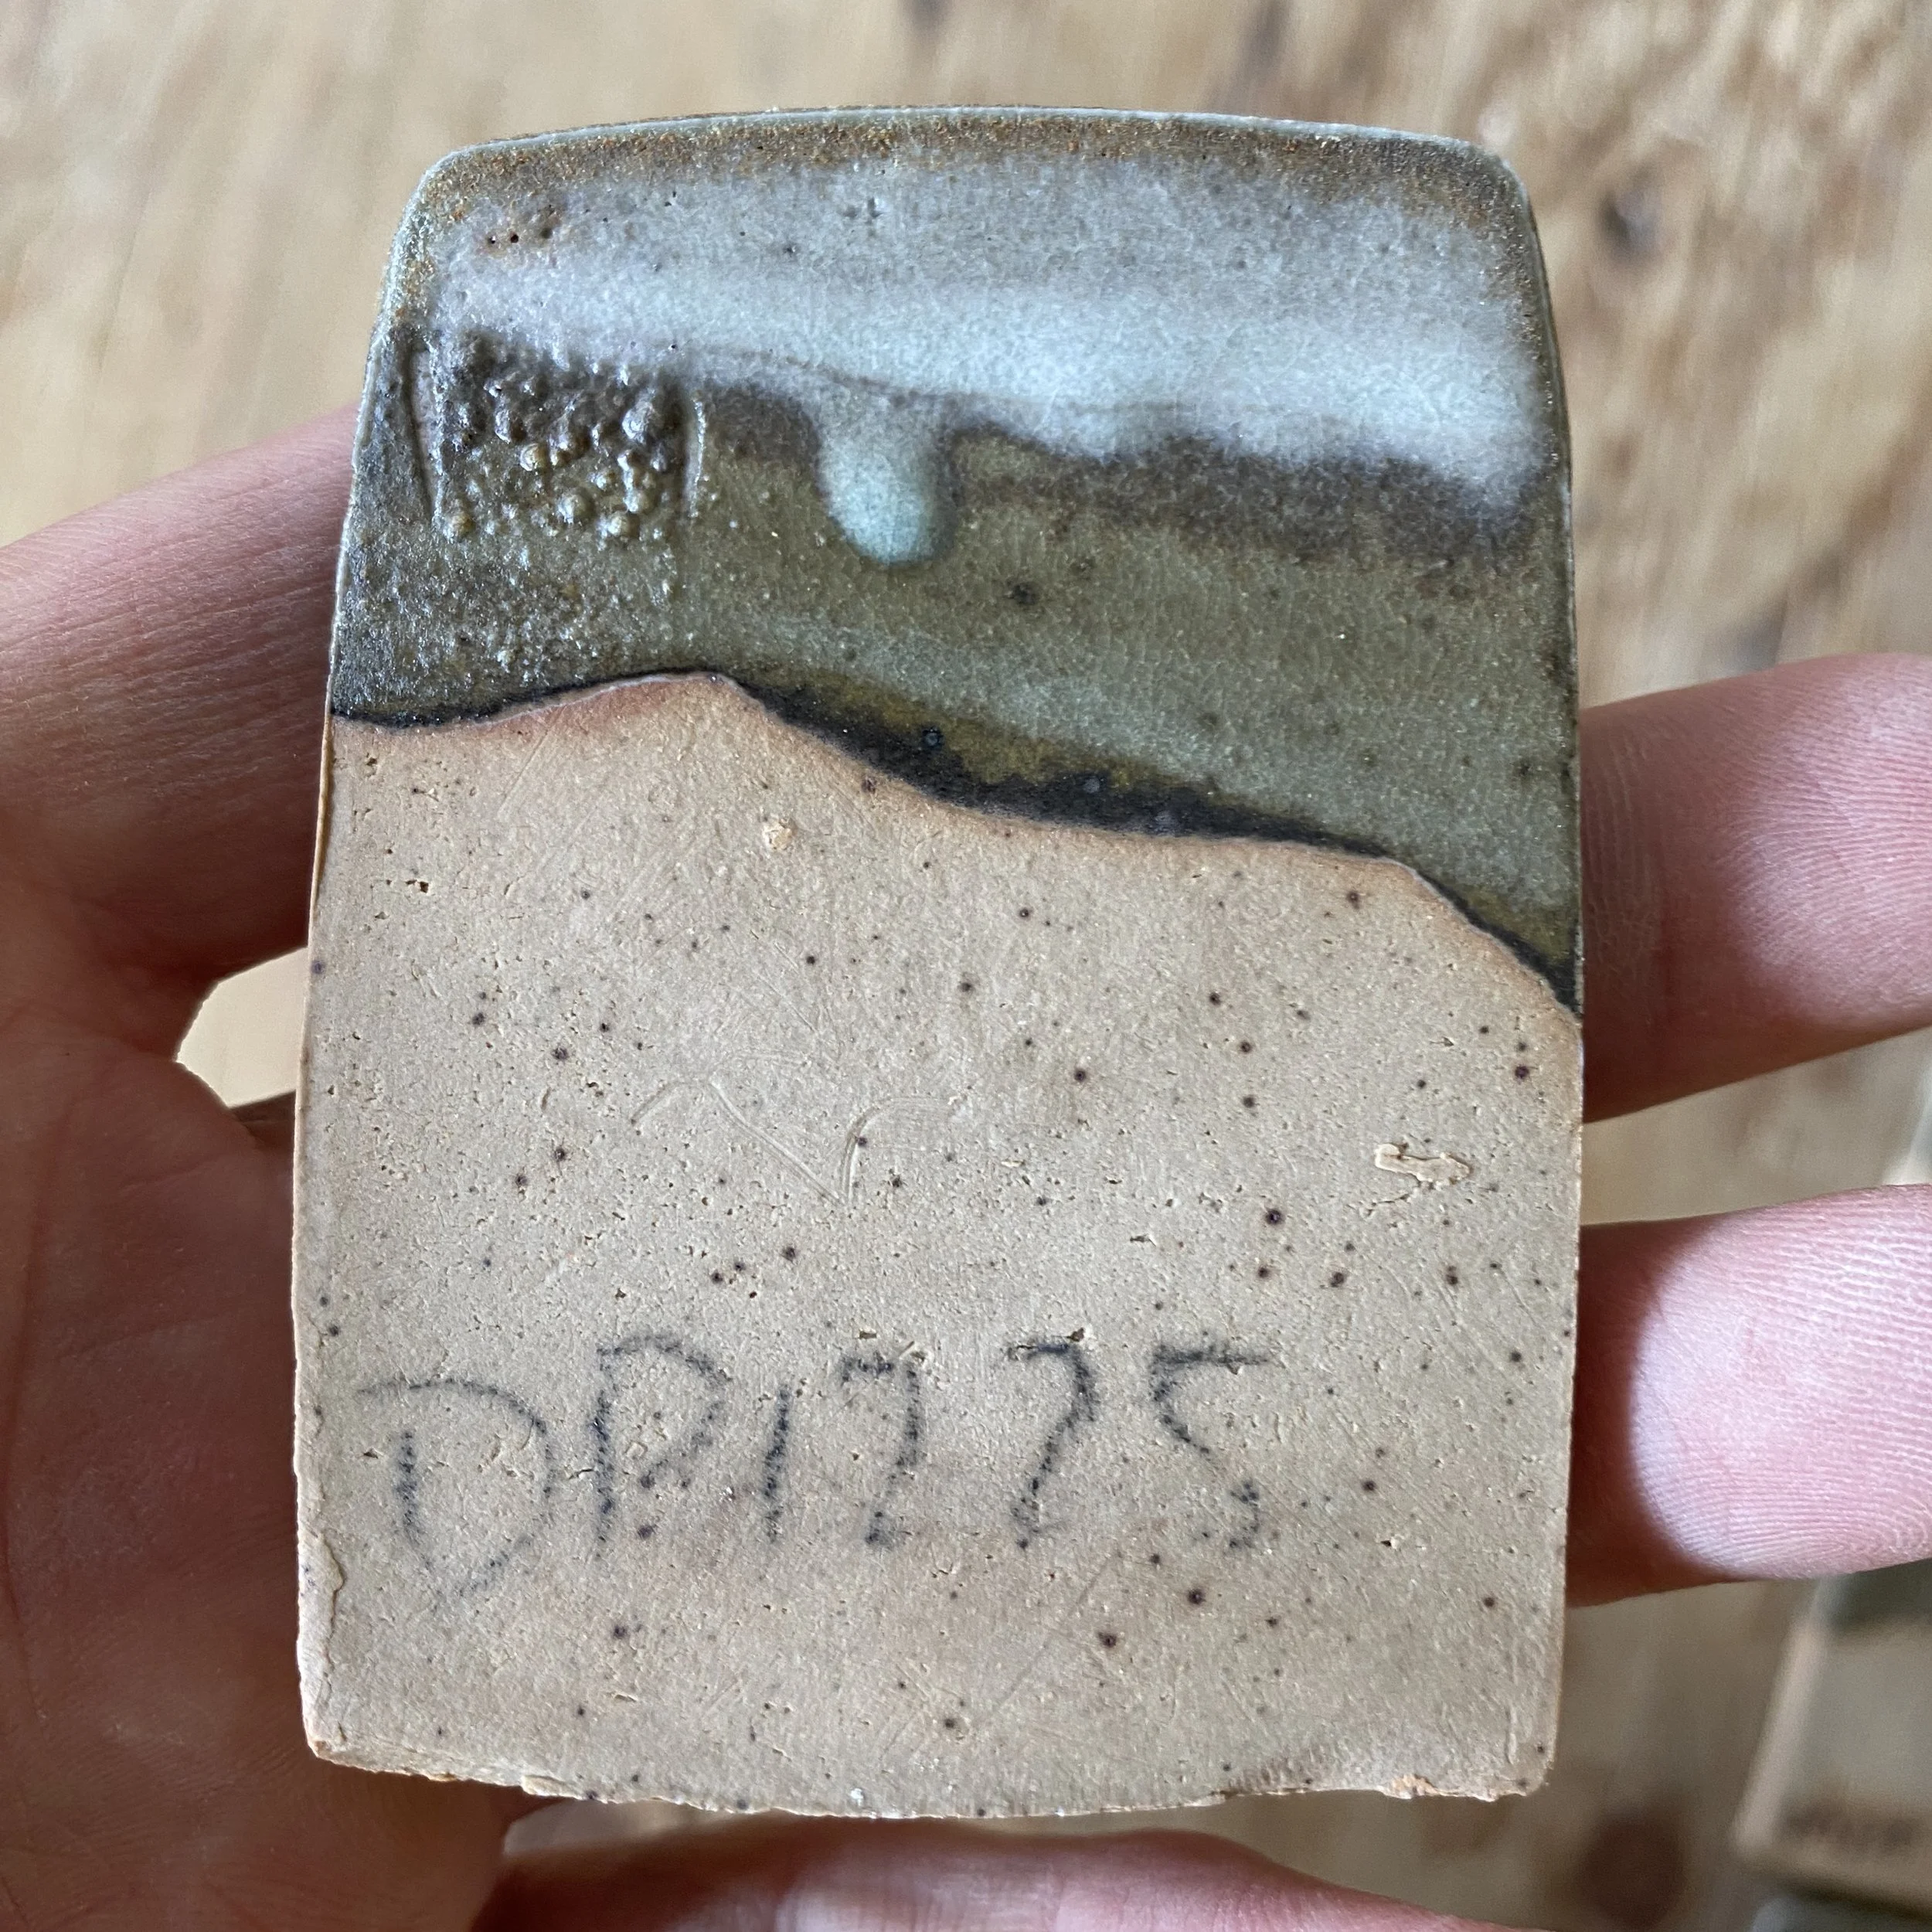
I accidentally dropped one of the cups that had this copper carbonate mix poured on the outside of the jun glaze. Another happy accident! It showed me quite a bit about the effect. Here are the sherds…


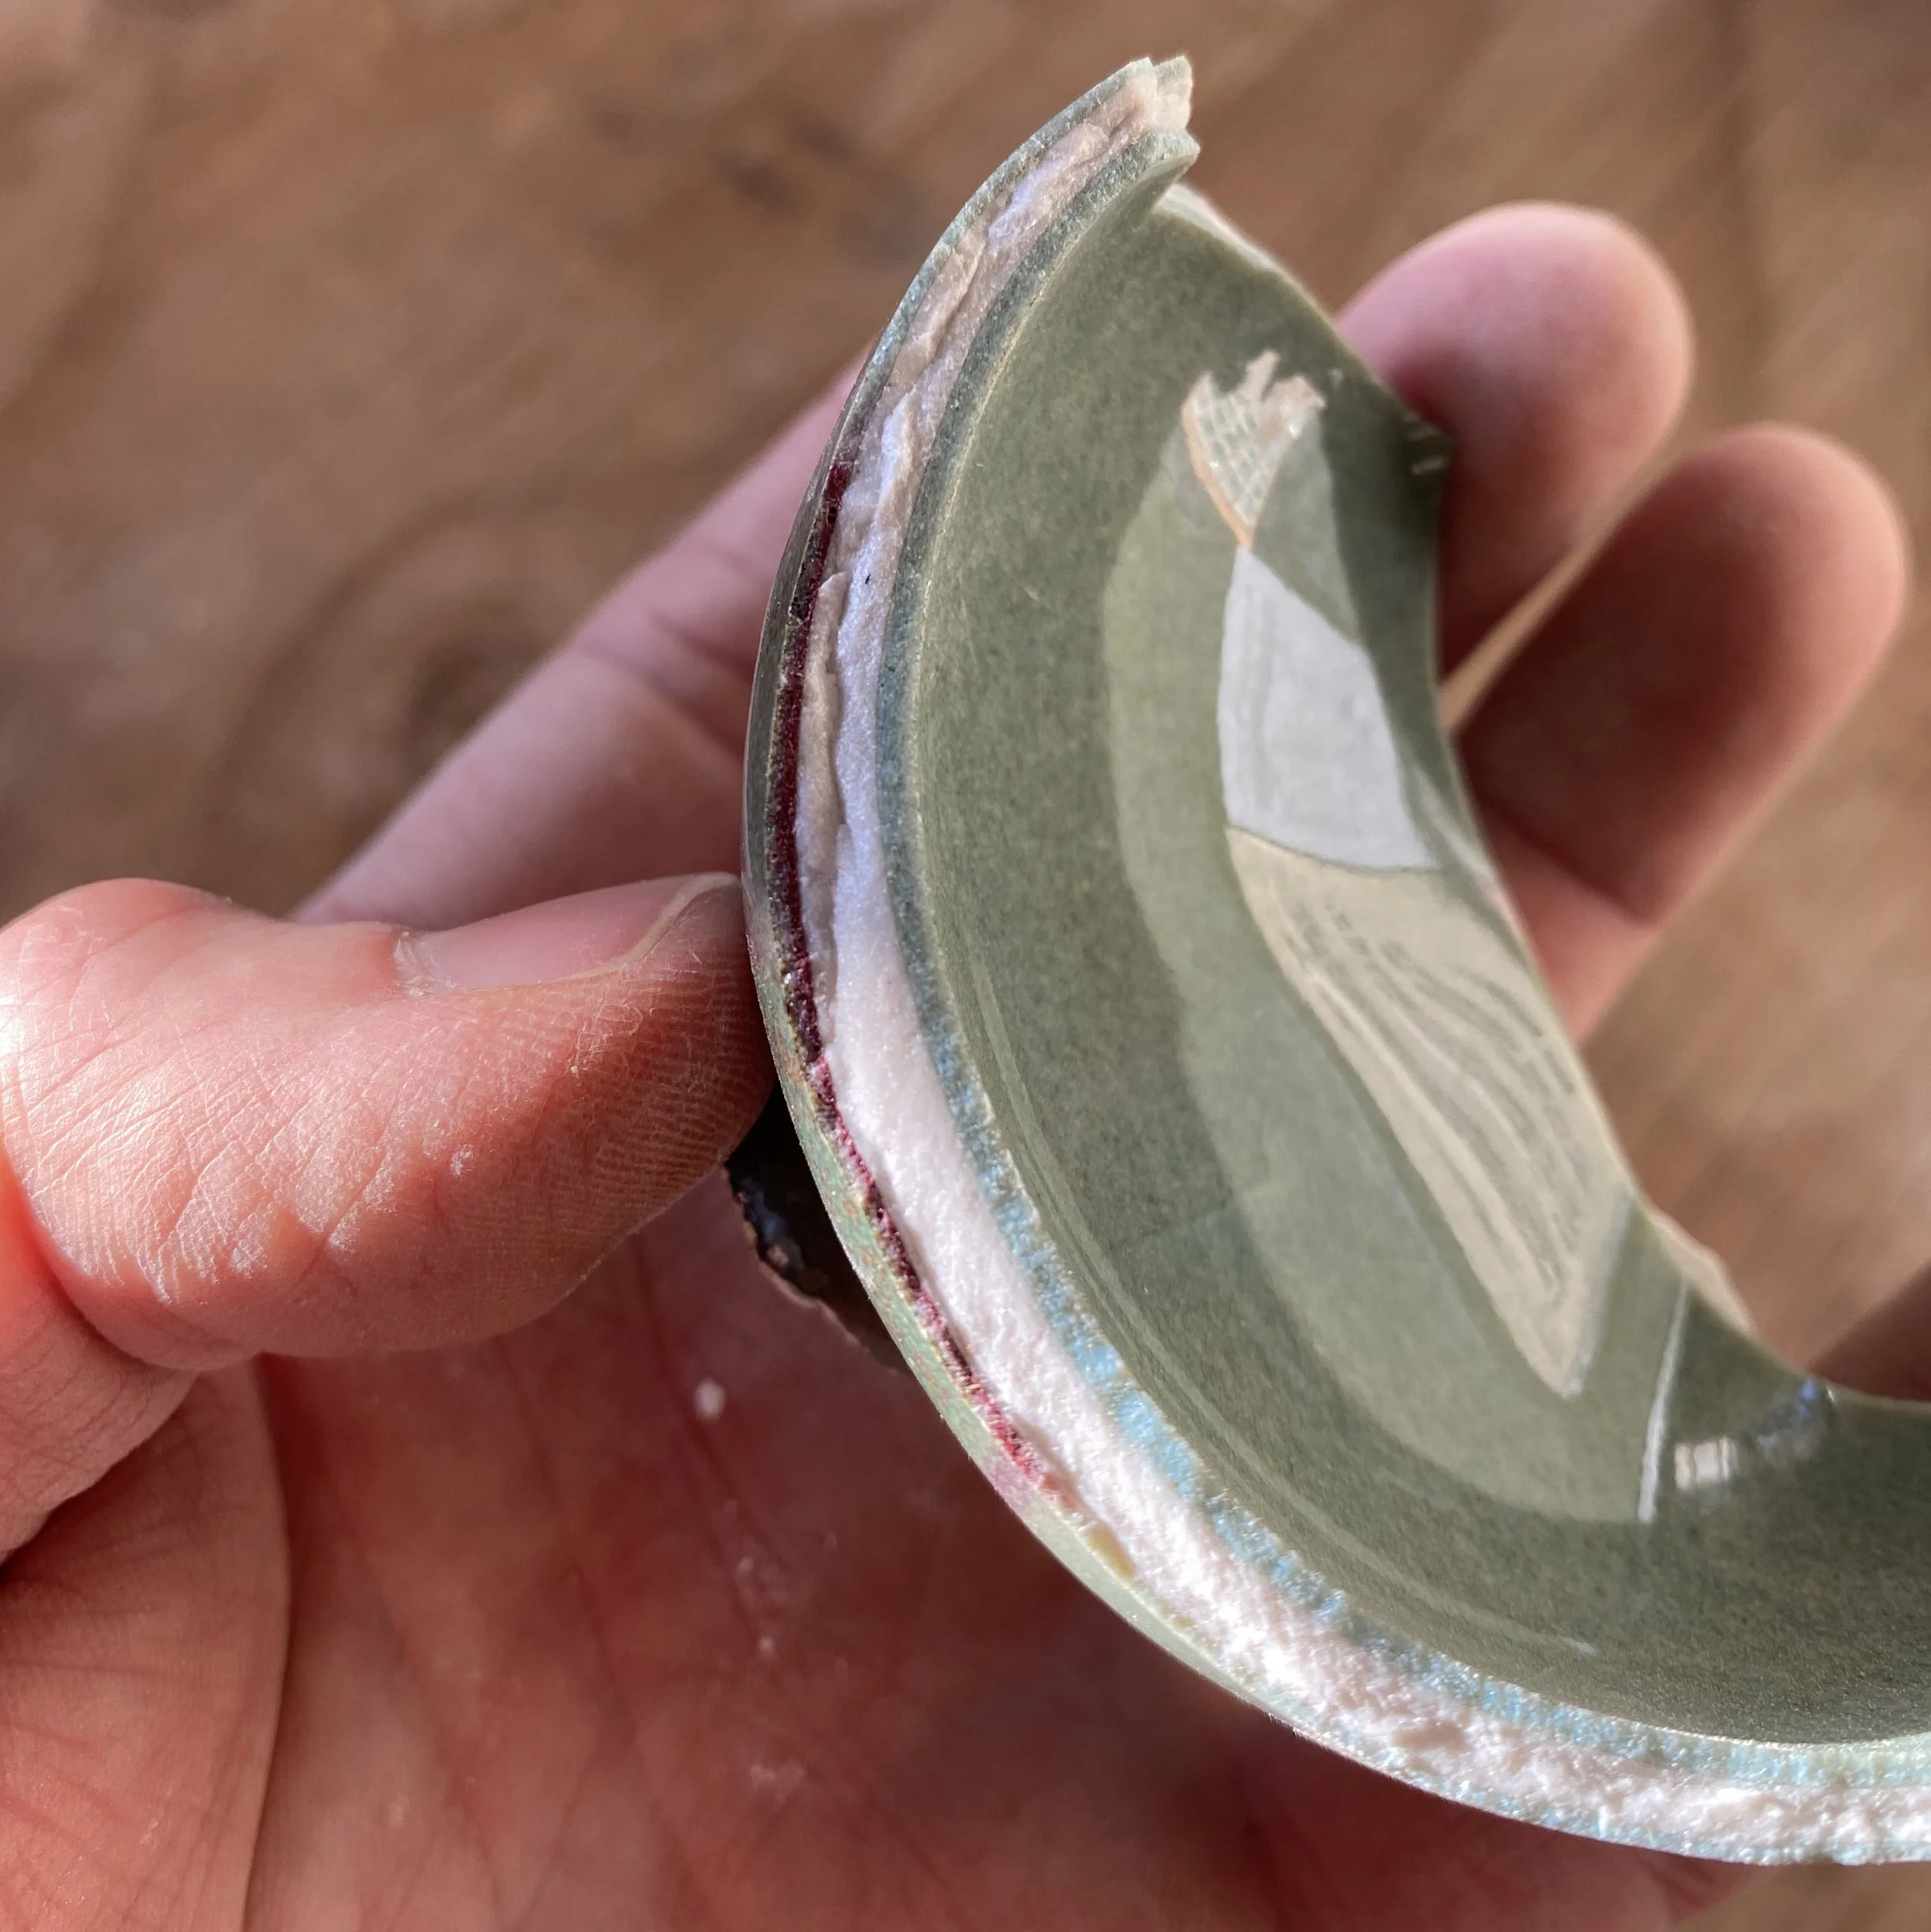


It looks so bright under the layer of glaze. I wonder if this is from being more reduced. I am considering trying a firing with some late heavy reduction. This firing was more of as neutral atmosphere towards the end.
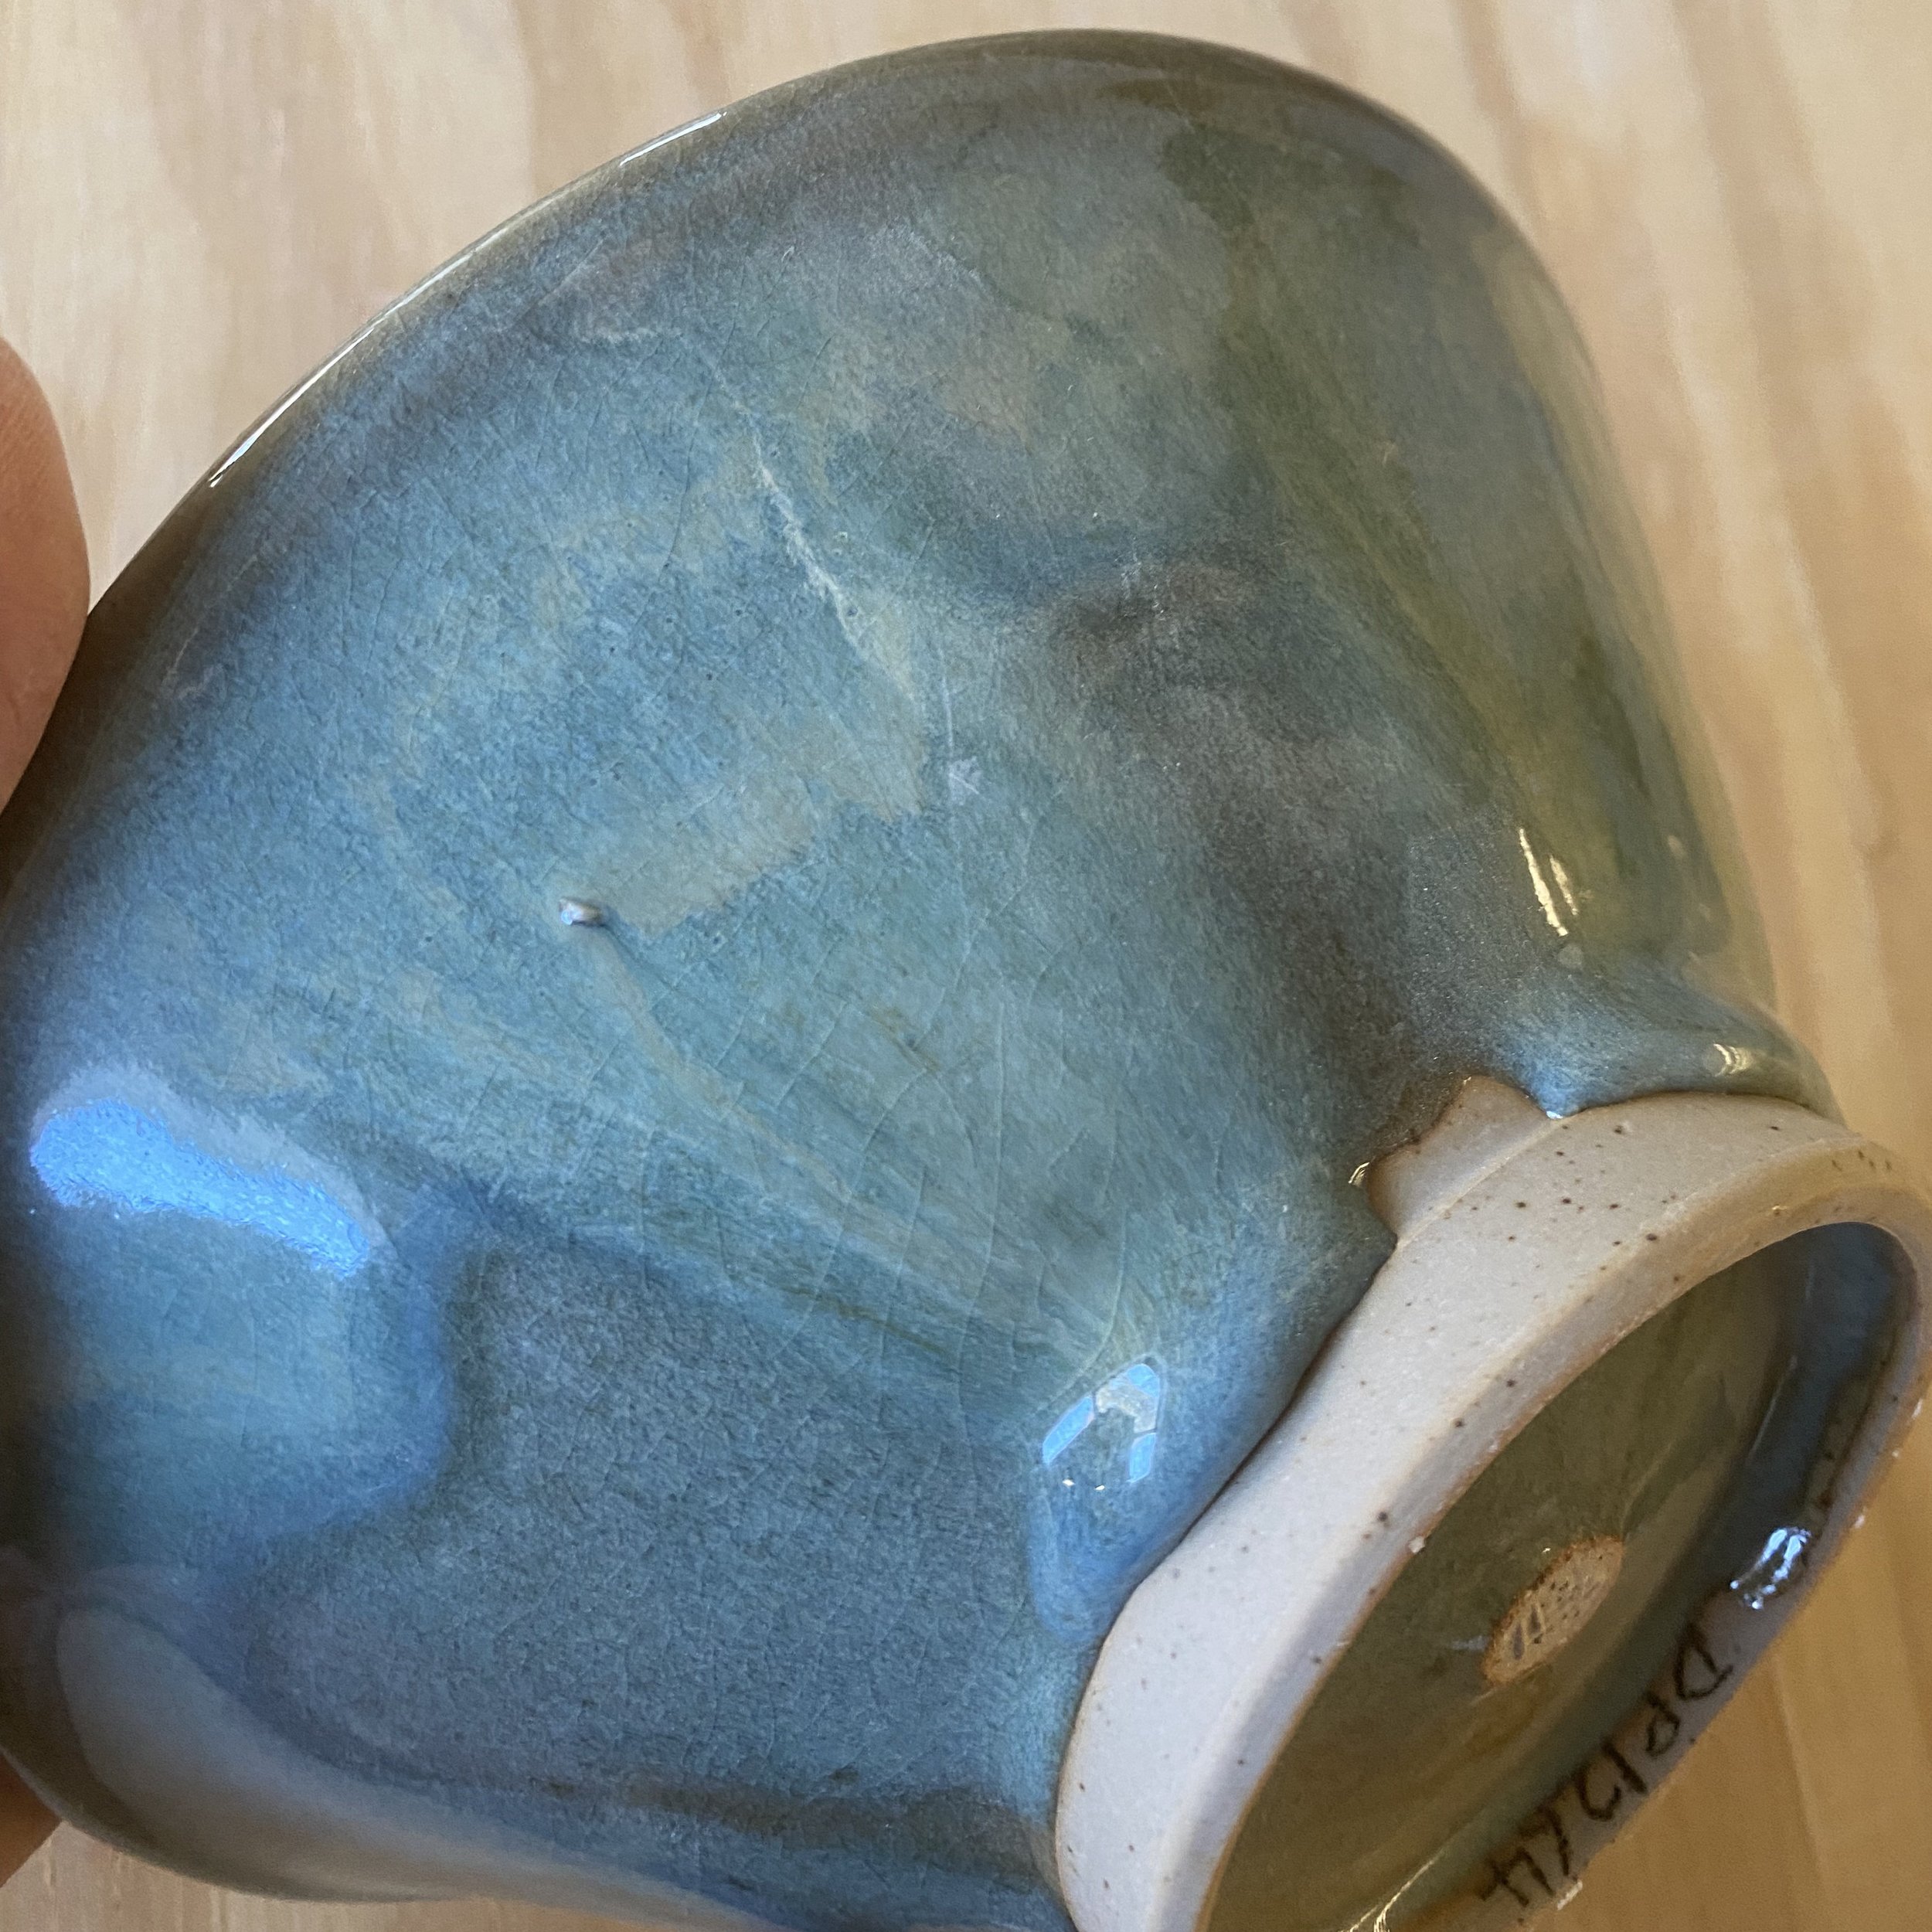
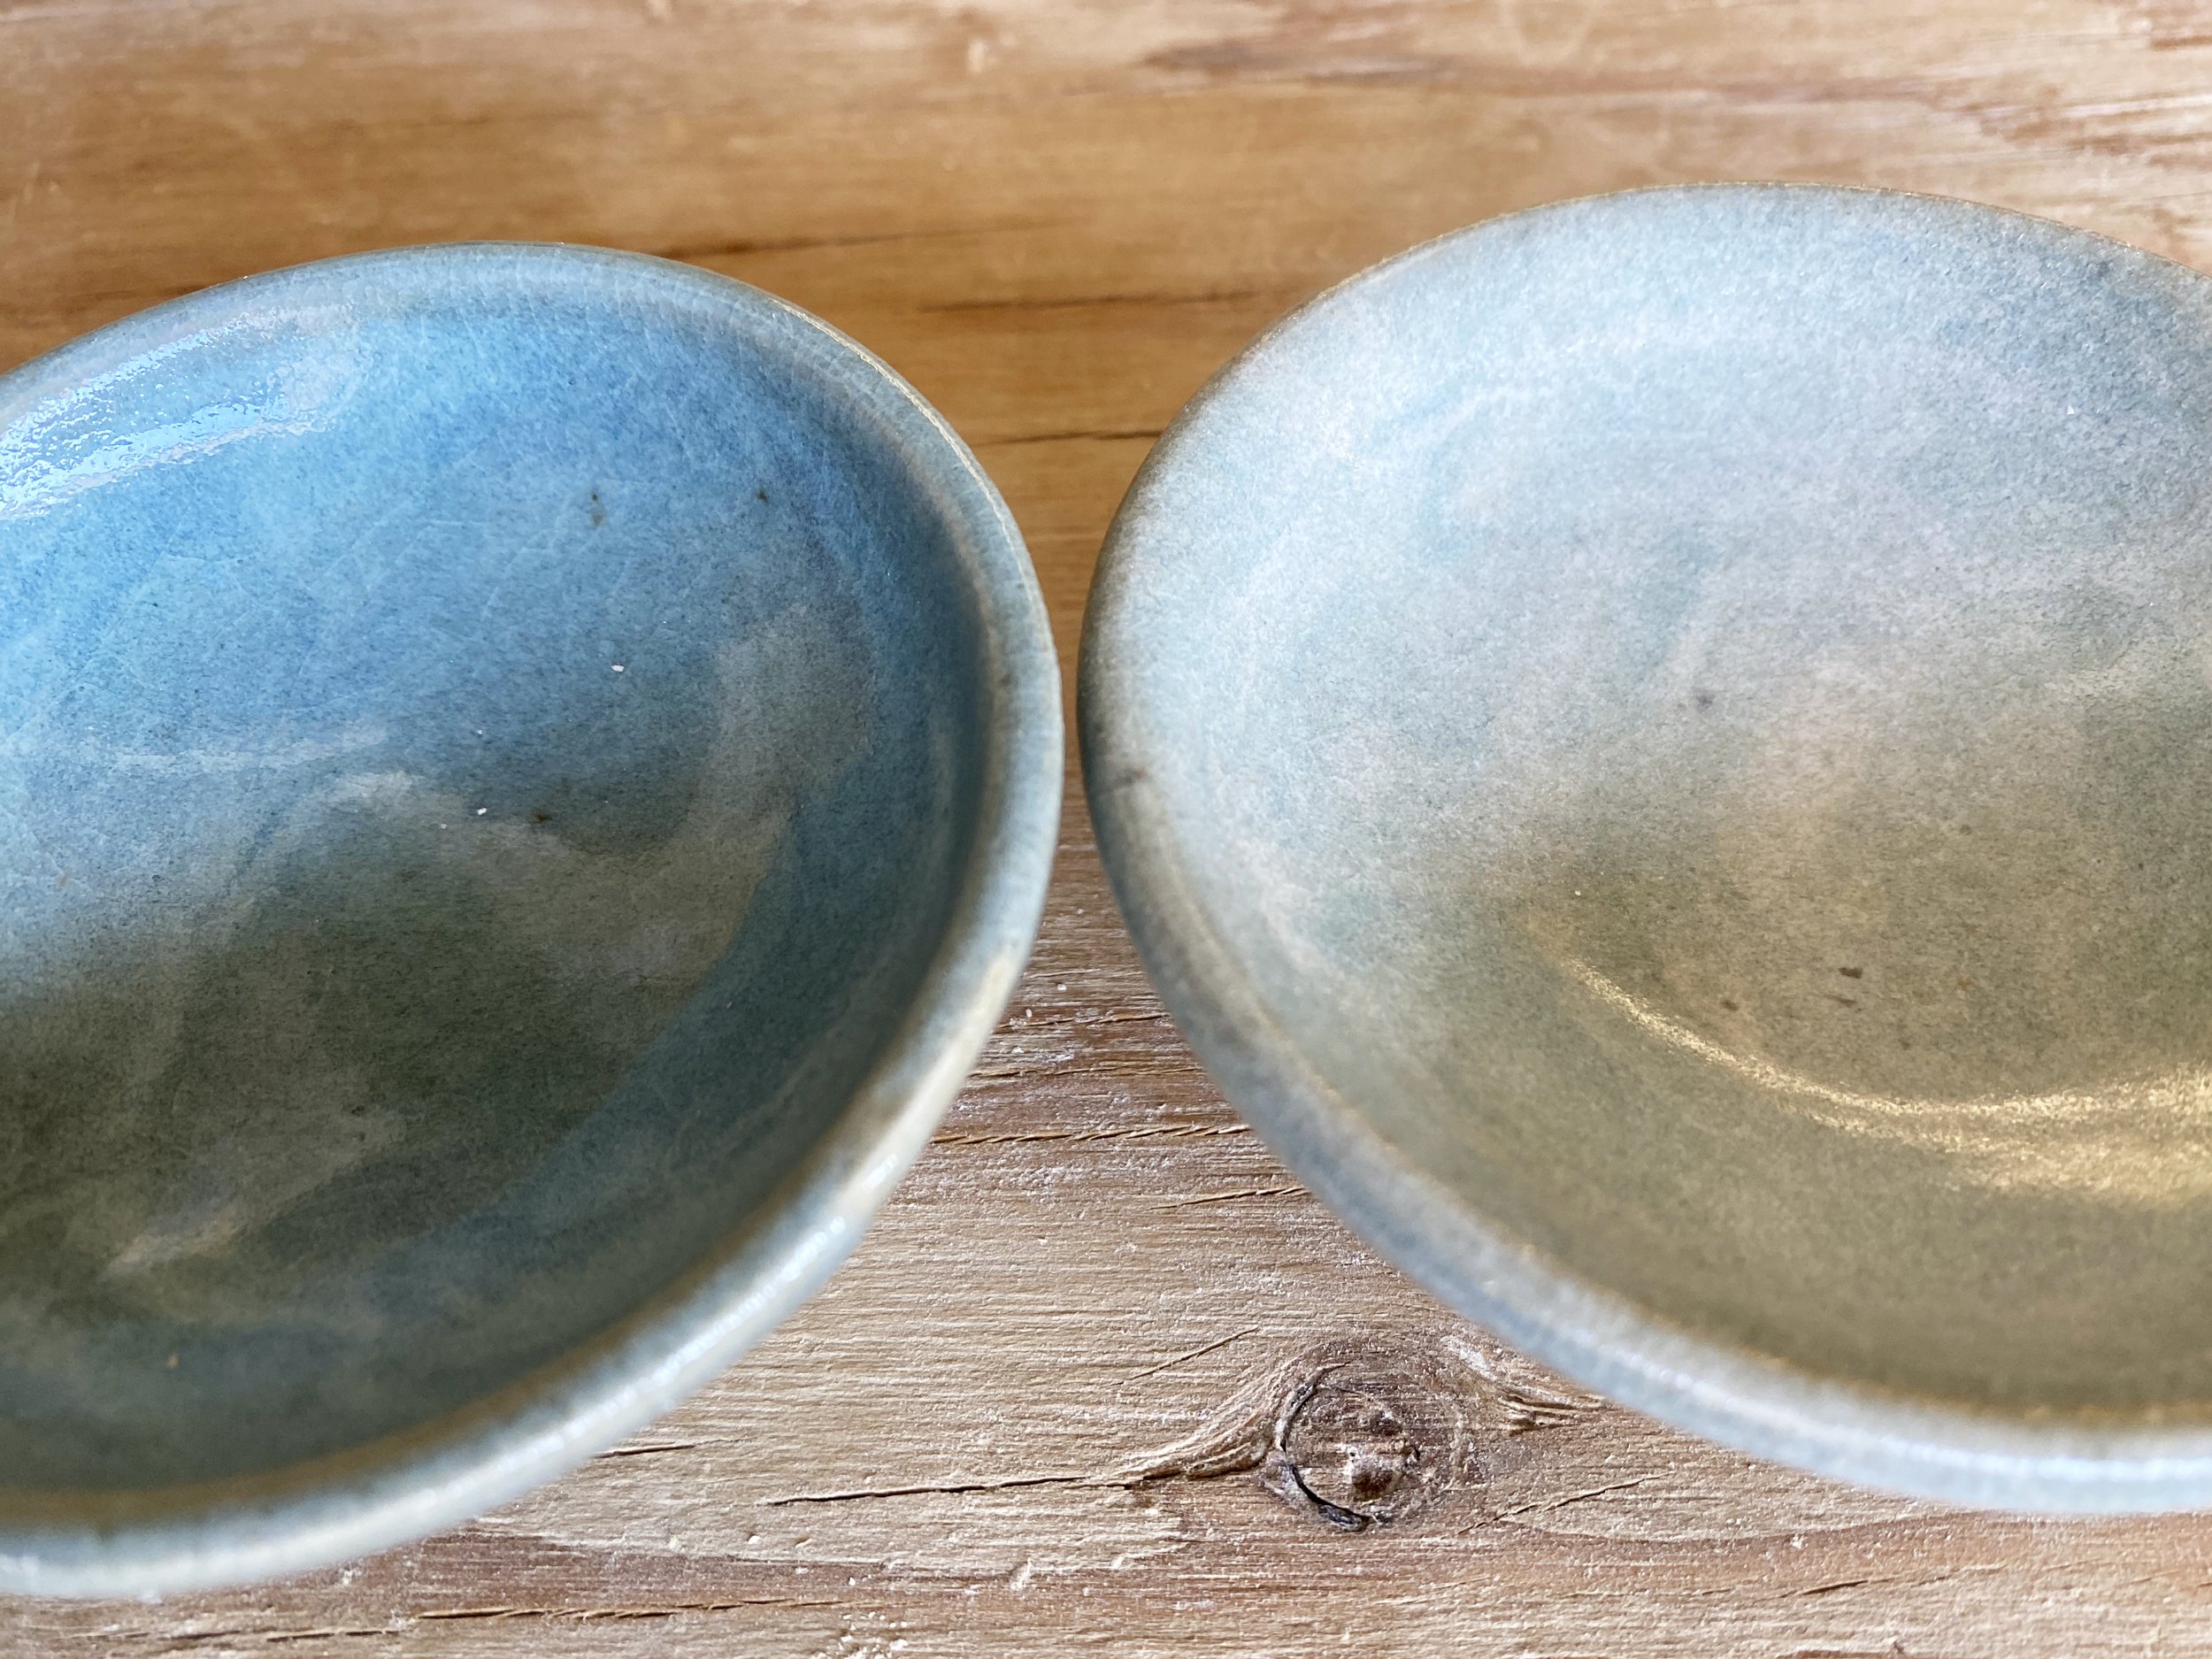
Other interesting finding… The bowls that I have fired twice already came out brilliantly this time:


These results are much bluer than previously. I would say from this that refiring these jun glazes can really improve them.
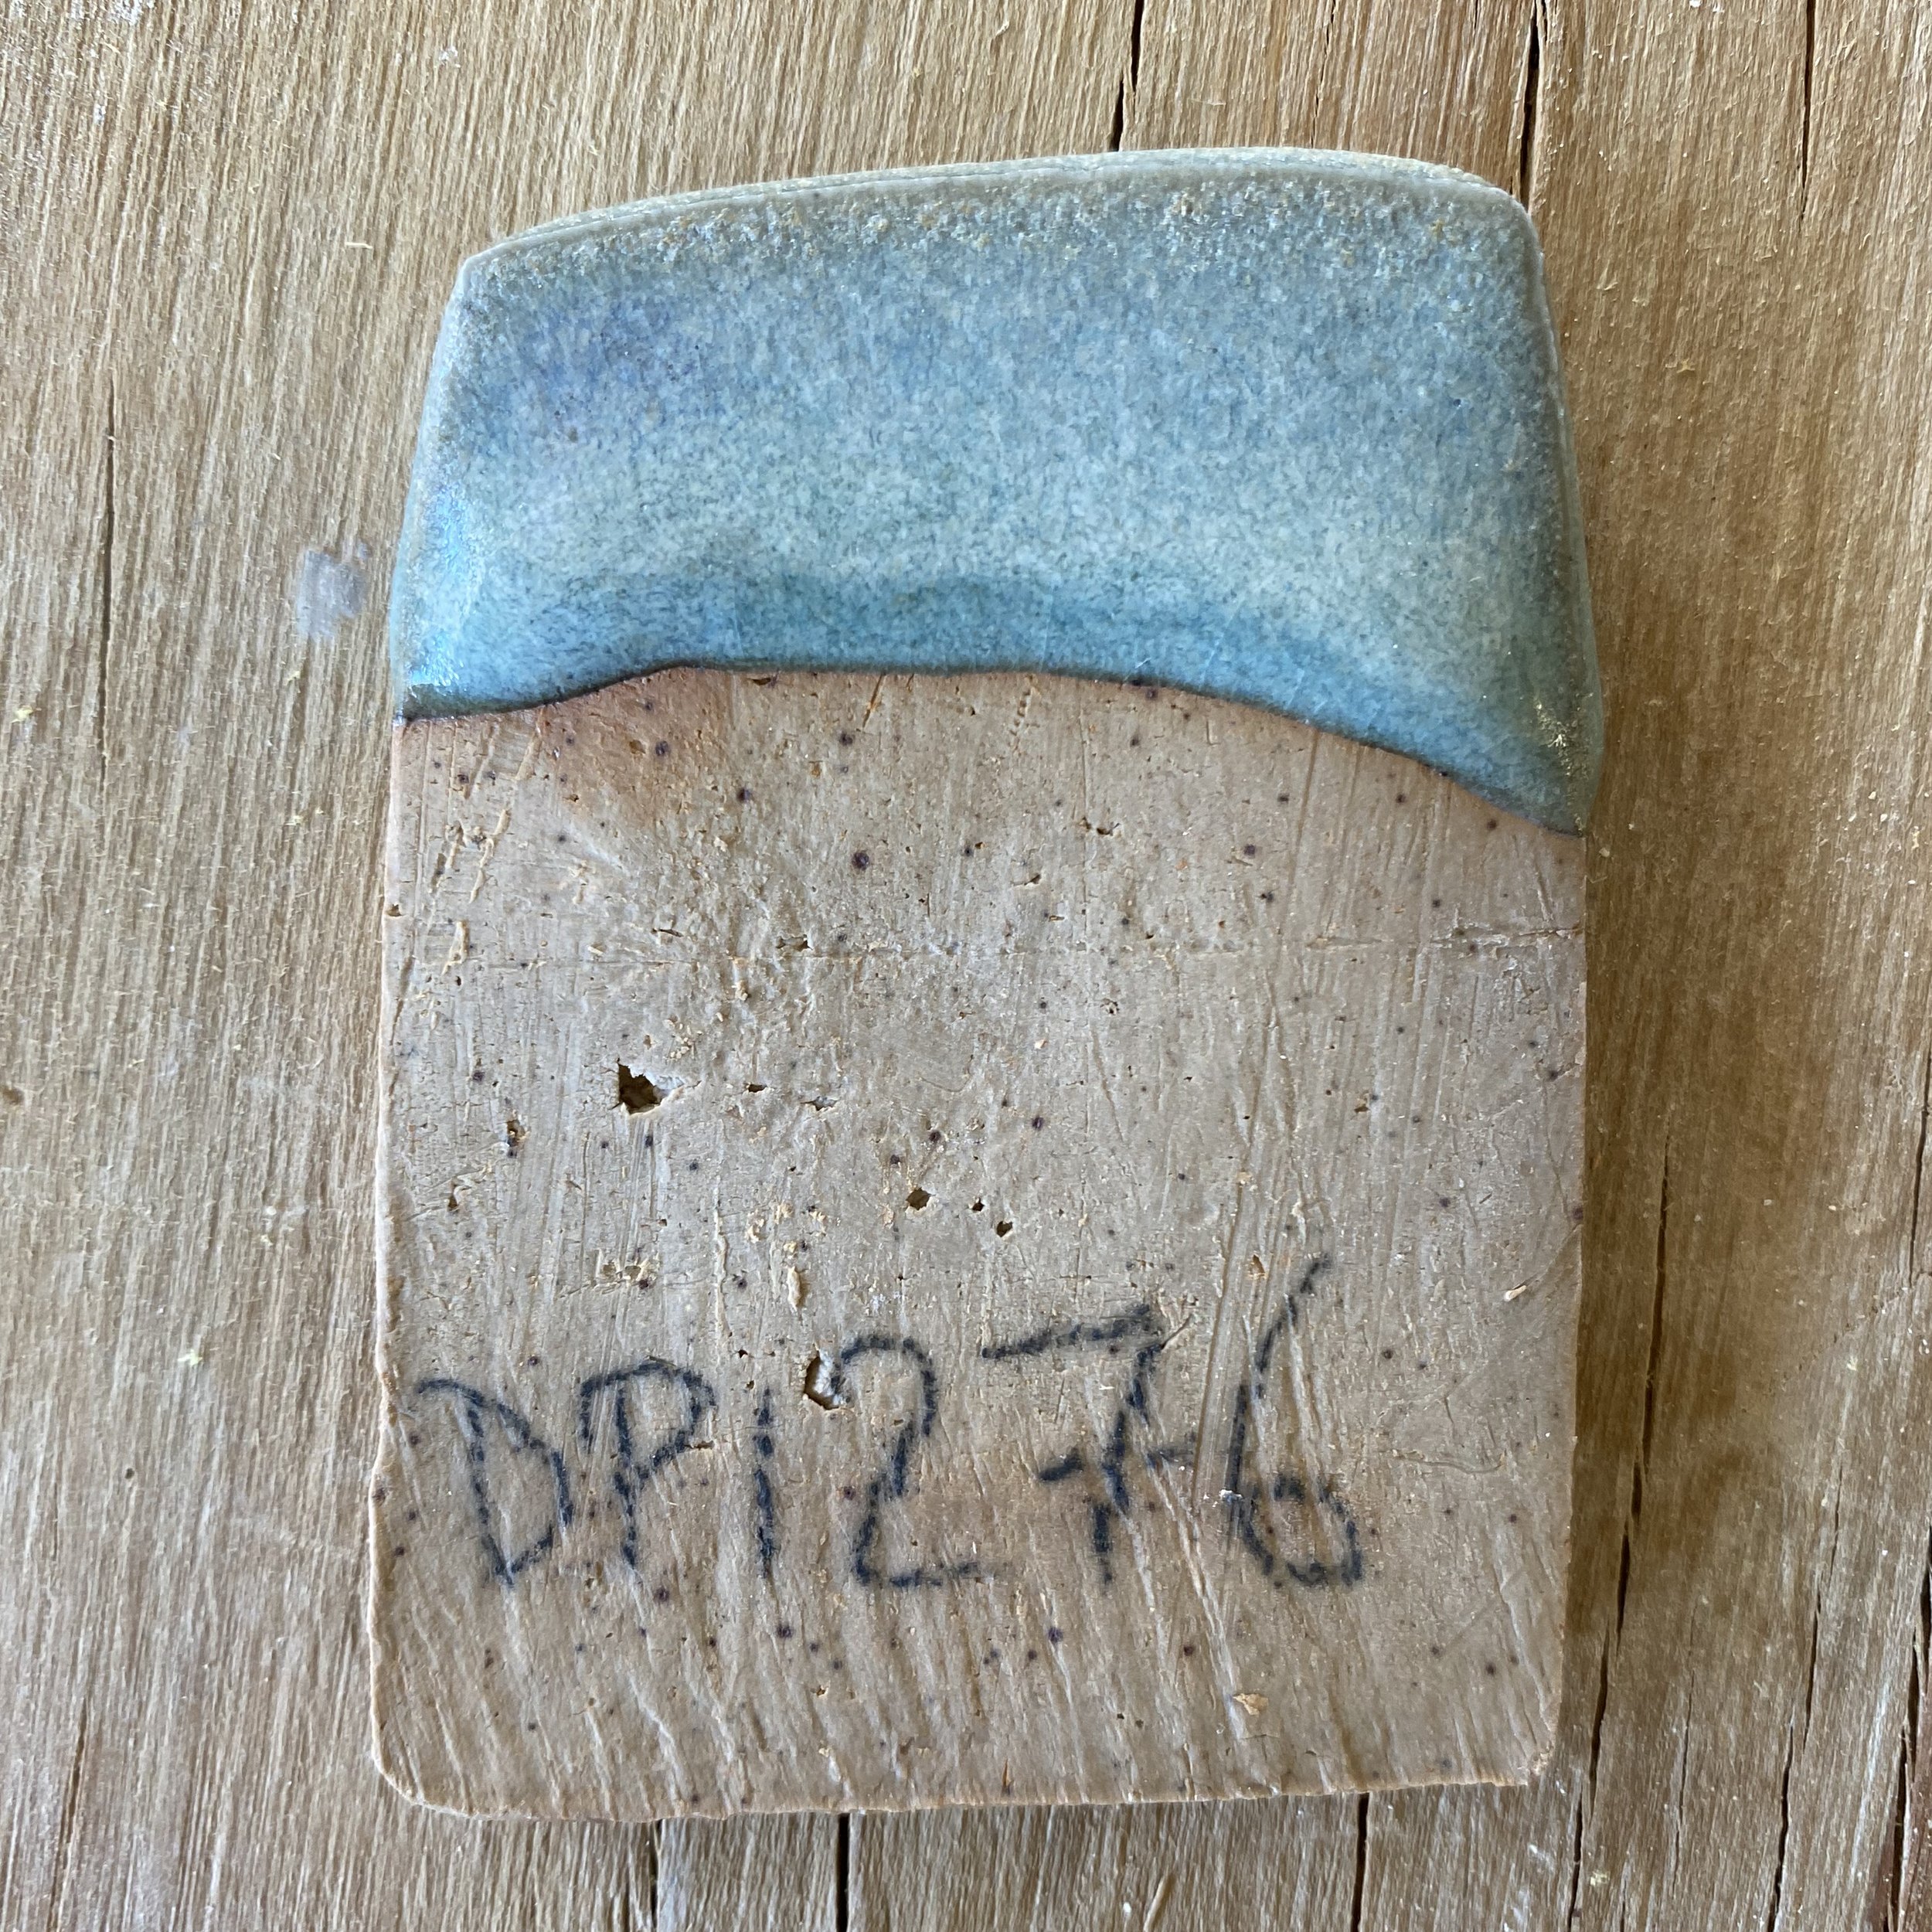
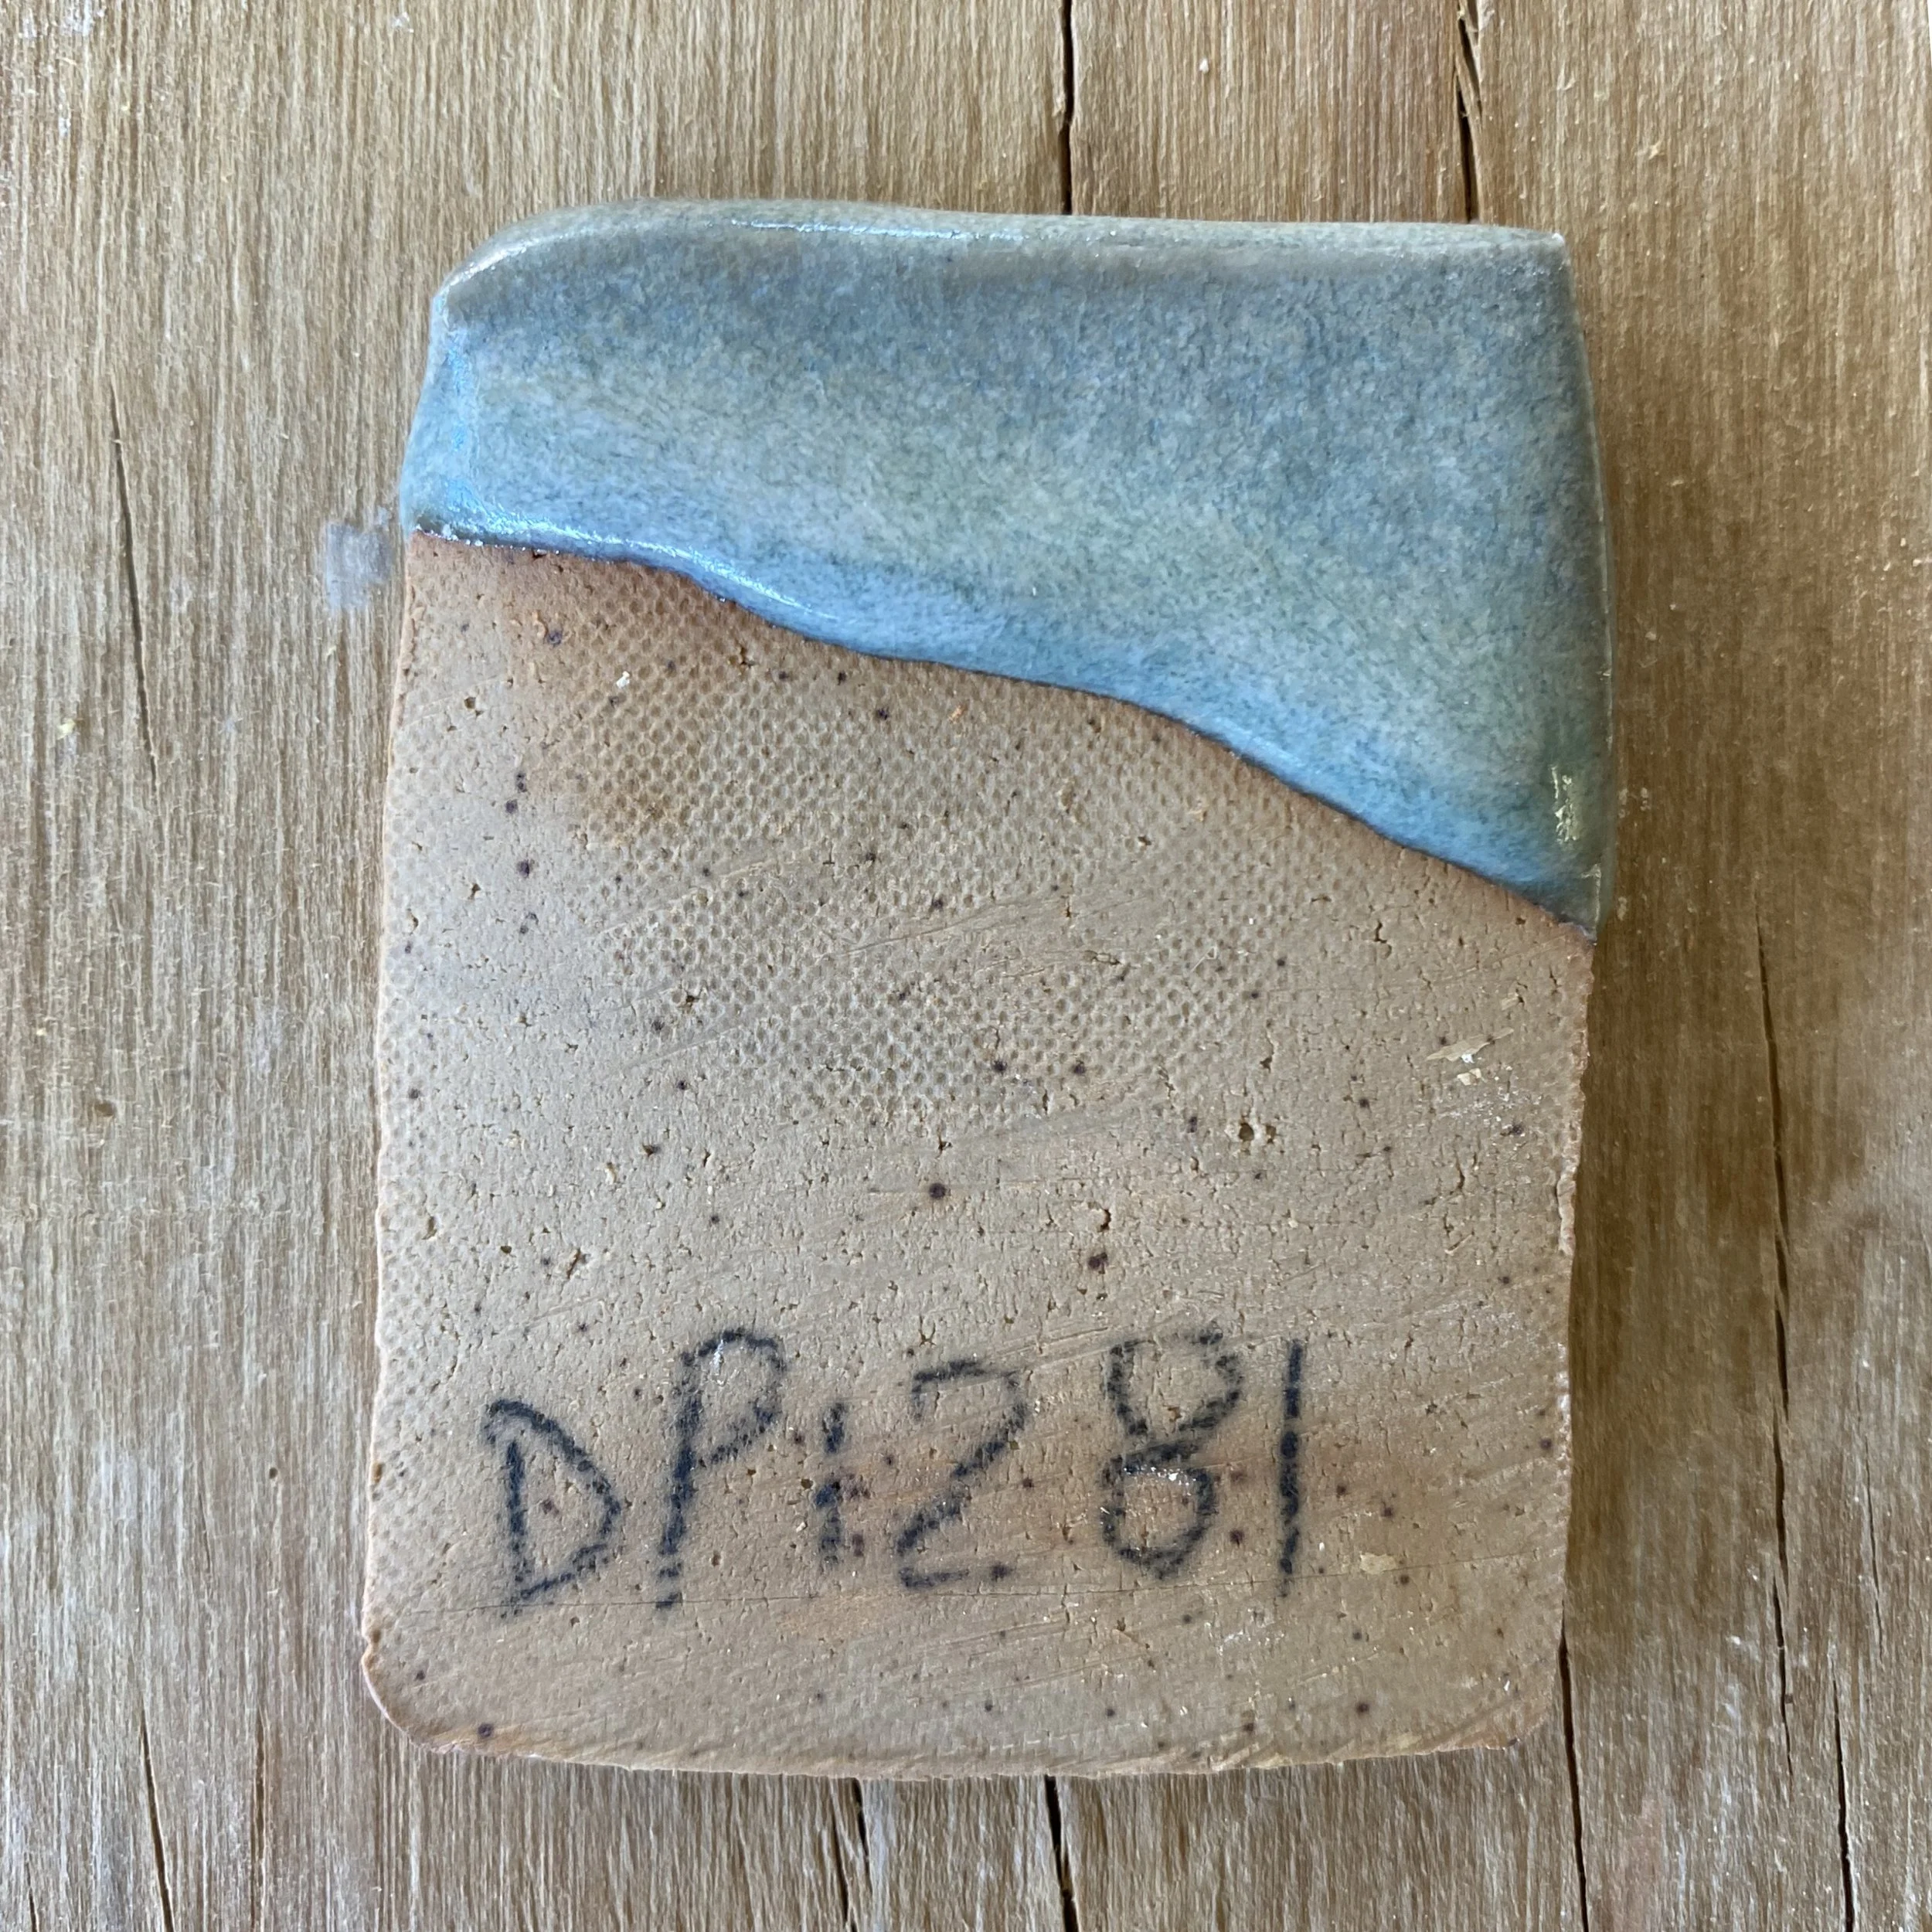
Here are some more test tiles…


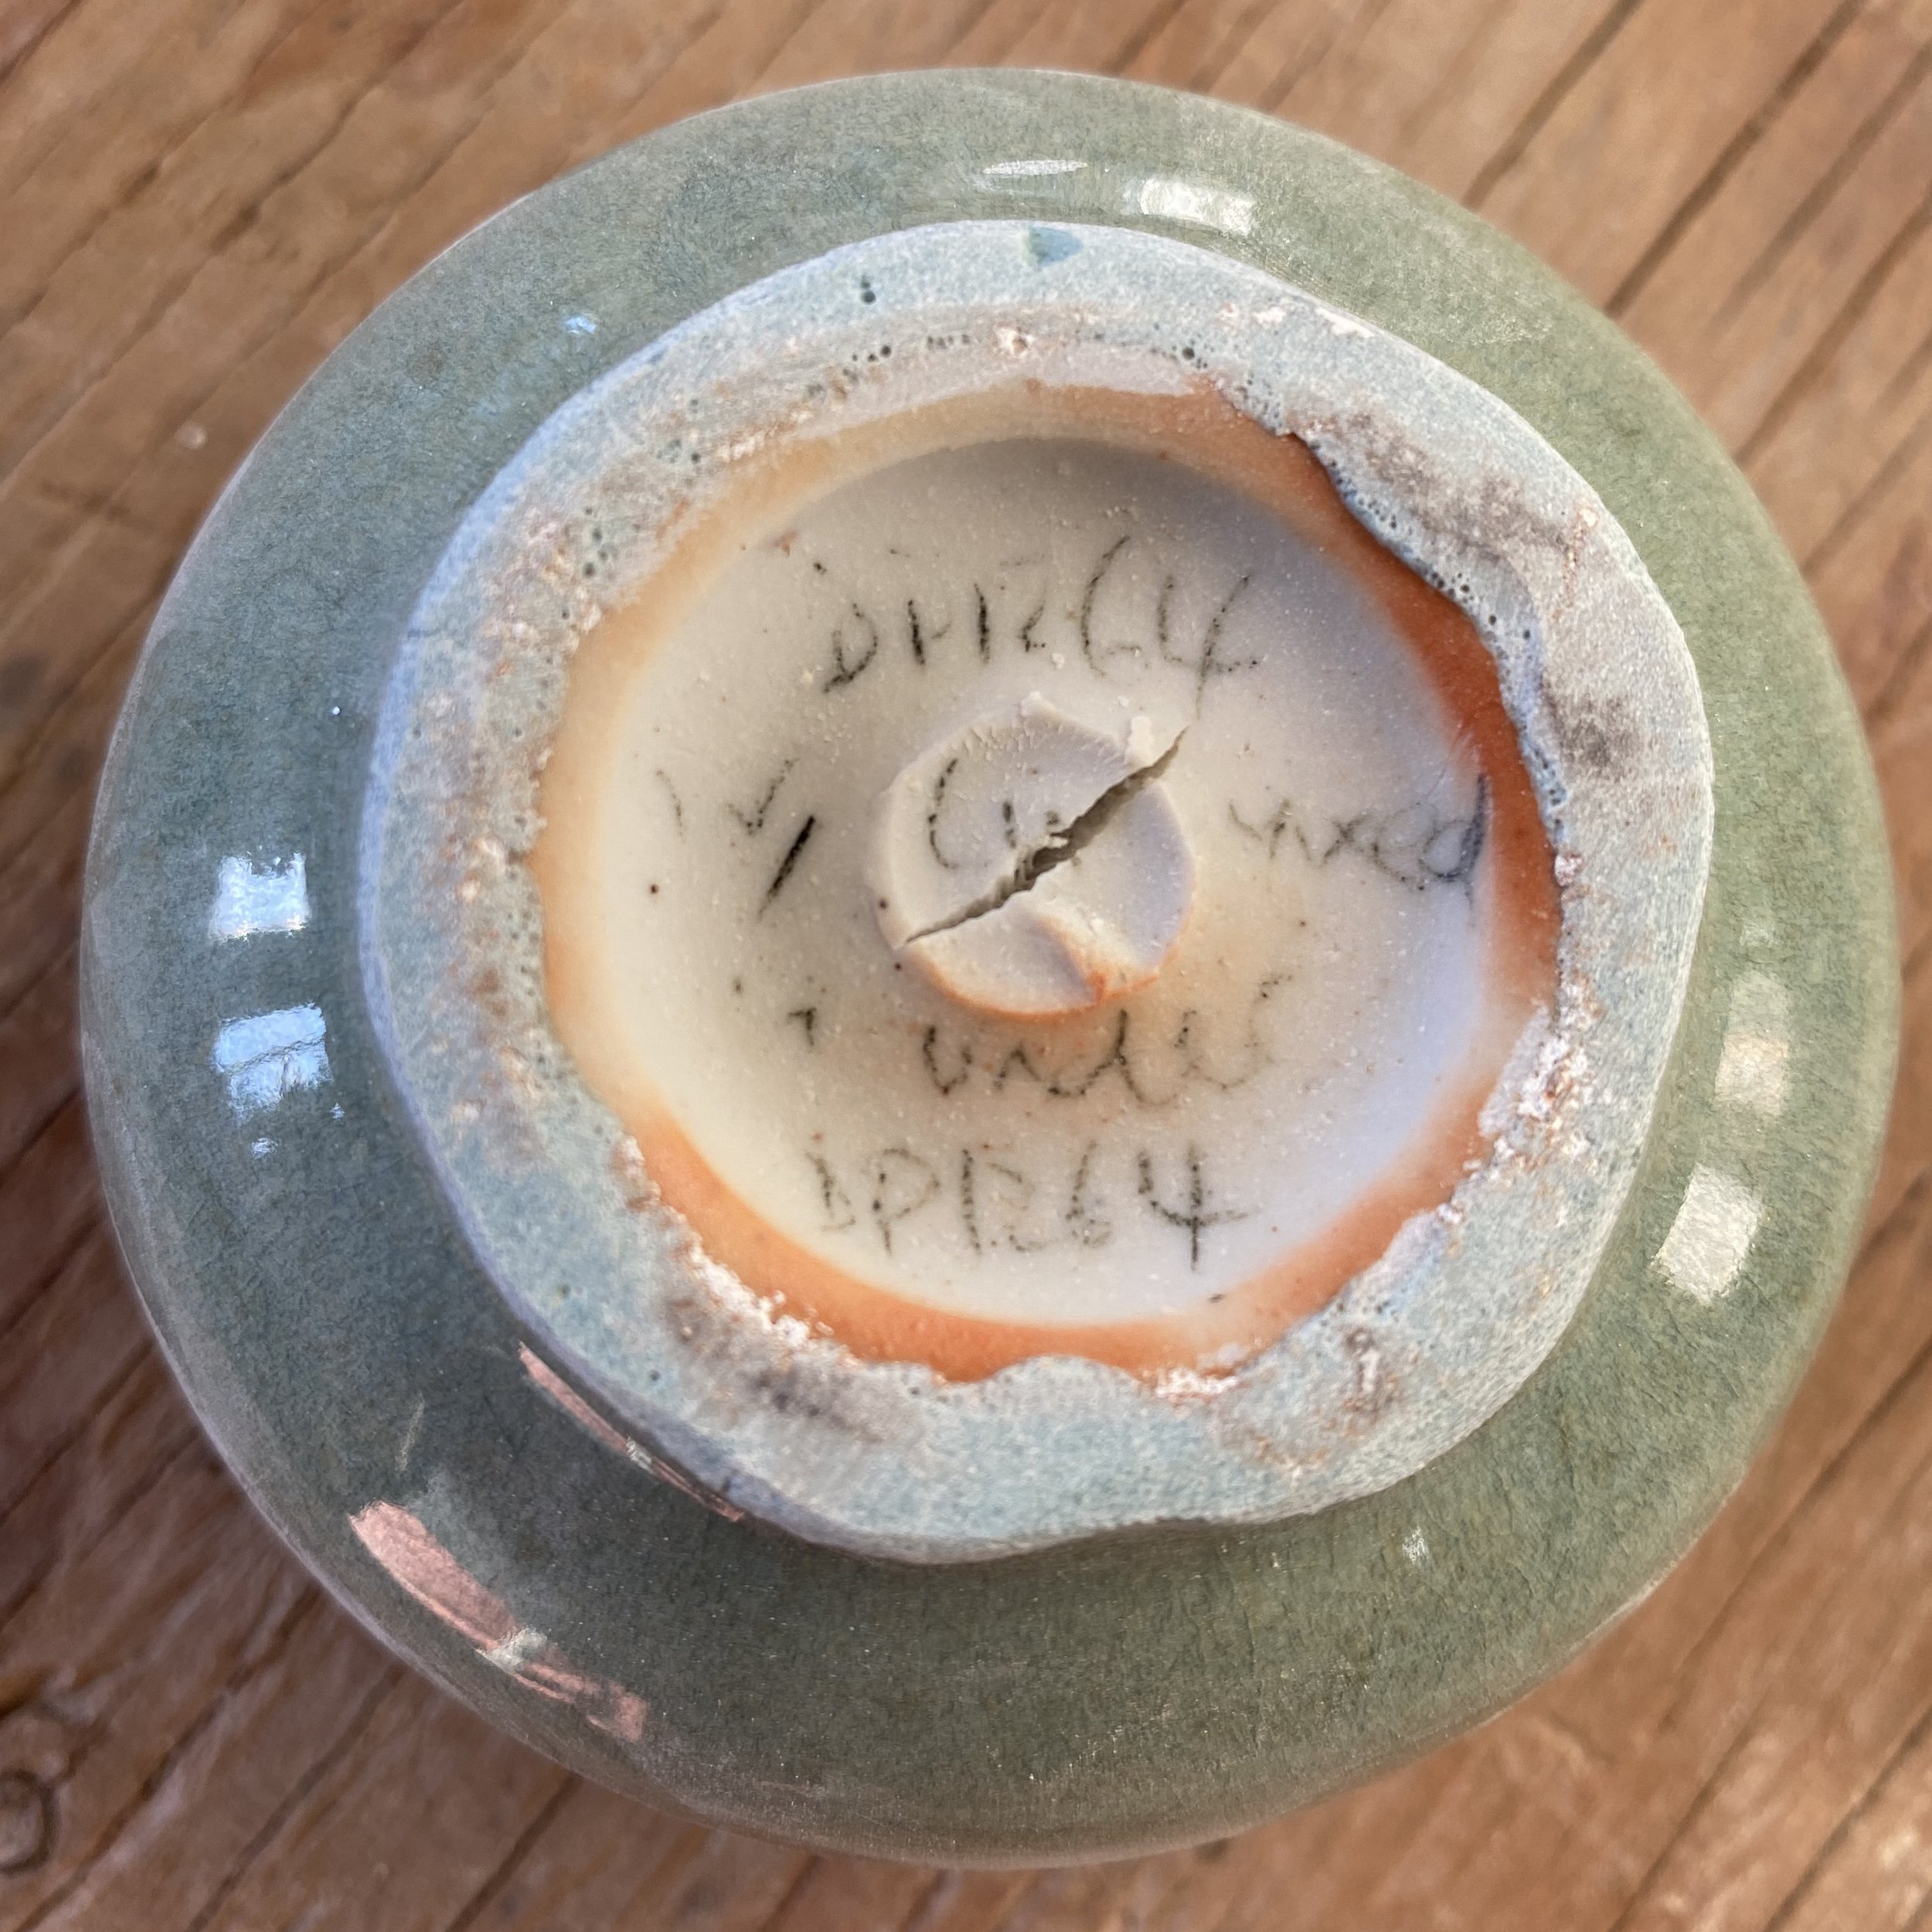
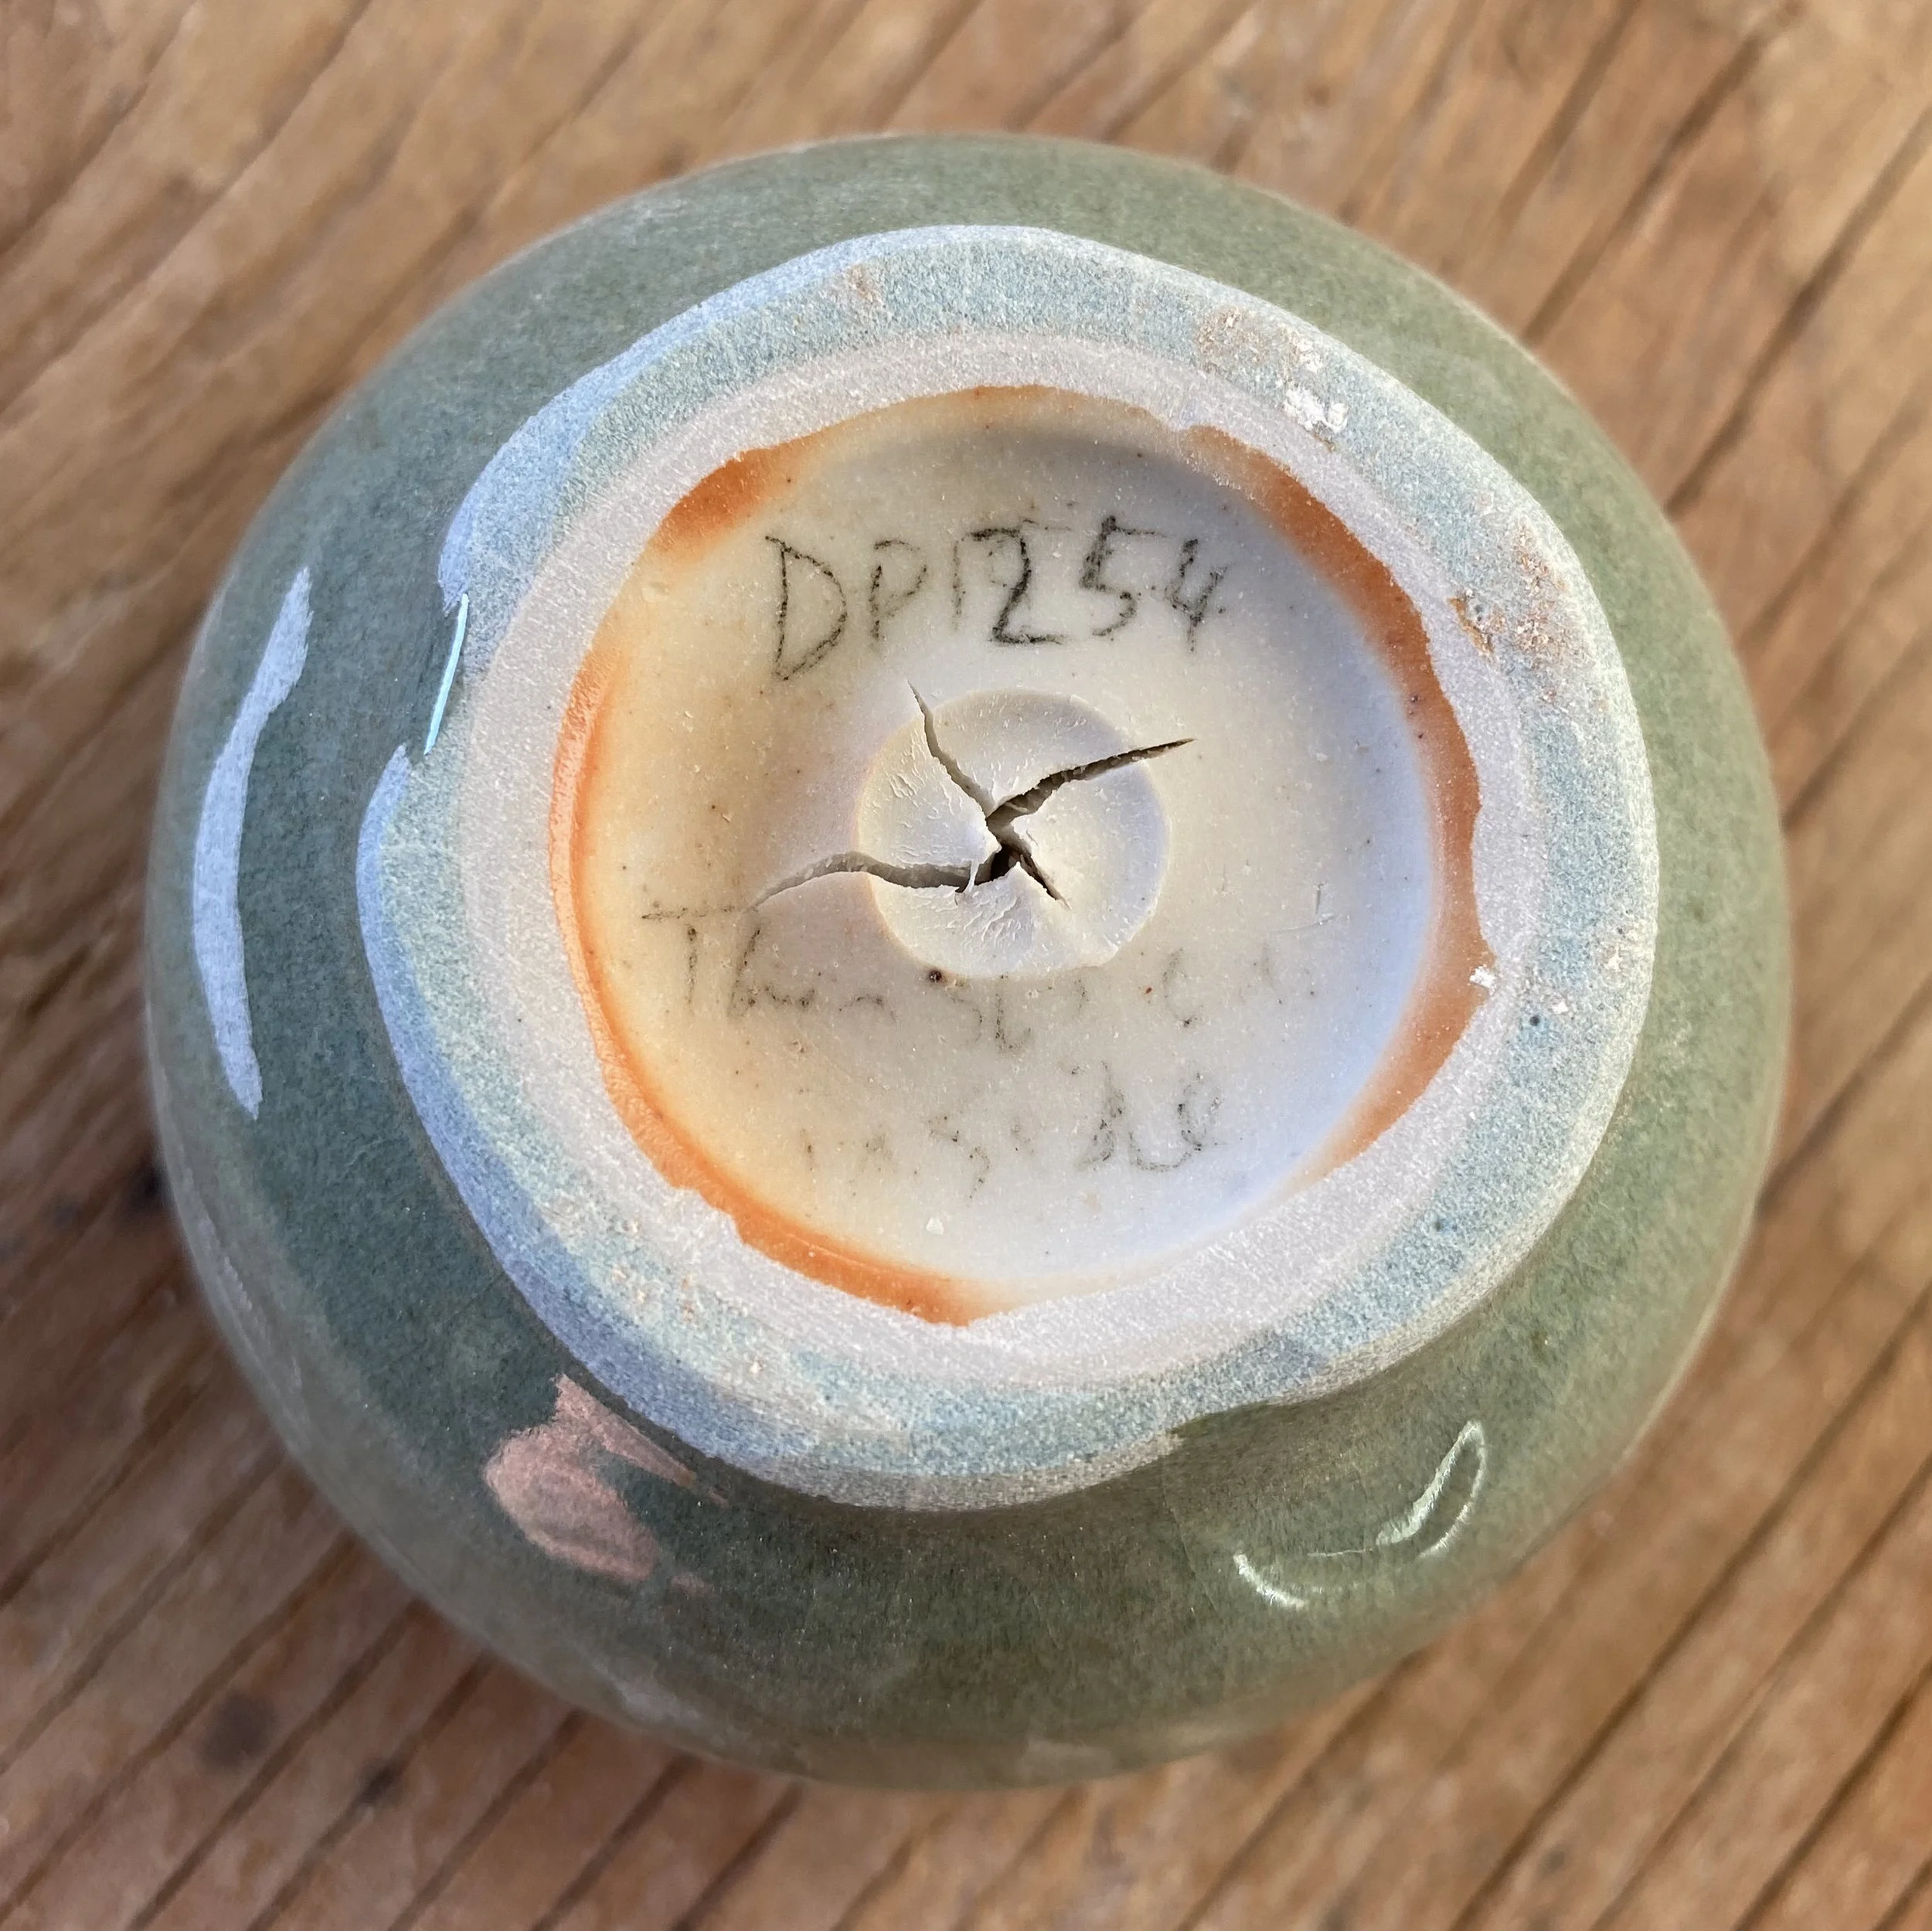
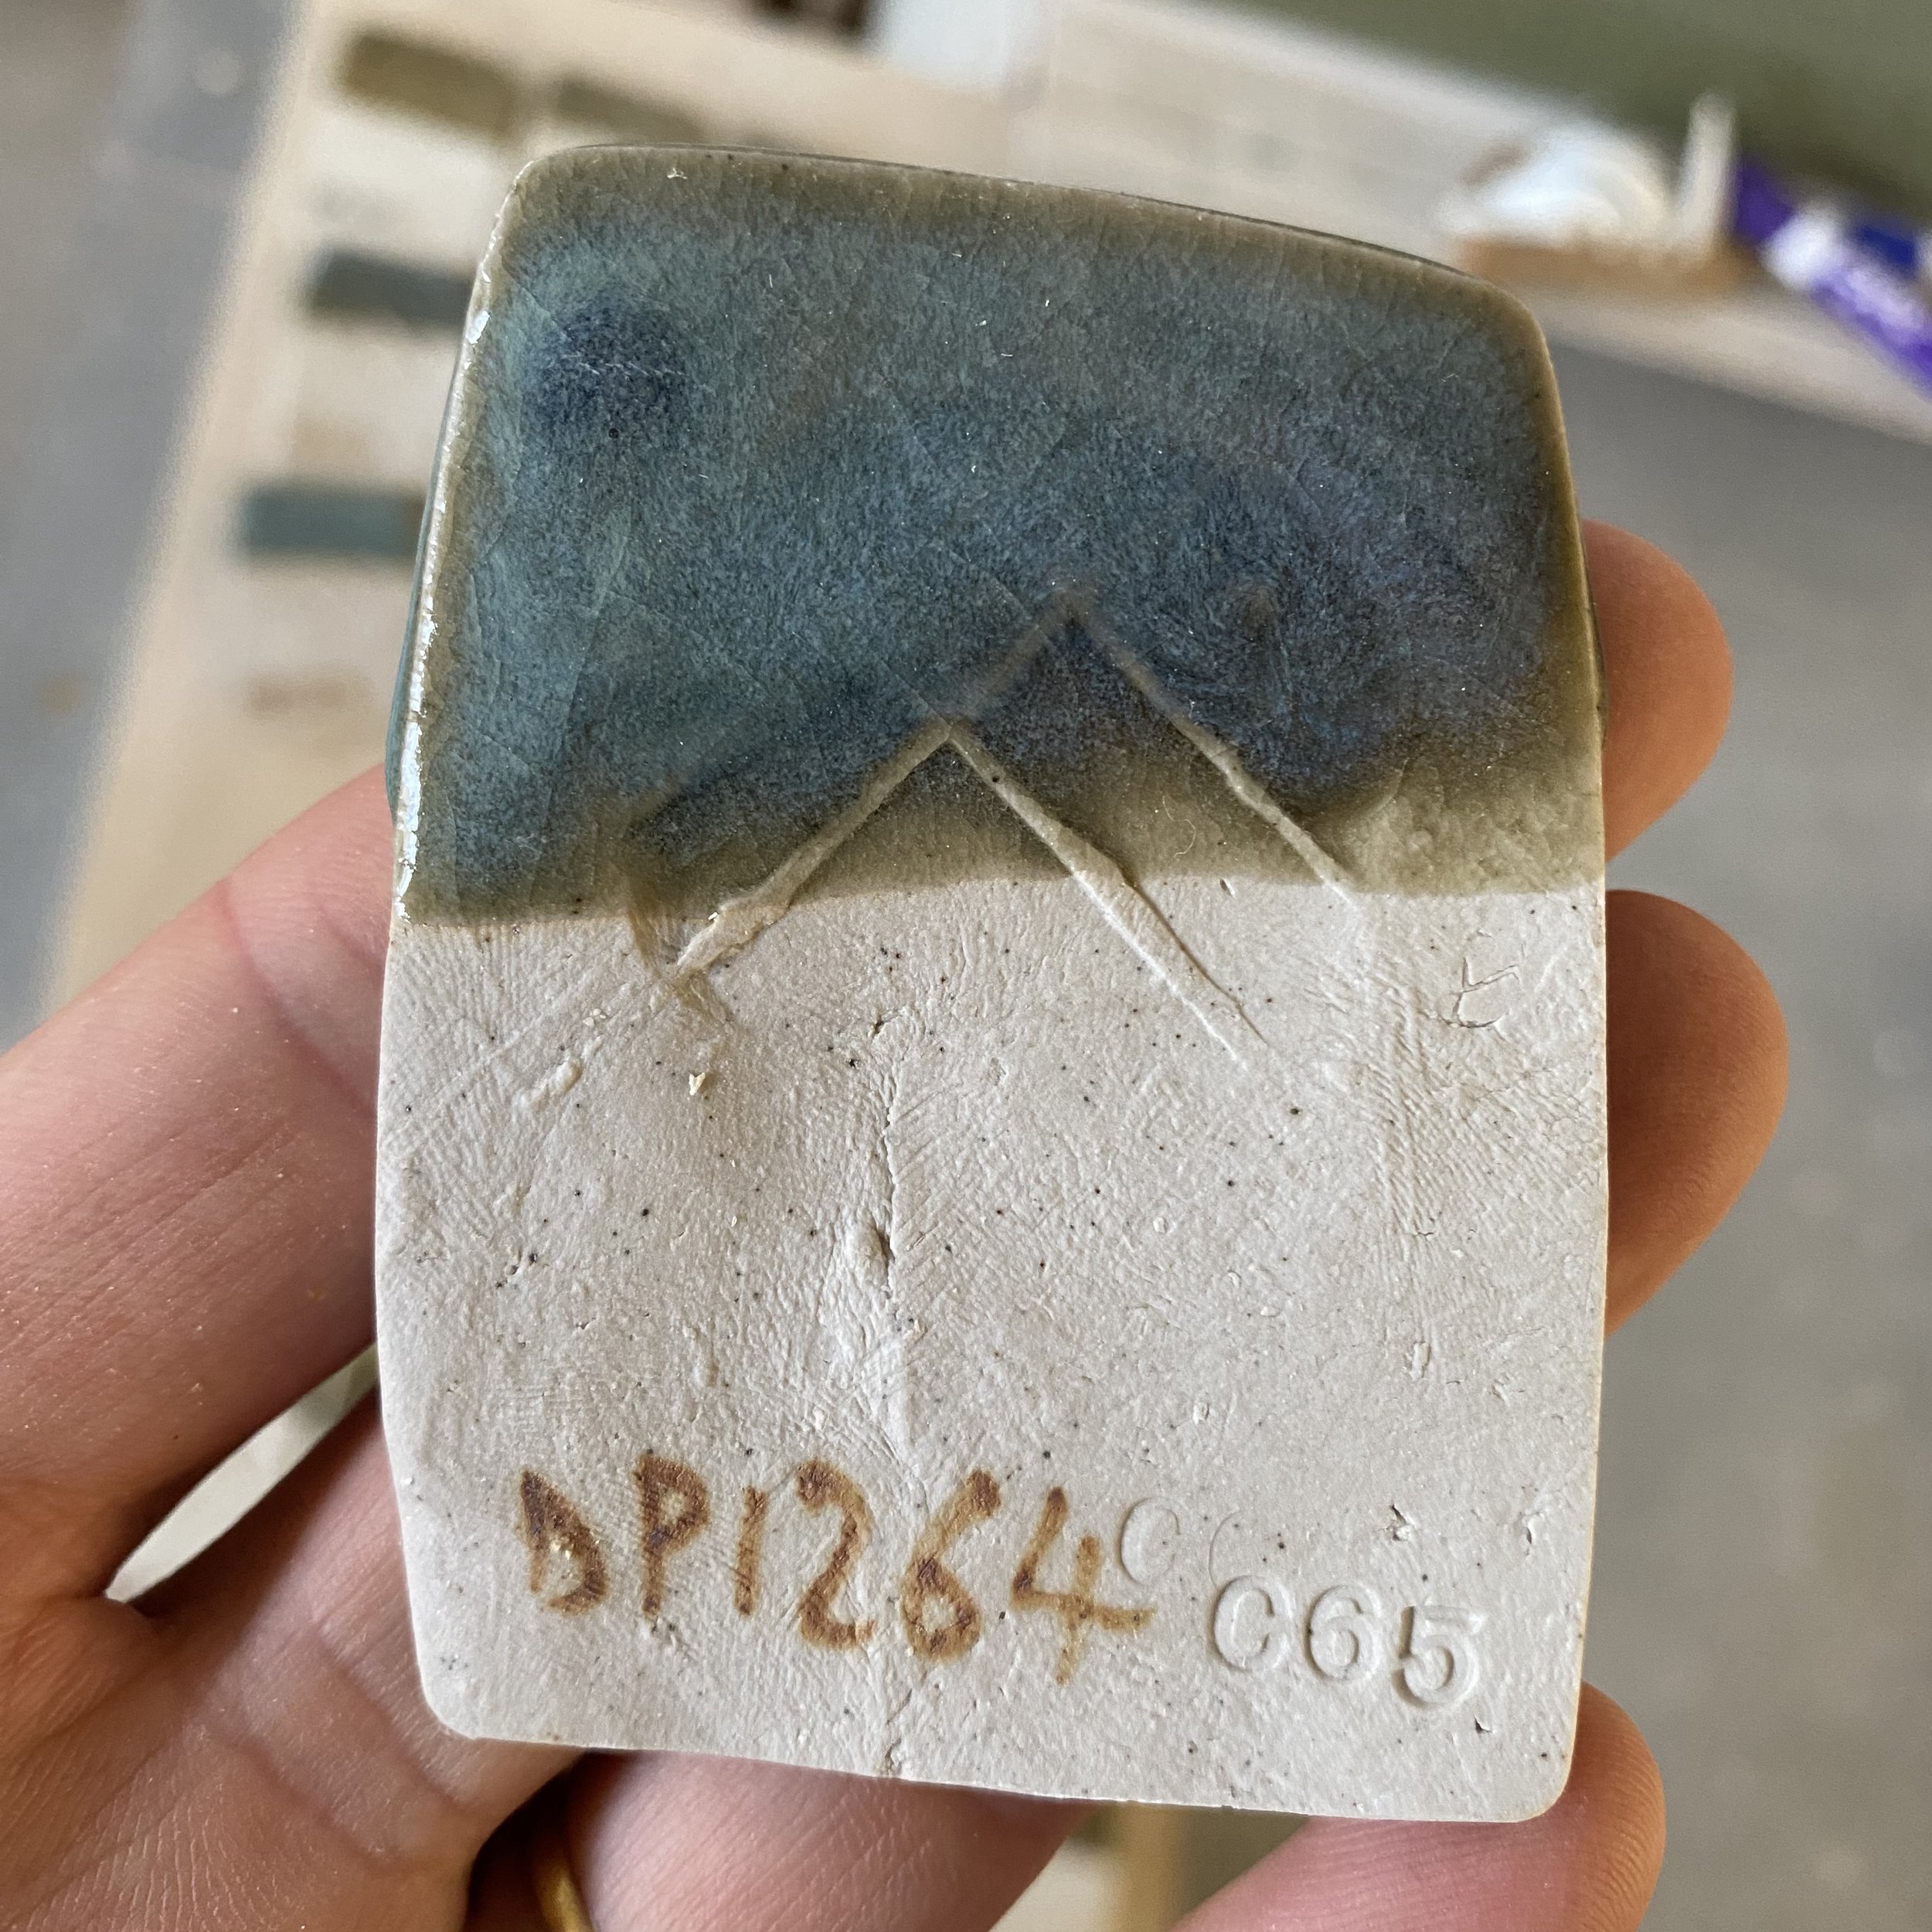
I have decided to mix a large batch of DP1264. The composition is as follows:
50% Devil’s a playground granite, 20% Wollastonite, 20% silica, 10% mahavir feldspar, + 2% bentonite, 2% bone ash, 1.5% red iron oxide and 1.5% Dolomite.
DP1264 seems to work. It is a solid glaze that doesn’t run, appears opalescent if reduced well and does not require a special cooling cycle. I think that the greenish cast is more to do with the firing than the composition, but I may be wrong. I could try to lower the silica and raise the mahavir potash feldspar a little as this seems to produce bluer results (but less reliably opalescent). Perhaps something like 18% of each silica and wollastonite with 14% mahavir might be a touch bluer. I shall try this!
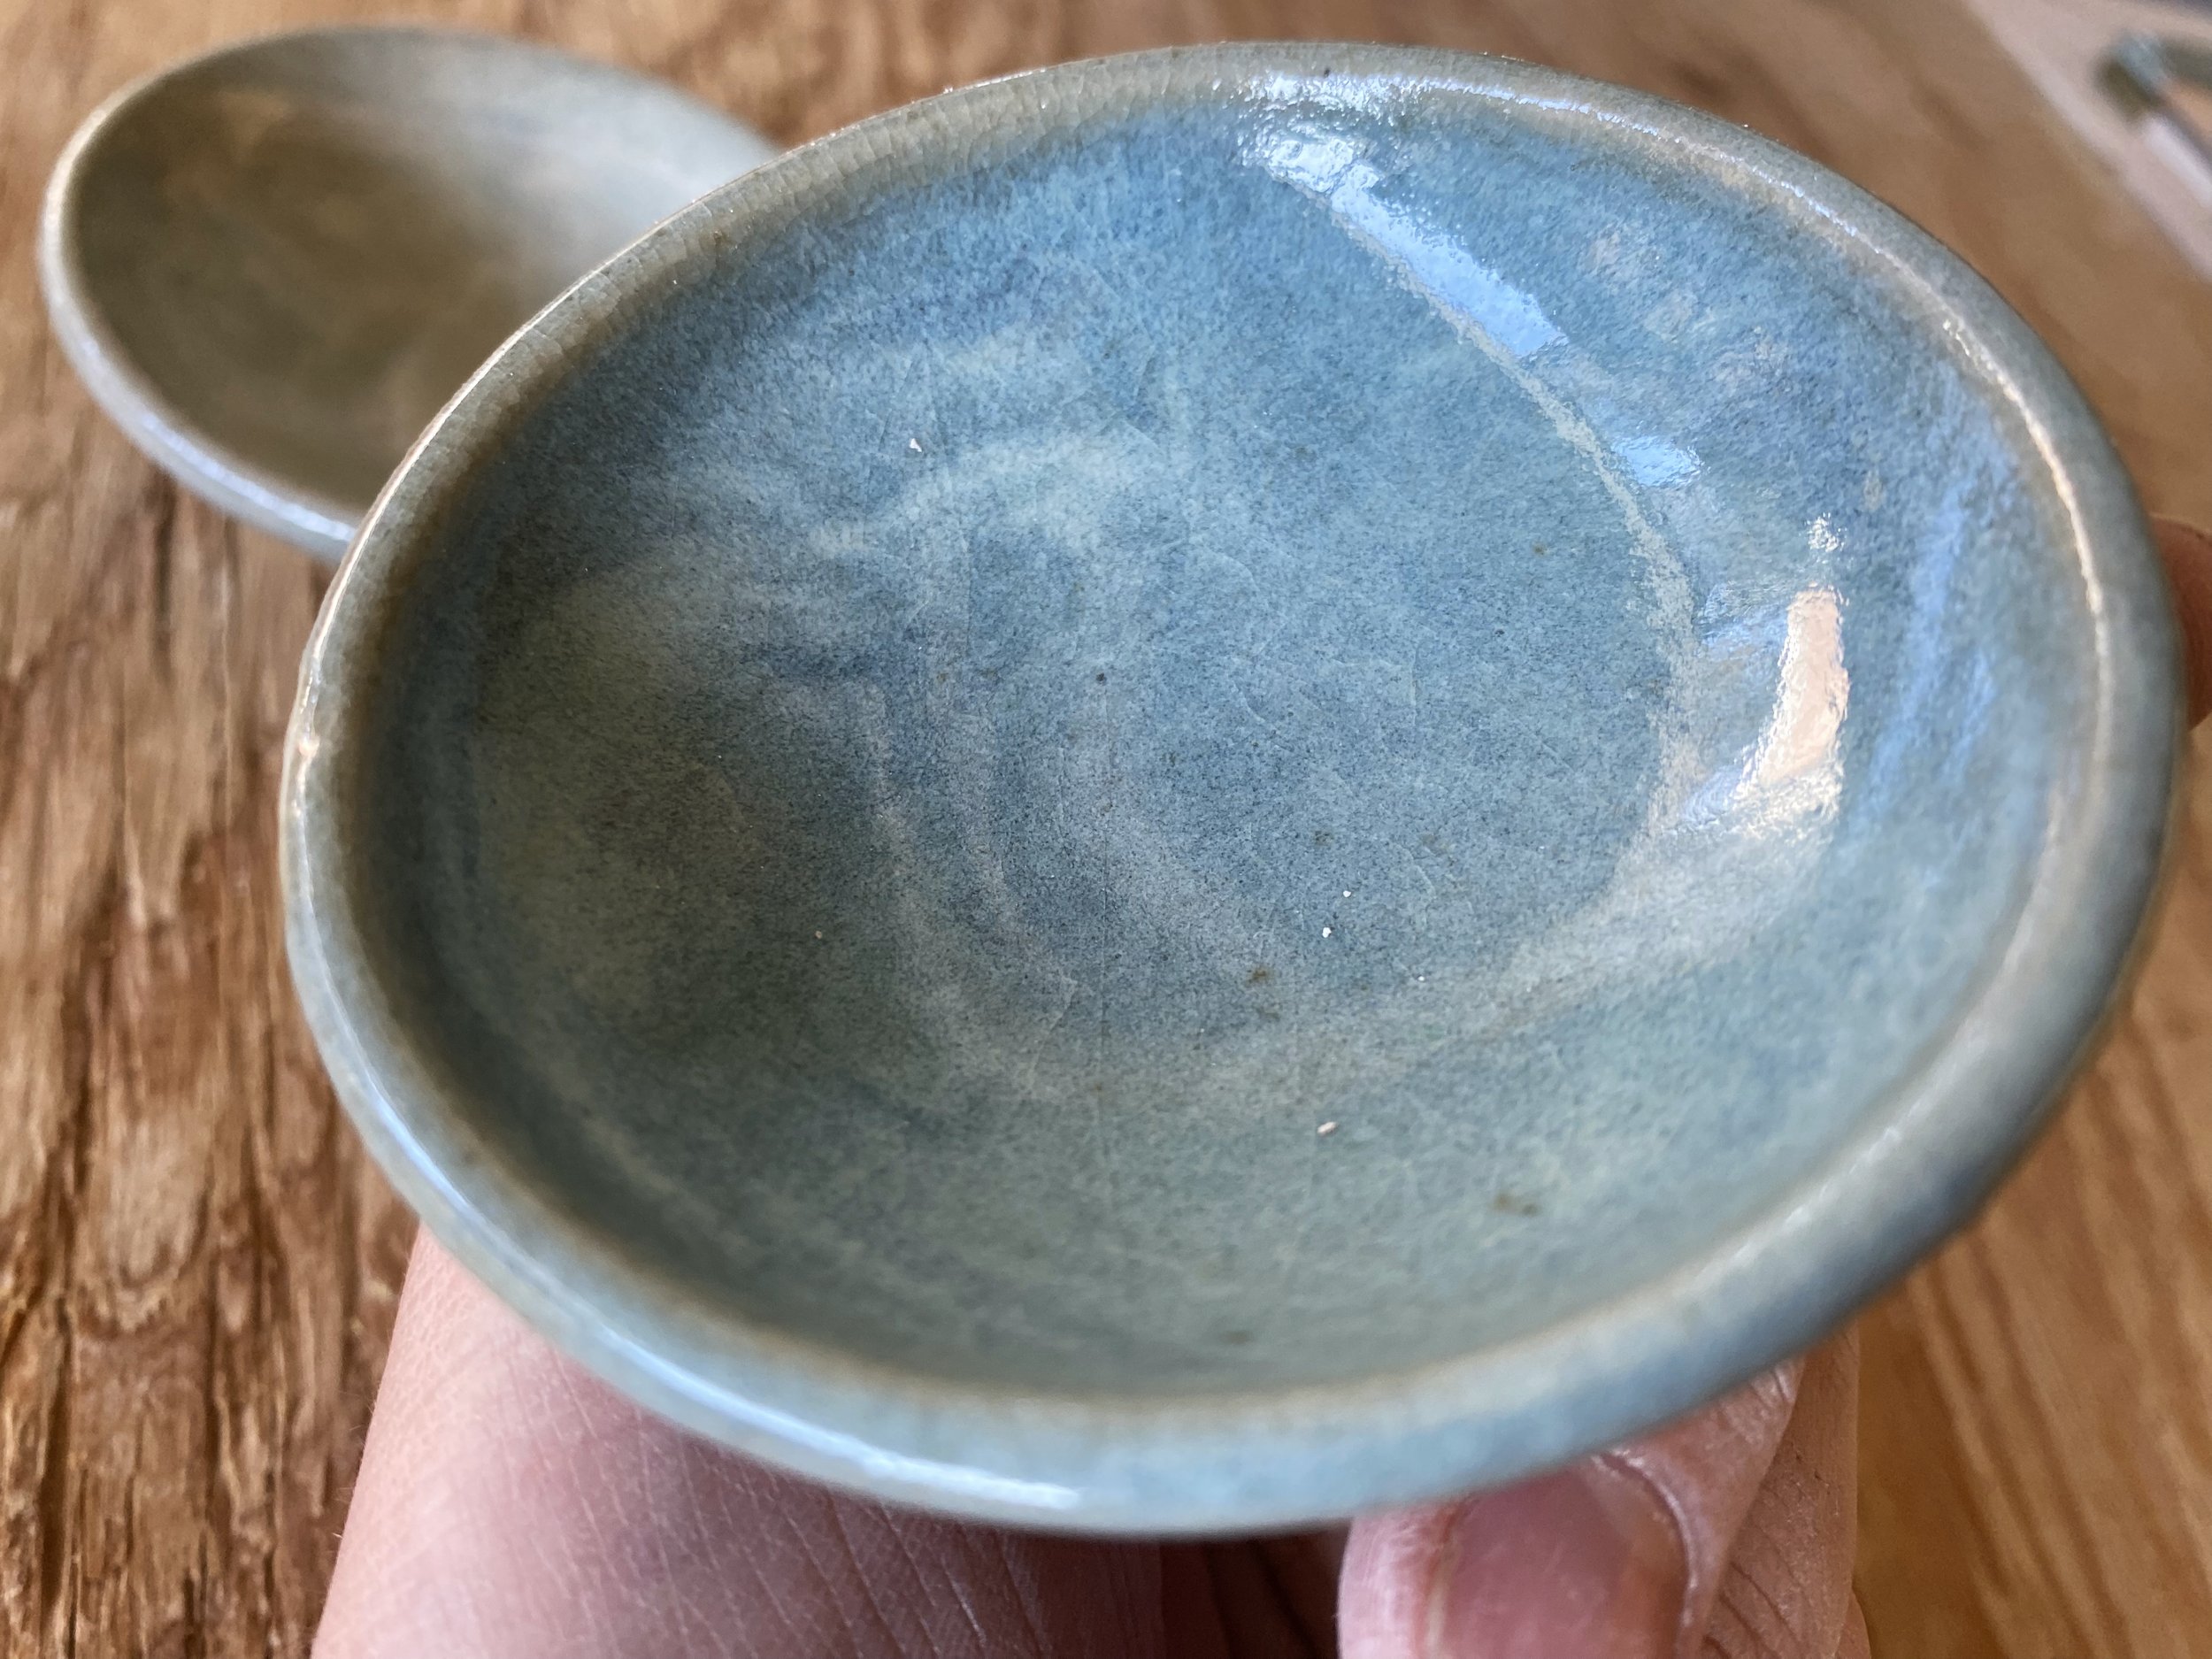
Here’s DP1264 on a bowl…

Other promising results:
Jun over tenmokus. DP1302 is DP1264 over DP …… and DP1303 is DP1264 over ……….


They both worked, but to my eye, the effect is nicer in DP1302. I will definitely be trying this on some teabowls.
Jun (Chün) glaze tests in the soda kiln
This is not necessarily the best set of tests because the results were more oxidised than I would have liked. I also held the kiln for 8 hours between 1830°F and 1750°F. This was a rather specific firing.
I wish I had a smaller soda kiln that I could have reduced hard and not done a cooling cycle to see the results with only the variable of adding soda. But I did not have the luxury of this and they were in a firing which was mostly about yellow glazes wares for my thesis show.
Anyway, aside from that long preamble, lets get to the results.
These results can be compared to the ones from gas reduction which are in the last 4 or 5 blog posts.
Here are my initial jun tests…


Similar to those in gas reduction but perhaps a littl emore drippy and a little jazzier. i think my long hold contributed to some of this crystal growth. I’d love to get these surfaces analysed and see what the composition of these crystals is.
Now on to my grid tests…


Here they are individually…


The second set has the most promising looking results but this may be deceptive. It got the least amount of soda (being on the bottom of the stack). Maybe this suggests that the chun blues do not like soda.
Here are the vertical tiles from grid 2 organised:

And now the ones from grid 3:


It is pretty difficult to make sweepinf statements about these results. So much depends on the atmosphere and how much soda each tile got. Considering this firing was pretty oxidised these results are actually pretty encouraging. I think I could get a working jun glaze in a soda atmosphere.
There were some nice surfaces out of the individual test tiles. Here are some that stood out…


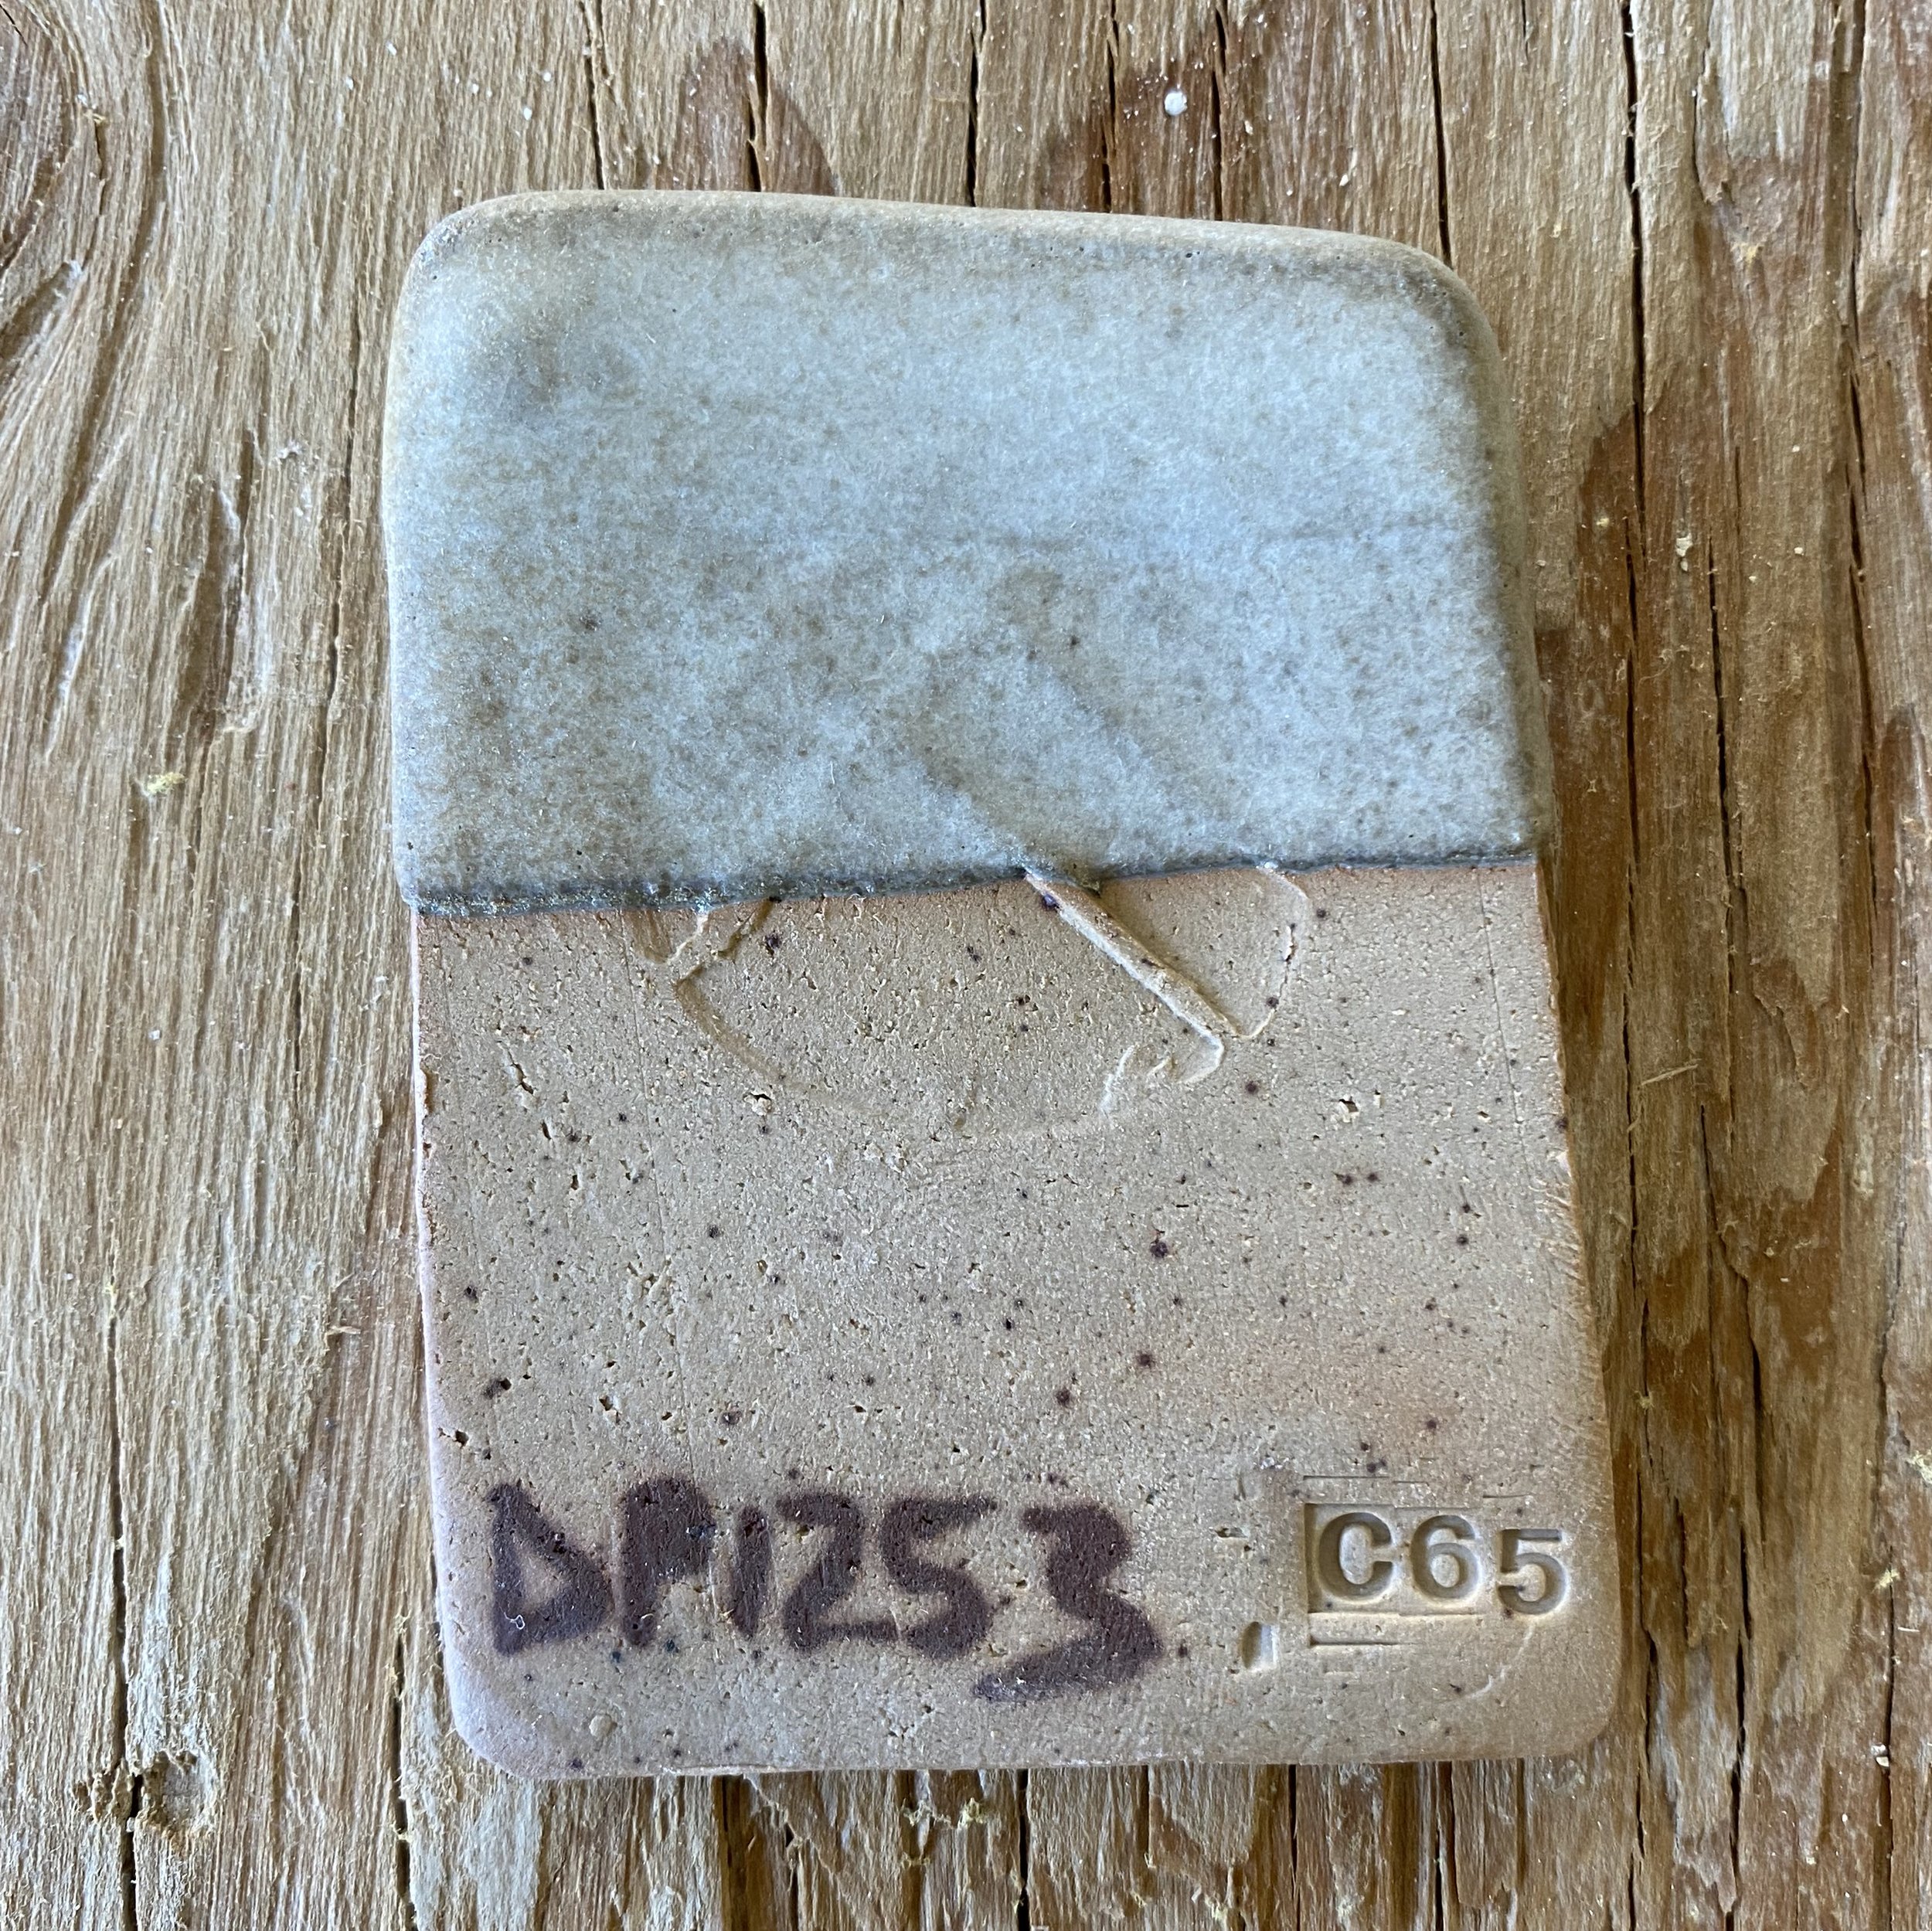
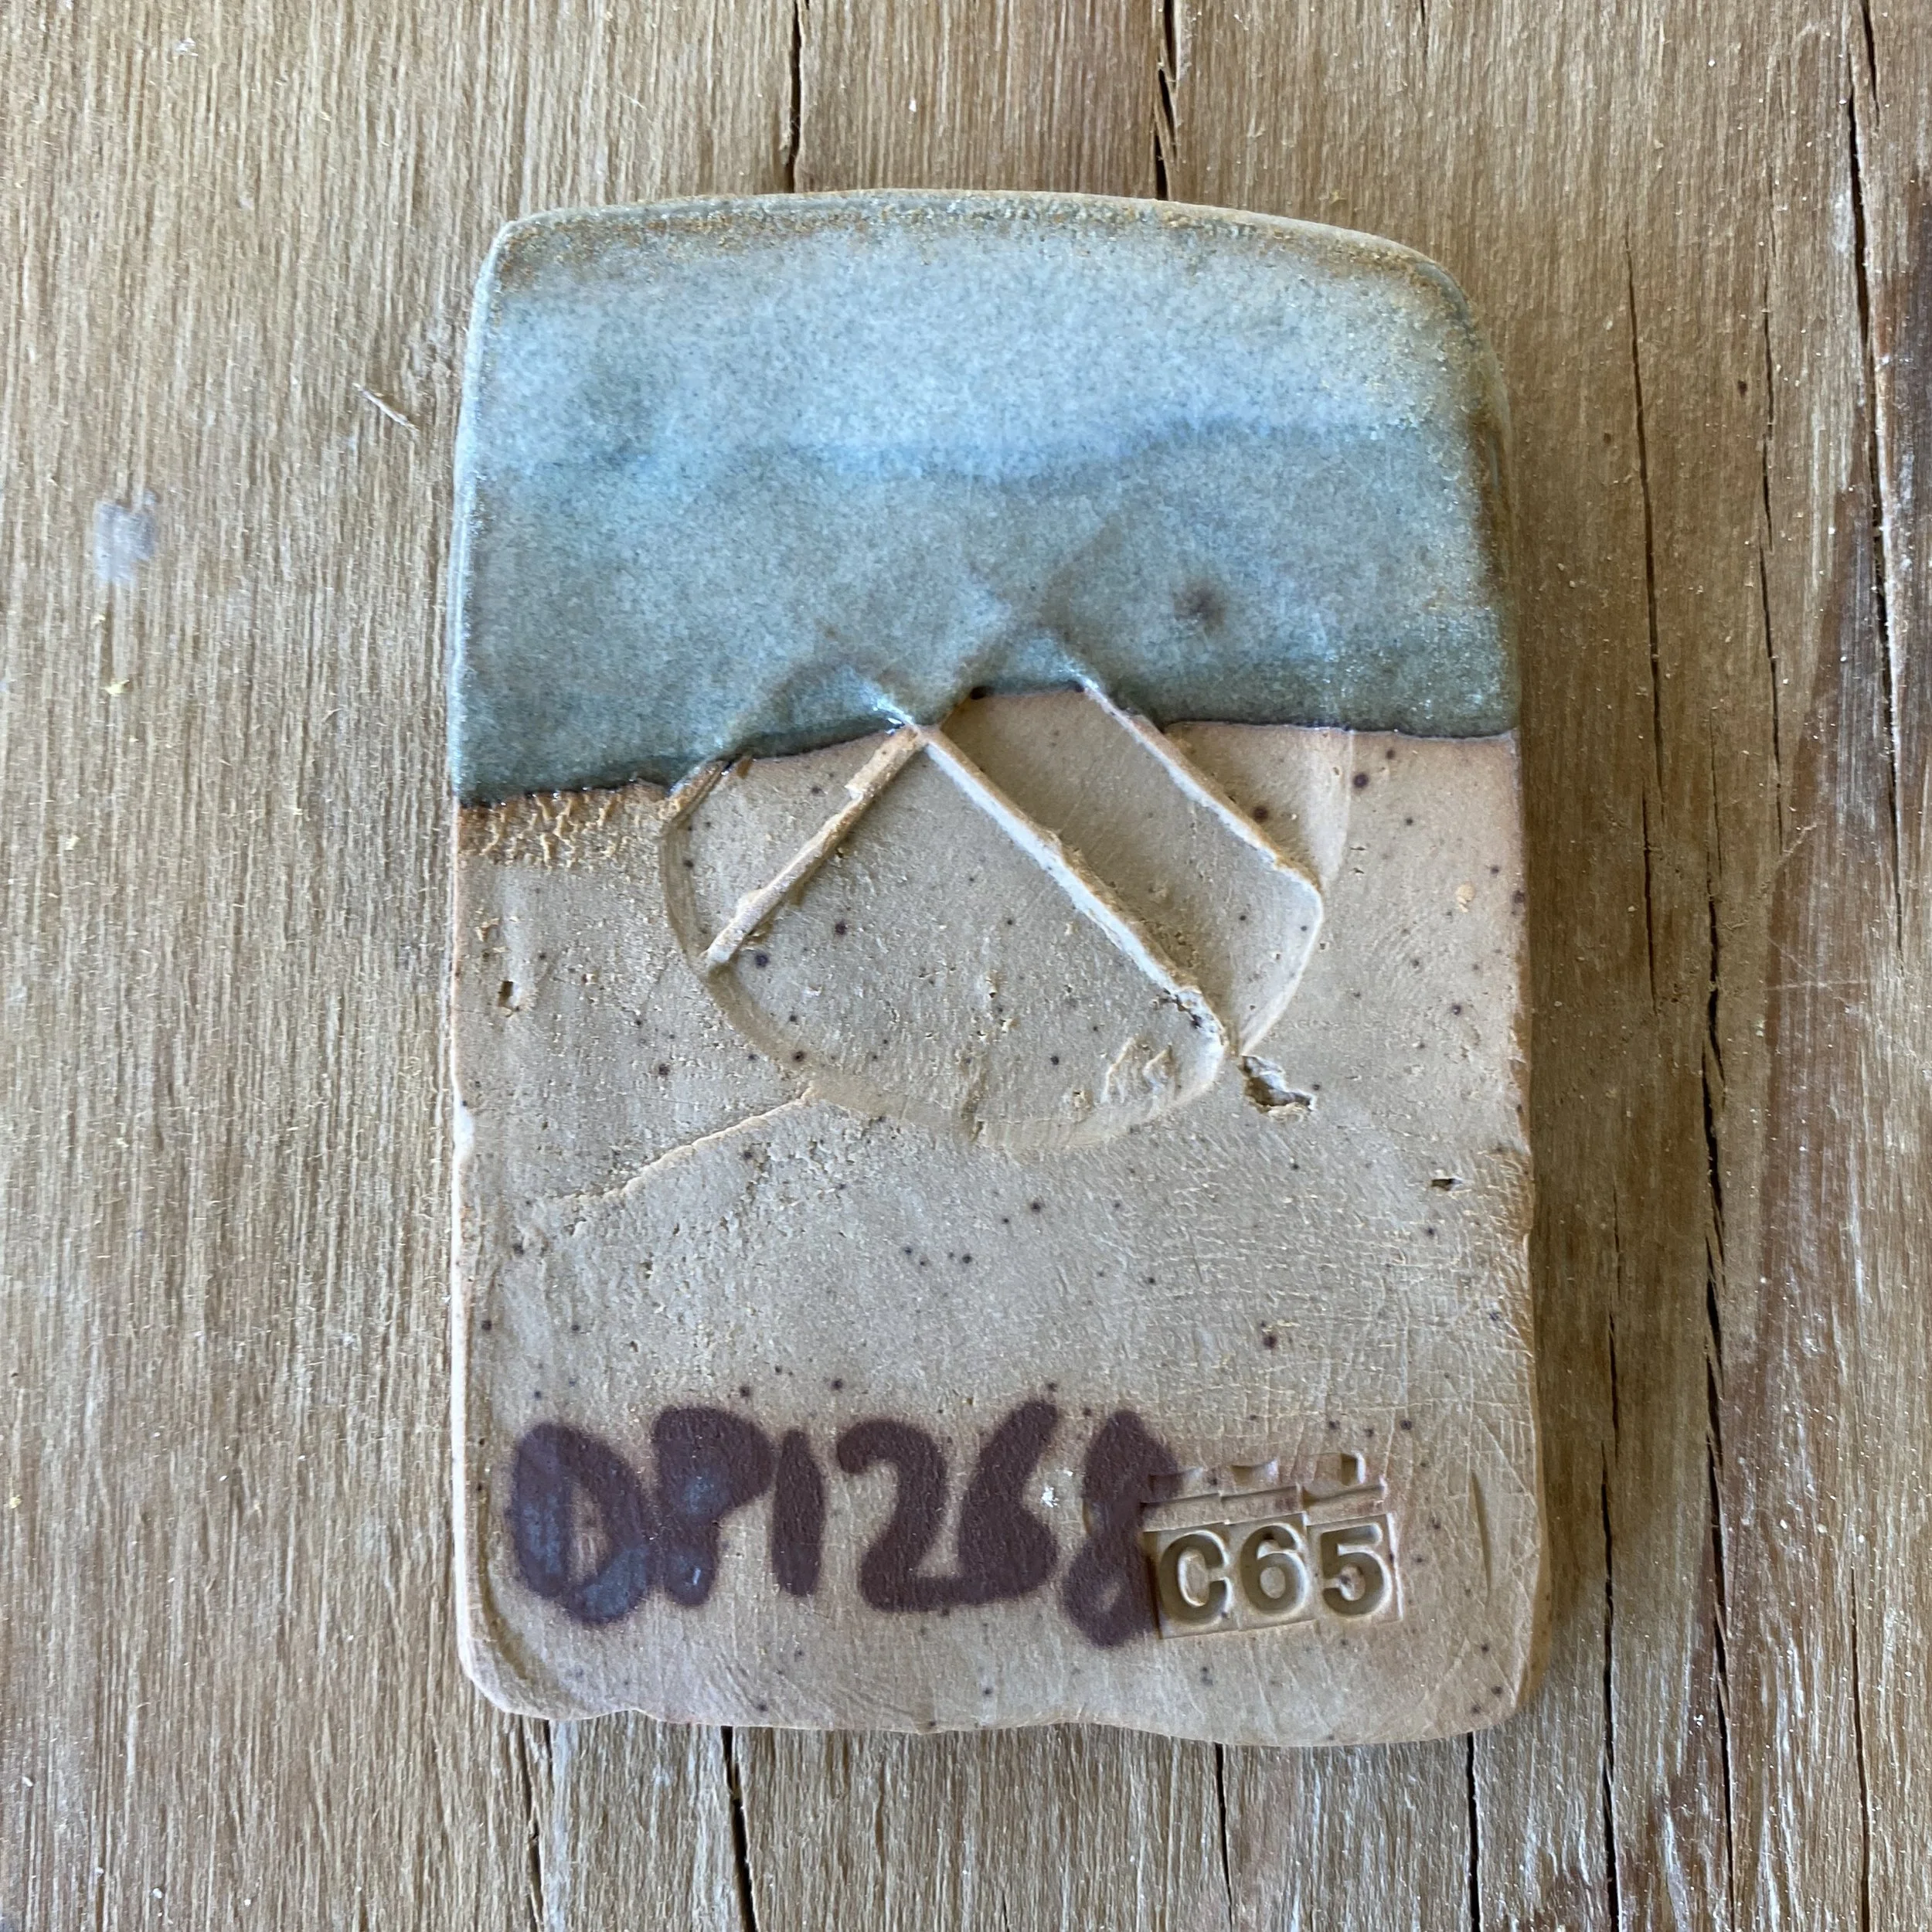
And then here is a small test bowl glazed with DP1266…


As you might be able to tell, these glazes felt really nice. This may have been due to the intentional slow cooling though. It would be worth redoing this test in a regular reduction soda firing with no intentional cool.
I am encouraged to keep putting jun formulations in the soda kiln!
Jun (Chün) glaze tests: Reduction cooling (down firing)
My results from Grid III (see my previous post) demonstrated the importance of reduction to achieving opalescent blue Jun effects.
So in this next test, I decided to fire in a more reduced atmosphere on the way up, and also during an intentionally slower cooling or down firing. On the grid test tiles I indicate this firing with “SLOW COOL.”
I did this in a medium-sized gas kiln at USU (mixed in with various tenmoku tests also)…
Here is the kiln log:.
This firing style had a significant effect on the glazes. Up until now, I have been firing in a very standard way: going up to cone 10 in medium reduction, with an hour of body reduction when cone 011 goes down. I have been letting the kiln cool naturally from the time when cone 10 touches down… in these small test gas kilns that means the glazes cool off very rapidly.
In this firing, I reduced a lot more on the way up and also on the way down. You can see this from the clay color on these cone packs (and the tone of all the test tiles to follow). The darker cone packs were from this firing and the lighter one was in a previous firing. These cone packs were made of the same clay, so they offer a good indication of the different atmospheres.

I slowed the cooling down (in reduction) for 8 hours, with a 4 hour hold around 1850*F. I was expecting the extra reduction on the way up and during the cooling to make the blues richer and darker, but this was not the case. In fact, the opposite happened. It did make the opalescent Jun effect much more prominent, however.
Let’s take a look at the tests. I included test tiles from my grids 1, 2, 3 and my initial 12 tests in this firing, so there is a lot to lay out and compare.
First let’s look at my first grid test…
You can see a marked difference in these tiles. They were made at the same time, with the same materials and application, just fired differently.
Here are the corner tiles, too. On the left, we have them from their gas reduction firing to cone 10 and on the right are the same tests but in this slow-cooled kiln firing.


Here are the backs of these same tiles…


What do we notice? The second firing with more reduction brought out blues from the glazes rather than greens. There was also more Jun opalescence present. You can check out the exact recipes of these glaze in this previous blog post.
Now let’s look at the second grid test…
This is actually really interesting, I think. The more successful glazes in the initial cone 10 gas firing (on the left) were in the center and the row just to the left of the center. This was confirmed by the vertically fired test tiles. See this previous blog post for a closer look.
In this firing though, the more successful glazes were in the center and the row to the right of center. The ones to the left of center were too dry and lacked that blue opalescent color. The slow cooling in reduction had the effect of creating the Jun opalescence in glazes with less silica content.
Here are the vertical test tiles next to each other. Front side…

Back side…
There is a dramatic shift here. I think you would be able to see it easier if I had mixed the corner glazes a bit thicker. Lesson learned! But it is clear to me that in the first regular gas firing with no reduction, the central line down the tile had the most promising Jun glazes. In the slow cooled reduction firing, the line of glazes to the right of center were most promising.
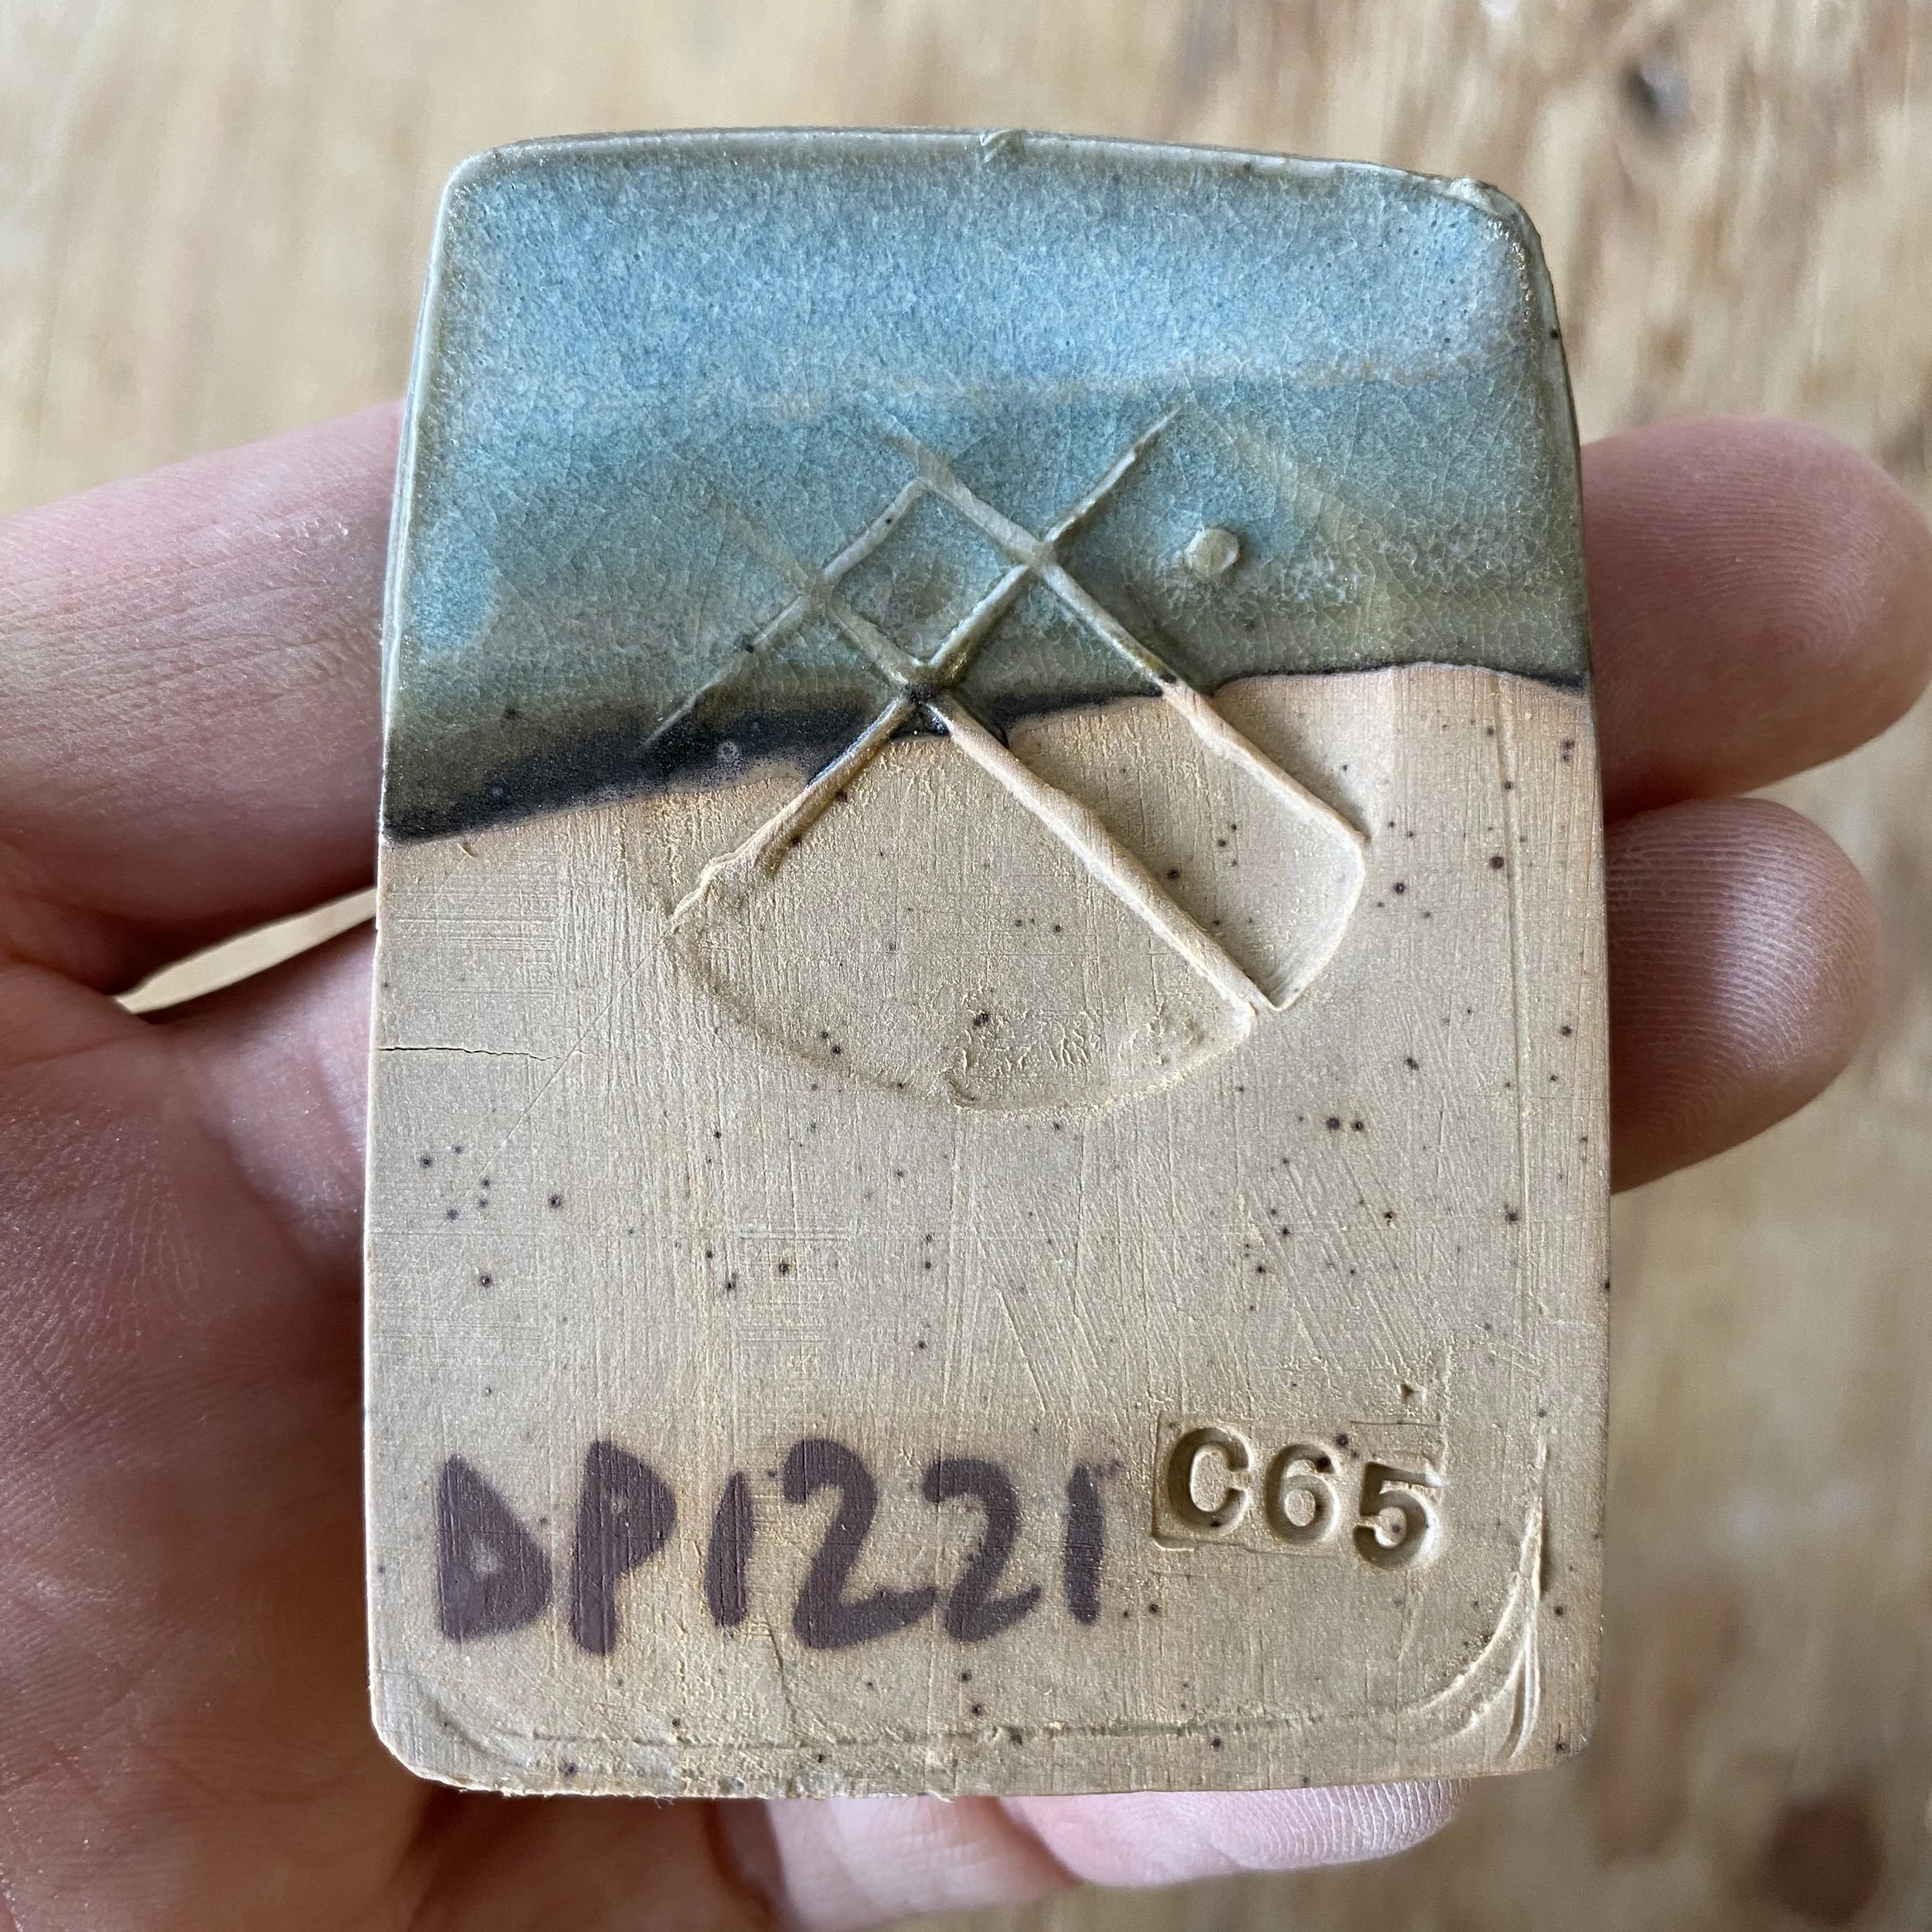
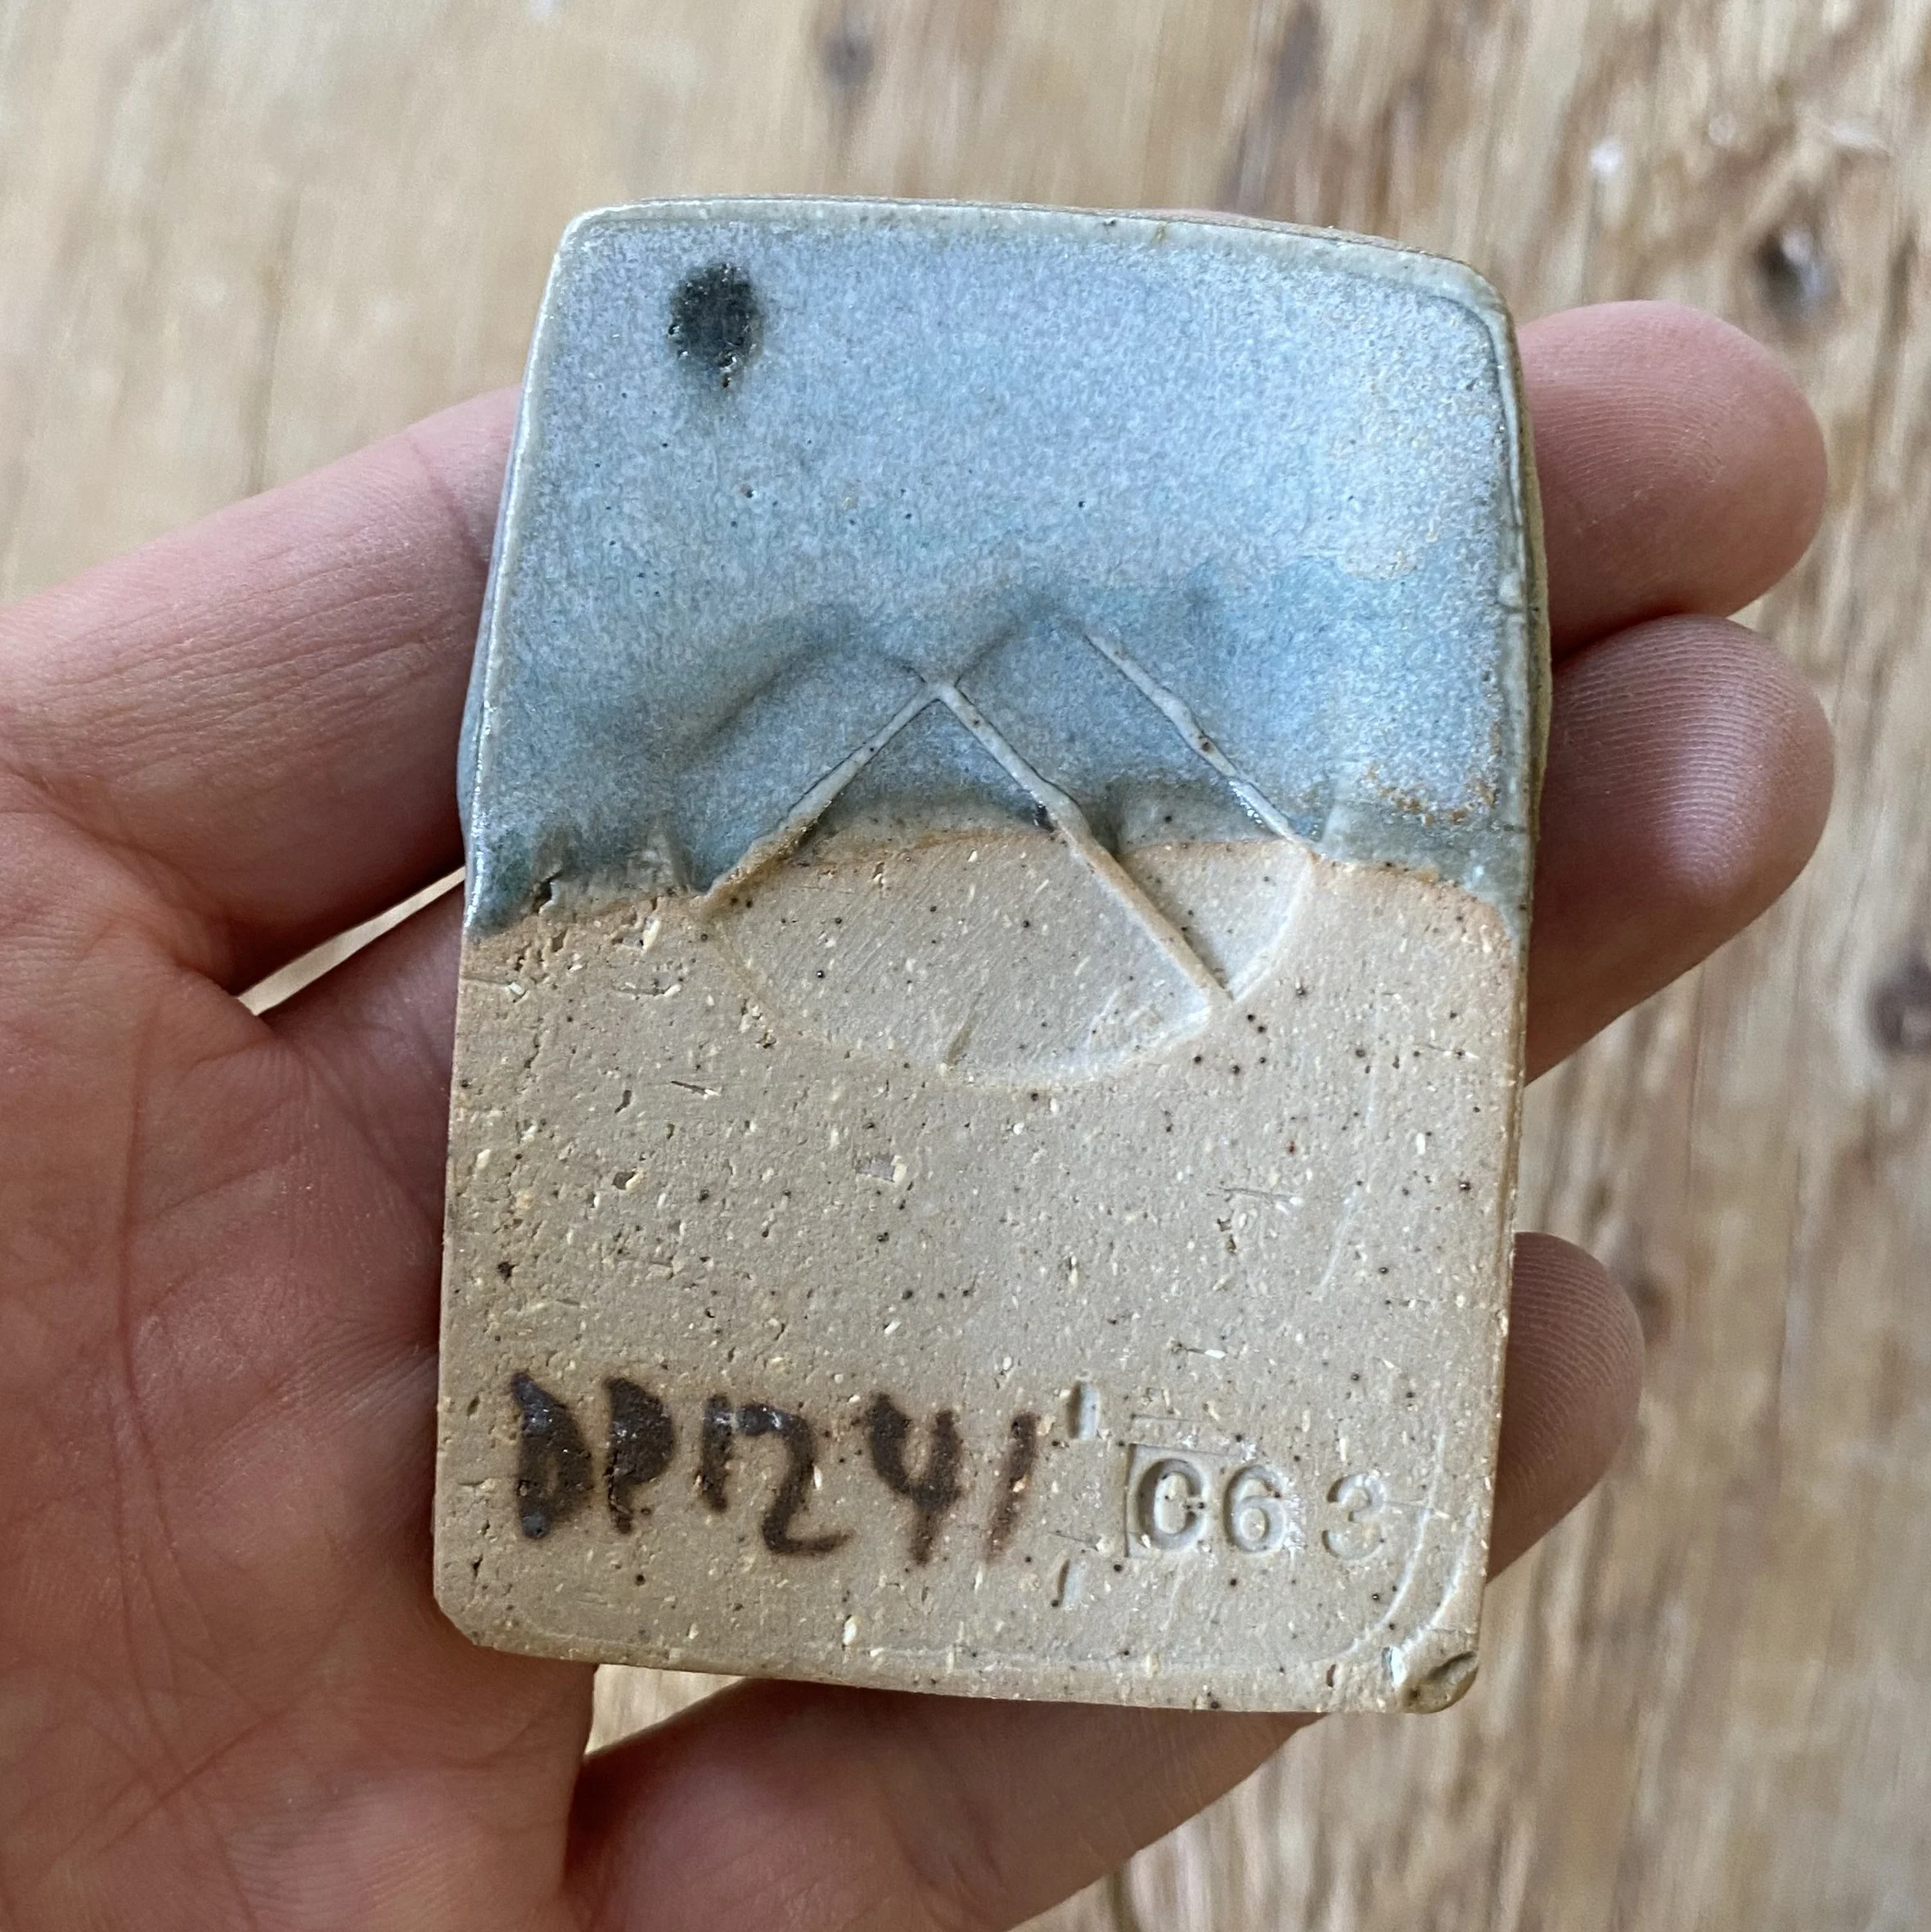
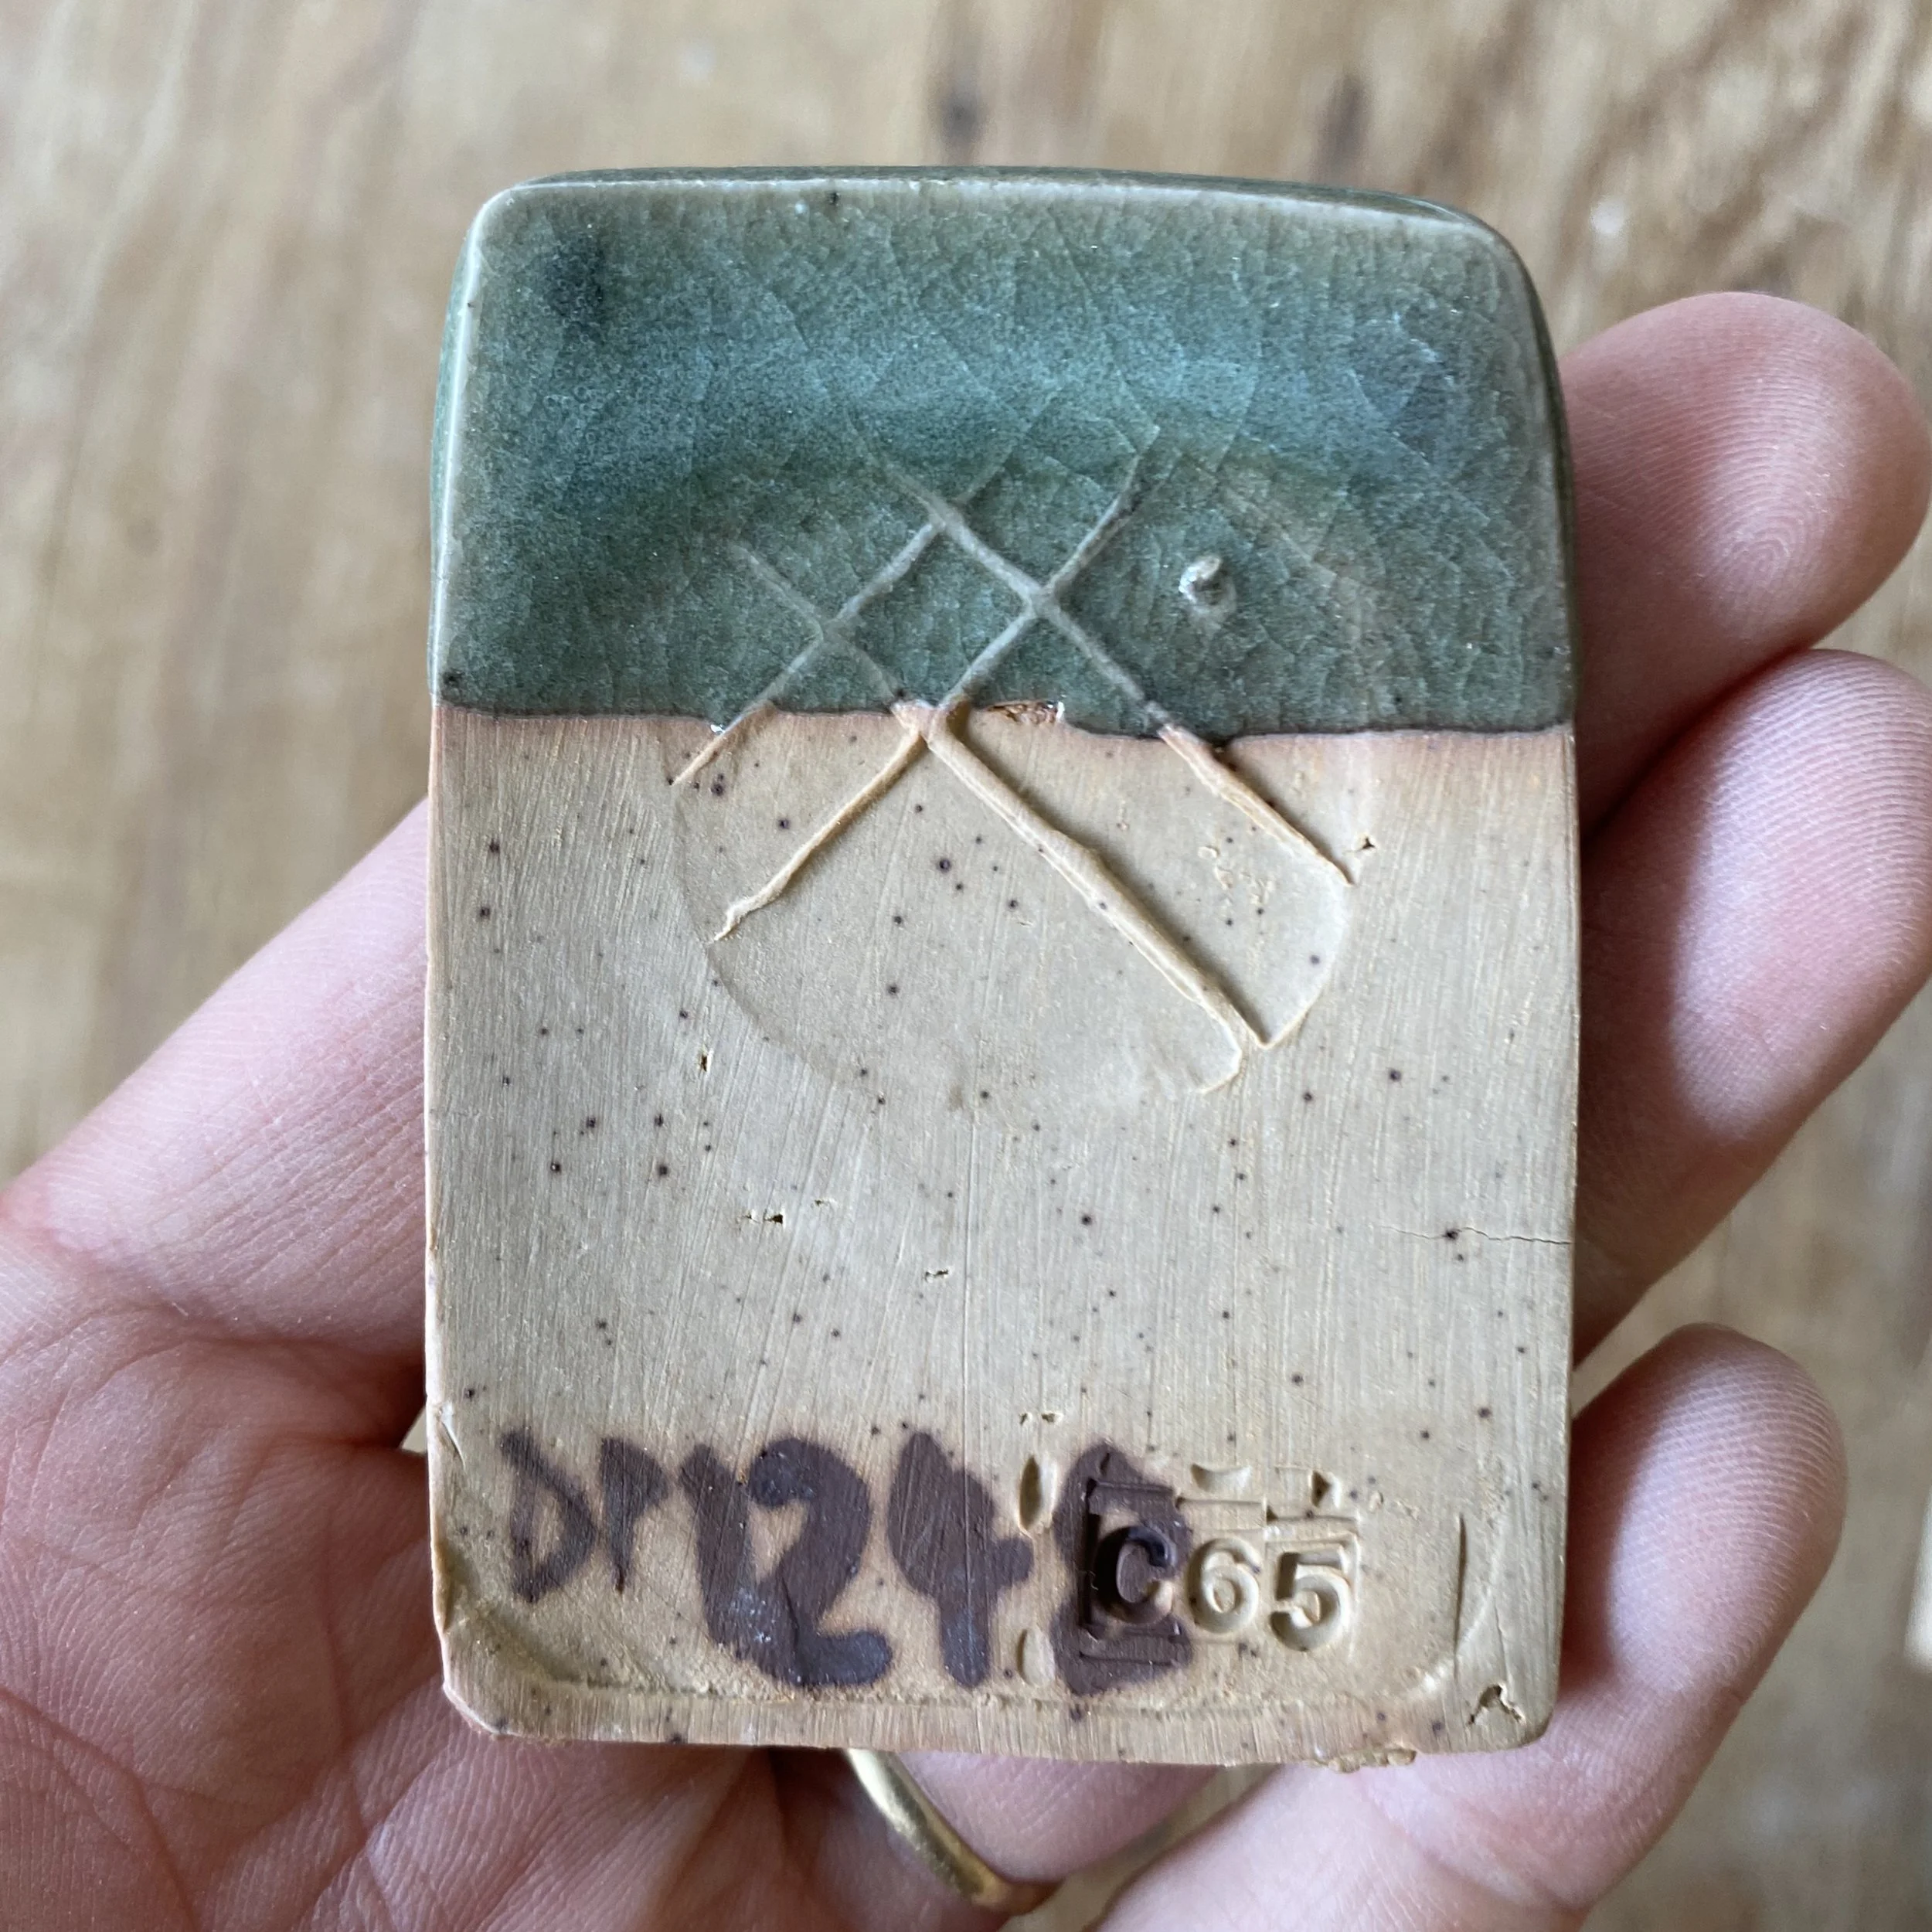
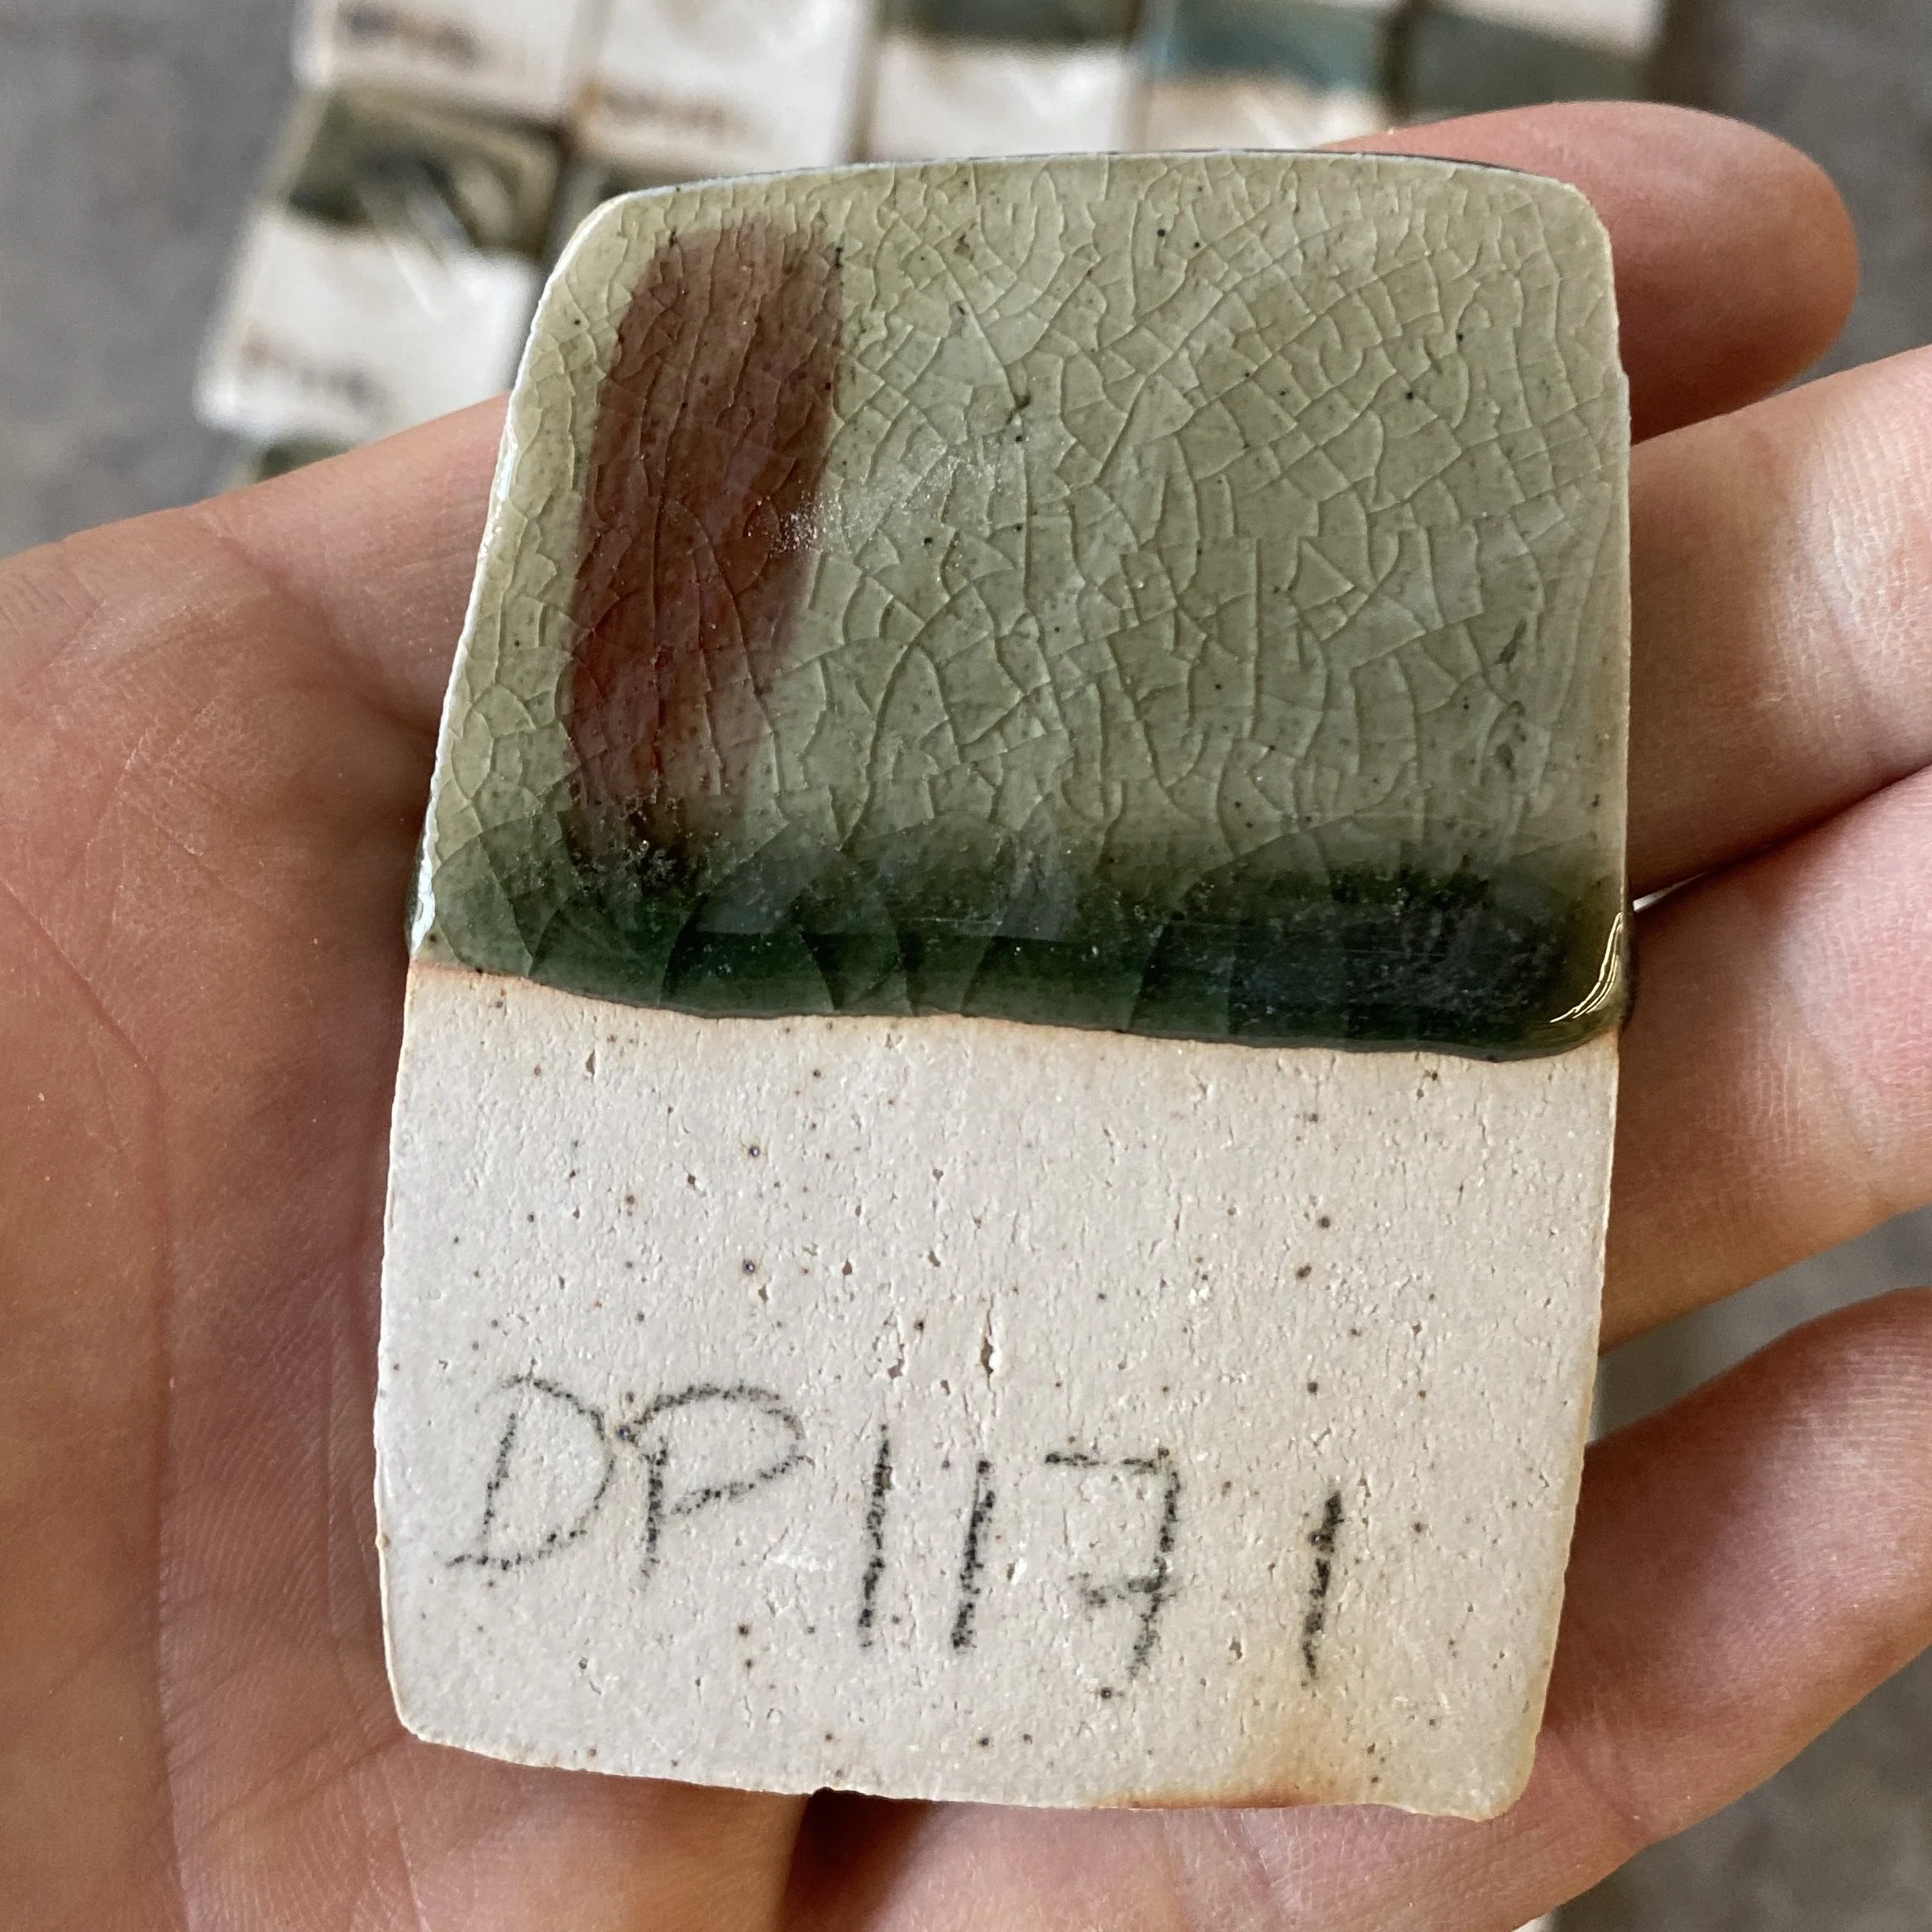
To illustrate this, let’s look at DP140-142…

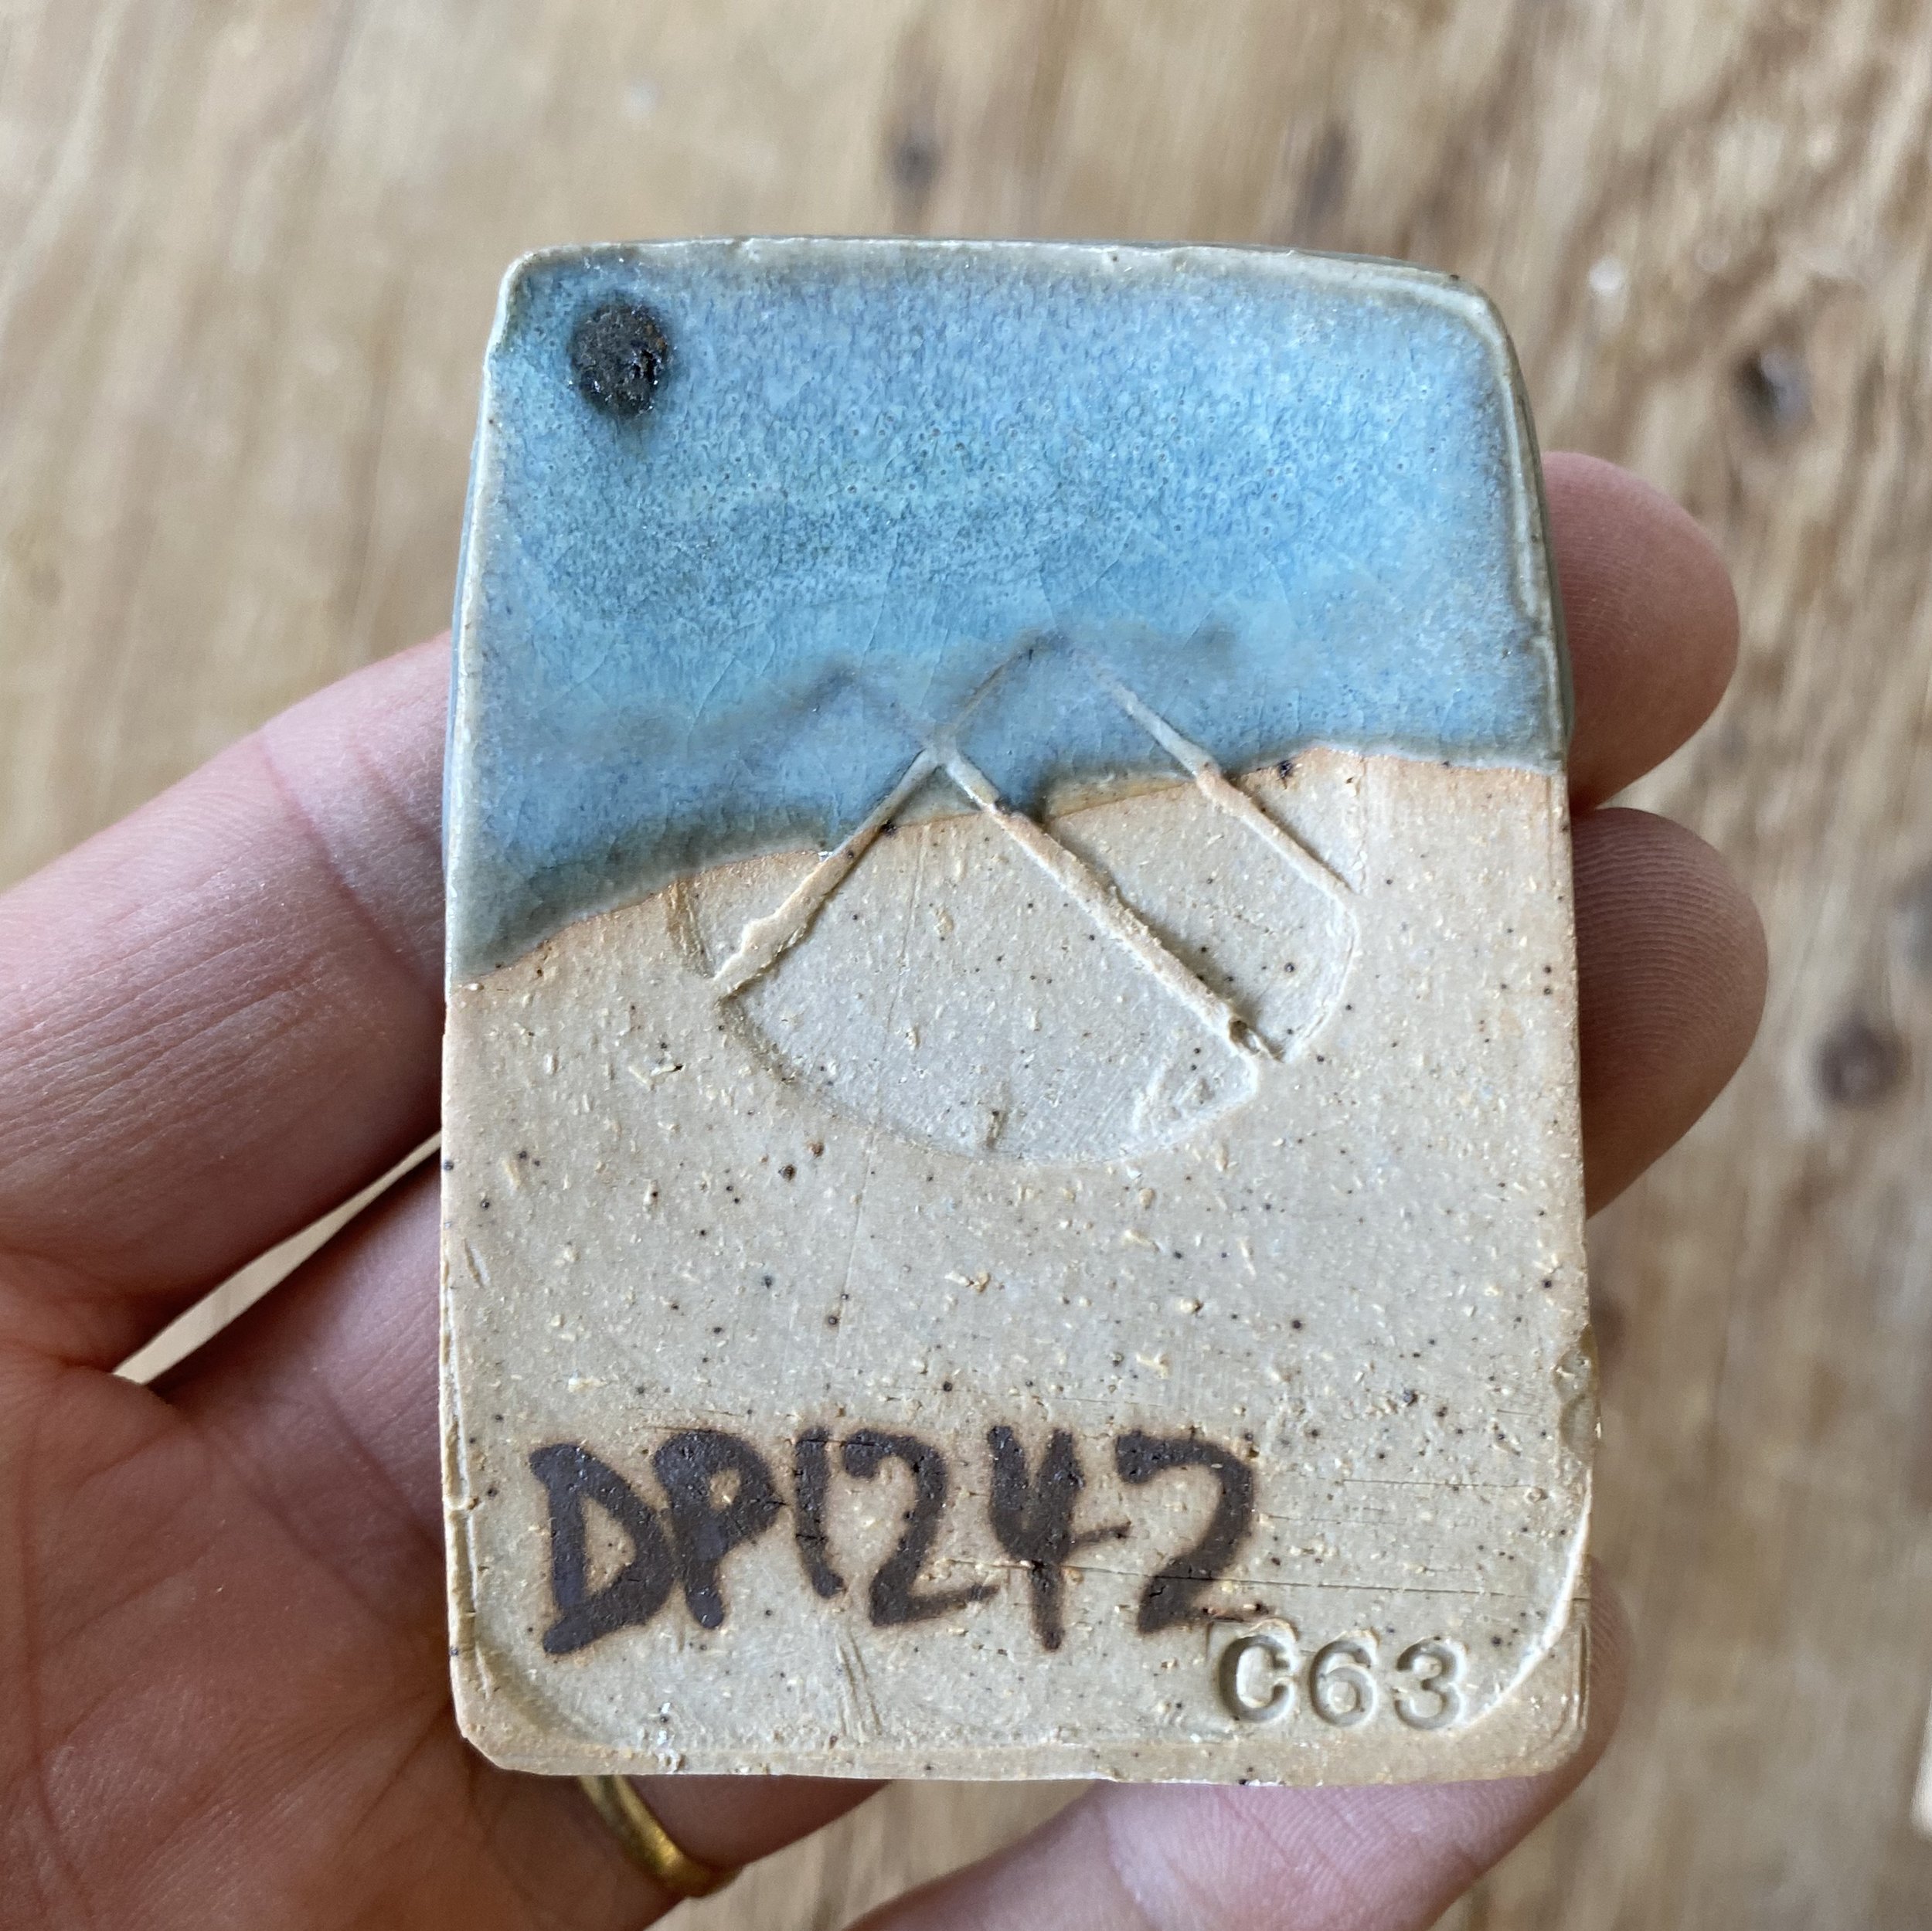
This shows just how much influence the firing had.
Here is the entire second grid laid out from this slow cooled firing…


Here are the back sides of these tiles:


Alright, let’s move on to grid 3.
This was a very dramatic difference also. Here is the front side of the vertical test tiles (in these the more reduced, slow cooled tiles are on the left)…
Here are the back sides…
I was surprised when first unloading these tests. They were so pale! You can see the previous set laid out in this previous blog post.
Here are the individual tiles so you can click on them and see them enlarged. Front side first…


And now the back sides of the tiles…


All of these are opaque, but have less of the deeper blue color of some of the earlier tests. I believe that this is because in my search for opalescence, I gravitated toward the higher silica tests from grids 1 and 2 in making this set. In this kind of slow firing, they became quite pale. This was surprising. I would have expected higher reduction to make the blues brighter or darker. I think this is because as Jun glazes are not pigmented glazes. These recipes only have 1.5-2% iron in them. The blue color is caused by light scattering on tiny bubbles, rather than the iron pigmenting the glaze.
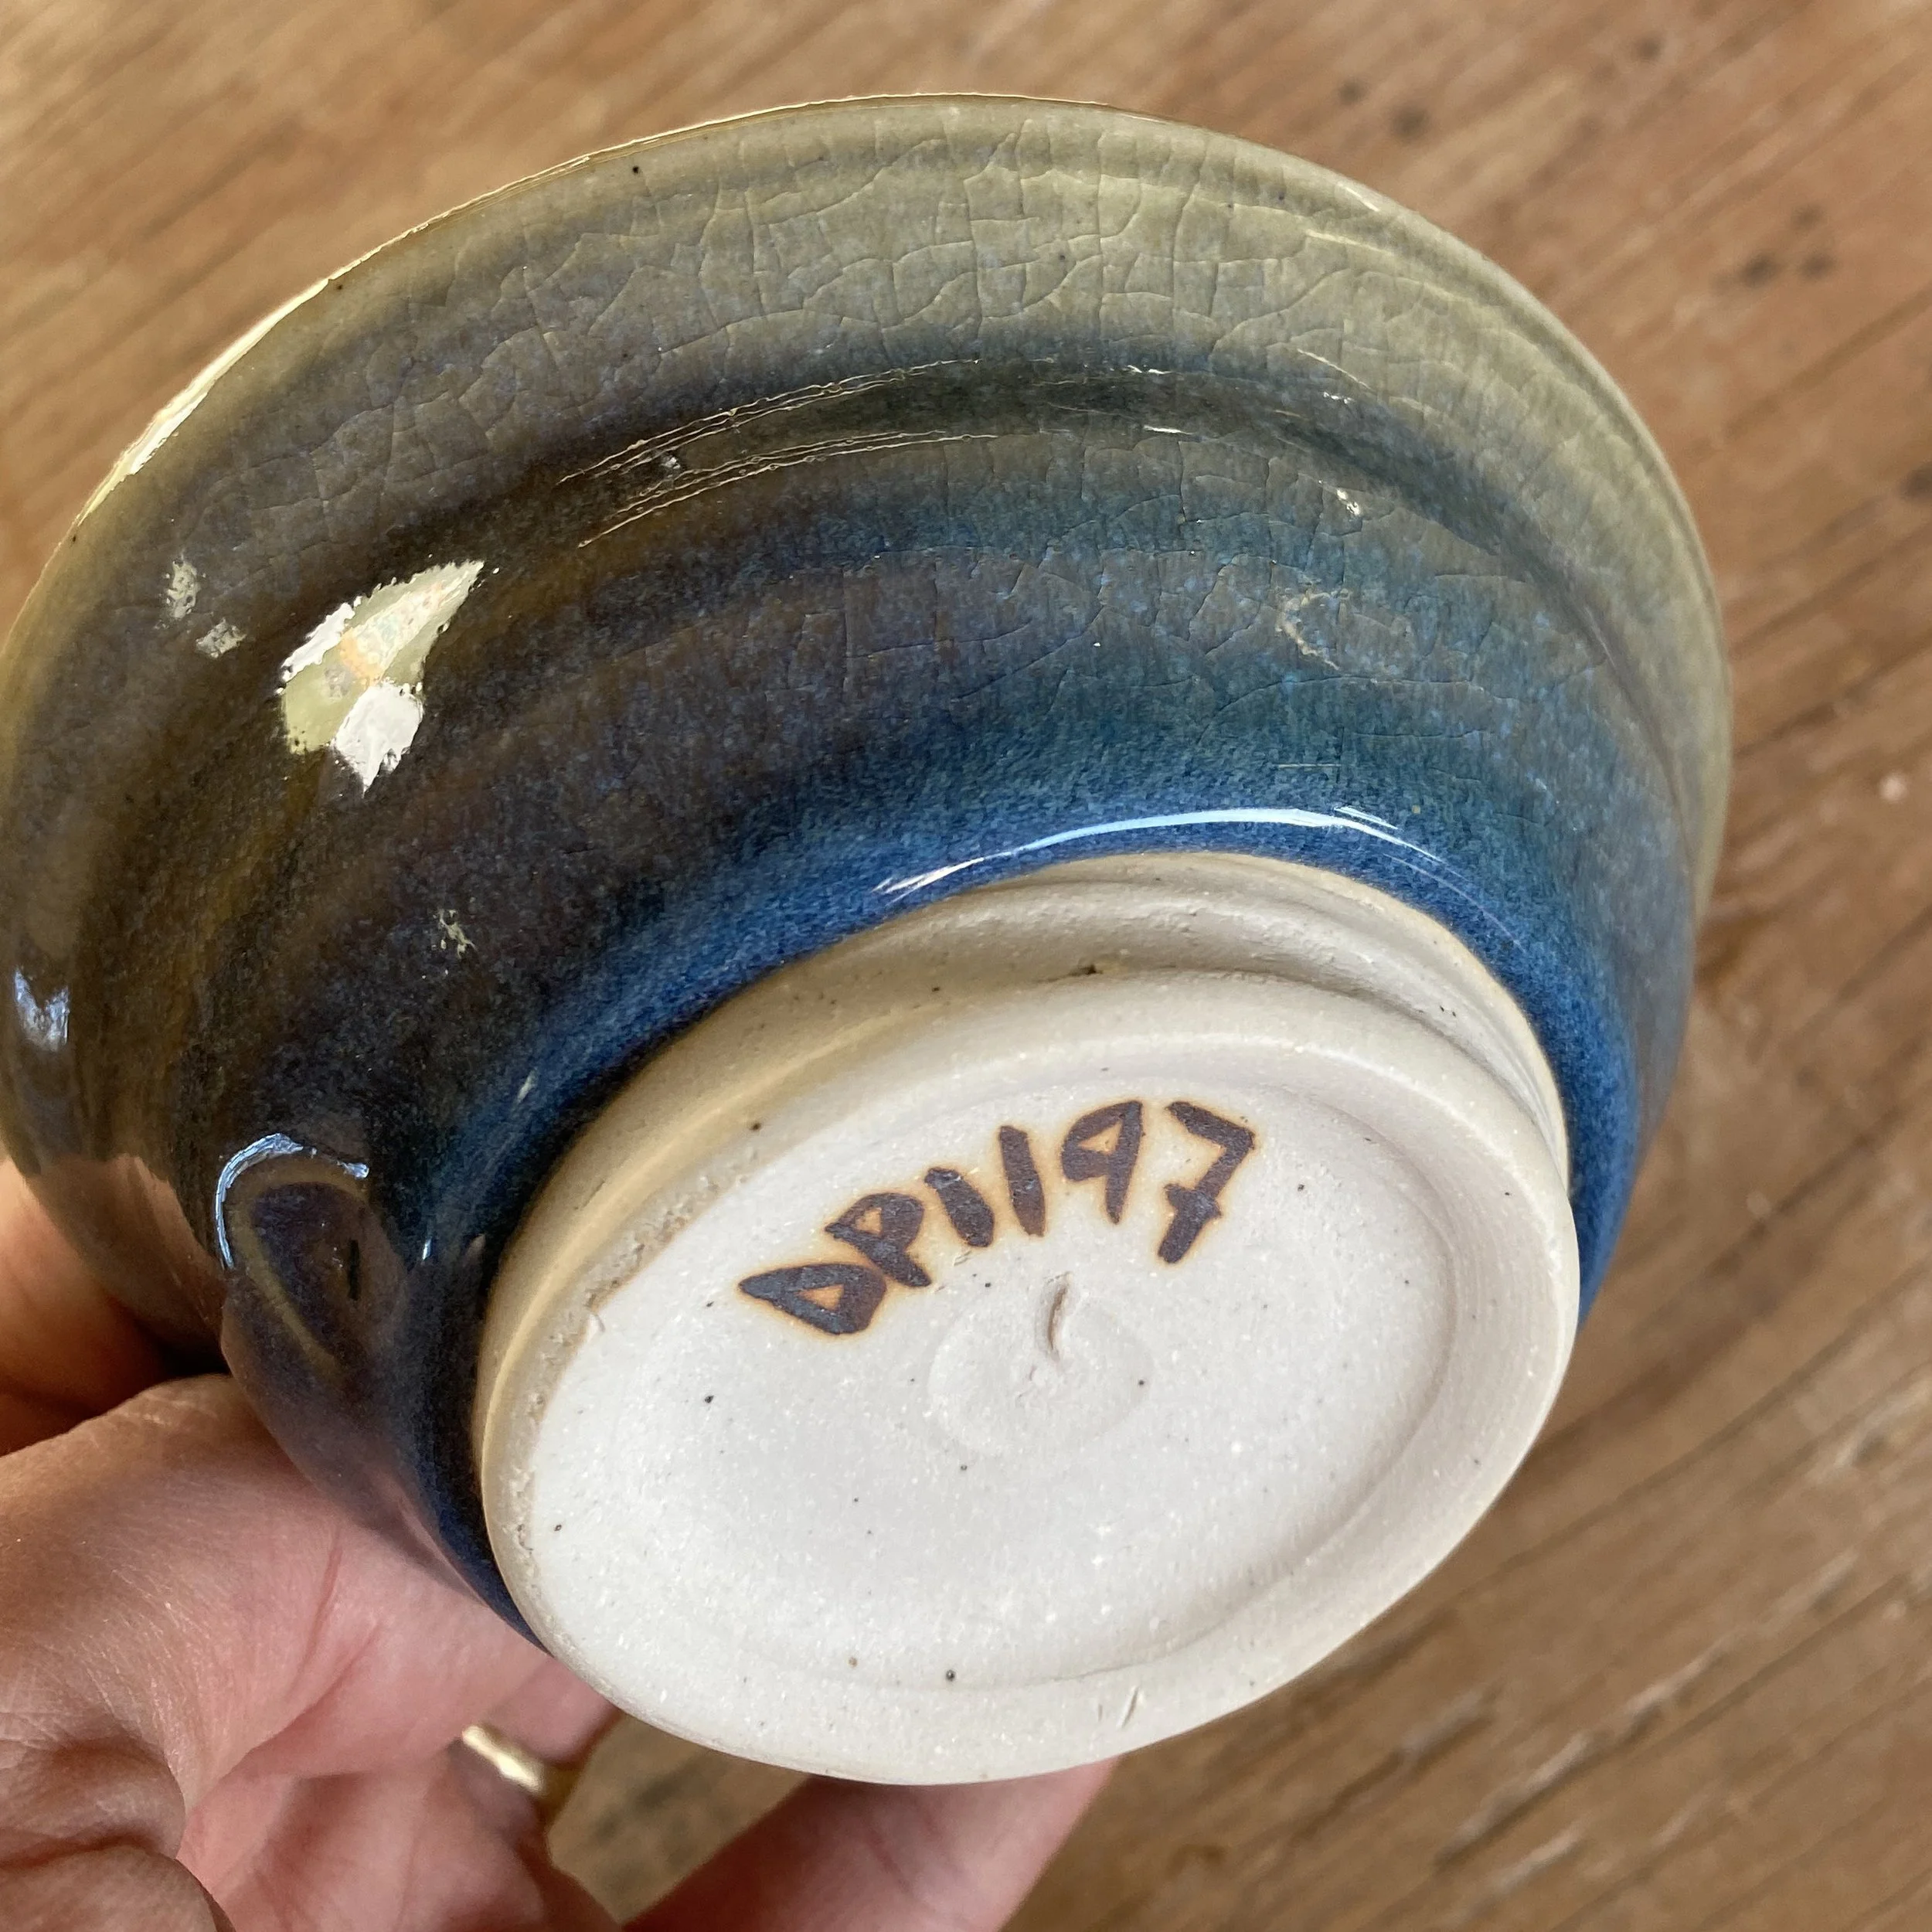
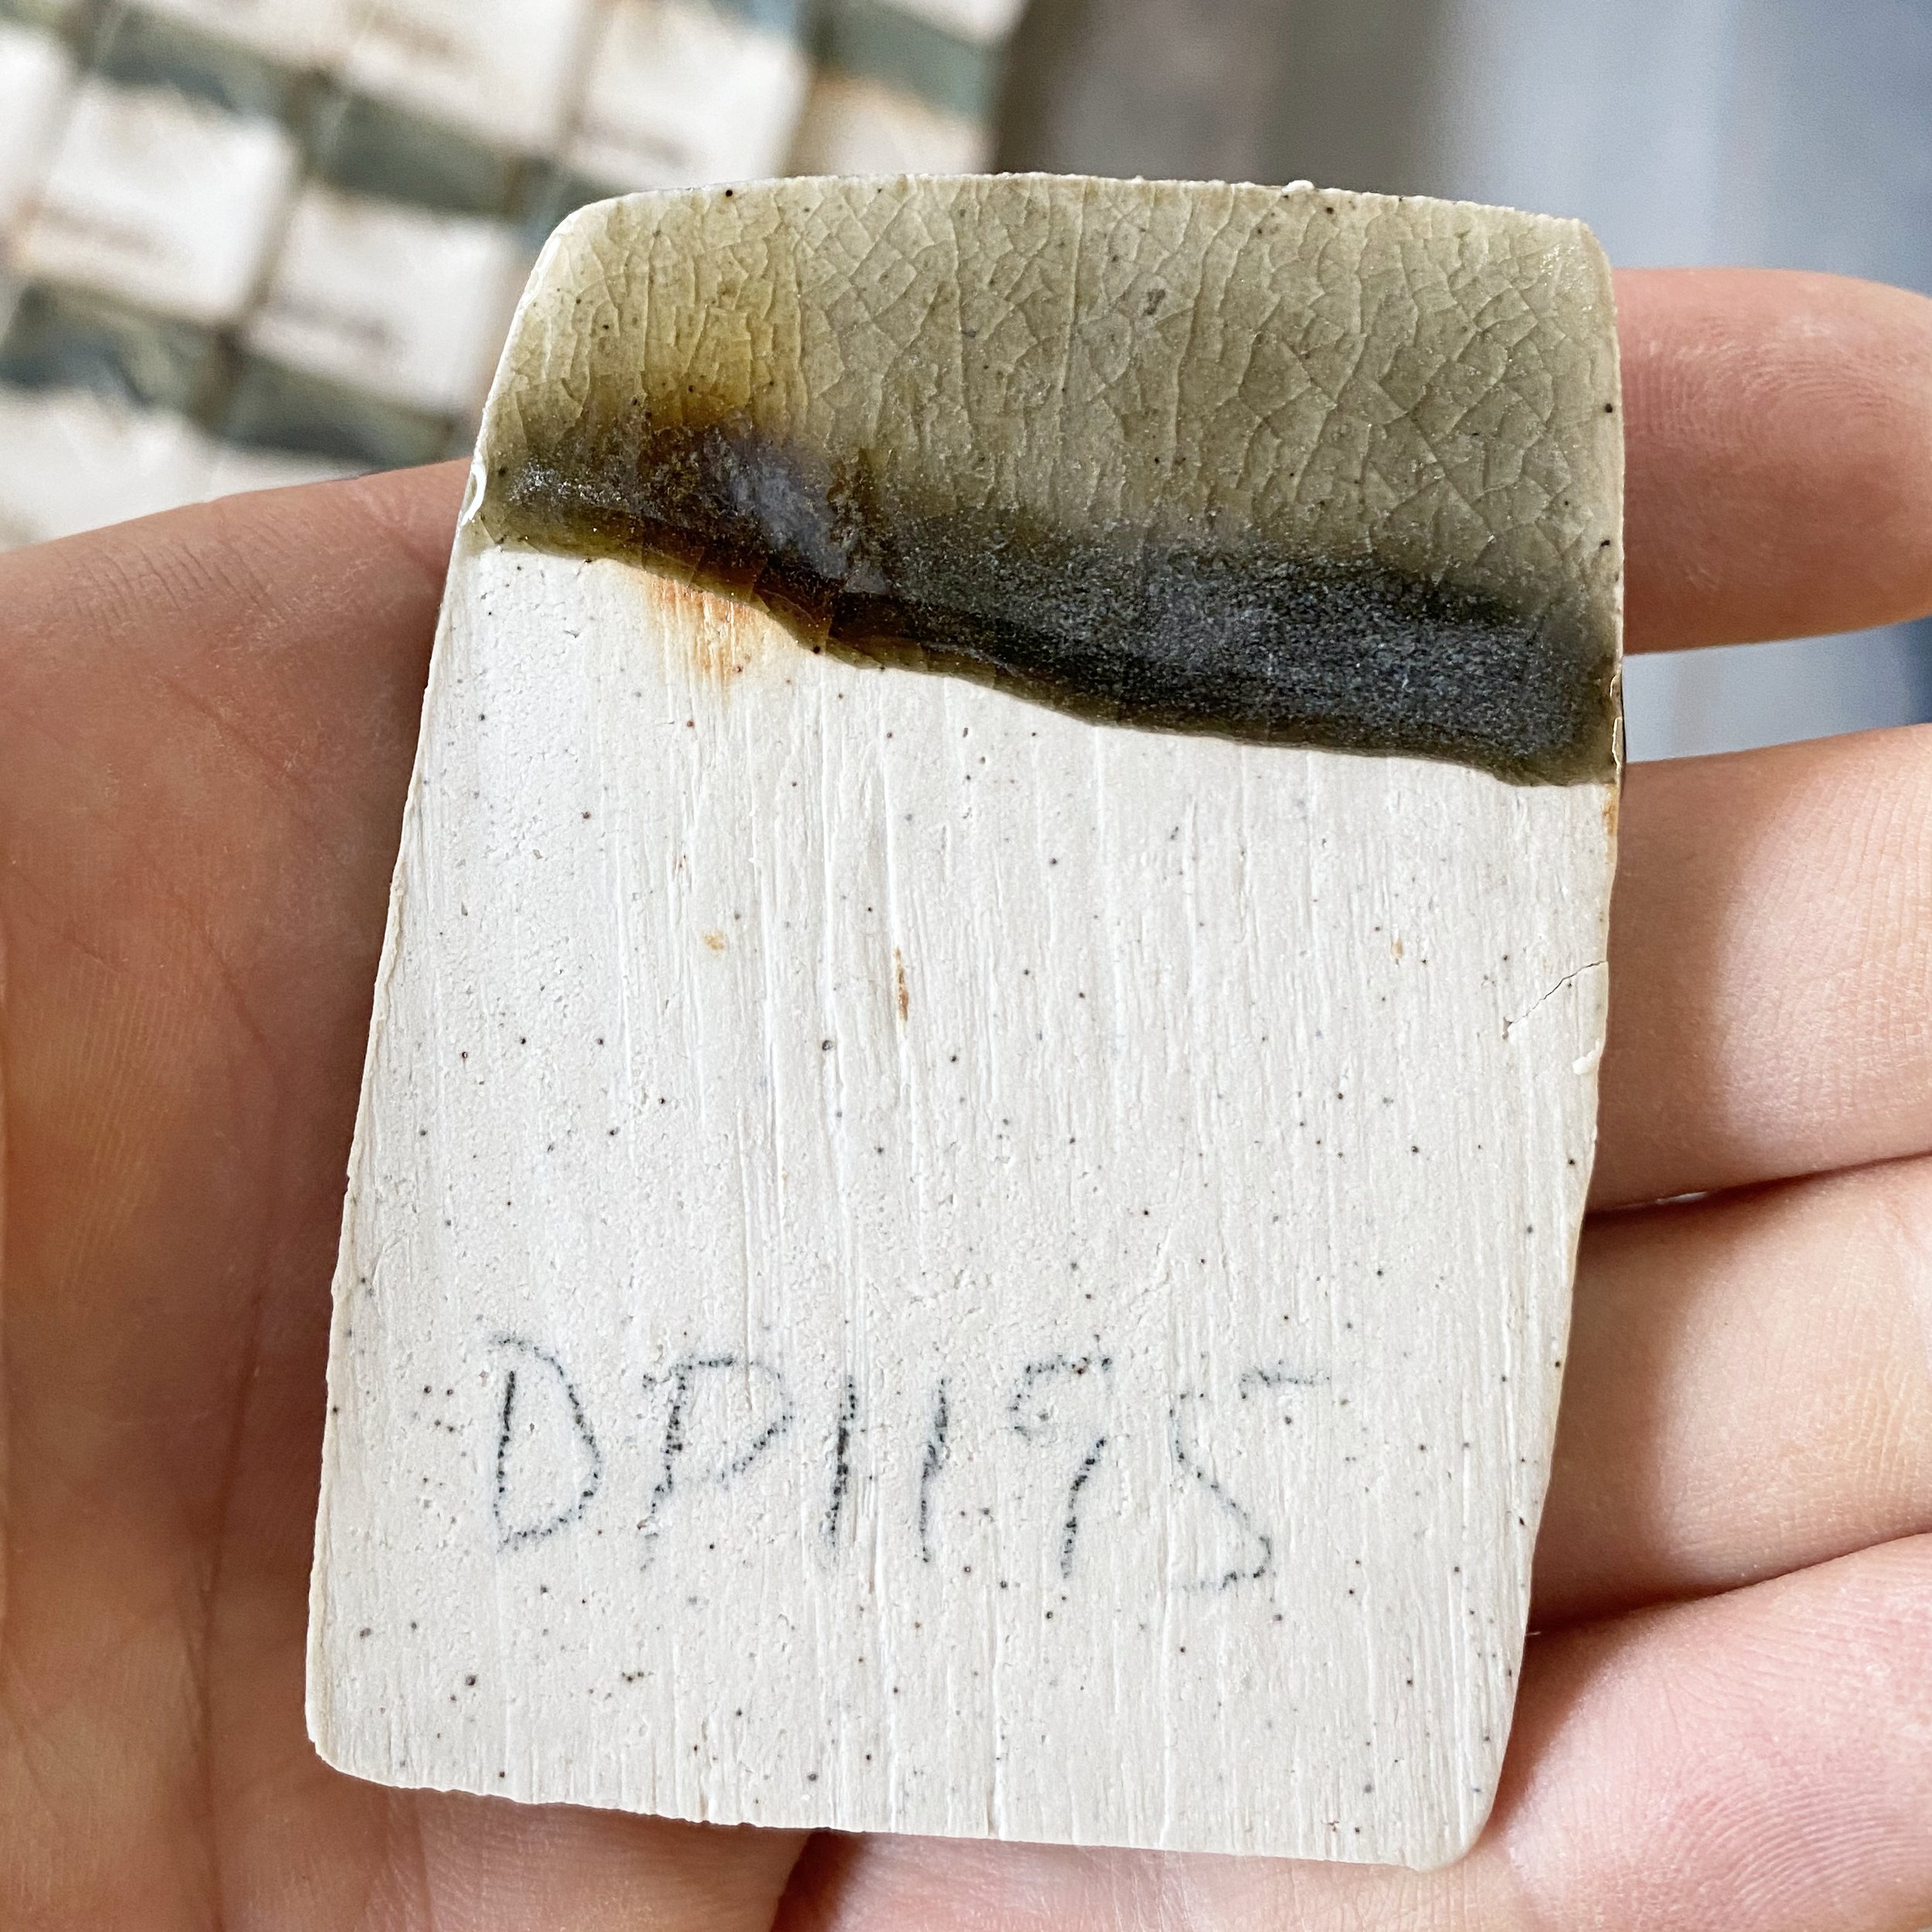
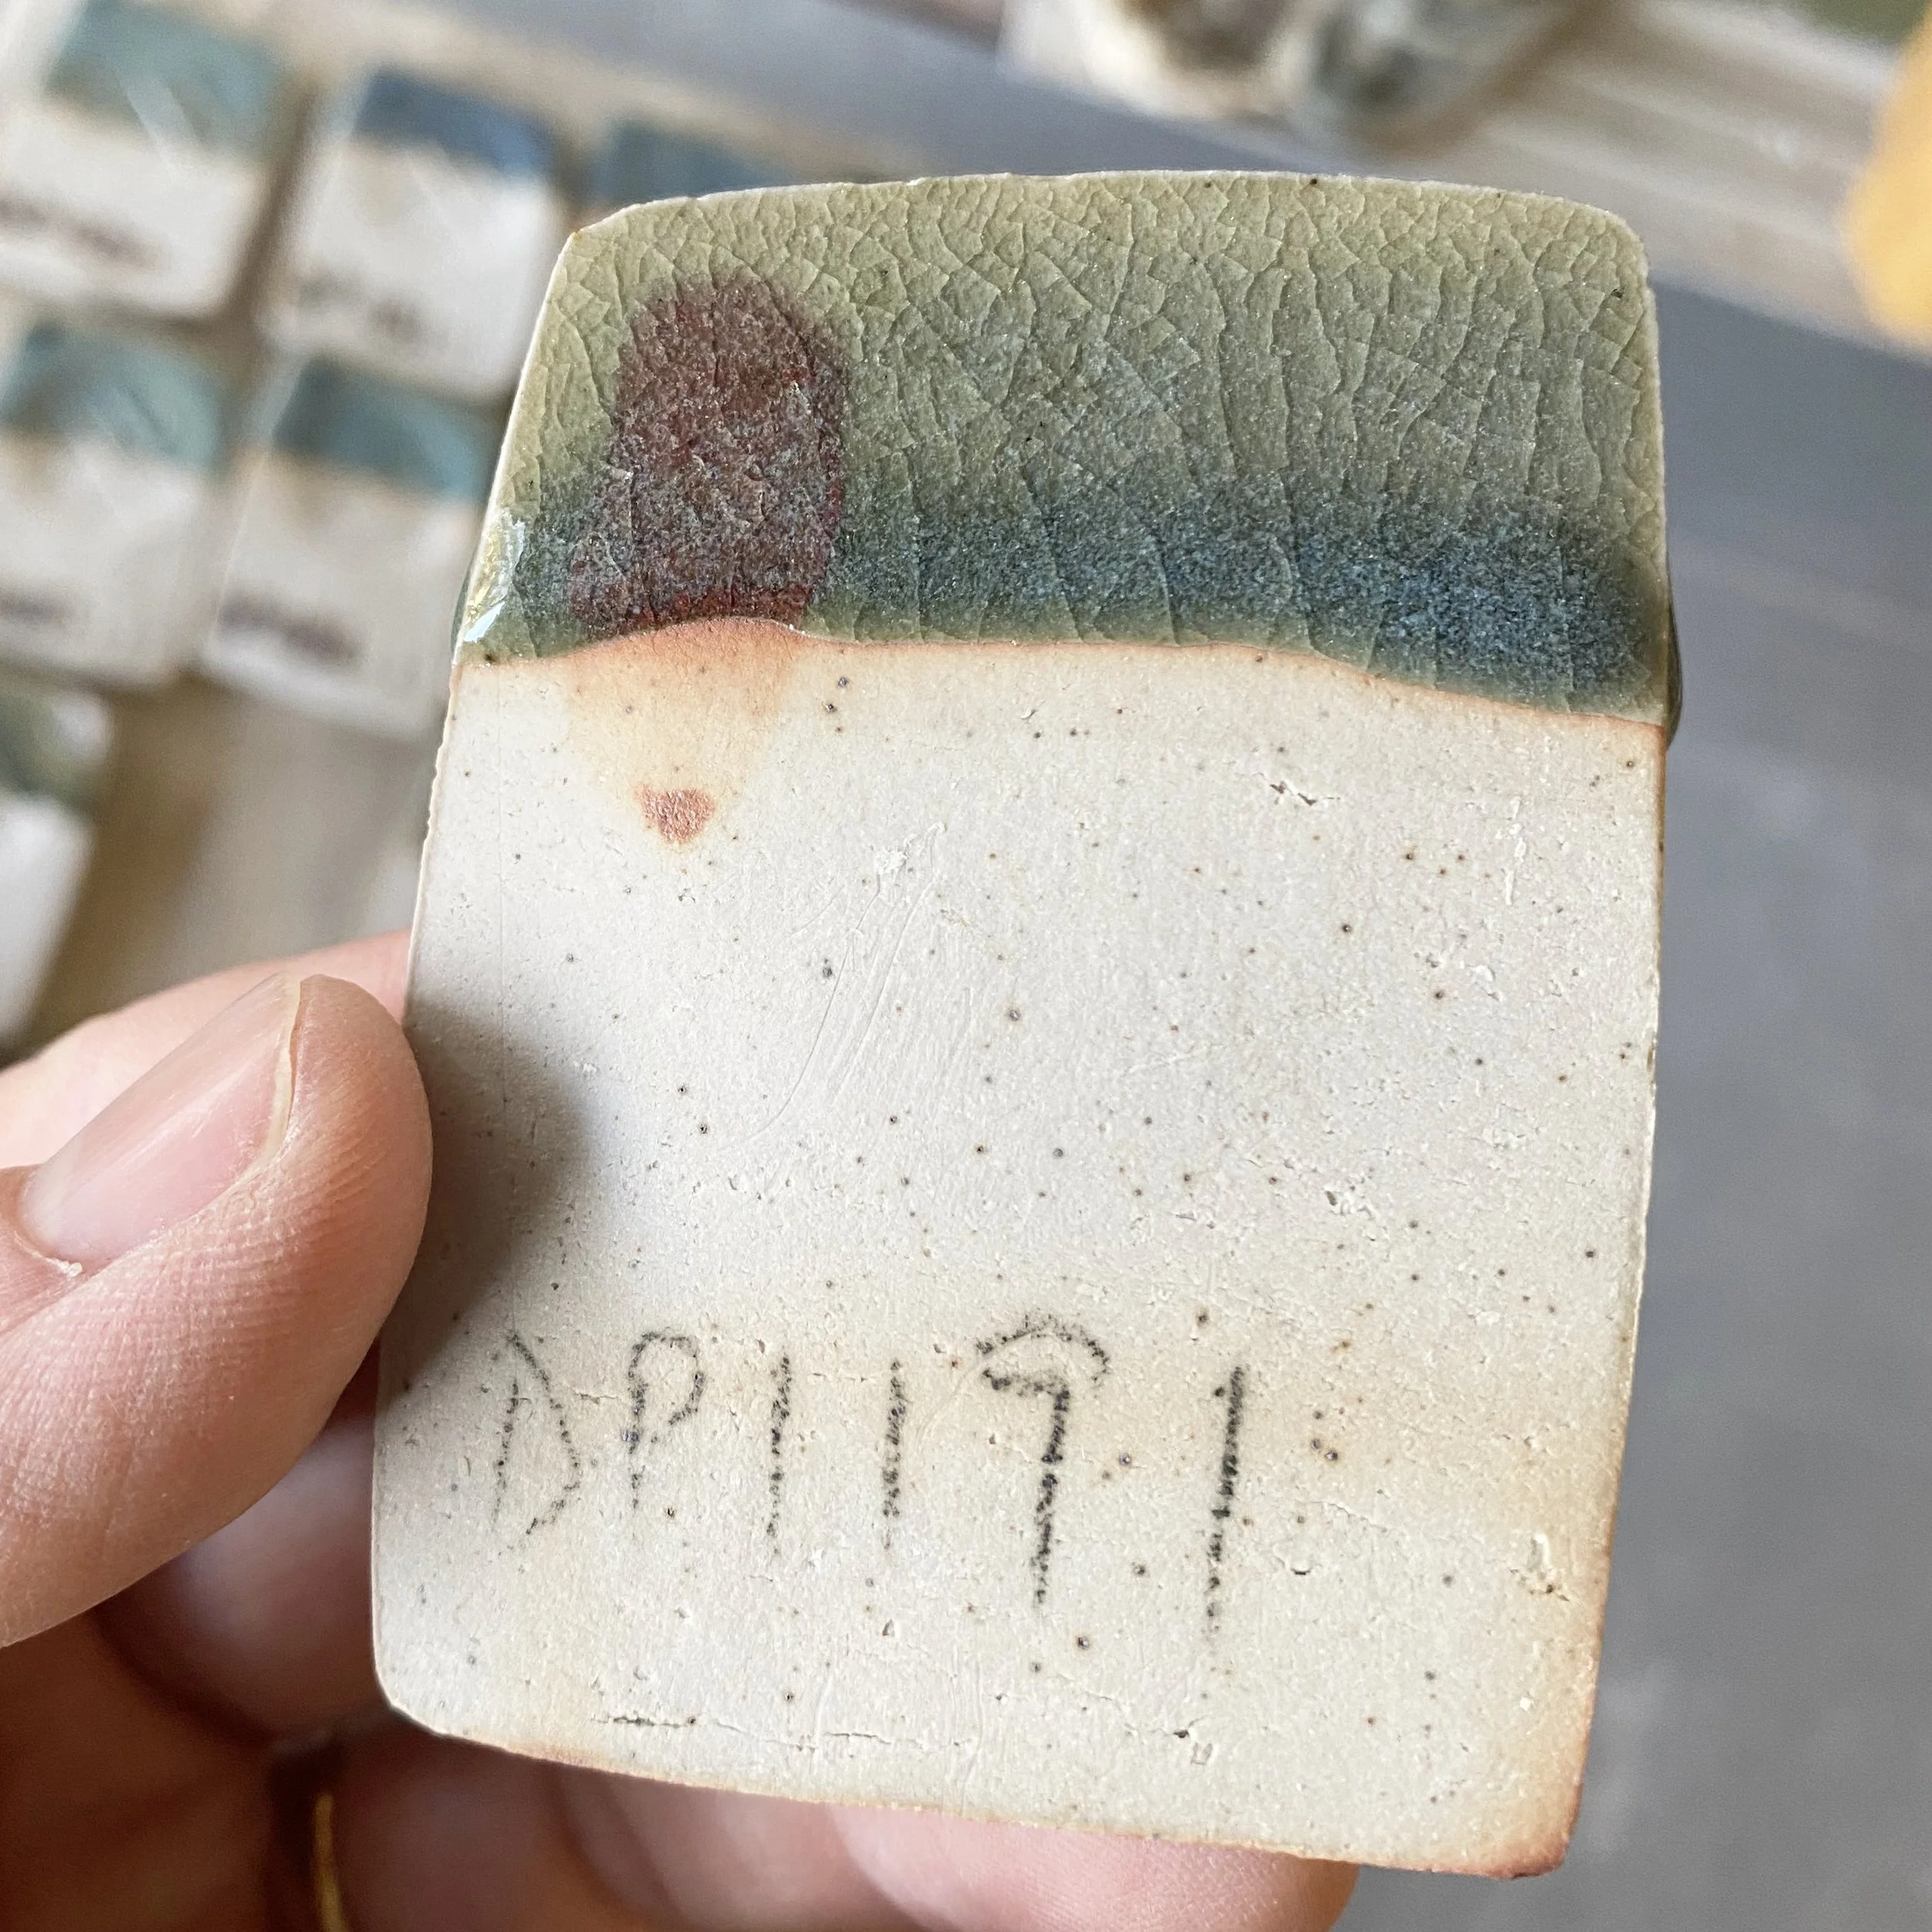
These three test porcelain cups were glazed with the central glazes from each of the grids. DP1197 was the central test from grid 1, DP1231 was the central glaze from grid 2 and DP1266 was the central grid test from grid 3. I combined all of the leftover tests to make these central glazes so they may not be 100% true in composition, but close enough for this purpose.
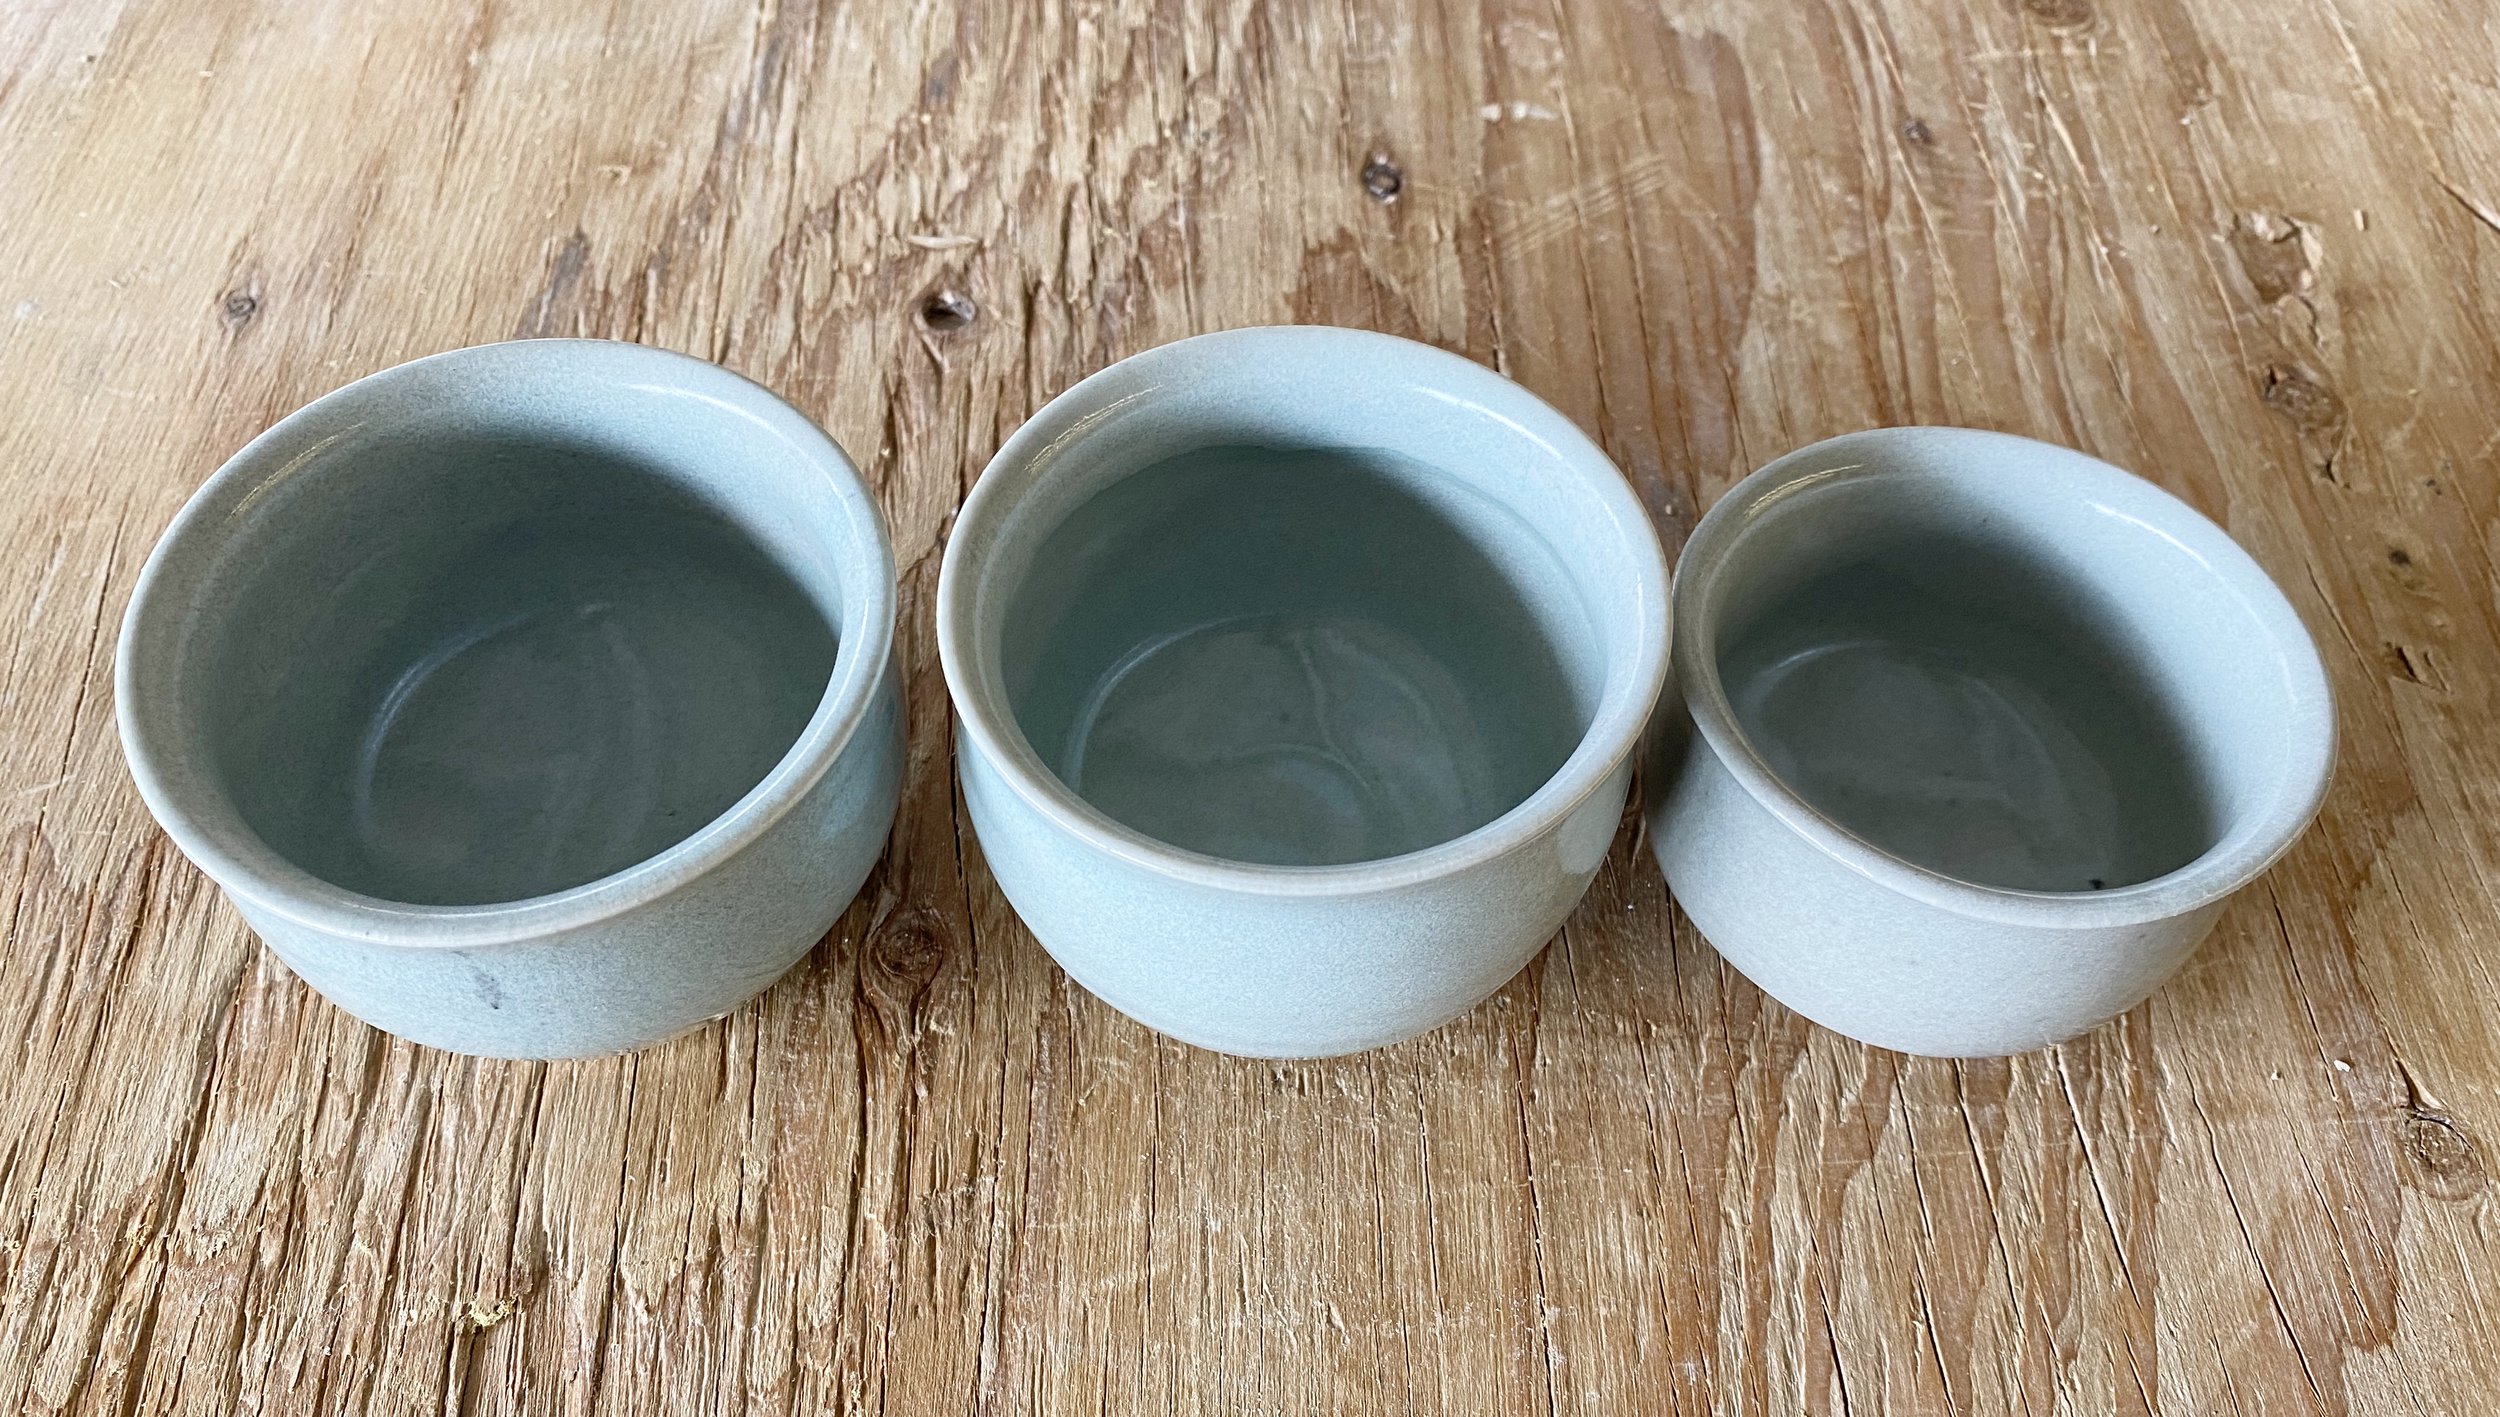
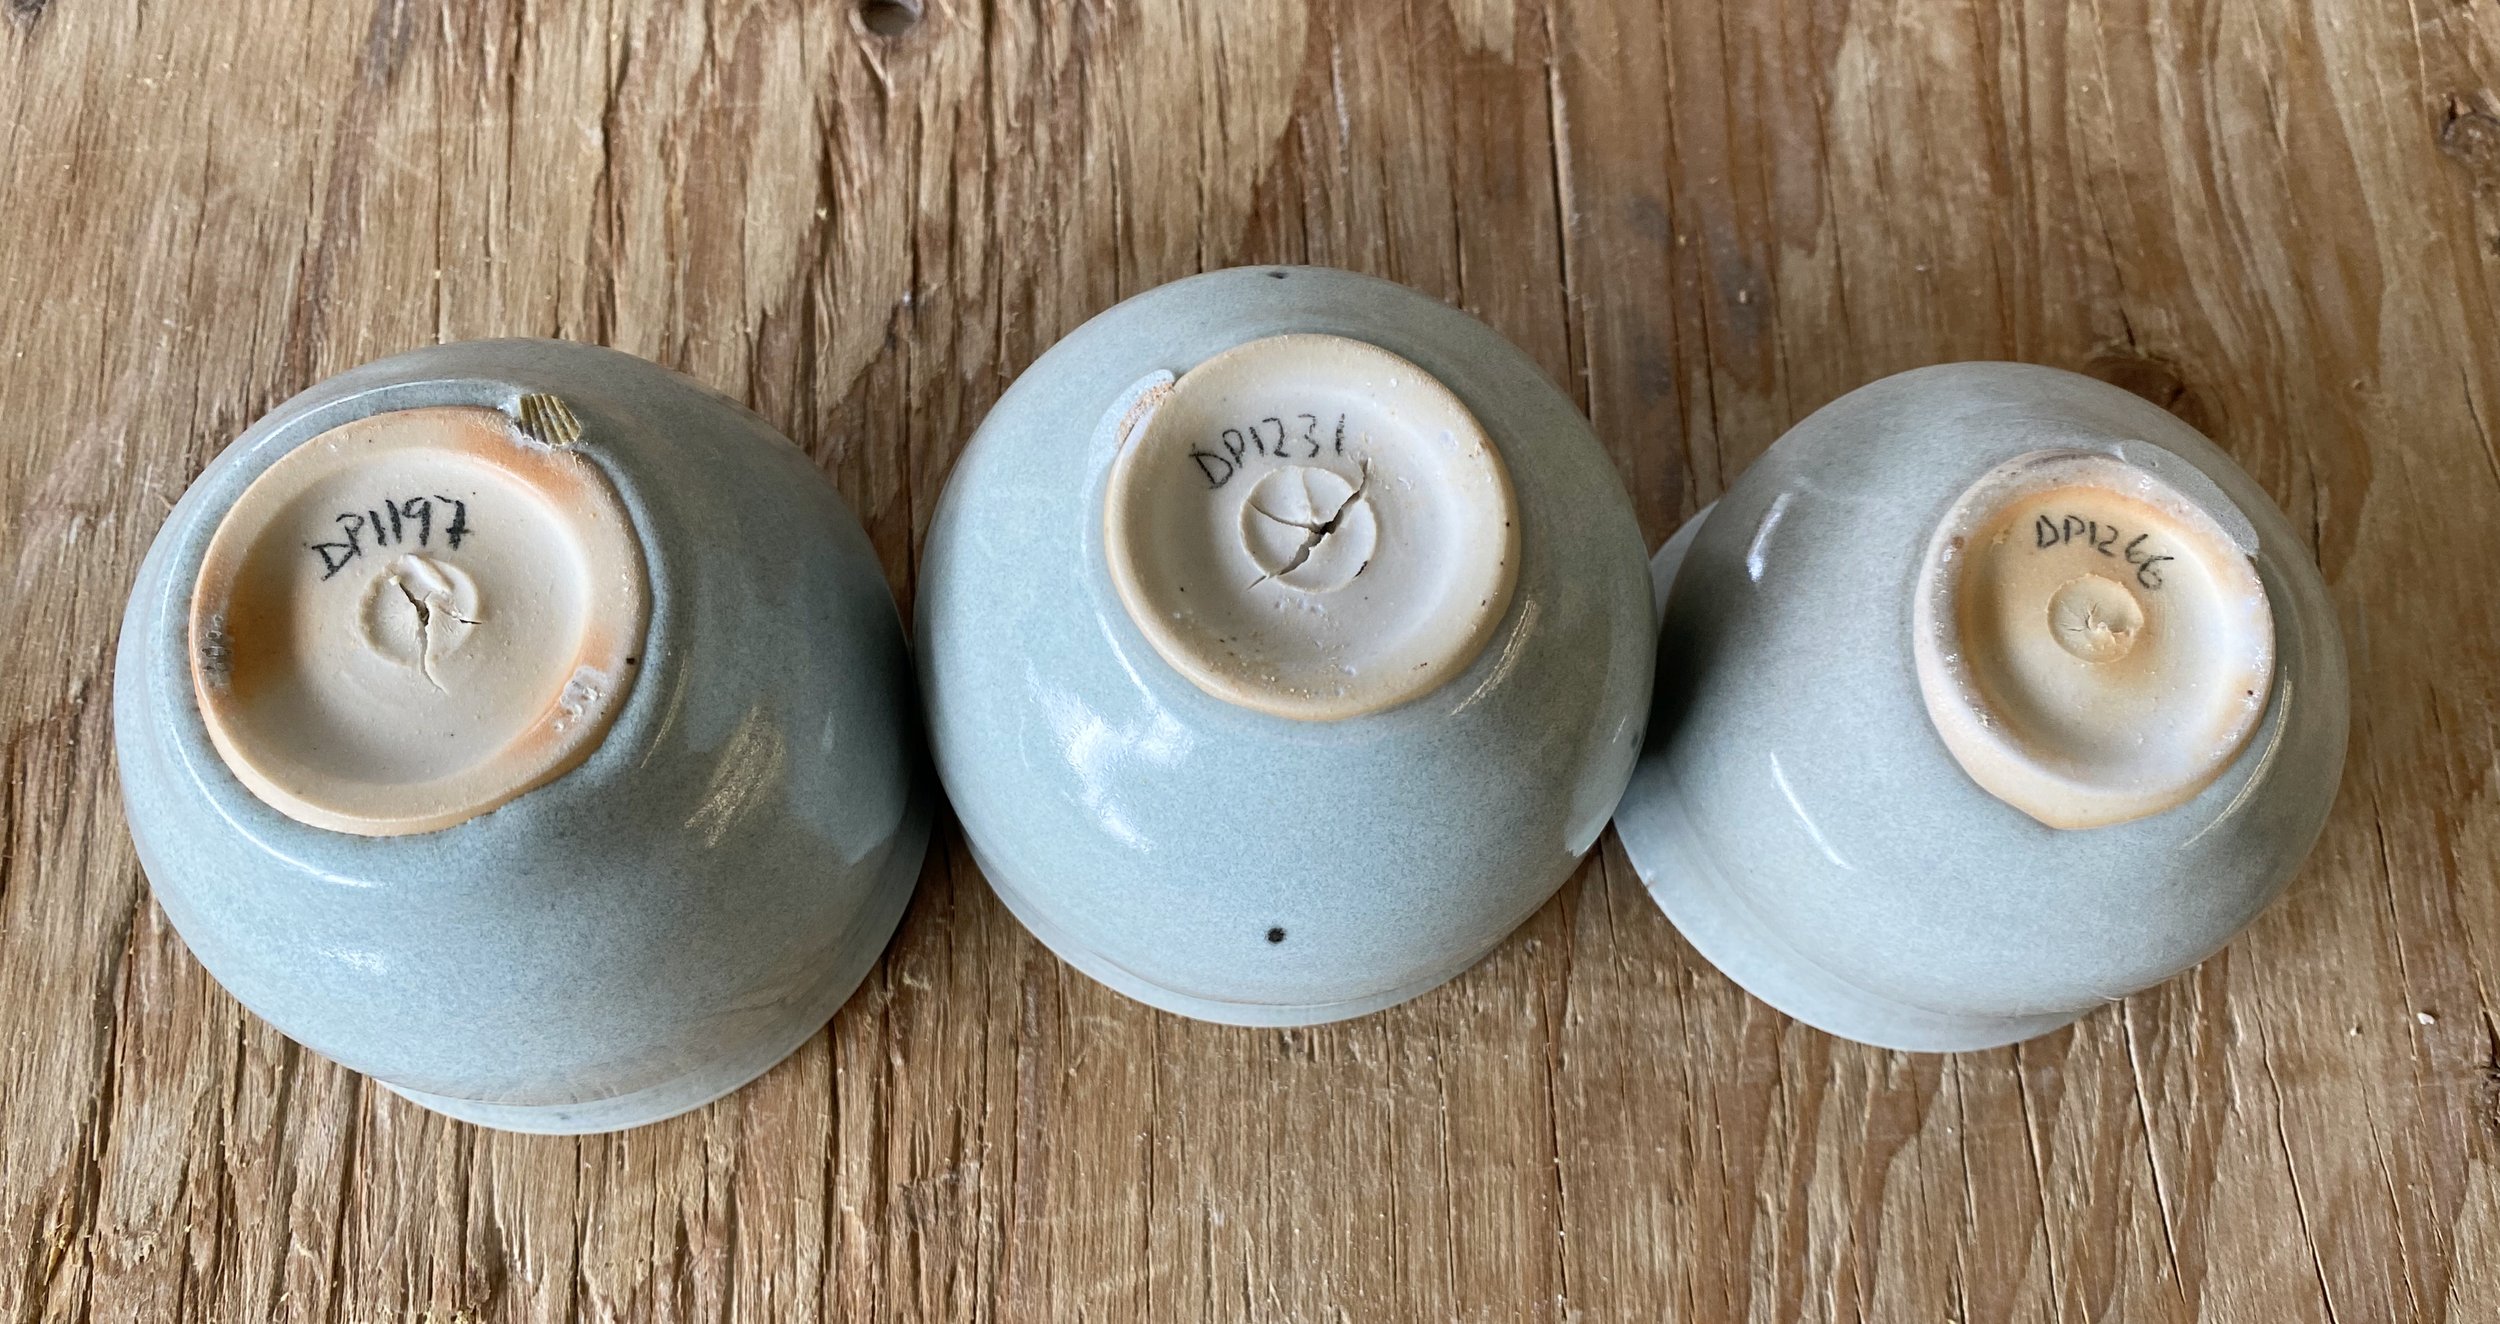
What is striking to me is how similar they are! The slow cooling firing made them all very opaque and light colored. The composition of the glazes is not the same of course…
DP1197:
53.75% DP granite
15% Silica
17.5% Wollastonite
11.75% Mahavir (potash feldspar)
+ 2% Dolomite
+2% Bentonite
+2% Bone Ash
+1.5% RIO
DP1231:
50.75% DP granite
19.5% Silica
19.5% Wollastonite
8.75% Mahavir (potash feldspar)
+ 1.5% Dolomite
+2% Bentonite
+2% Bone Ash
+1.5% RIO
DP 1266
52.5% DP granite
20% Wollastonite
21.25% Silica
6.25% Mahavir (potash feldspar)
+ 1.5% Dolomite
+2% Bentonite
+2% Bone Ash
+1.5% RIO
Here is what they looked like in regular gas firing (as test tiles).


One thing to note is that the cups are made of porcelain as opposed to my grey stoneware which has a little extra iron in it. This is not a huge factor but it is a difference to be aware of. Here are some more pictures of the cups from this slow reduction cooling…


So different from the test tiles!
Here is one other comparison of DP1266. The bowl with the grey foot (left) was fired in a regular gas reduction firing, and the one with the browner mottled foot was in this last slow cooled kiln. You can see that the color of the slow cooled one is much paler.
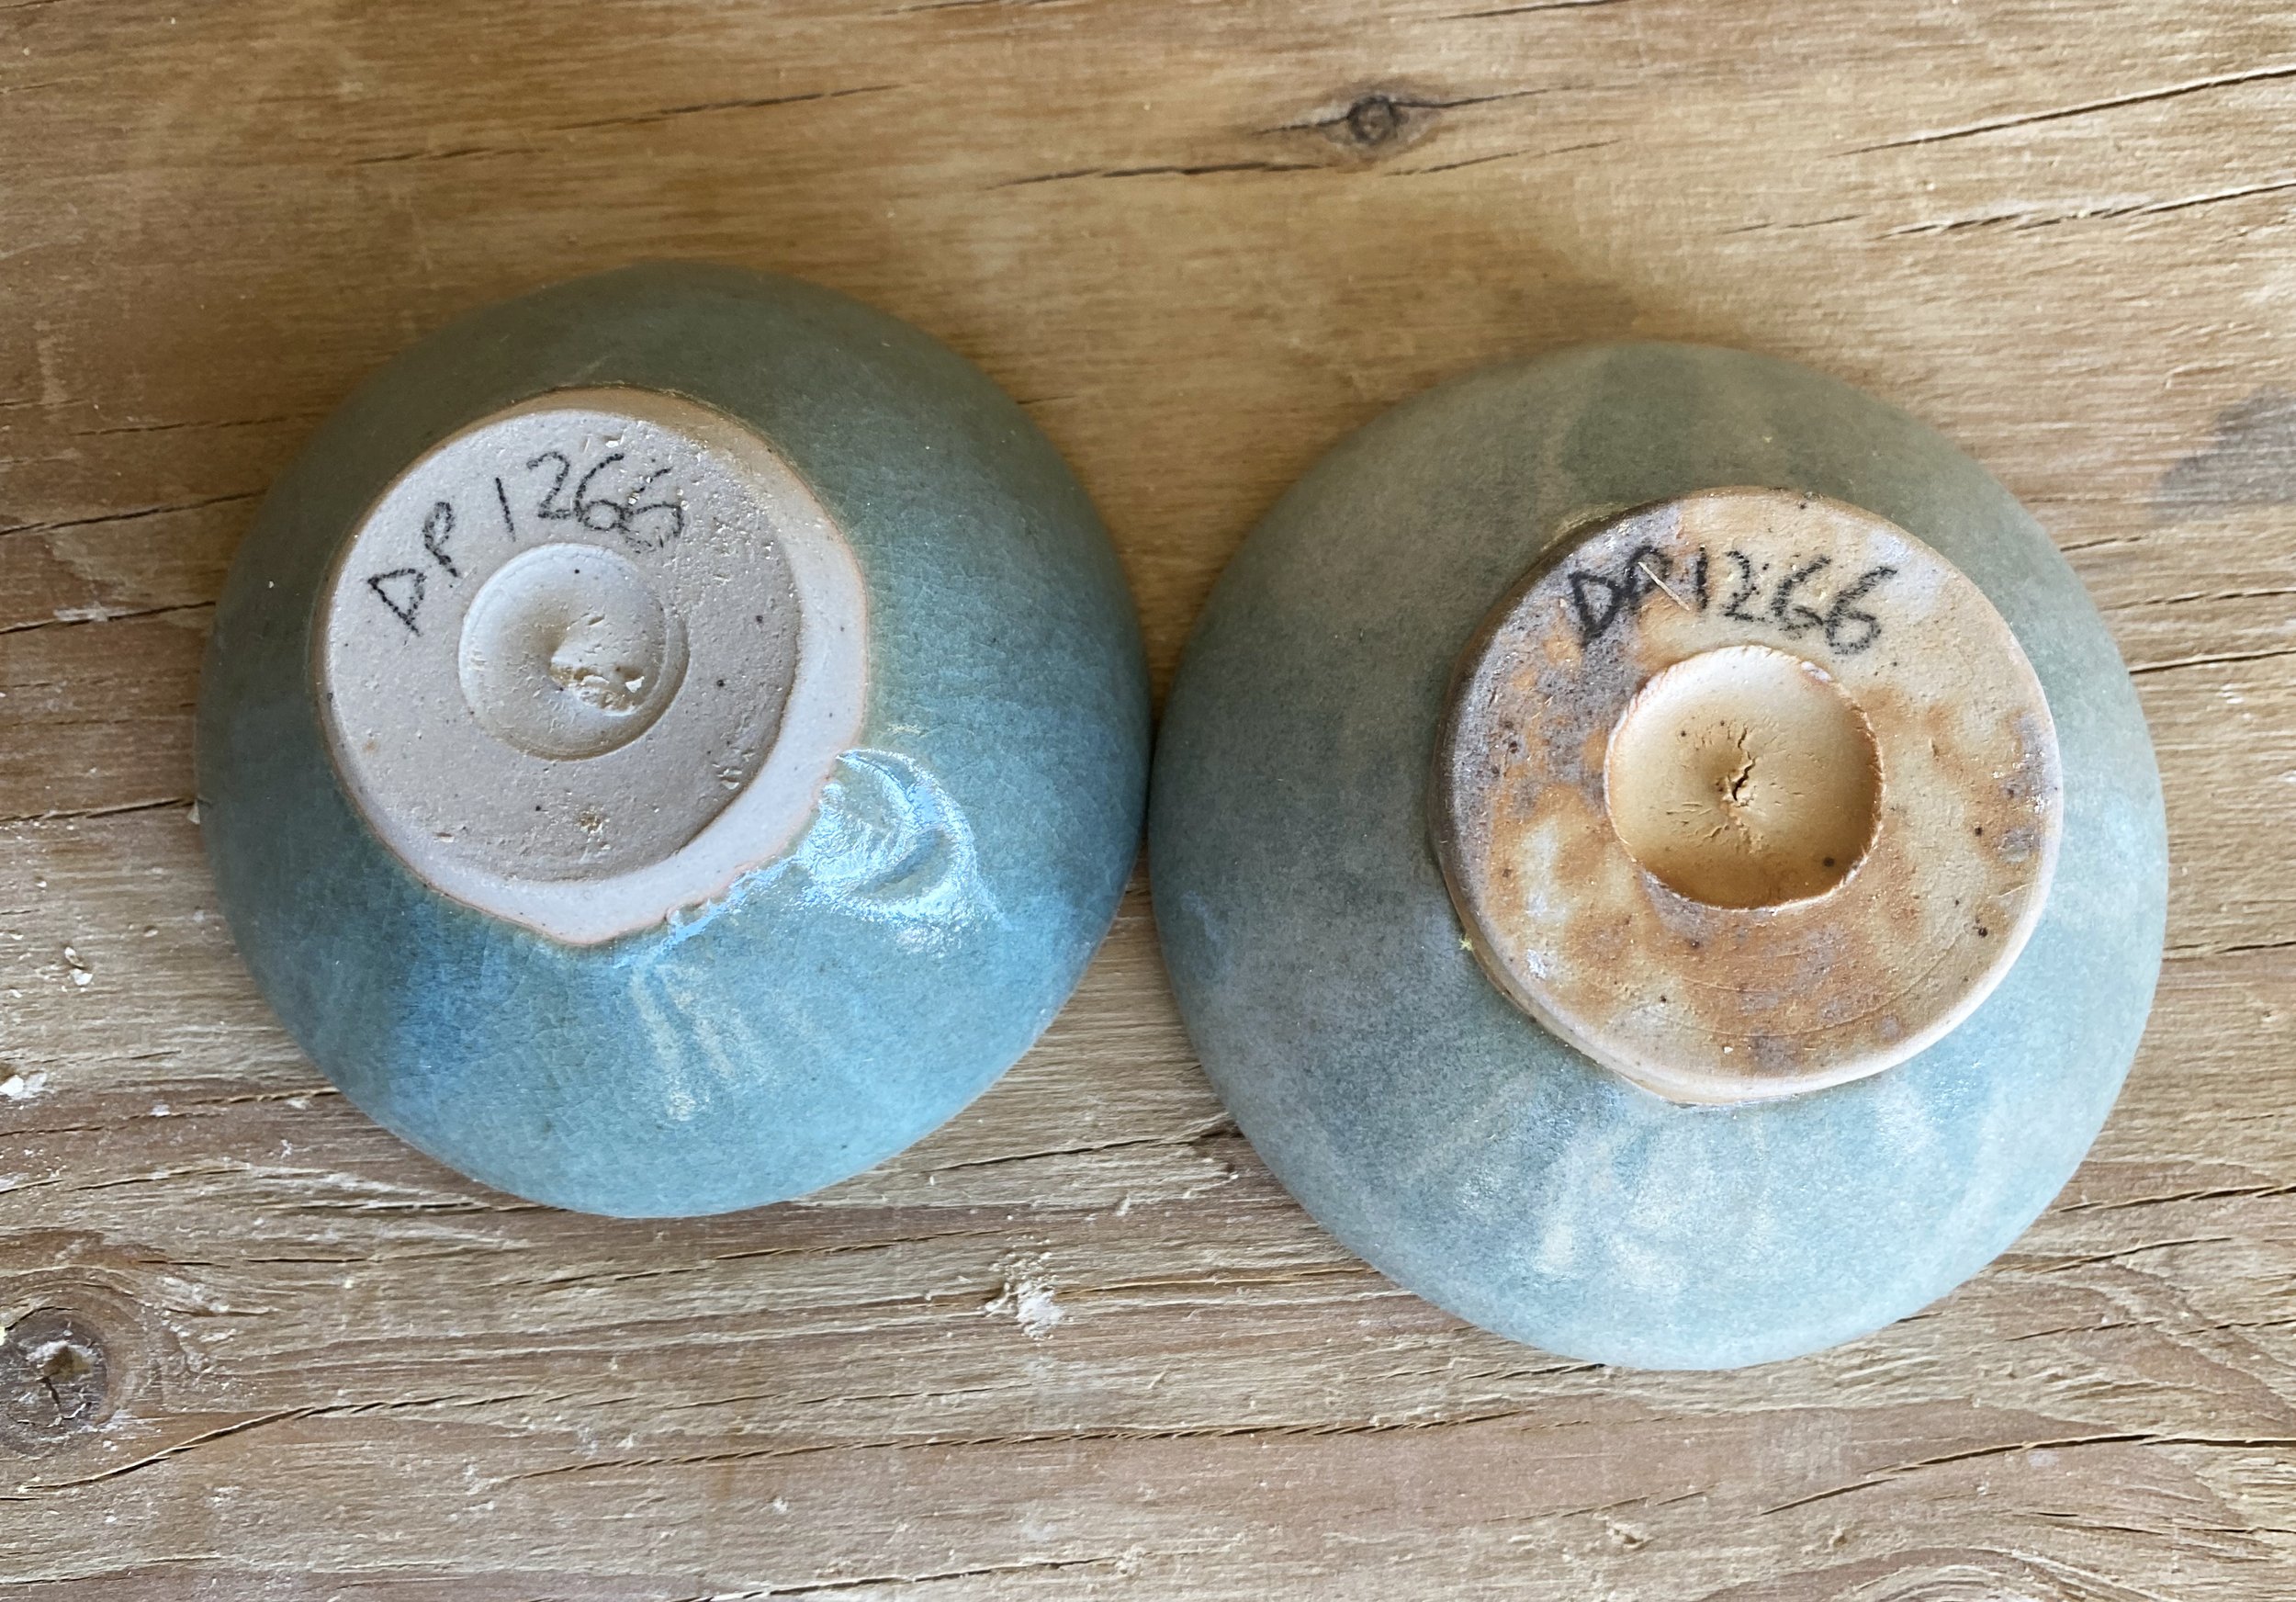
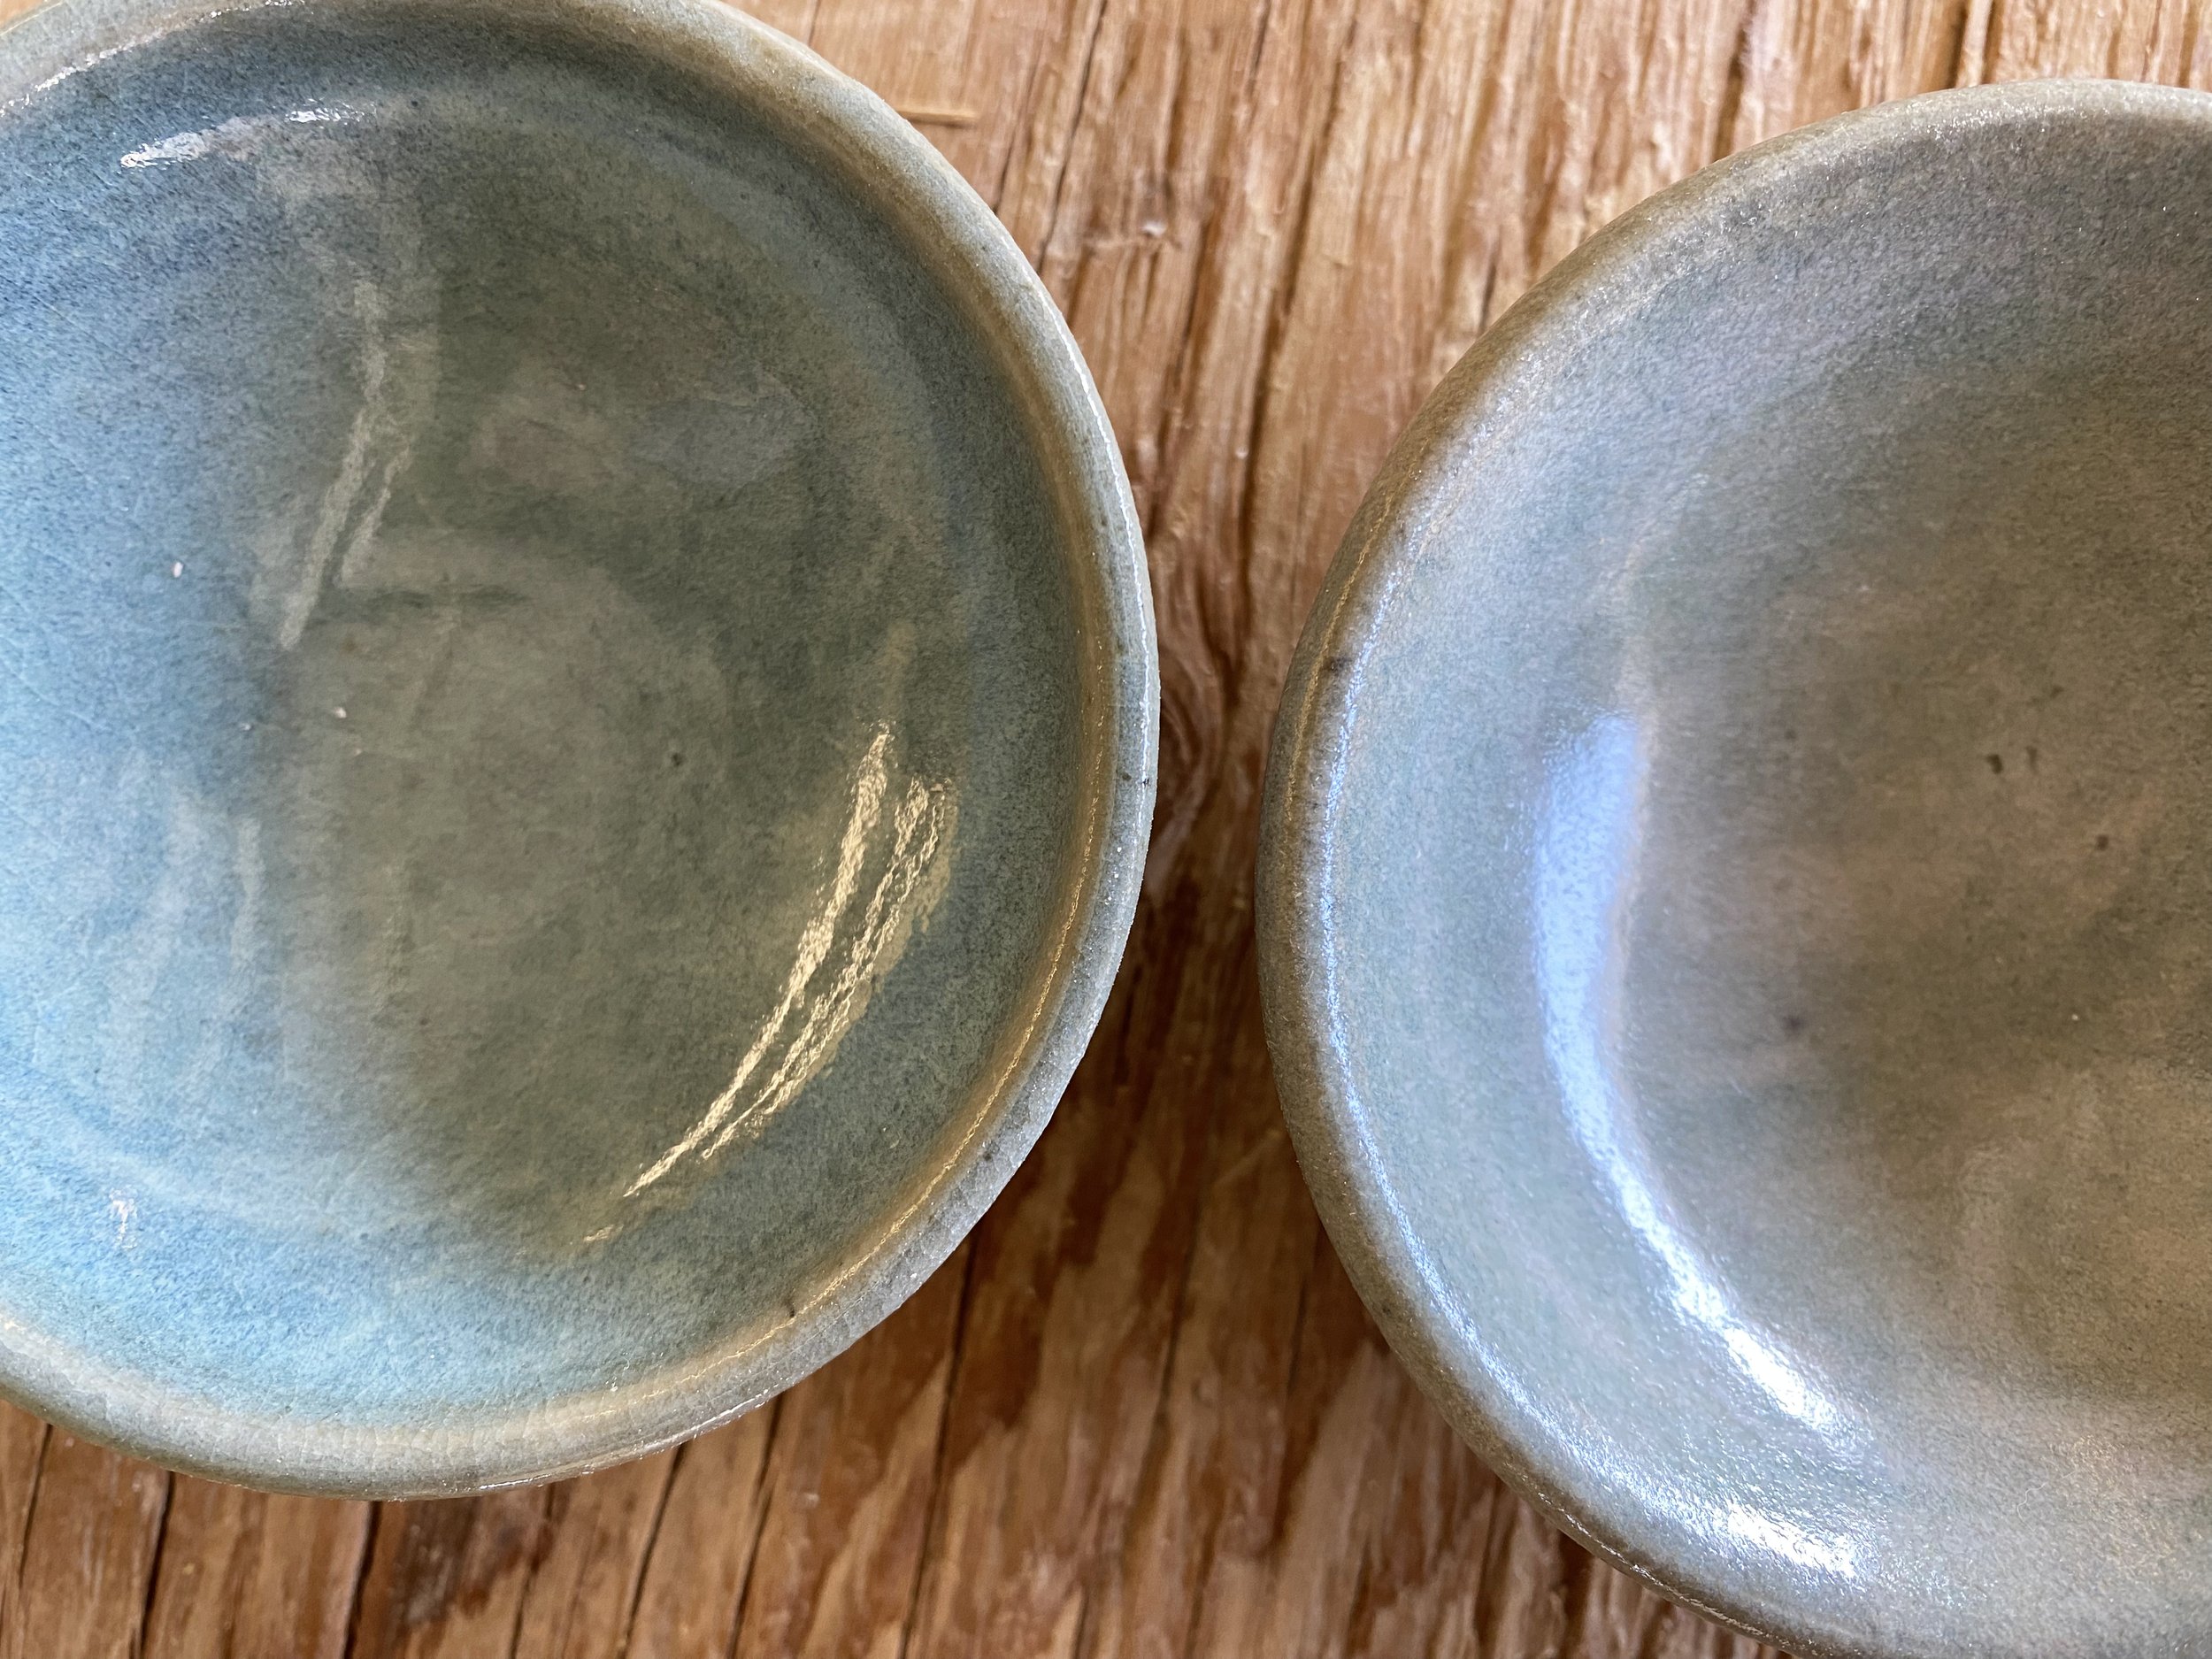
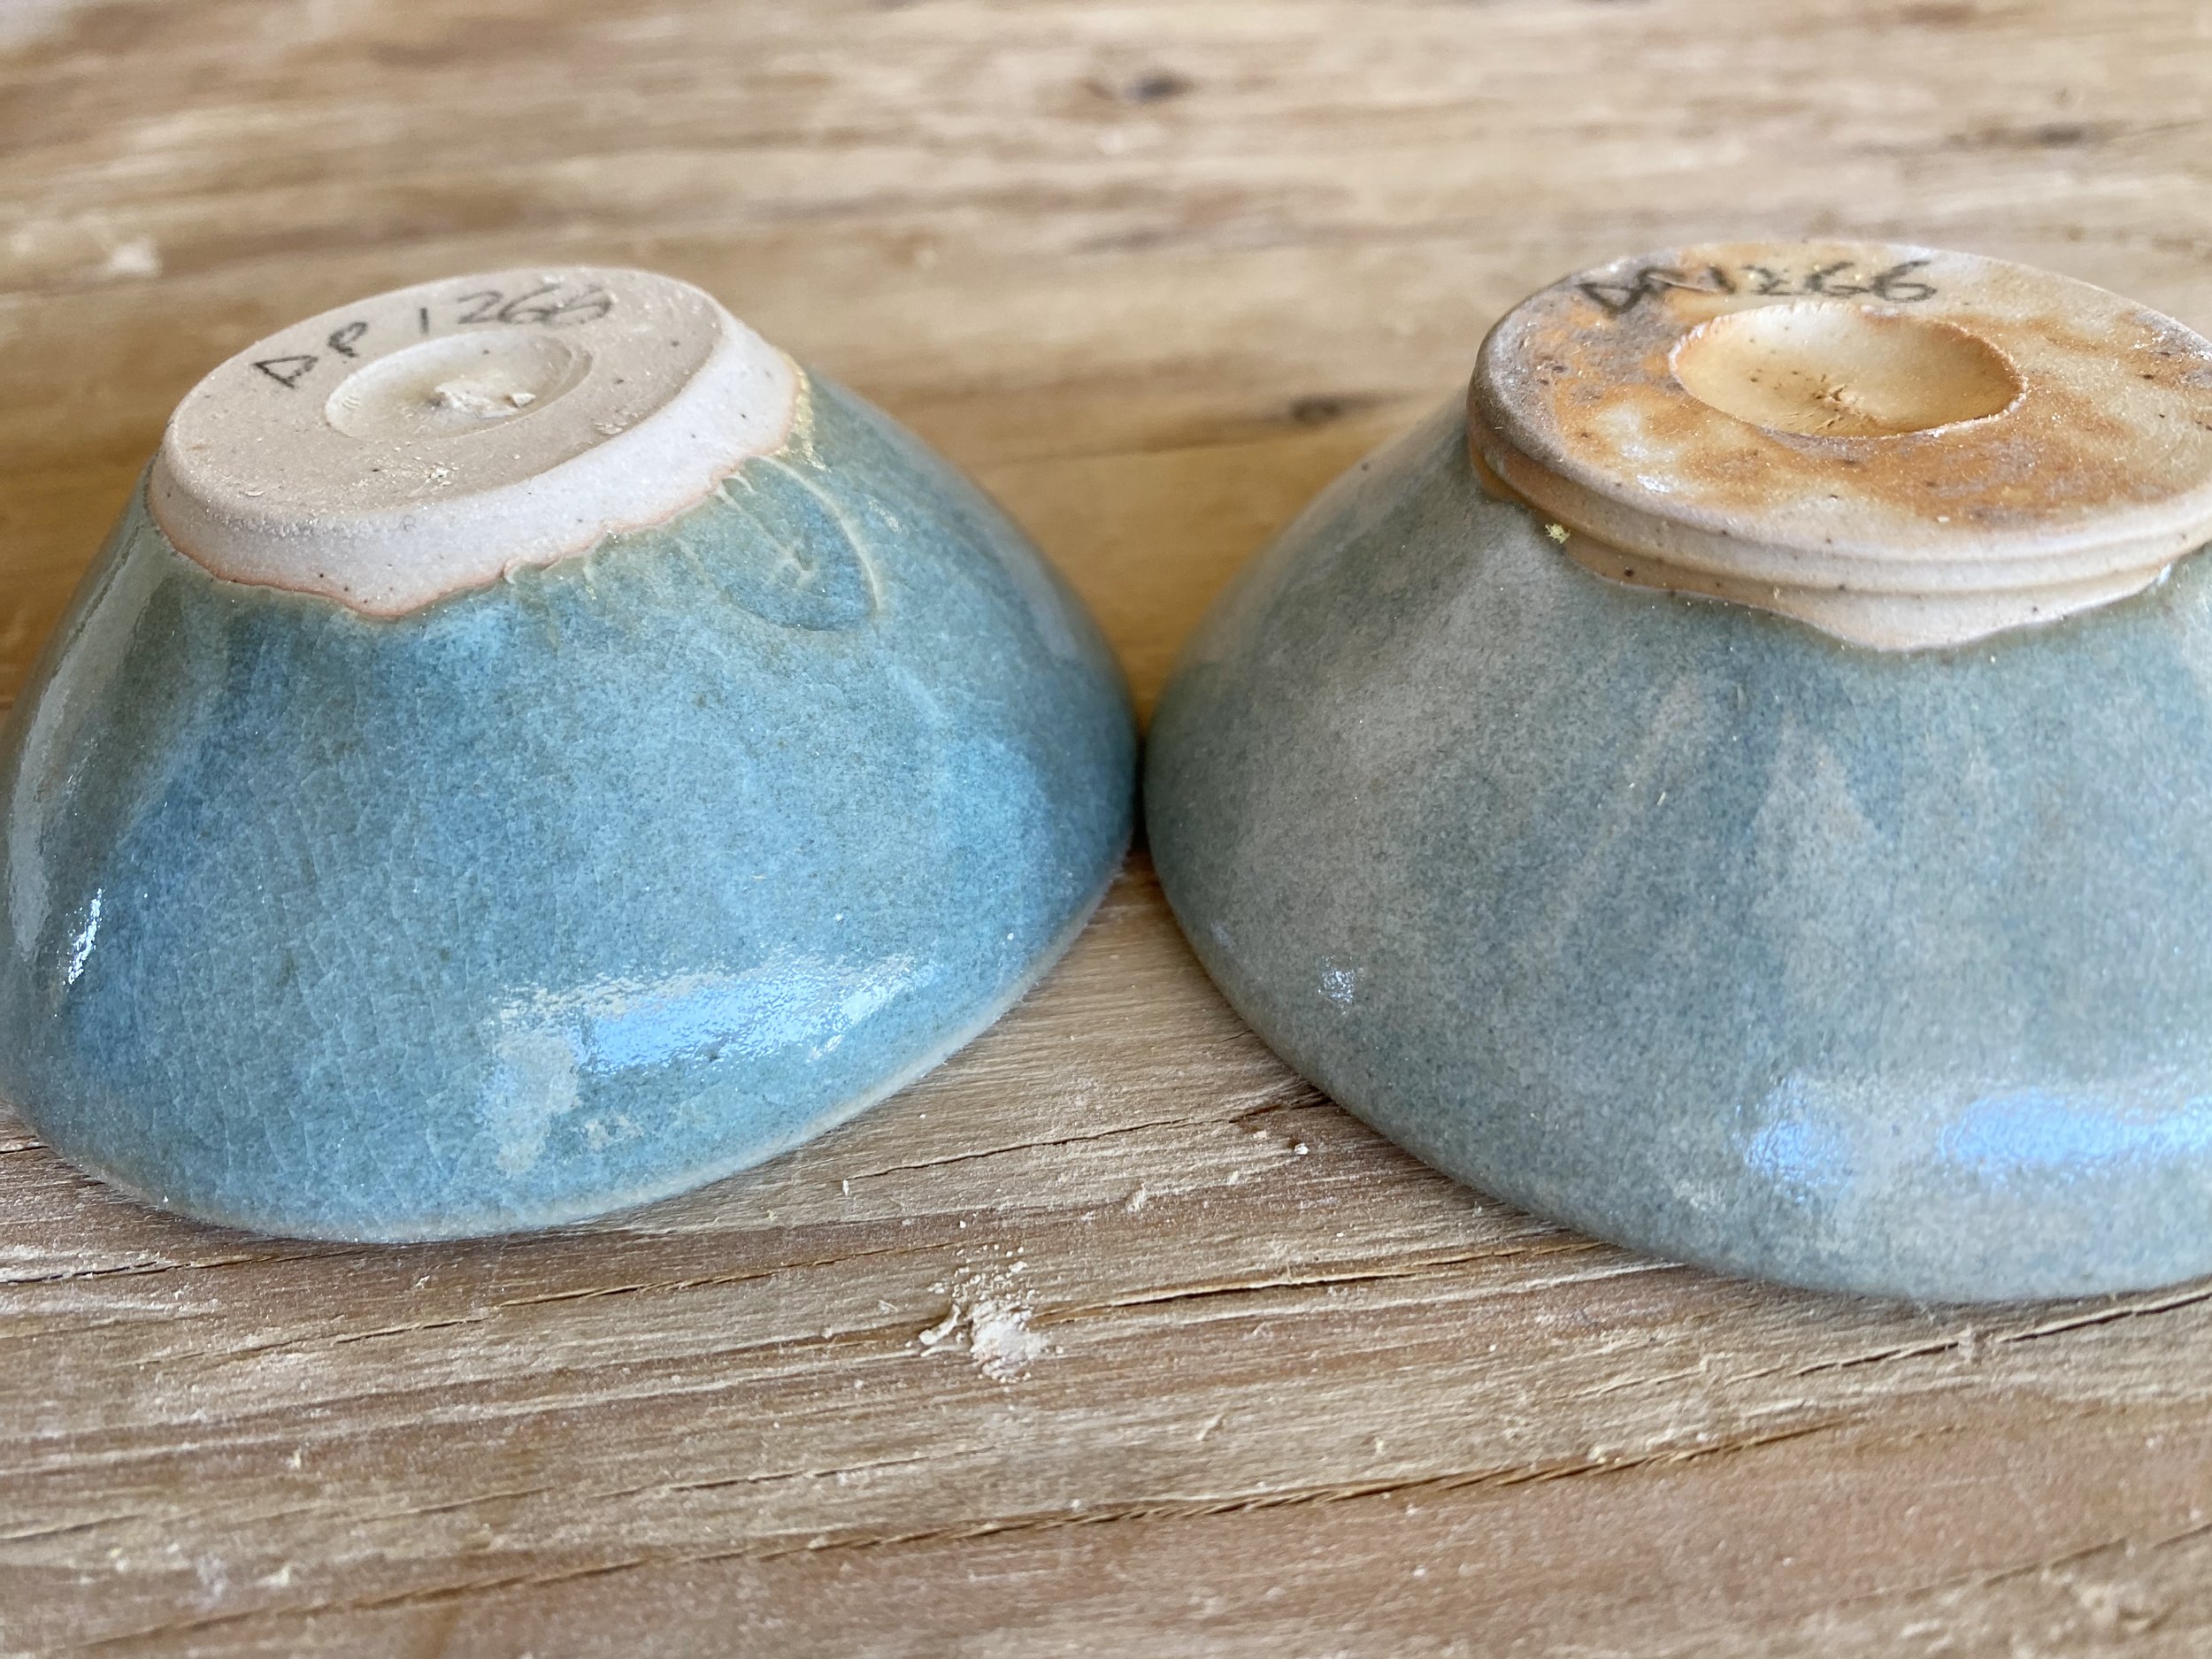

I think what is going on here is that under these slower cooling conditions, the excess of silica has made the glaze even cloudier… it has pushed the opalescence too far. It would be interesting to see these under a microscope. I wonder about the size of the bubbles compare to the brighter blue glaze tests from grid 1 or 2. Perhaps the slow cooling encourages bubbles that are too large or too small, which interfere with the Rayleigh scattering effect.
It seems to me that if I am going to slow cool my Jun kilns, then I can move the composition of the glaze back some, to include less silica. Having said this, I am curious to try firing in a less intense manner; somewhere in between. I also want to try slow cooling the kiln in oxidation rather than reduction. This would be more like what occurred in old thickly built Chinese kilns.
I am encouraged by these results, but also somewhat beguiled still. I was hoping this firing would solve Jun glazes in my mind, but they are so variable! There is still some mystery to be explored! It stands to reason really when you see the variation in historical examples… I am sure that a lot of this variation comes from different firing conditions. There are so many variables, but the way the kiln is fired seems very important to these glazes.
I am looking forward to seeing these in soda and wood firing, too. Will it ever end?
Here are the compositions fo each test if you like one you see…

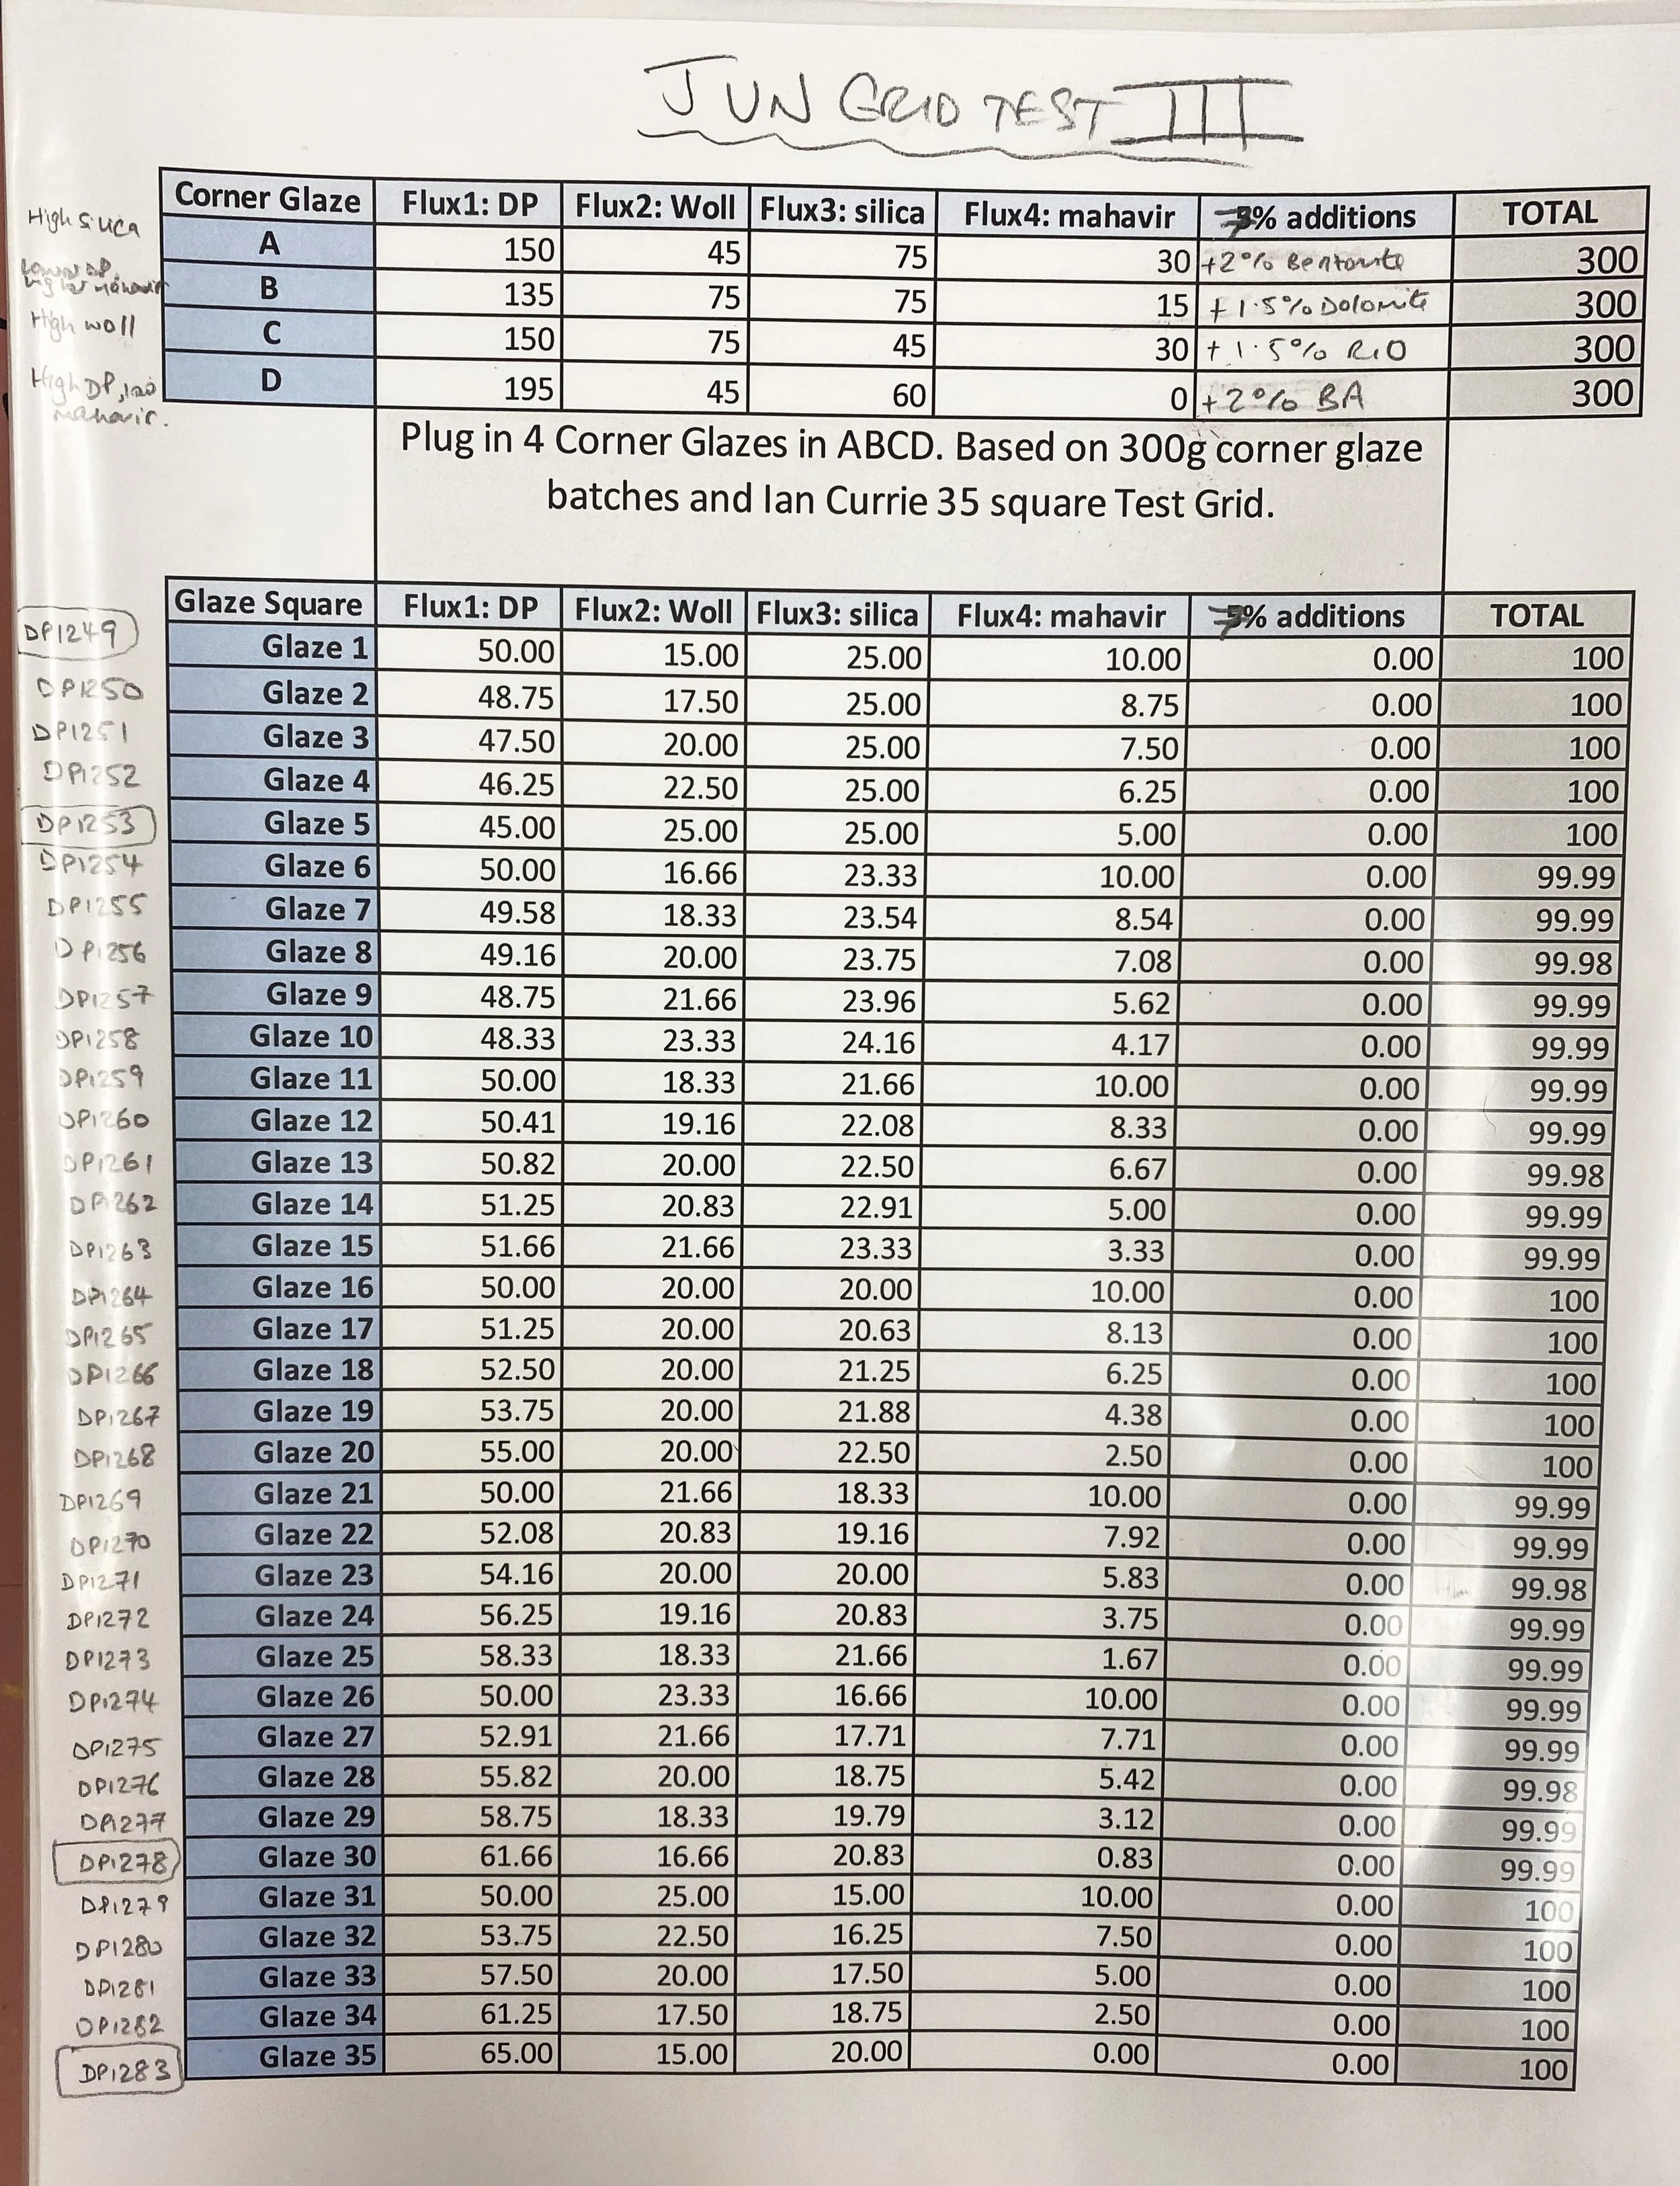

Jun (Chün) glaze tests: grid test 3
In this grid test, I honed in on the most successful zone from my previous tests. Here are the corner recipes:
Corner A = DP 1249 : High Silica Corner
50% DP granite
25% Silica
15% Wollastonite
10% Mahavir (potash feldspar)
+ 1.5% Dolomite
+2% Bentonite
+2% Bone Ash
+1.5% RIO
Corner B = DP 1218 : High Silica and Wollastonite (calcia) Corner
45% DP granite
25% Silica
25% Wollastonite
5% Mahavir (potash feldspar)
+ 1.5% Dolomite
+2% Bentonite
+2% Bone Ash
+1.5% RIO
Corner C = DP 1244 : High Wollastonite (calcia) Corner
50% DP granite
25% Wollastonite
15% Silica
10% Mahavir (potash feldspar)
+ 1.5% Dolomite
+2% Bentonite
+2% Bone Ash
+1.5% RIO
Corner D = DP 1248 : High Devil’s Playground Granite Corner
65% DP granite
20% Silica
15% Wollastonite
+ 1.5% Dolomite
+2% Bentonite
+2% Bone Ash
+1.5% RIO
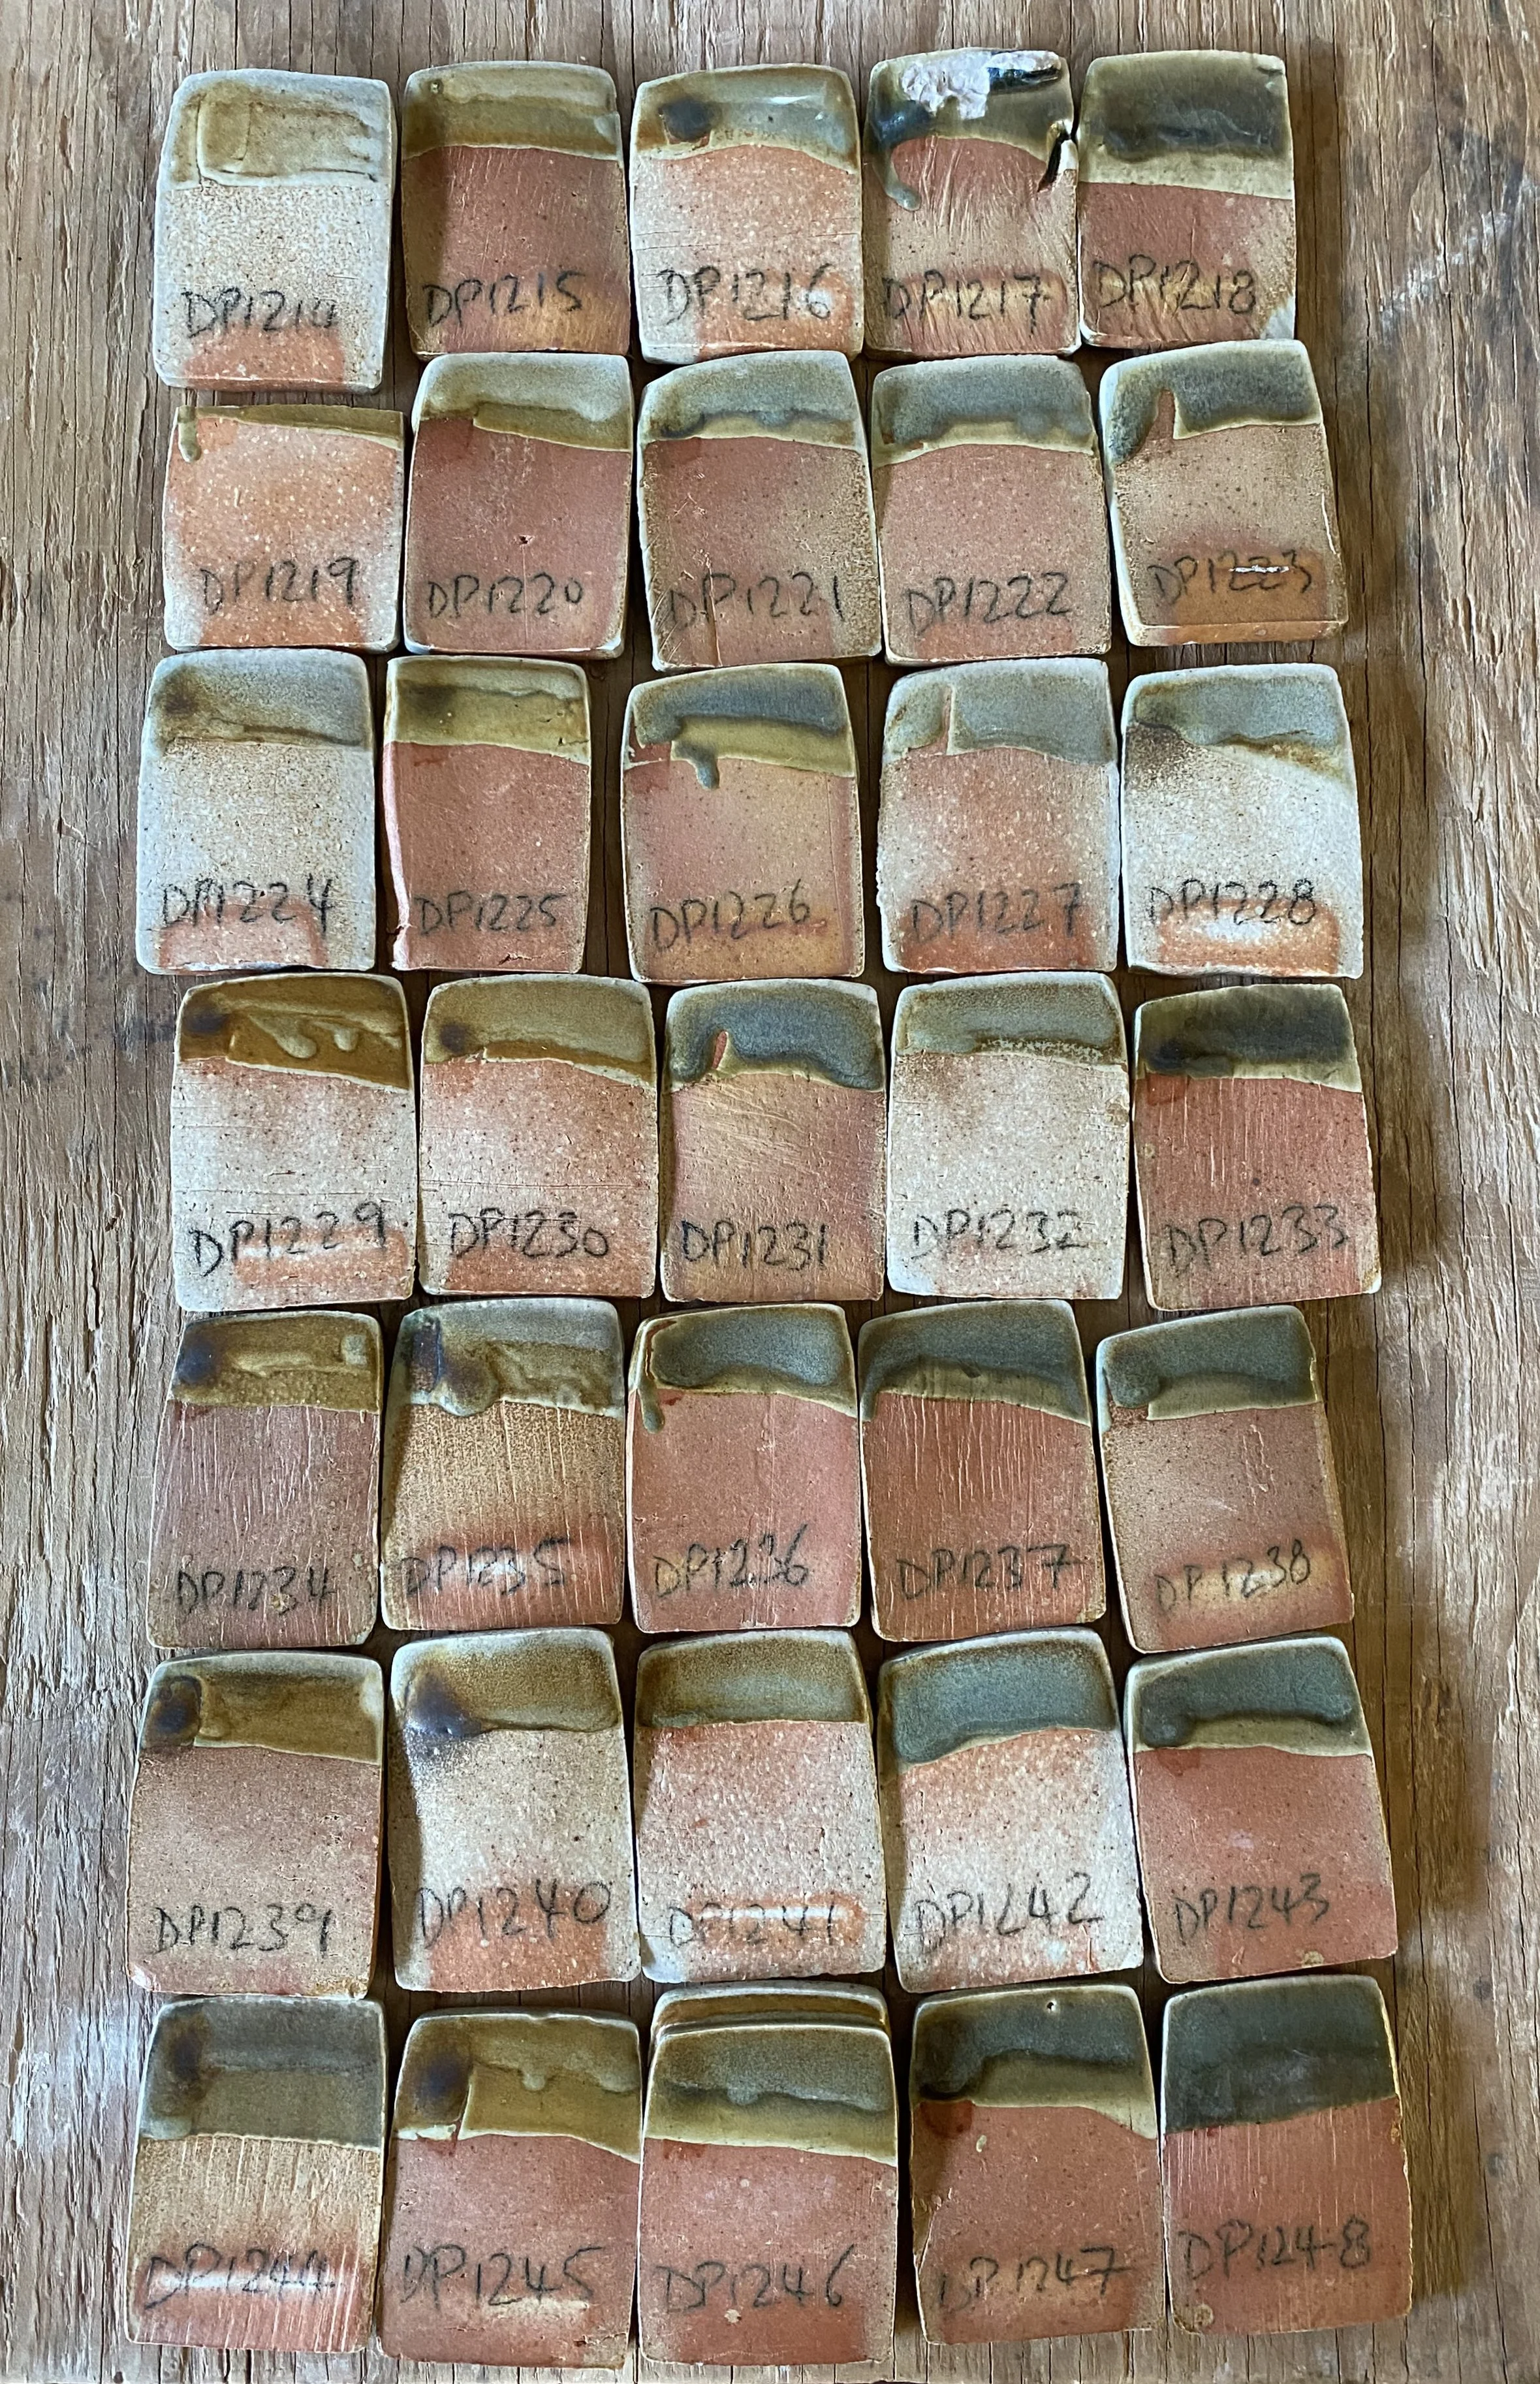
And the results…


Here are the vertically fired tiles which show us more information…


These tests show us how important the atmosphere in the kiln is. Aside from the glazes in the top row (and one below it, really), which seem a bit dry, every test in this grid has the potential to be a Jun glaze. The changes in composition are fairly minimal. The inconsistencies in the results were a little frustrating to me at first, but now I see they provide a solid lesson: Reduction is really important for the phase separation and color of these glazes.
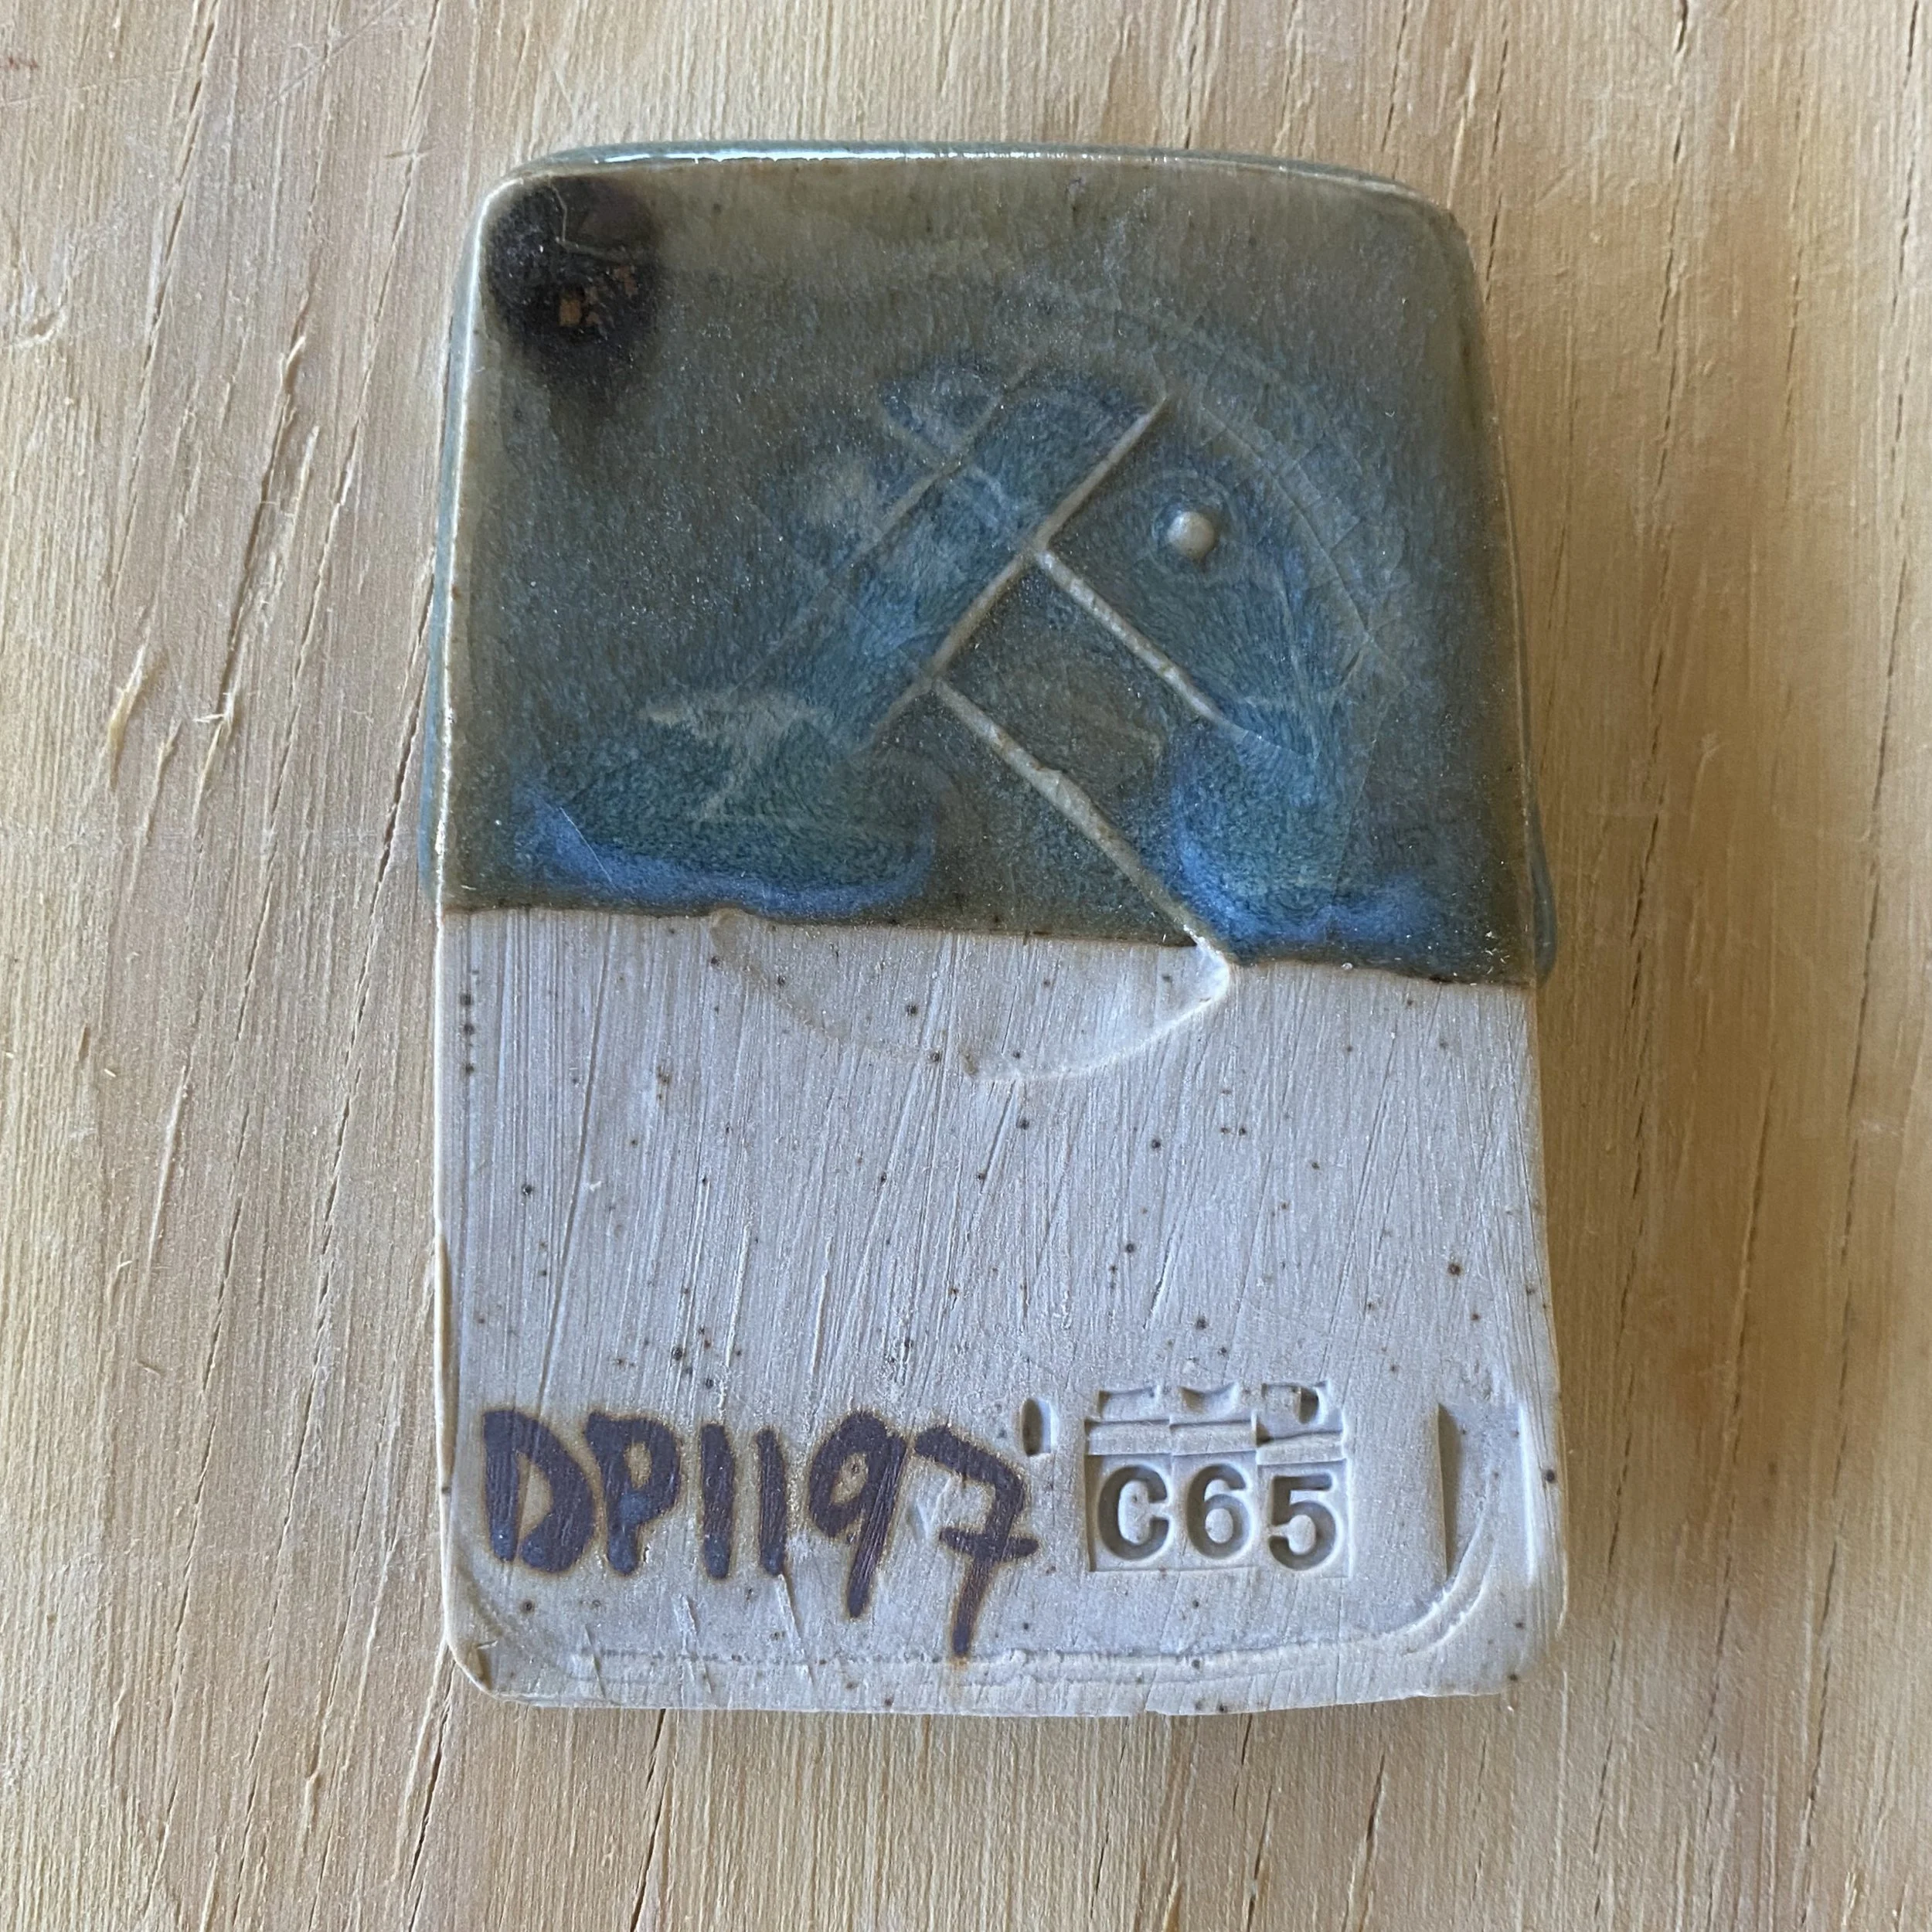
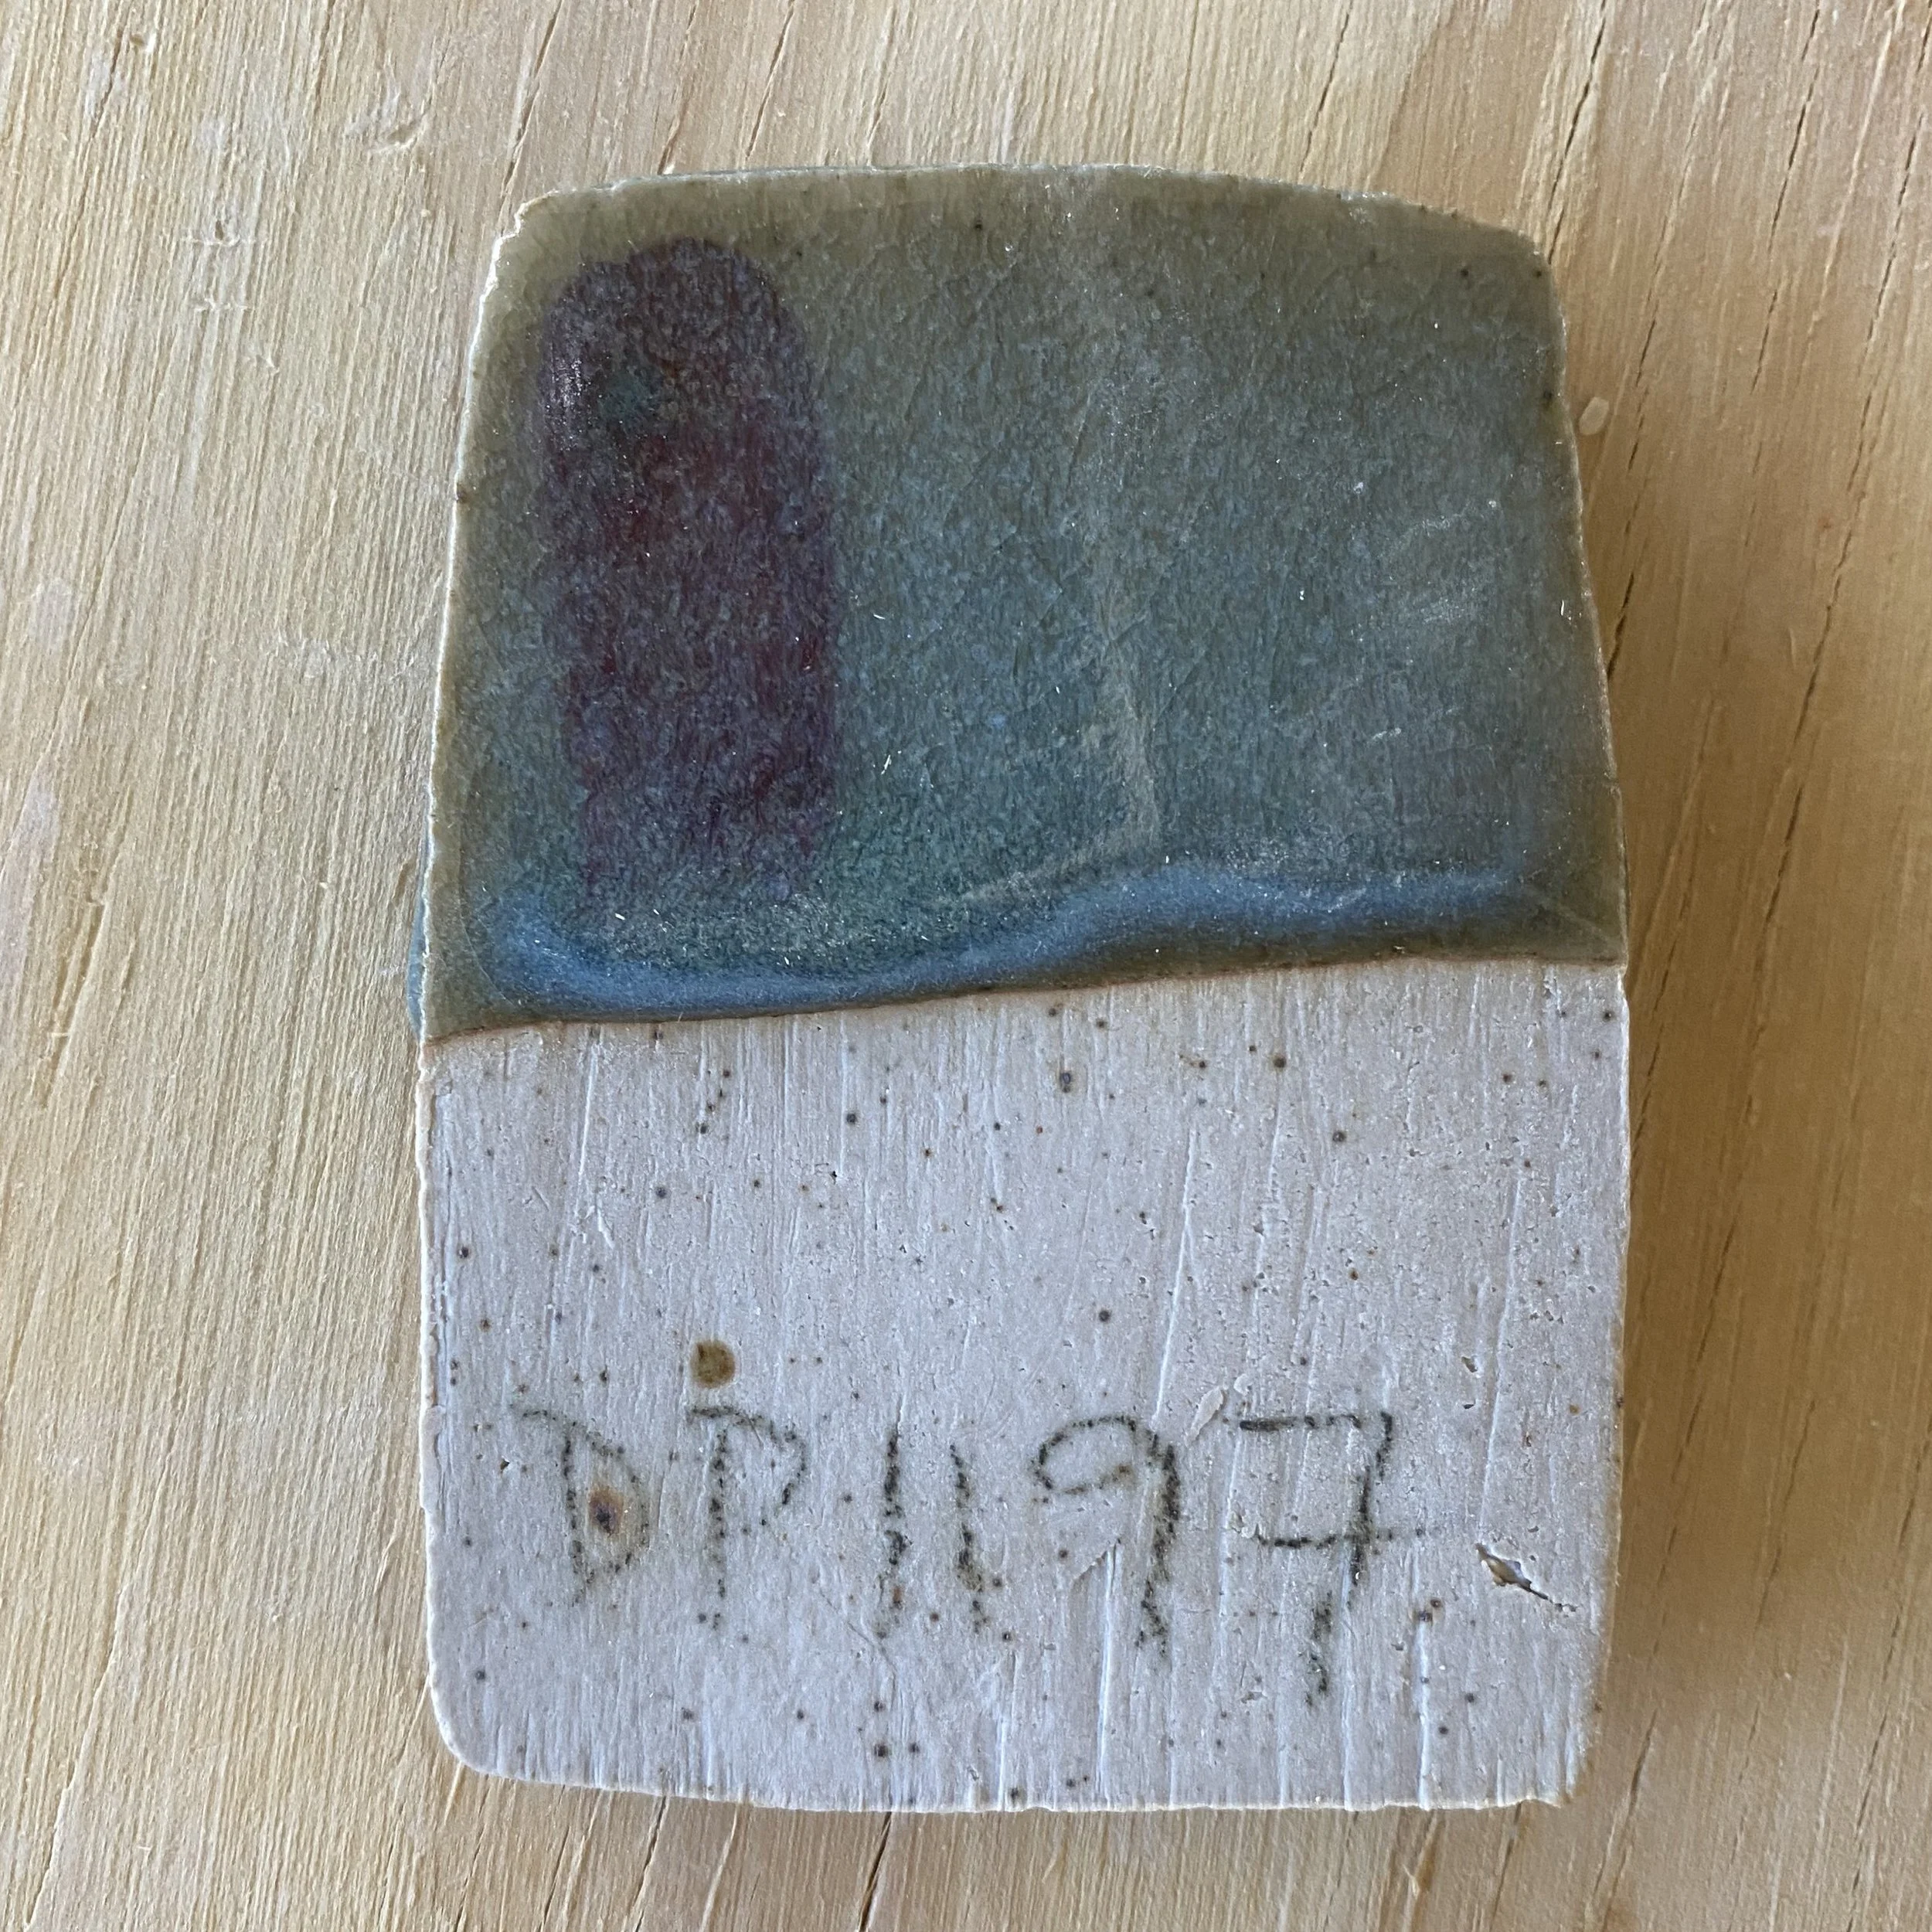
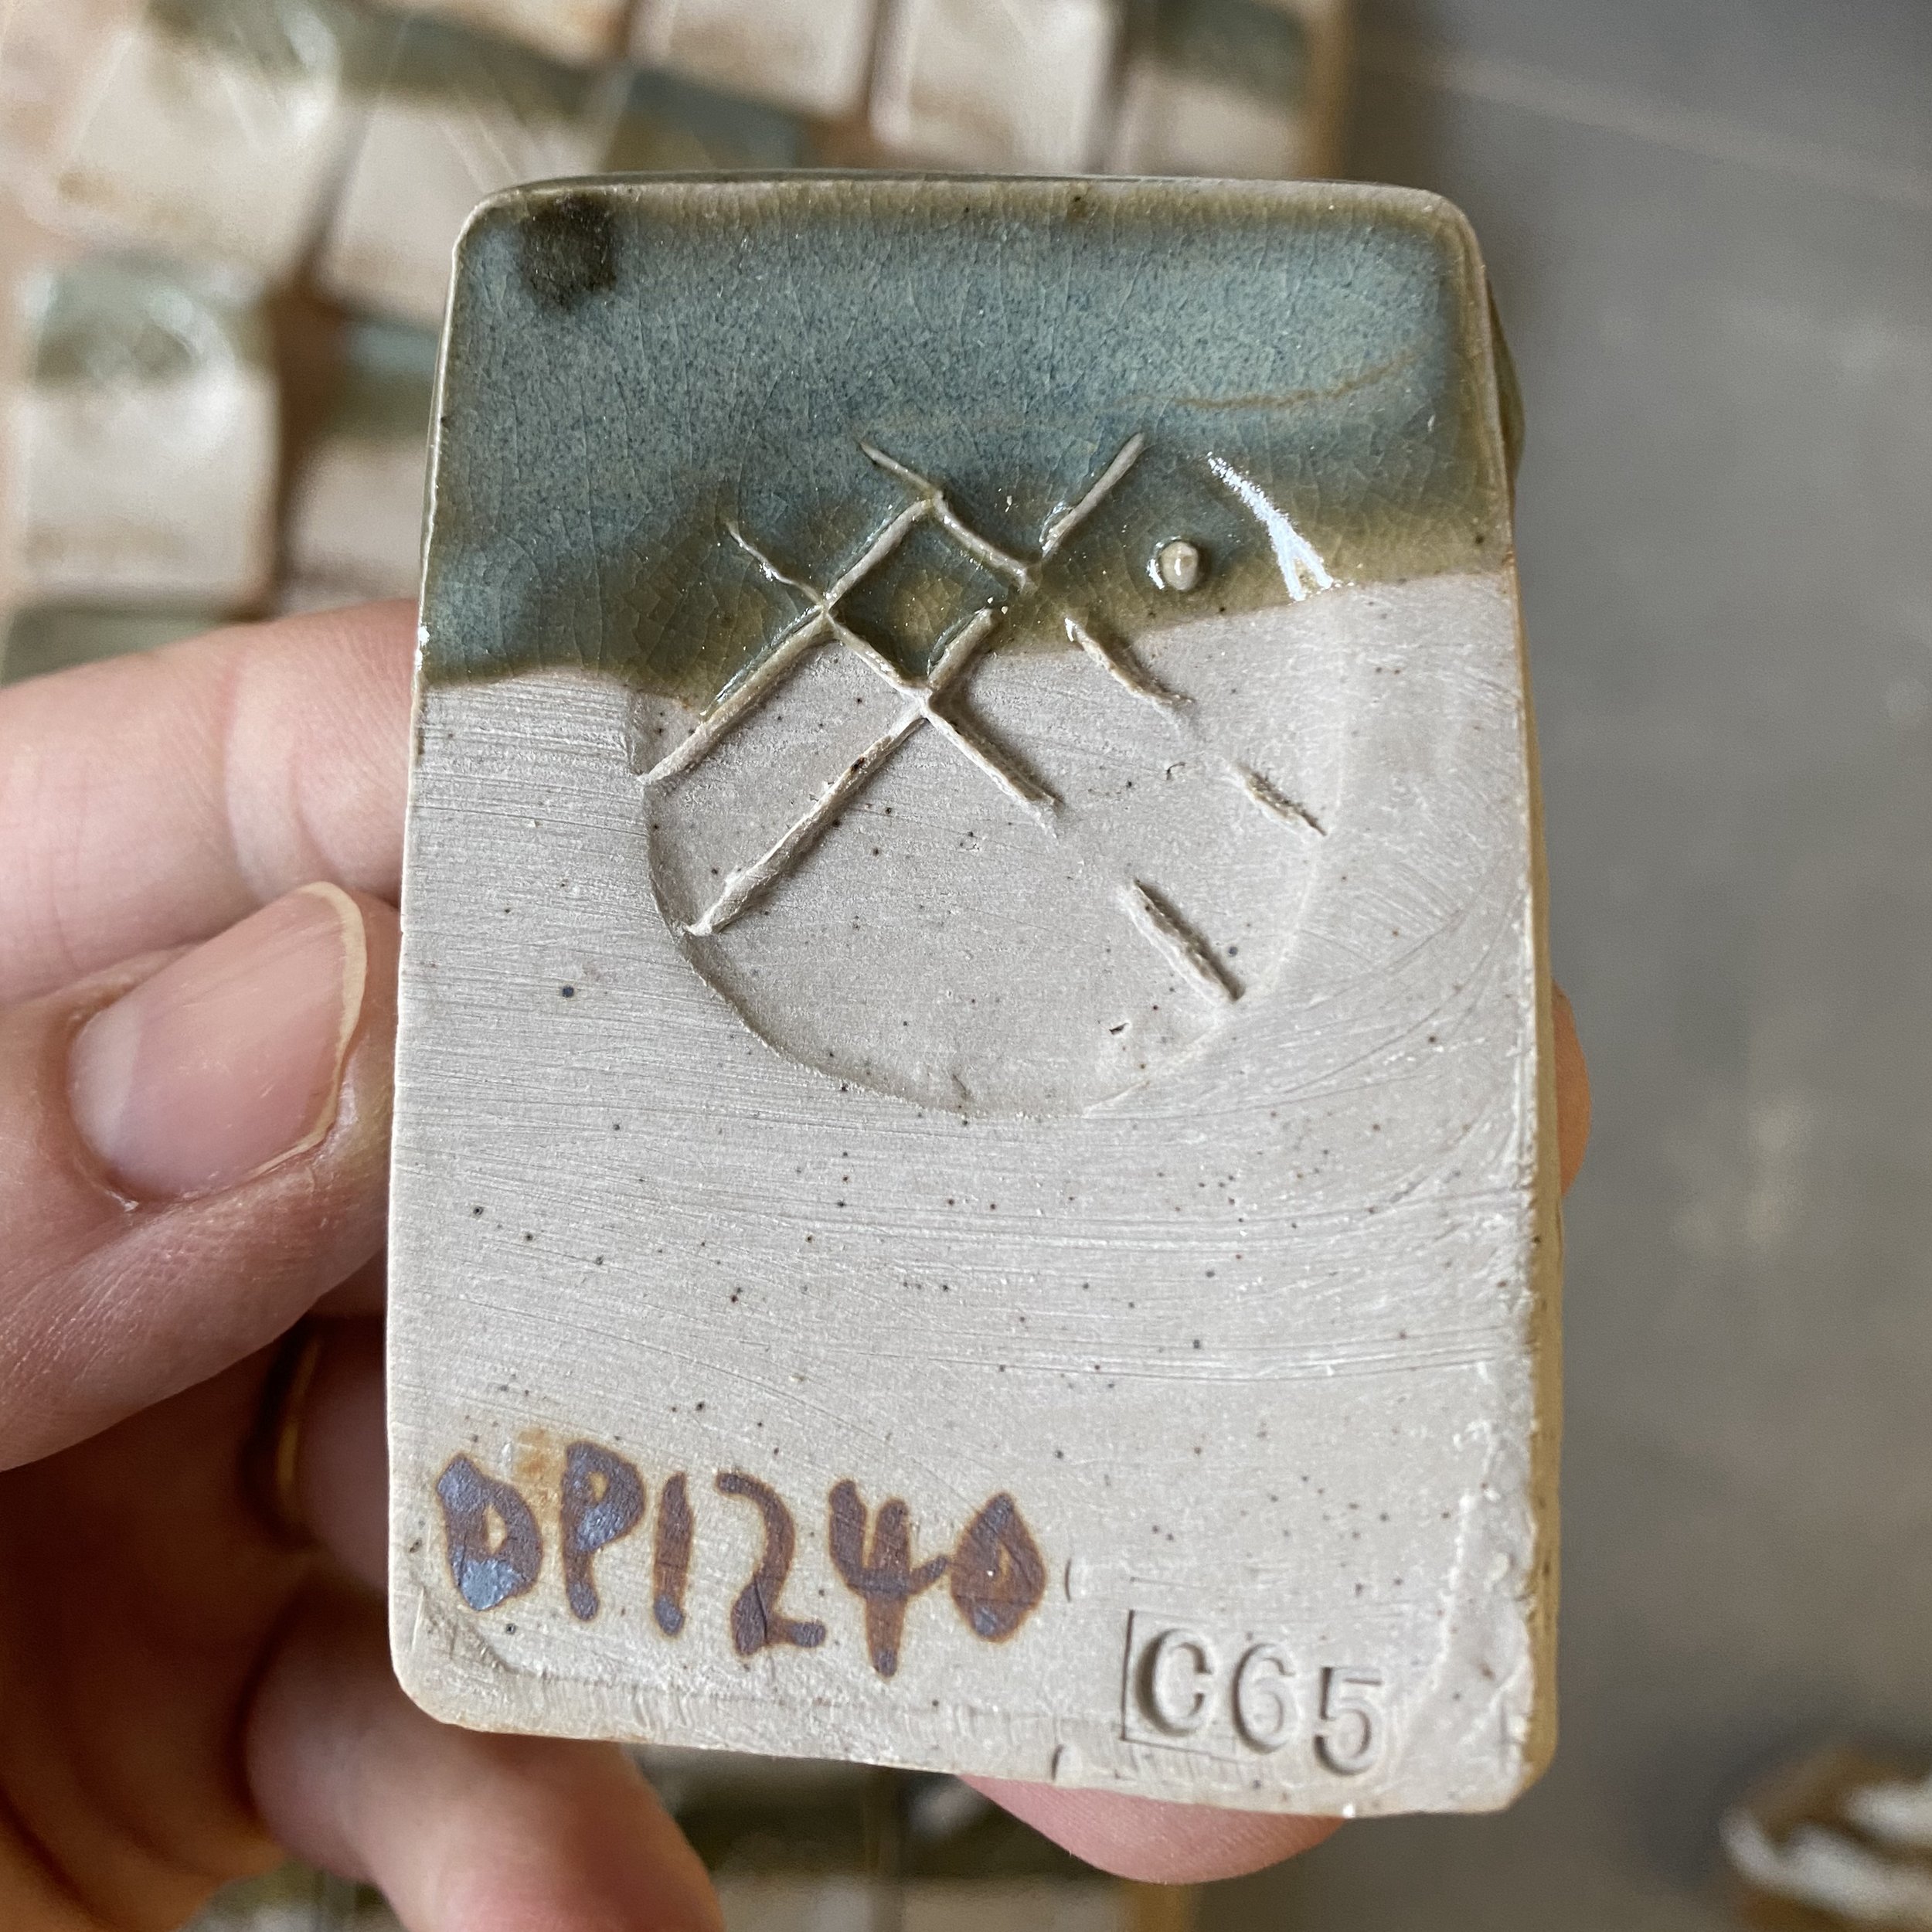
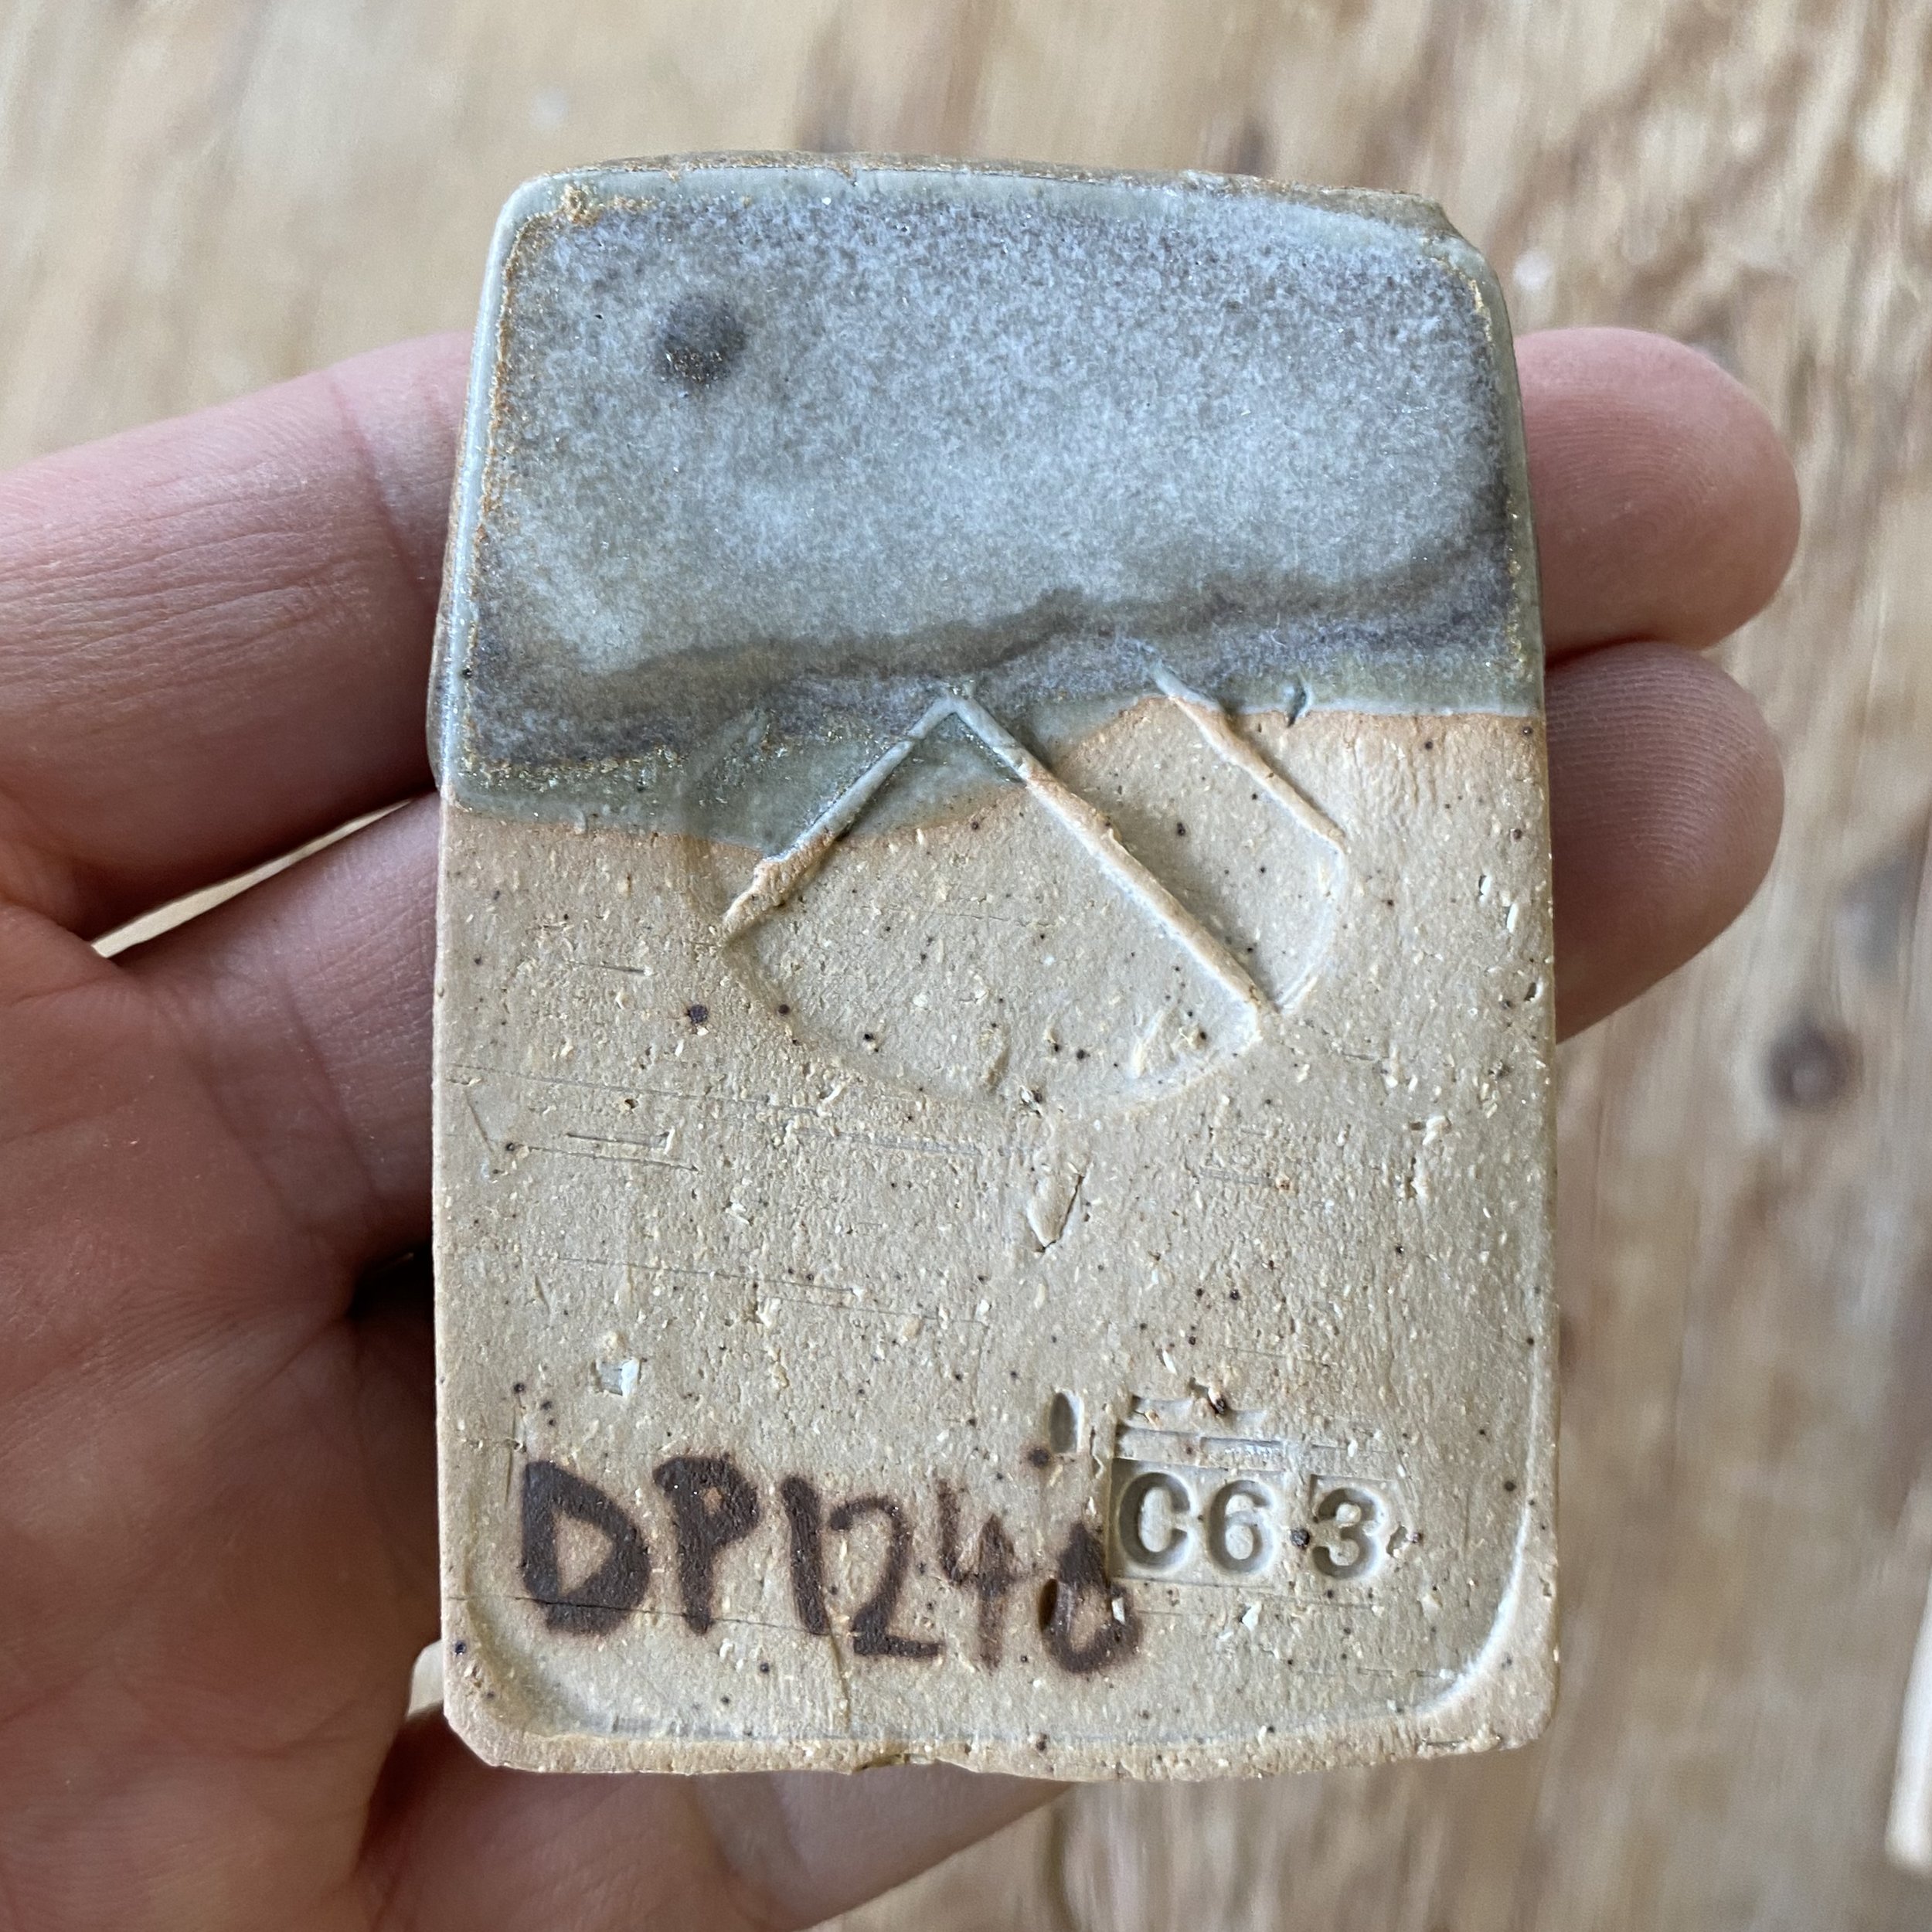
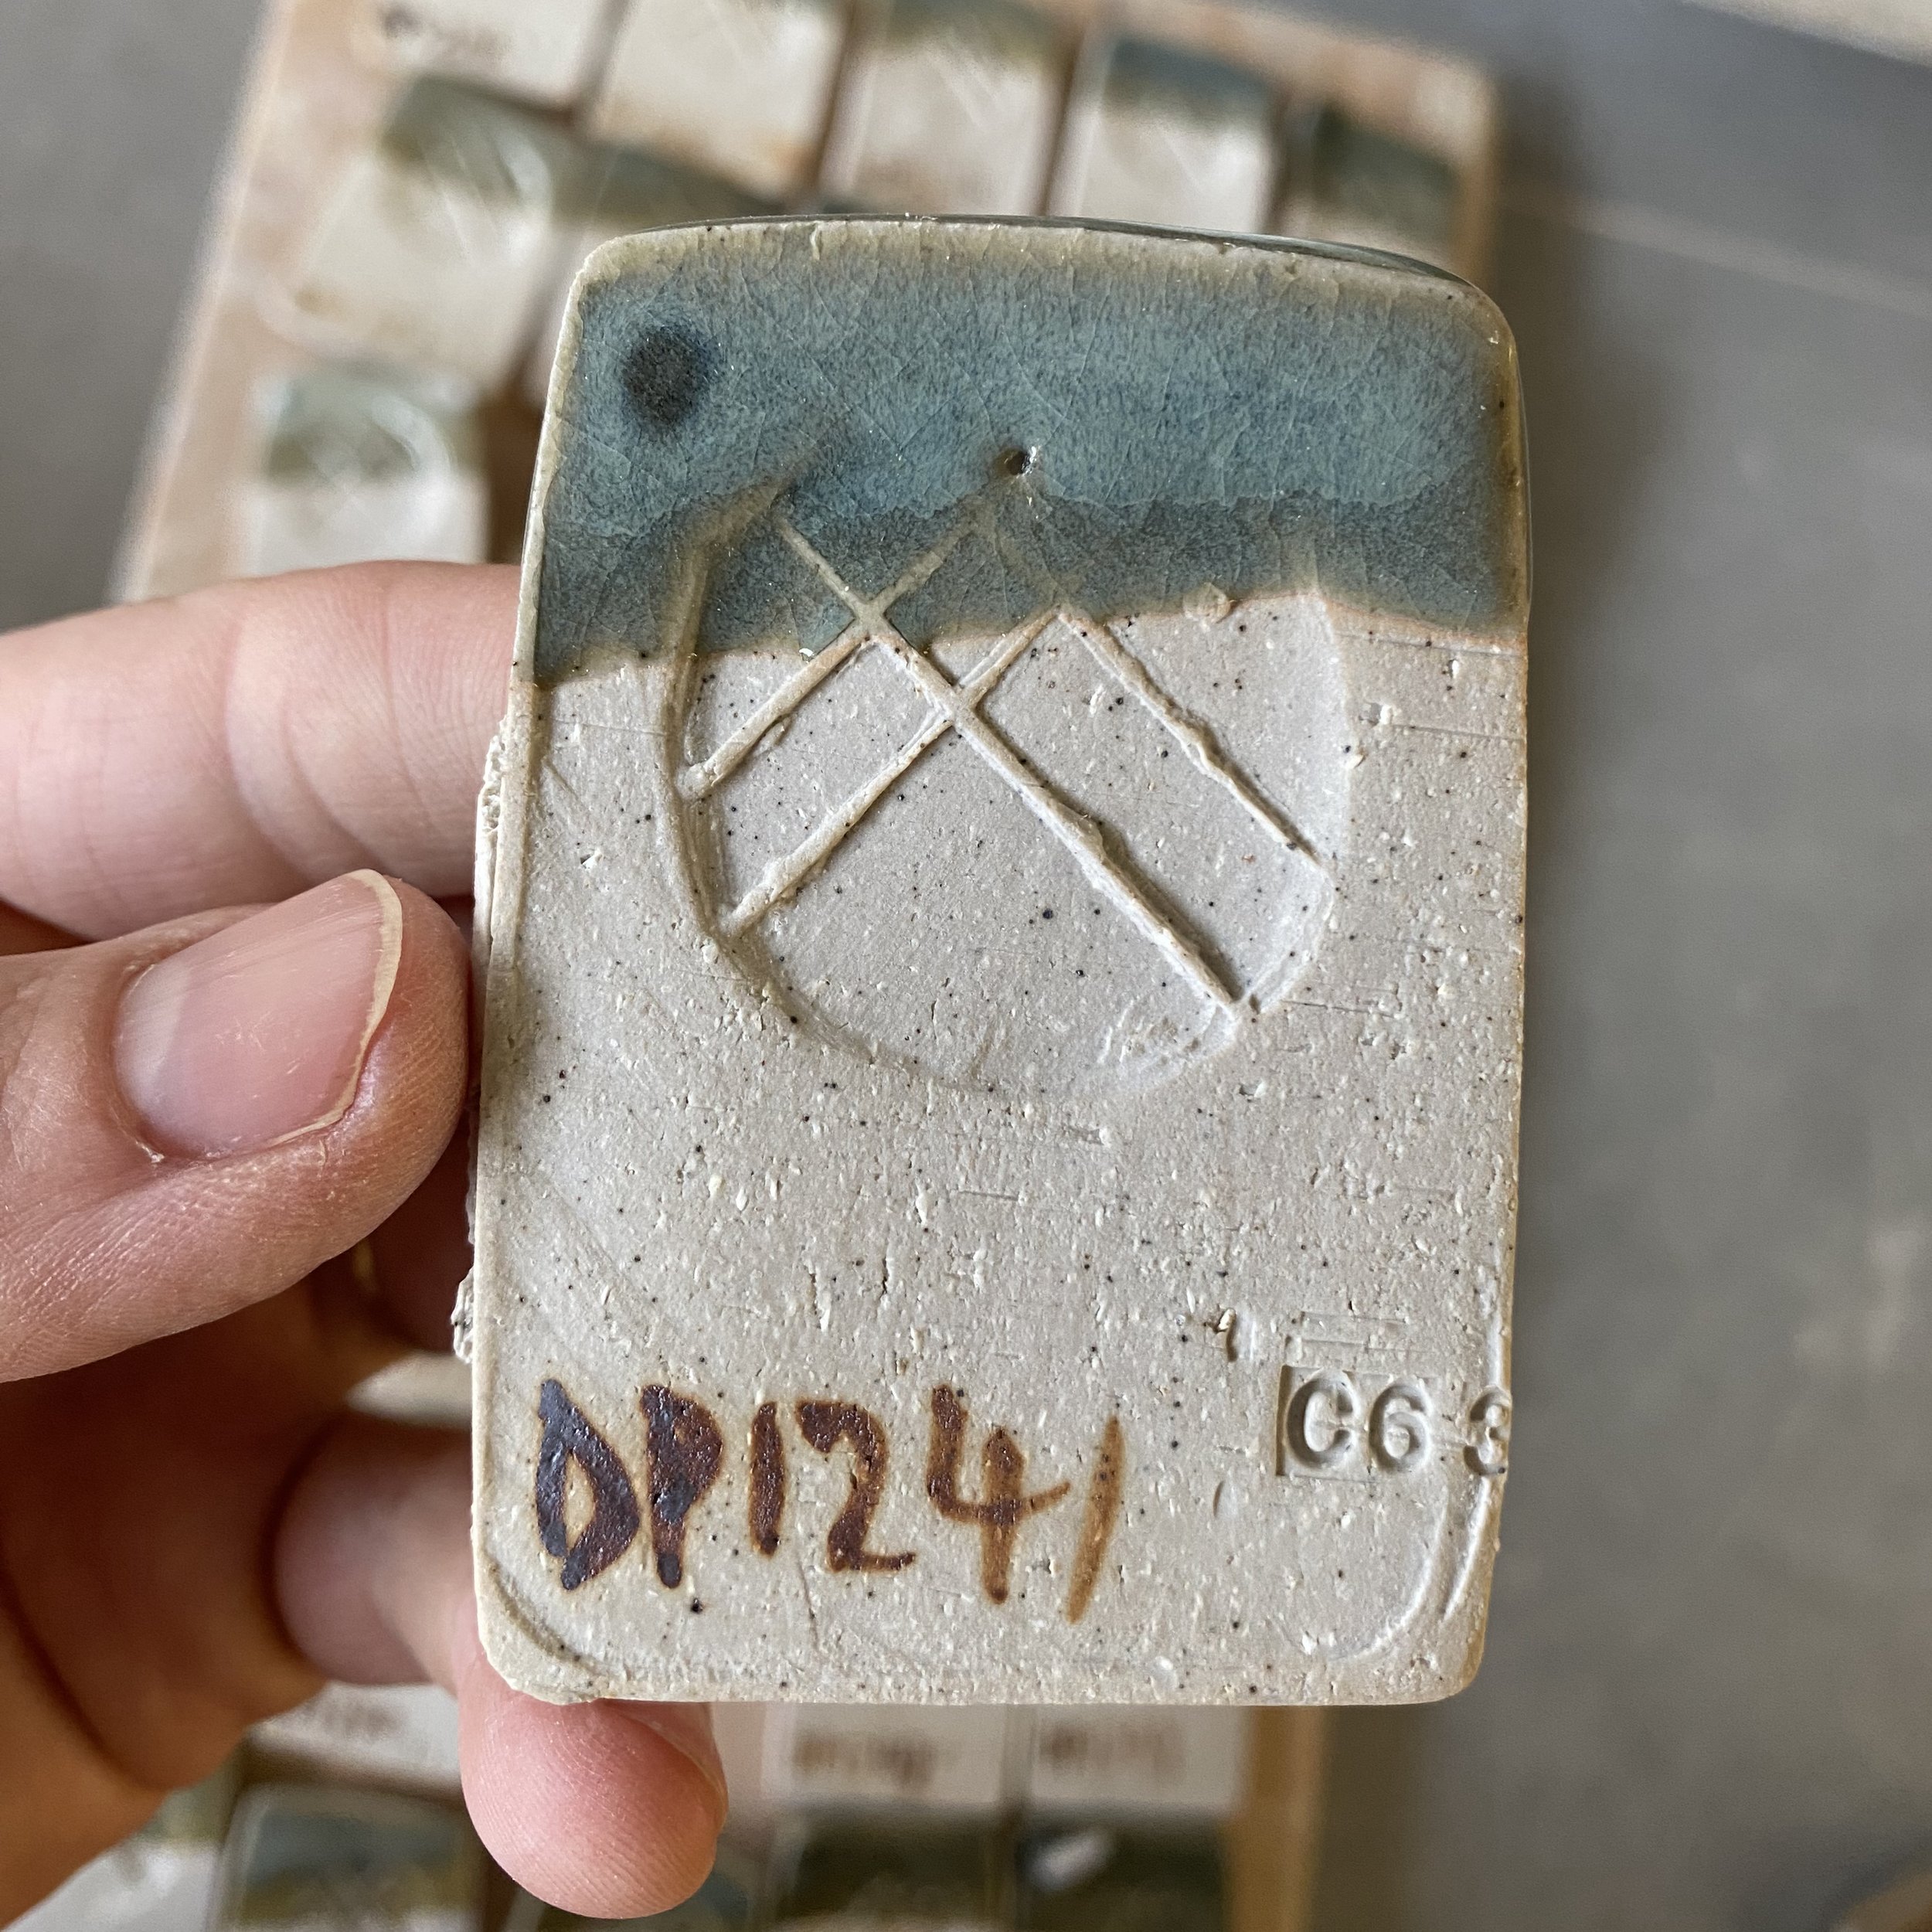
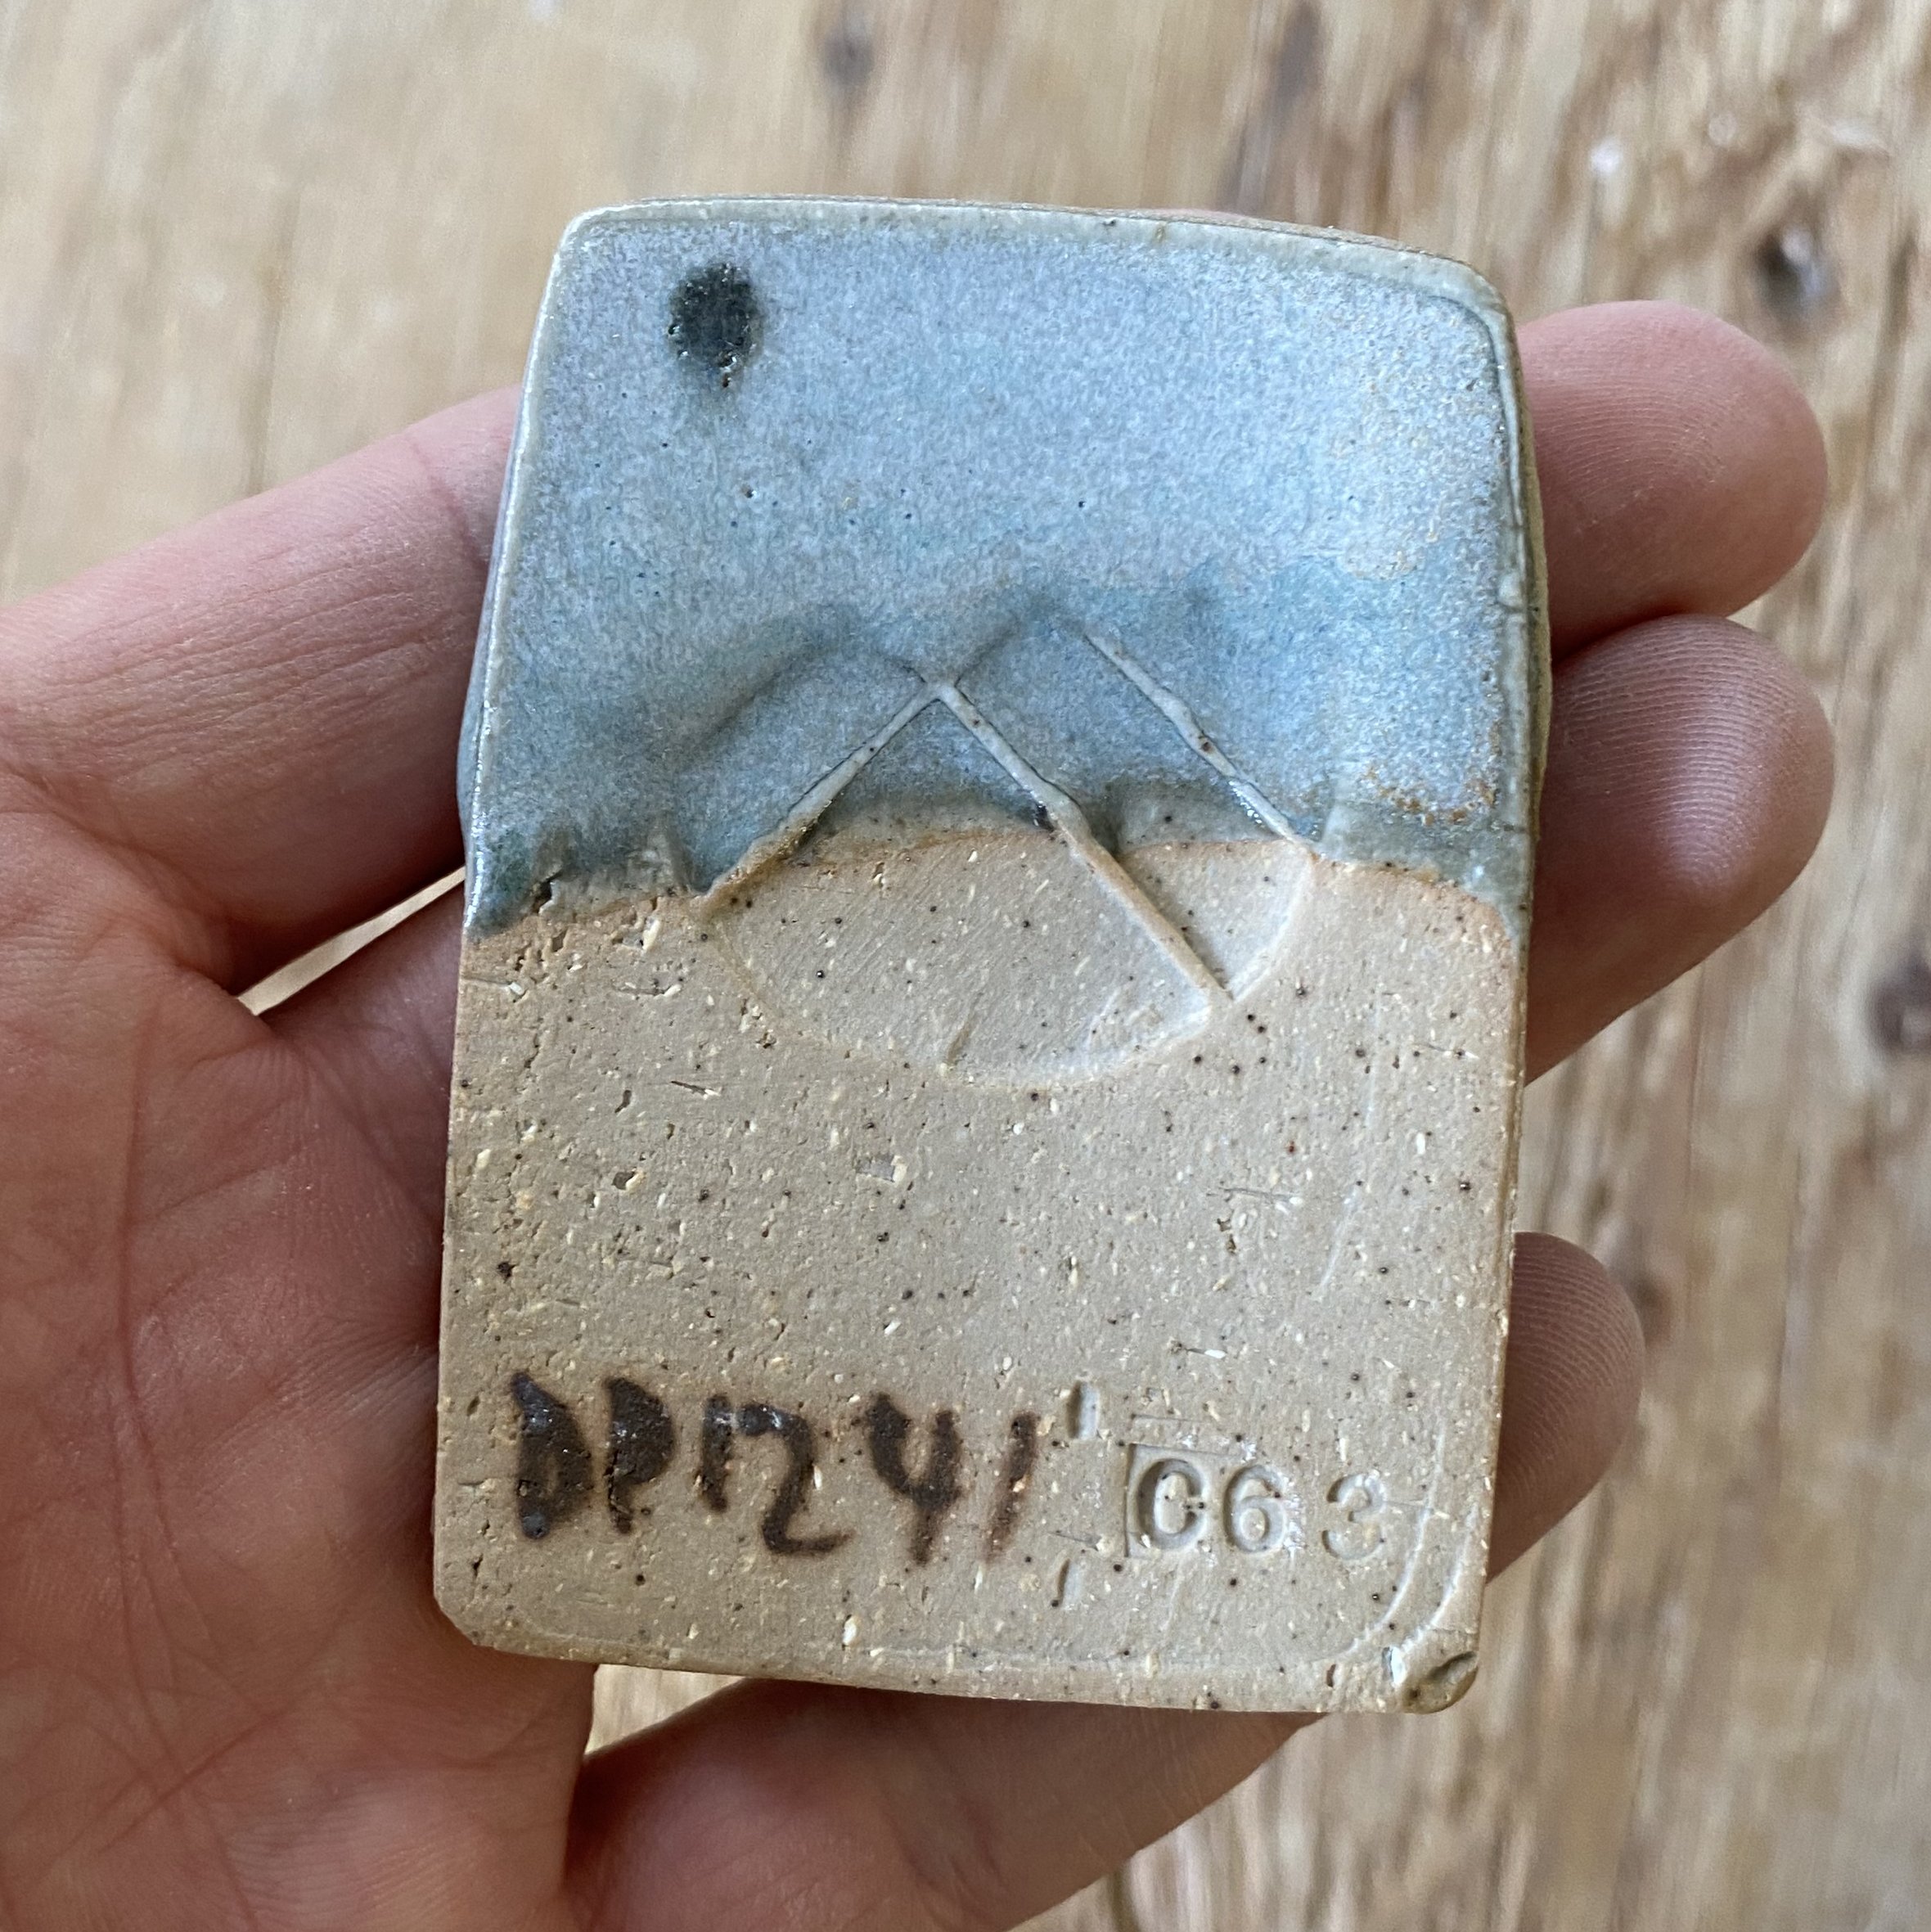
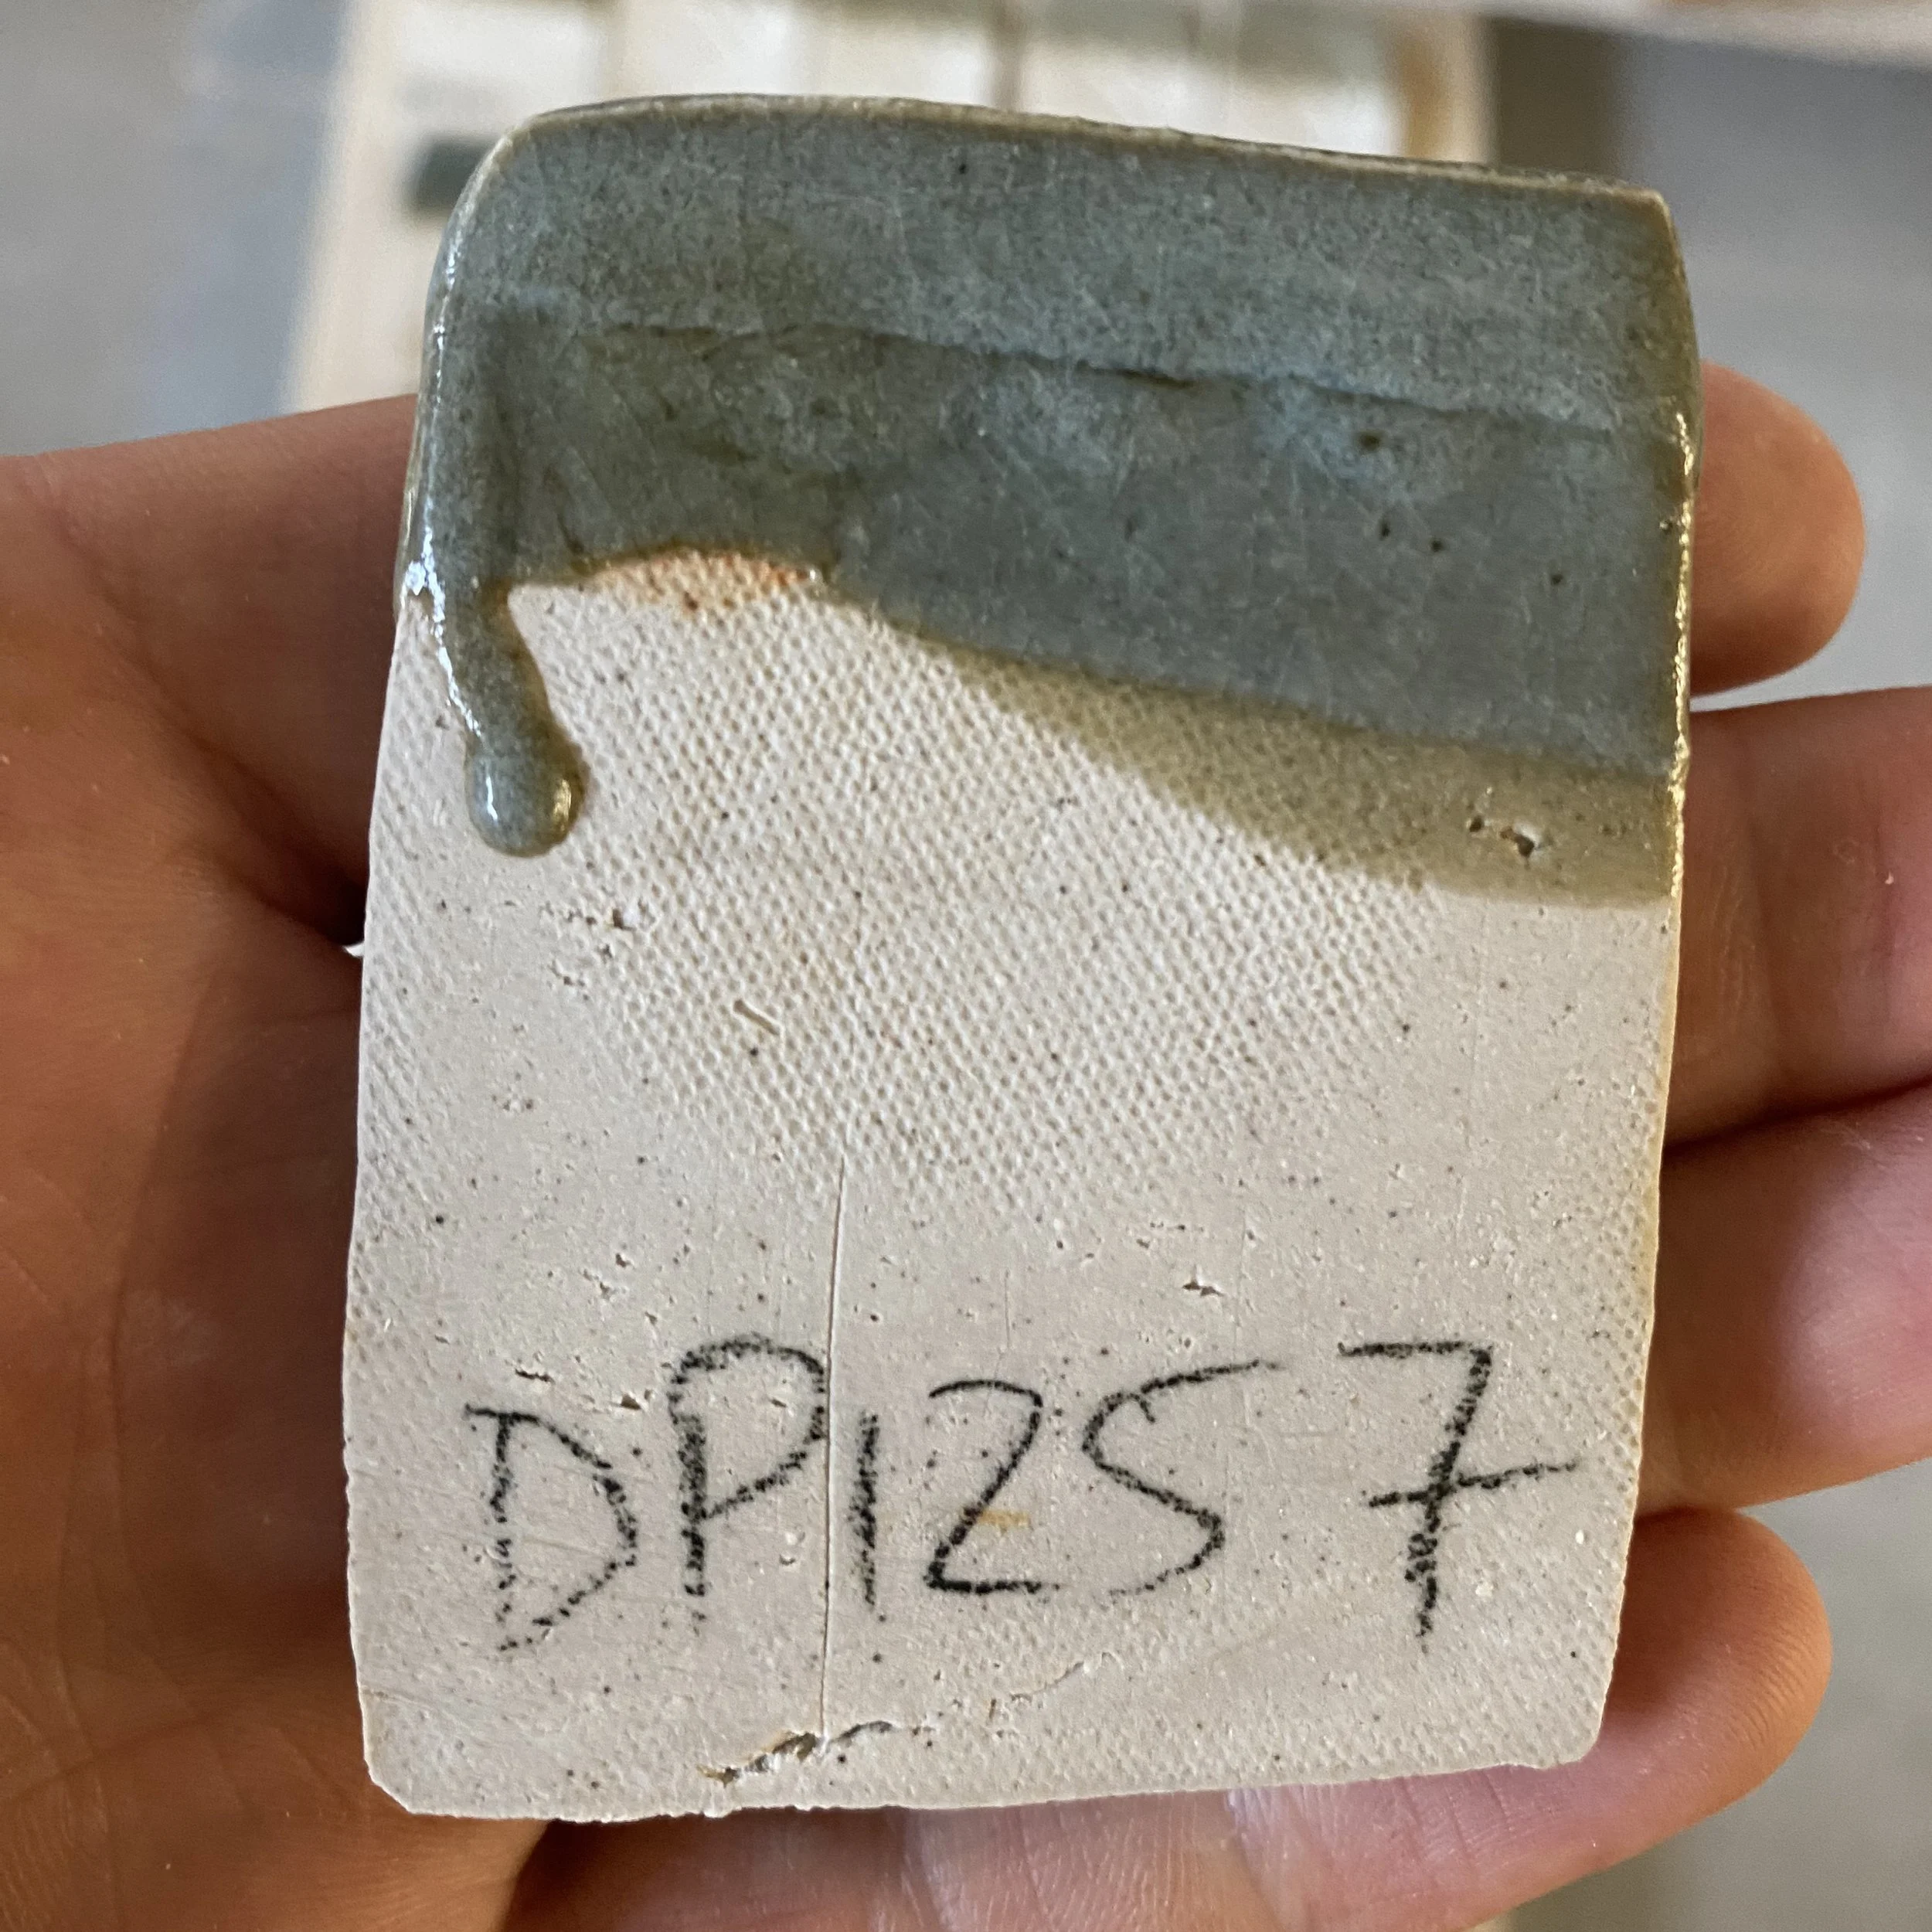
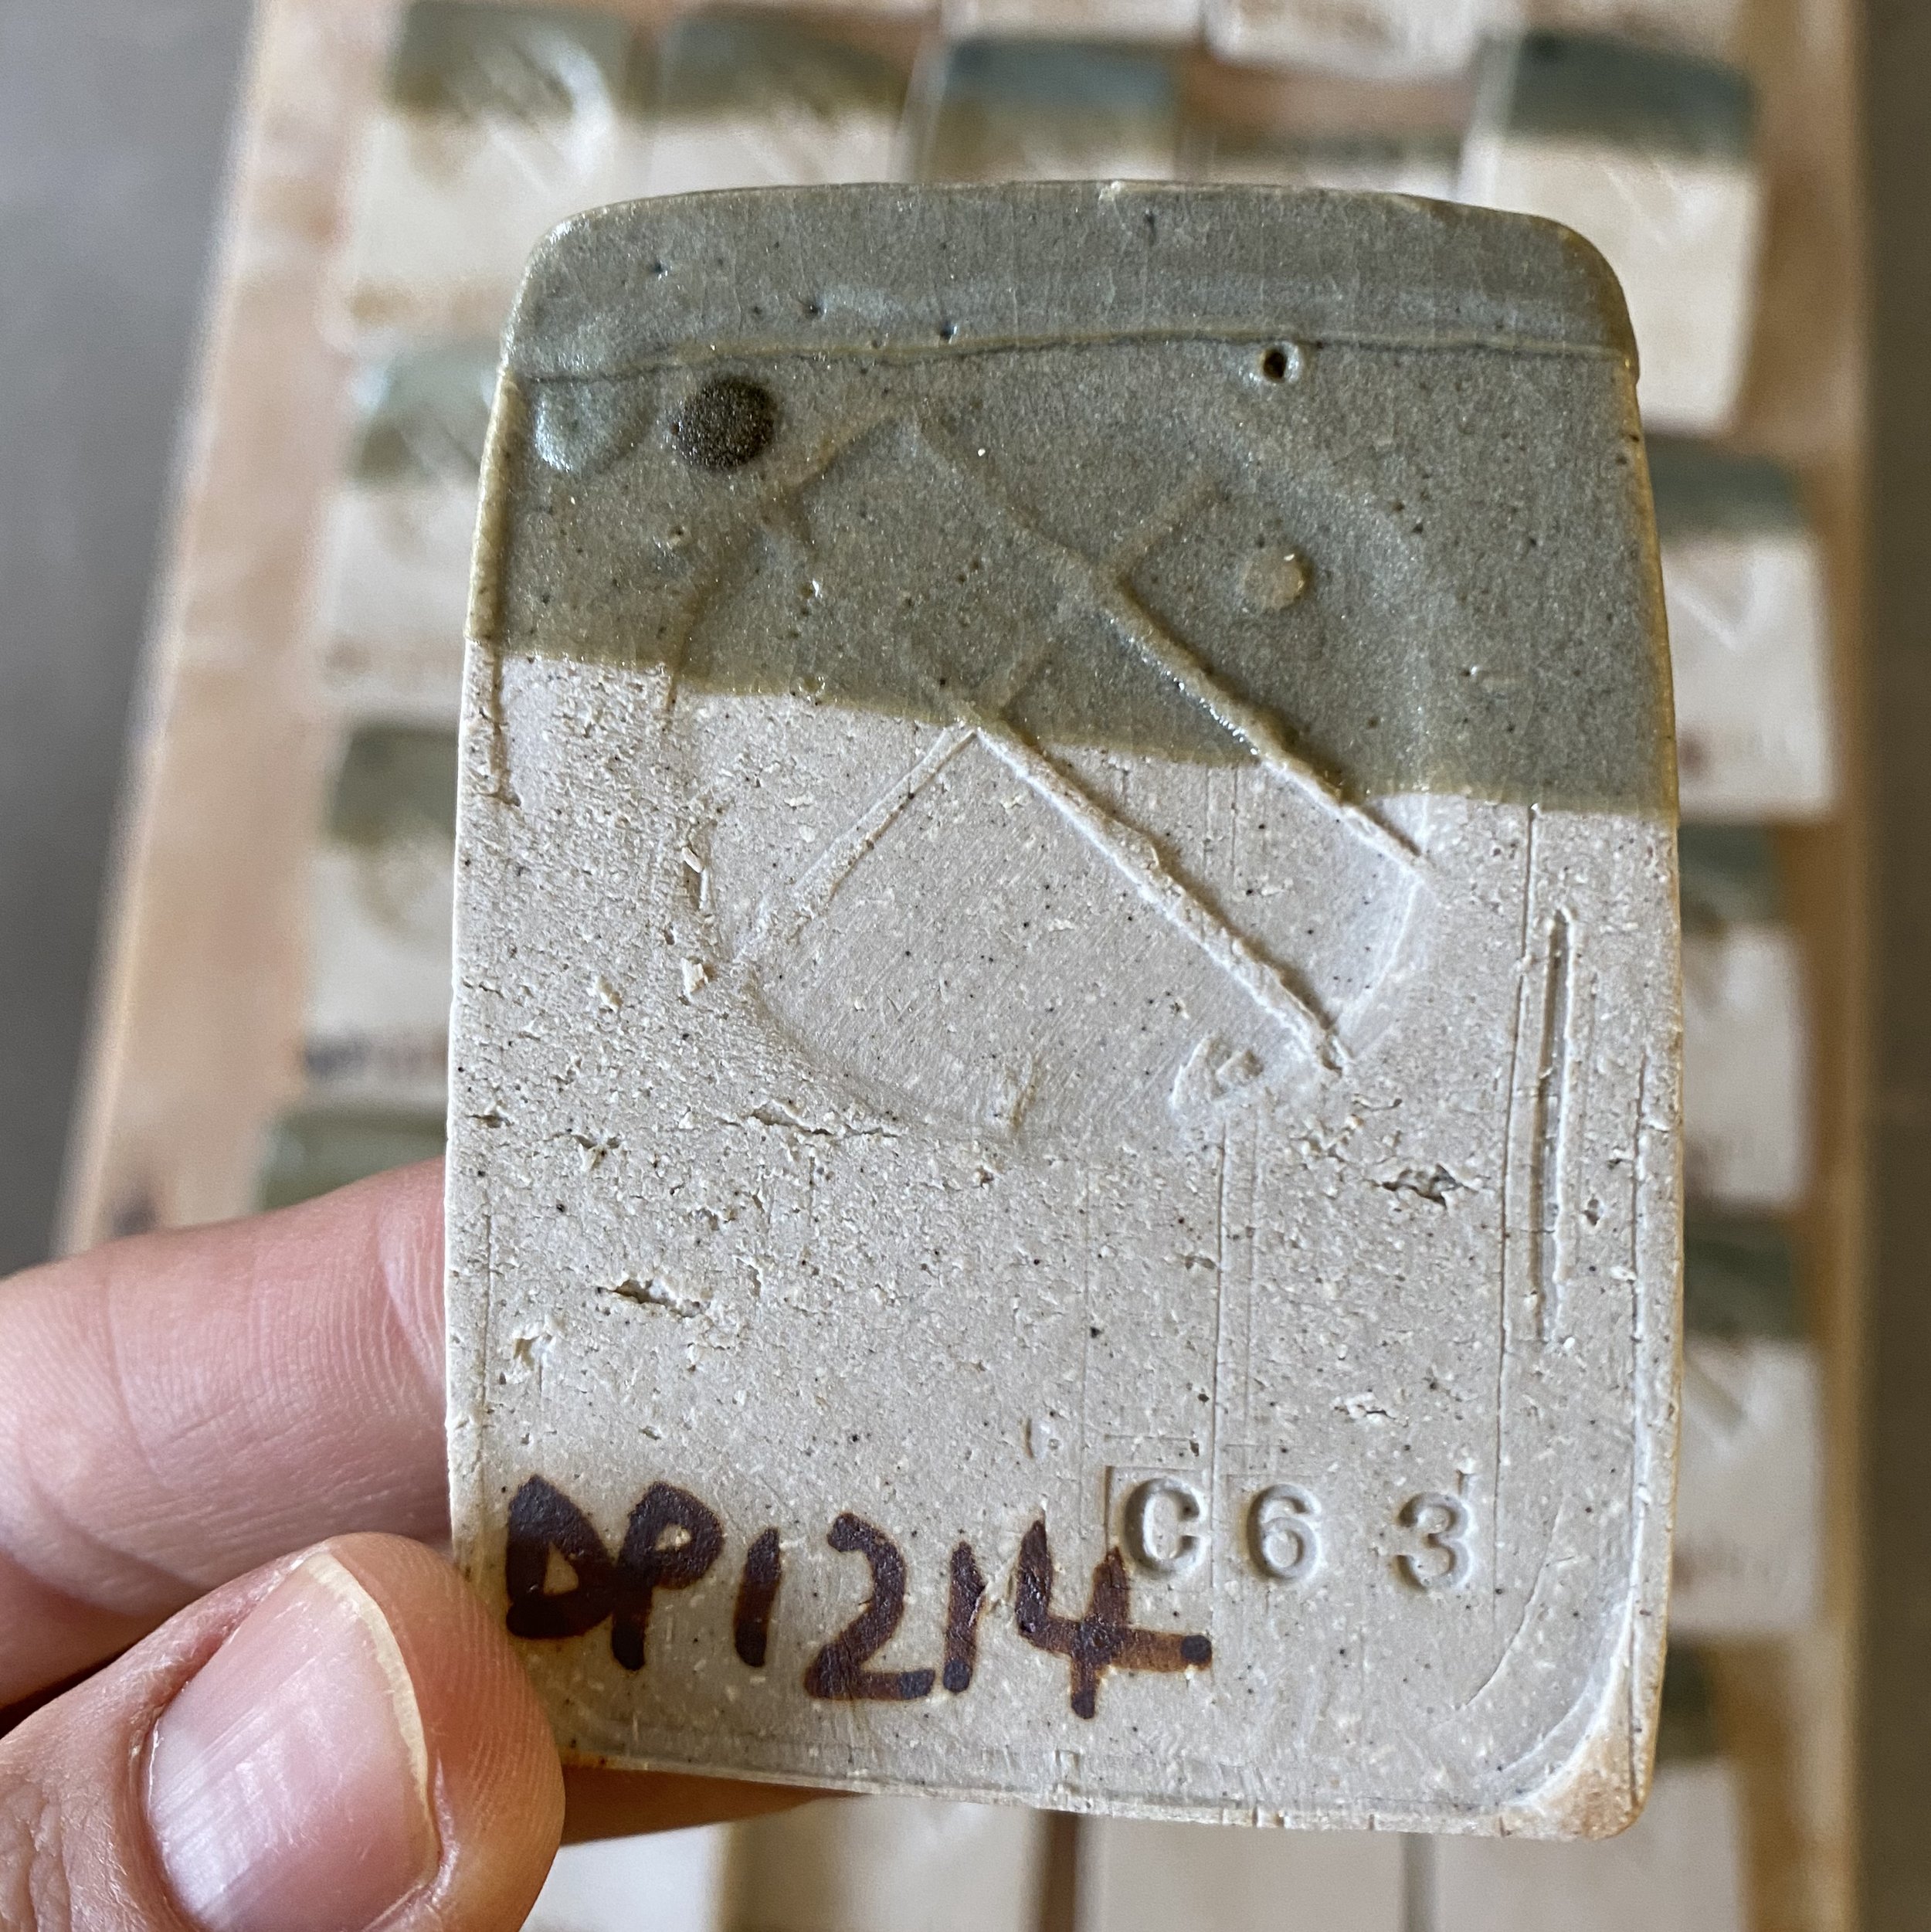
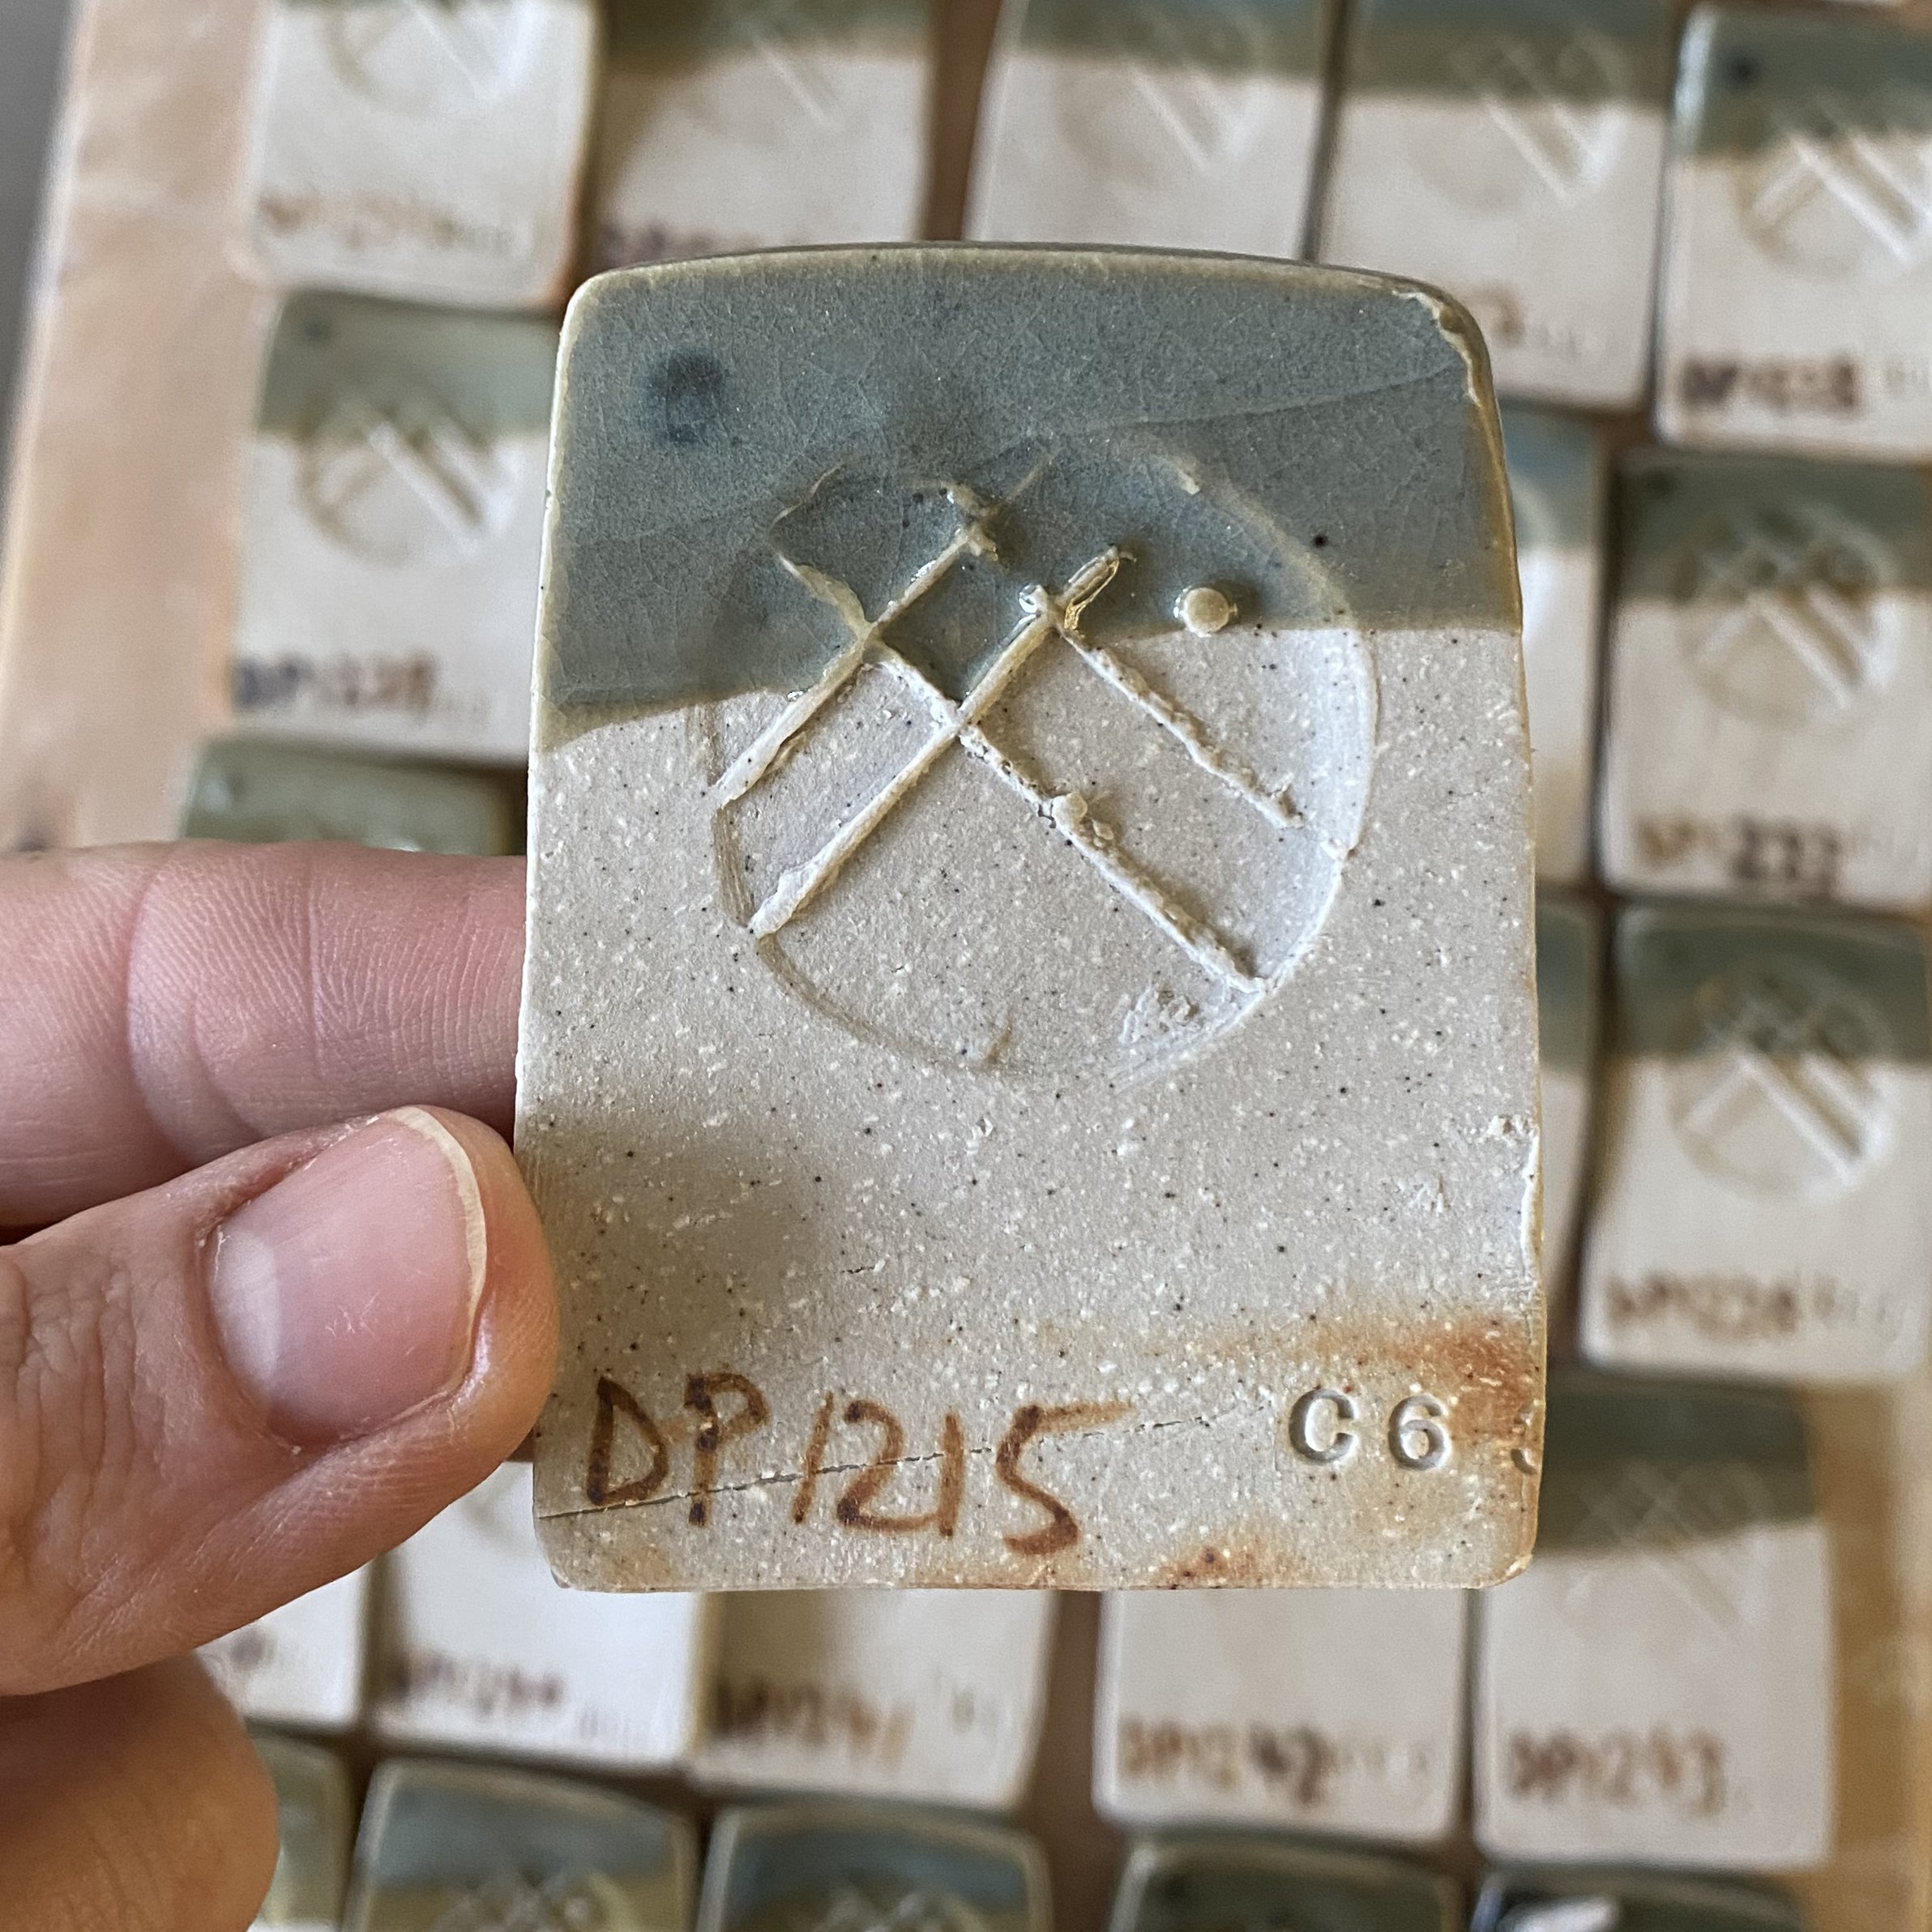
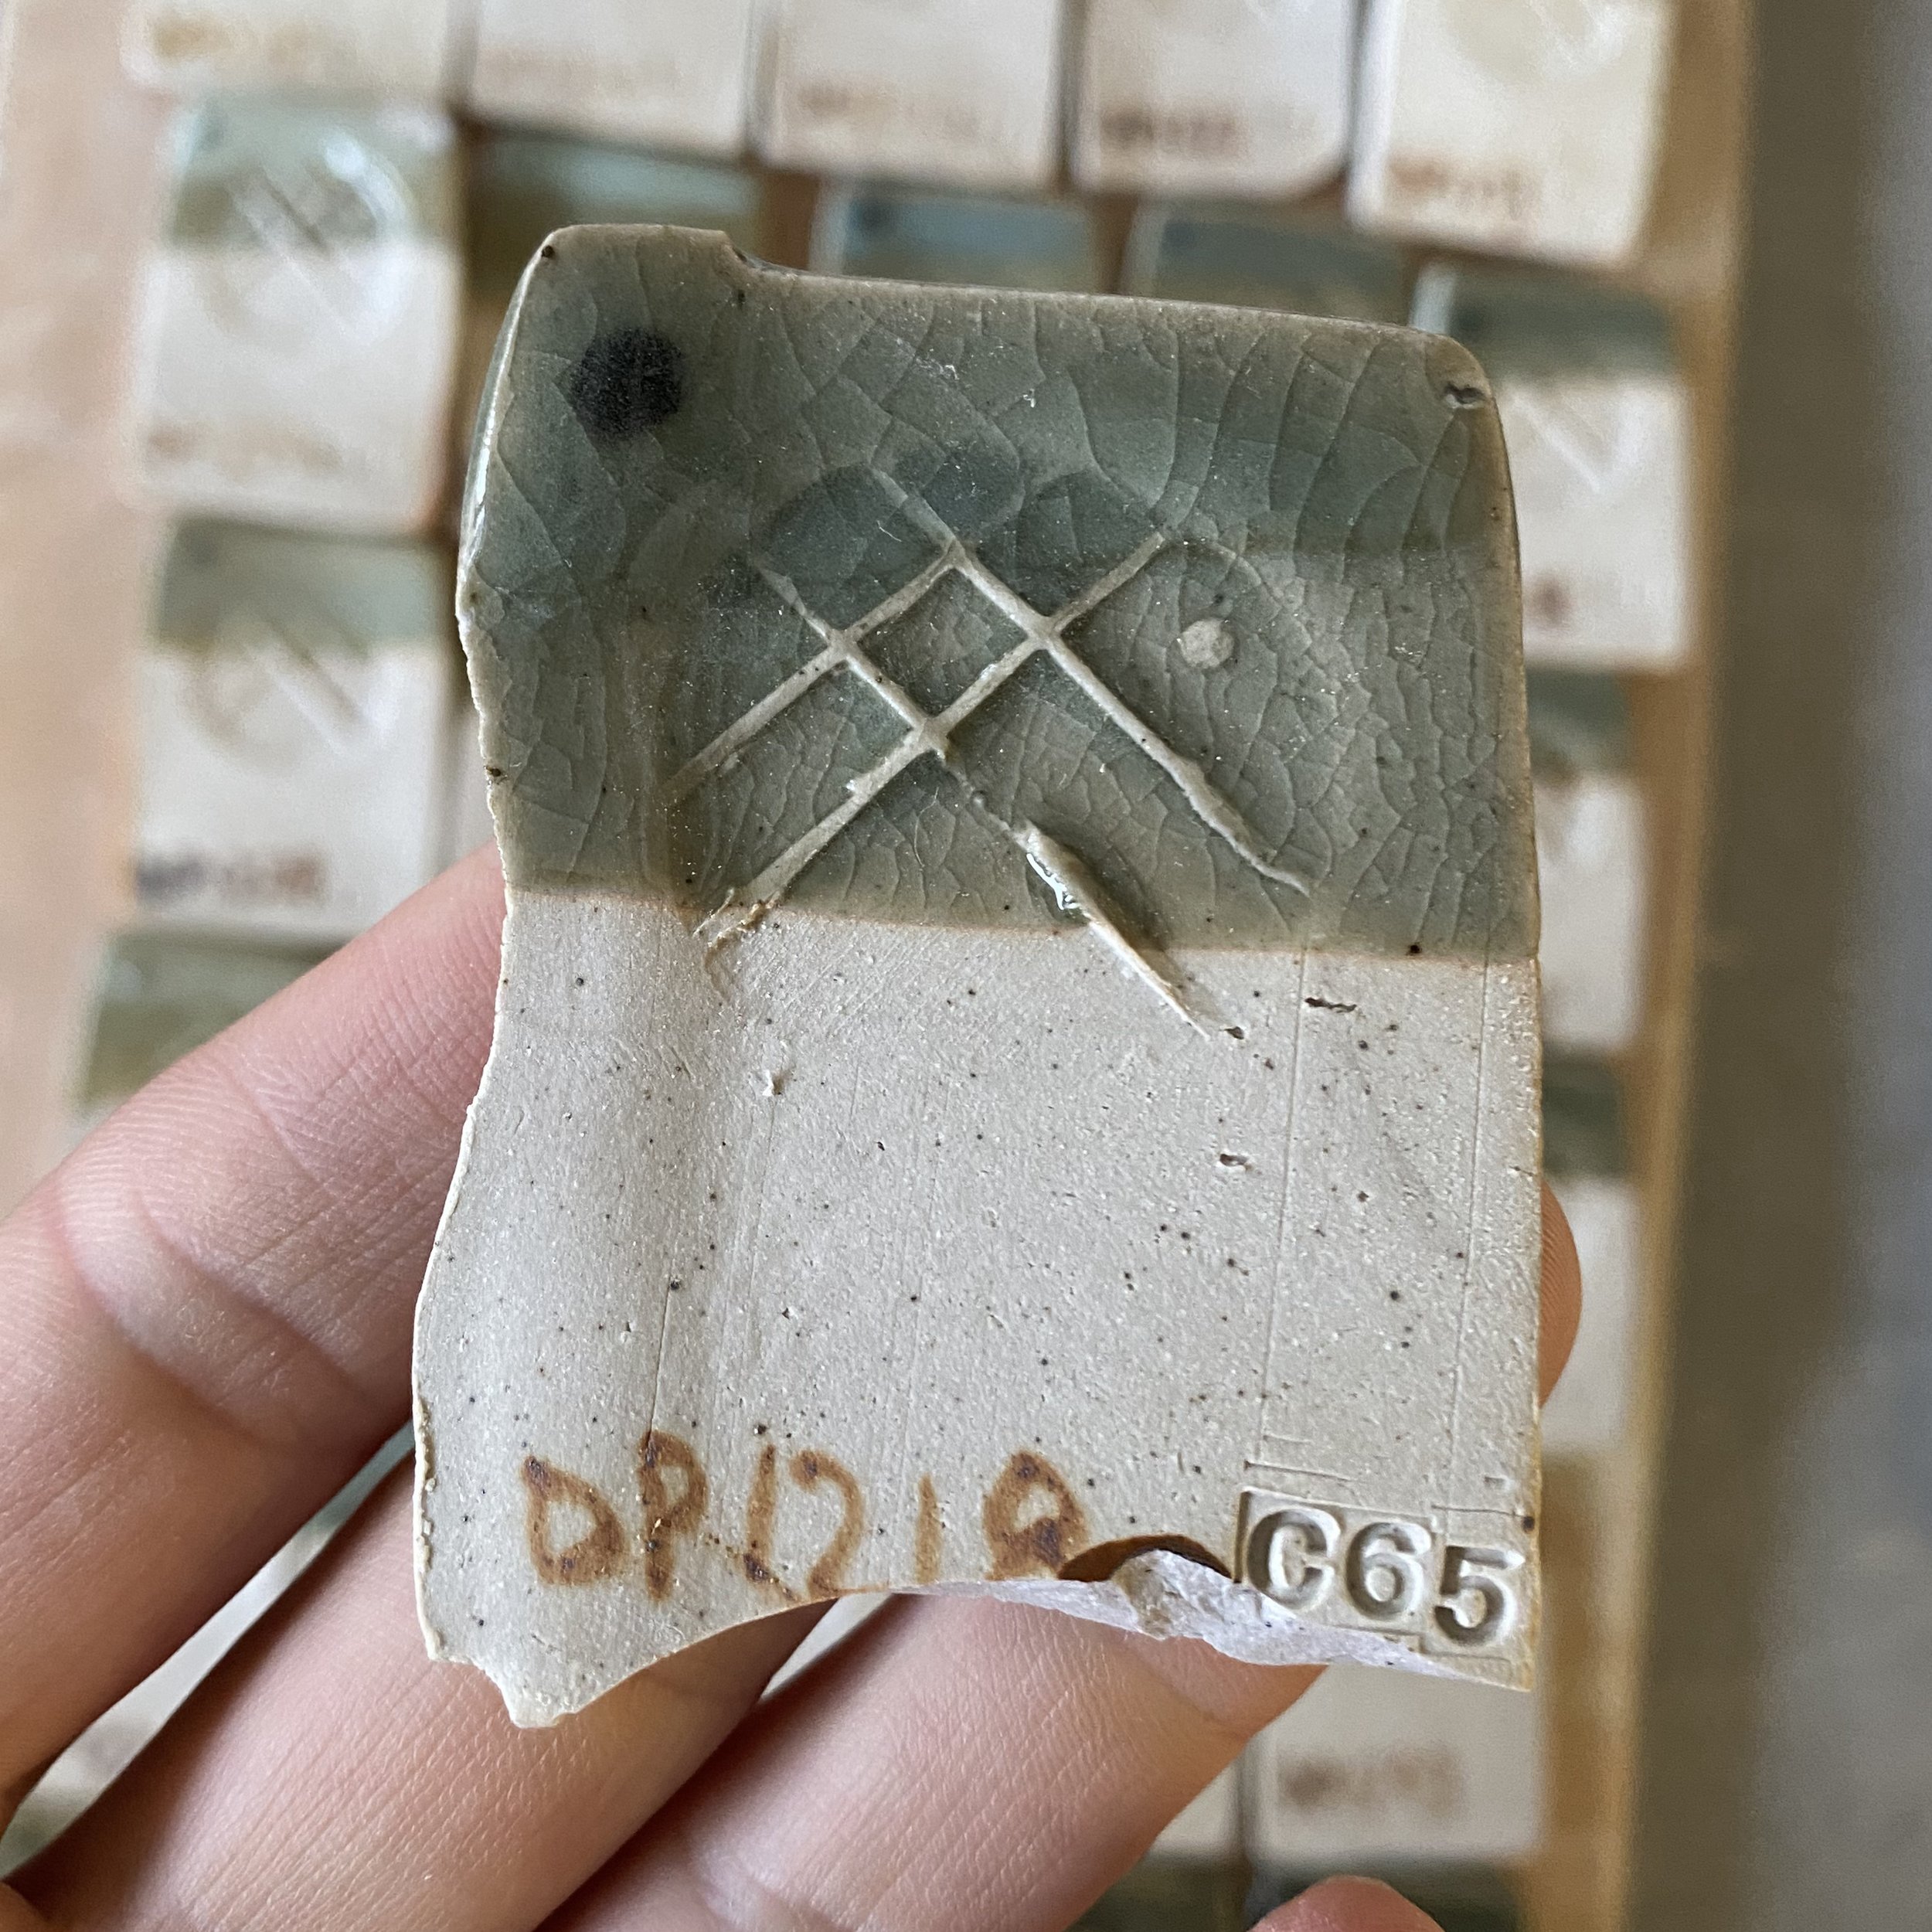
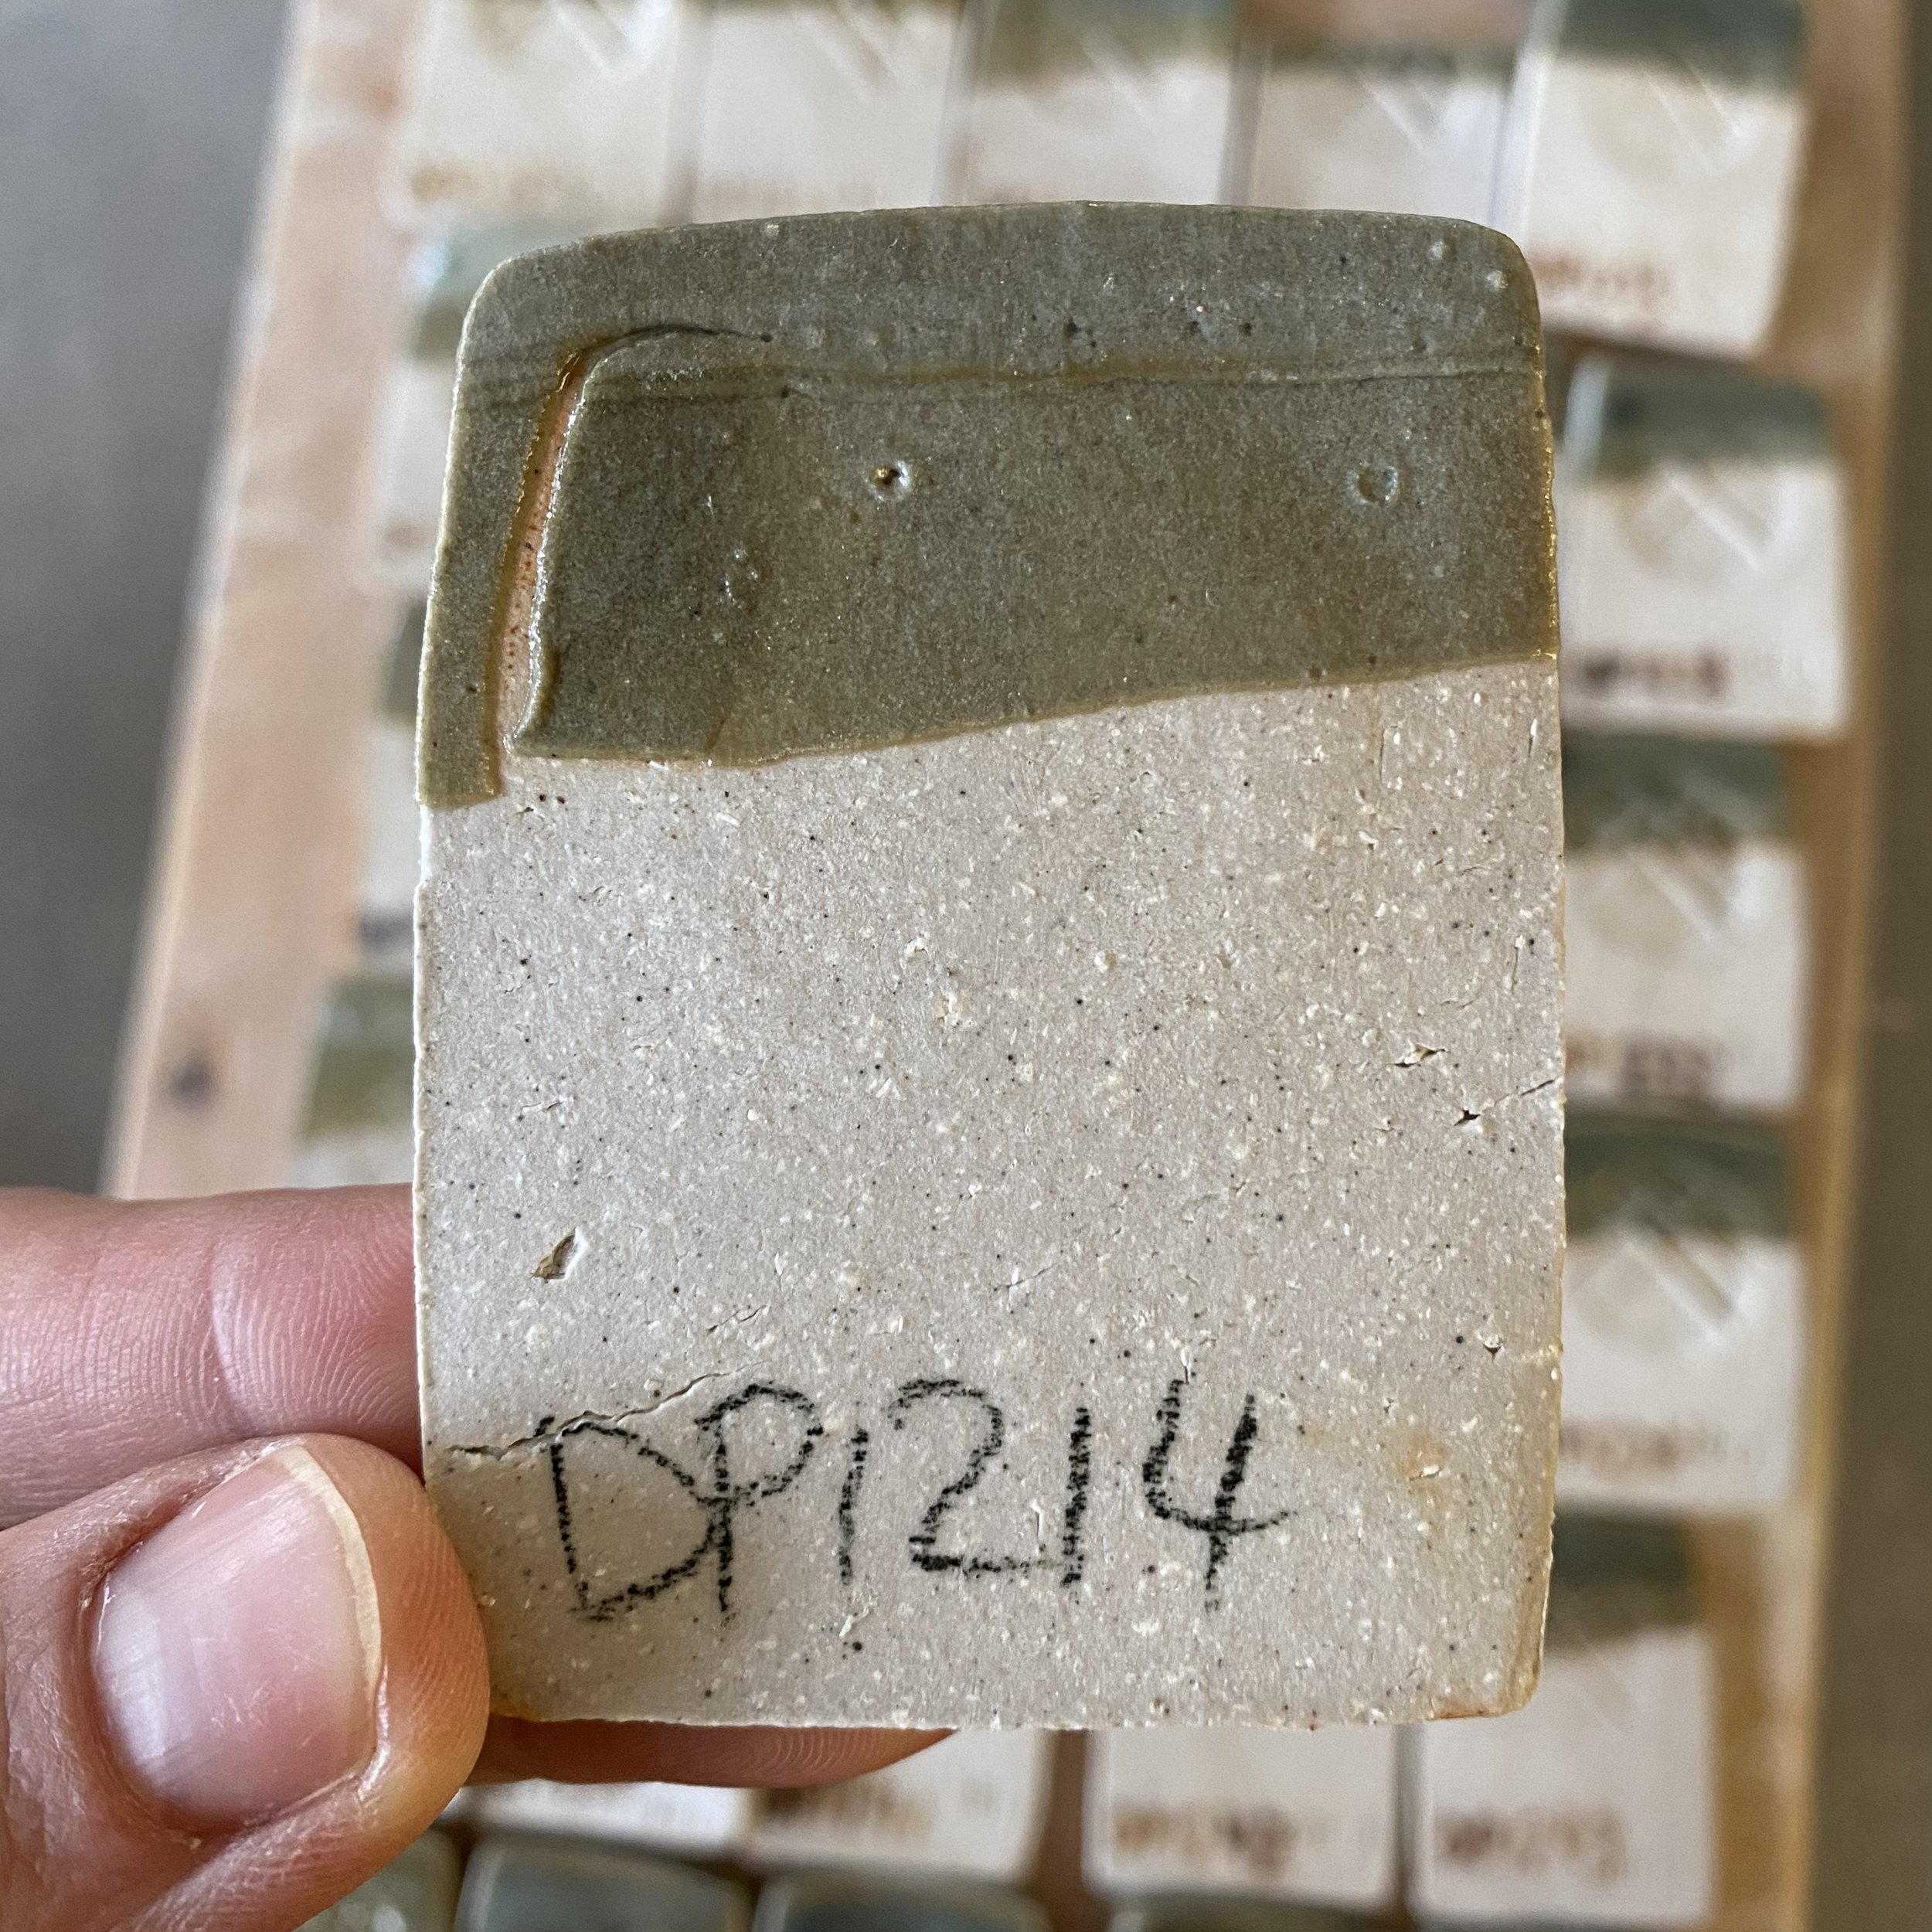
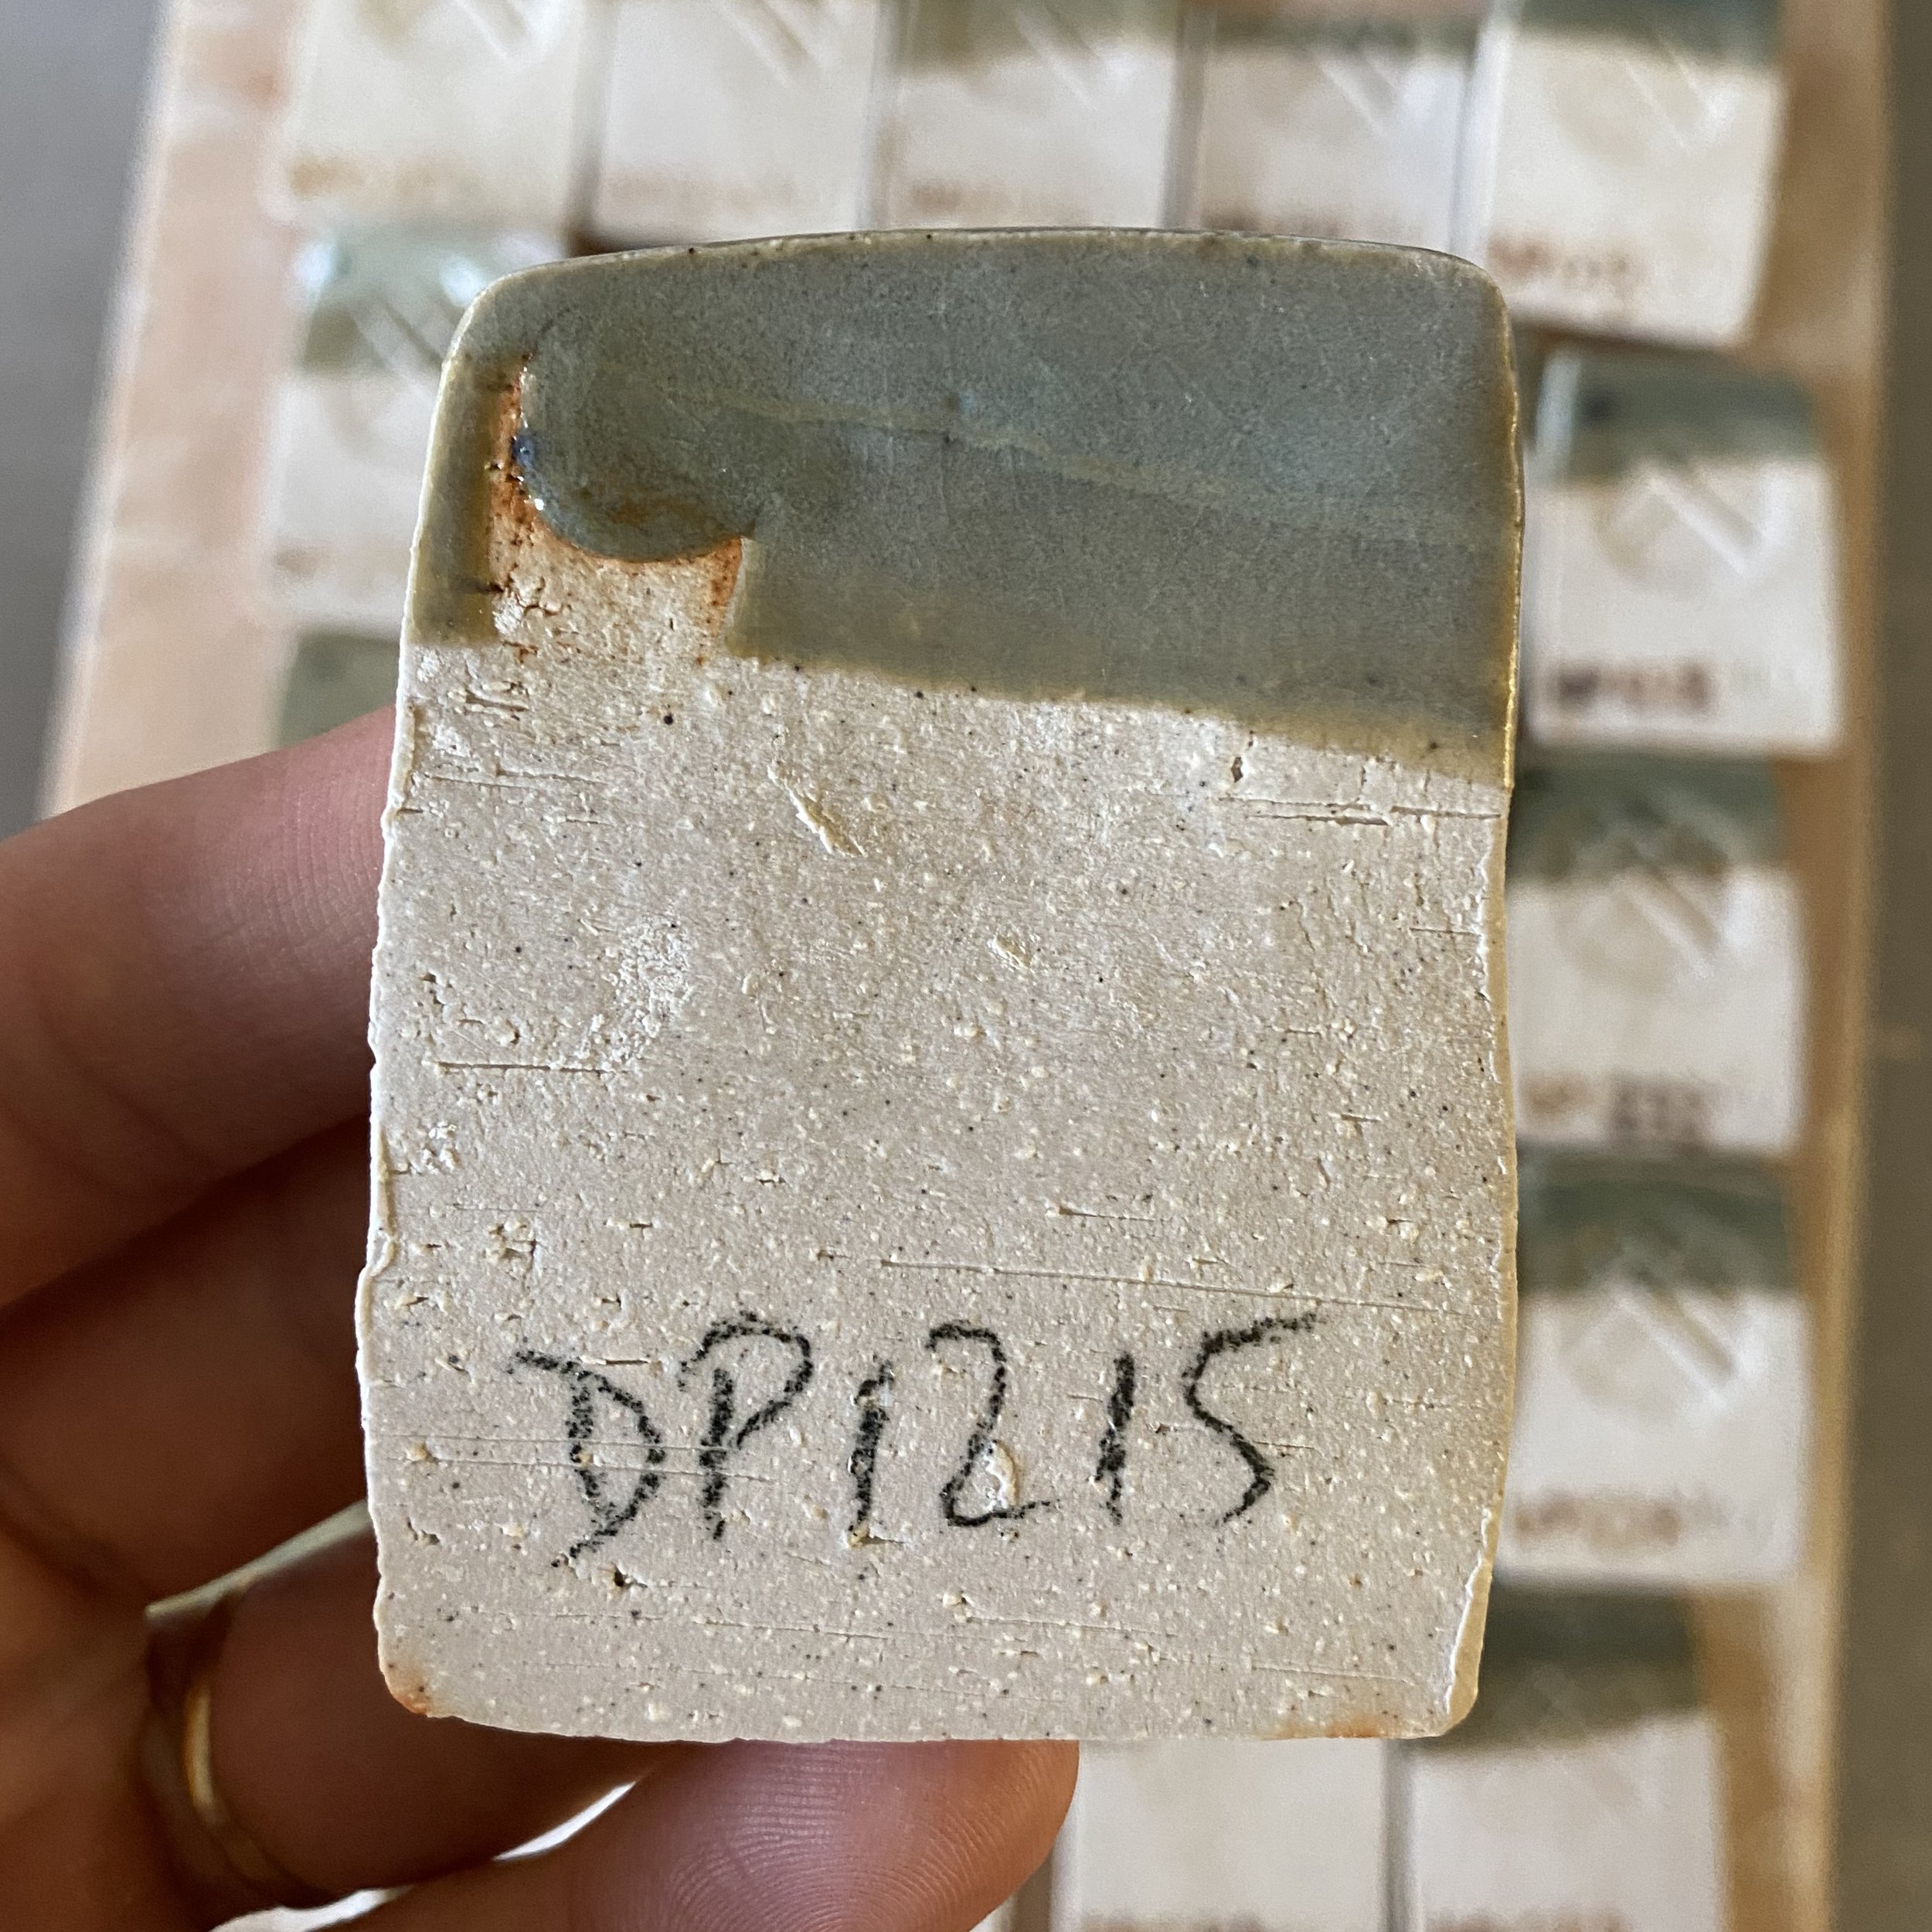
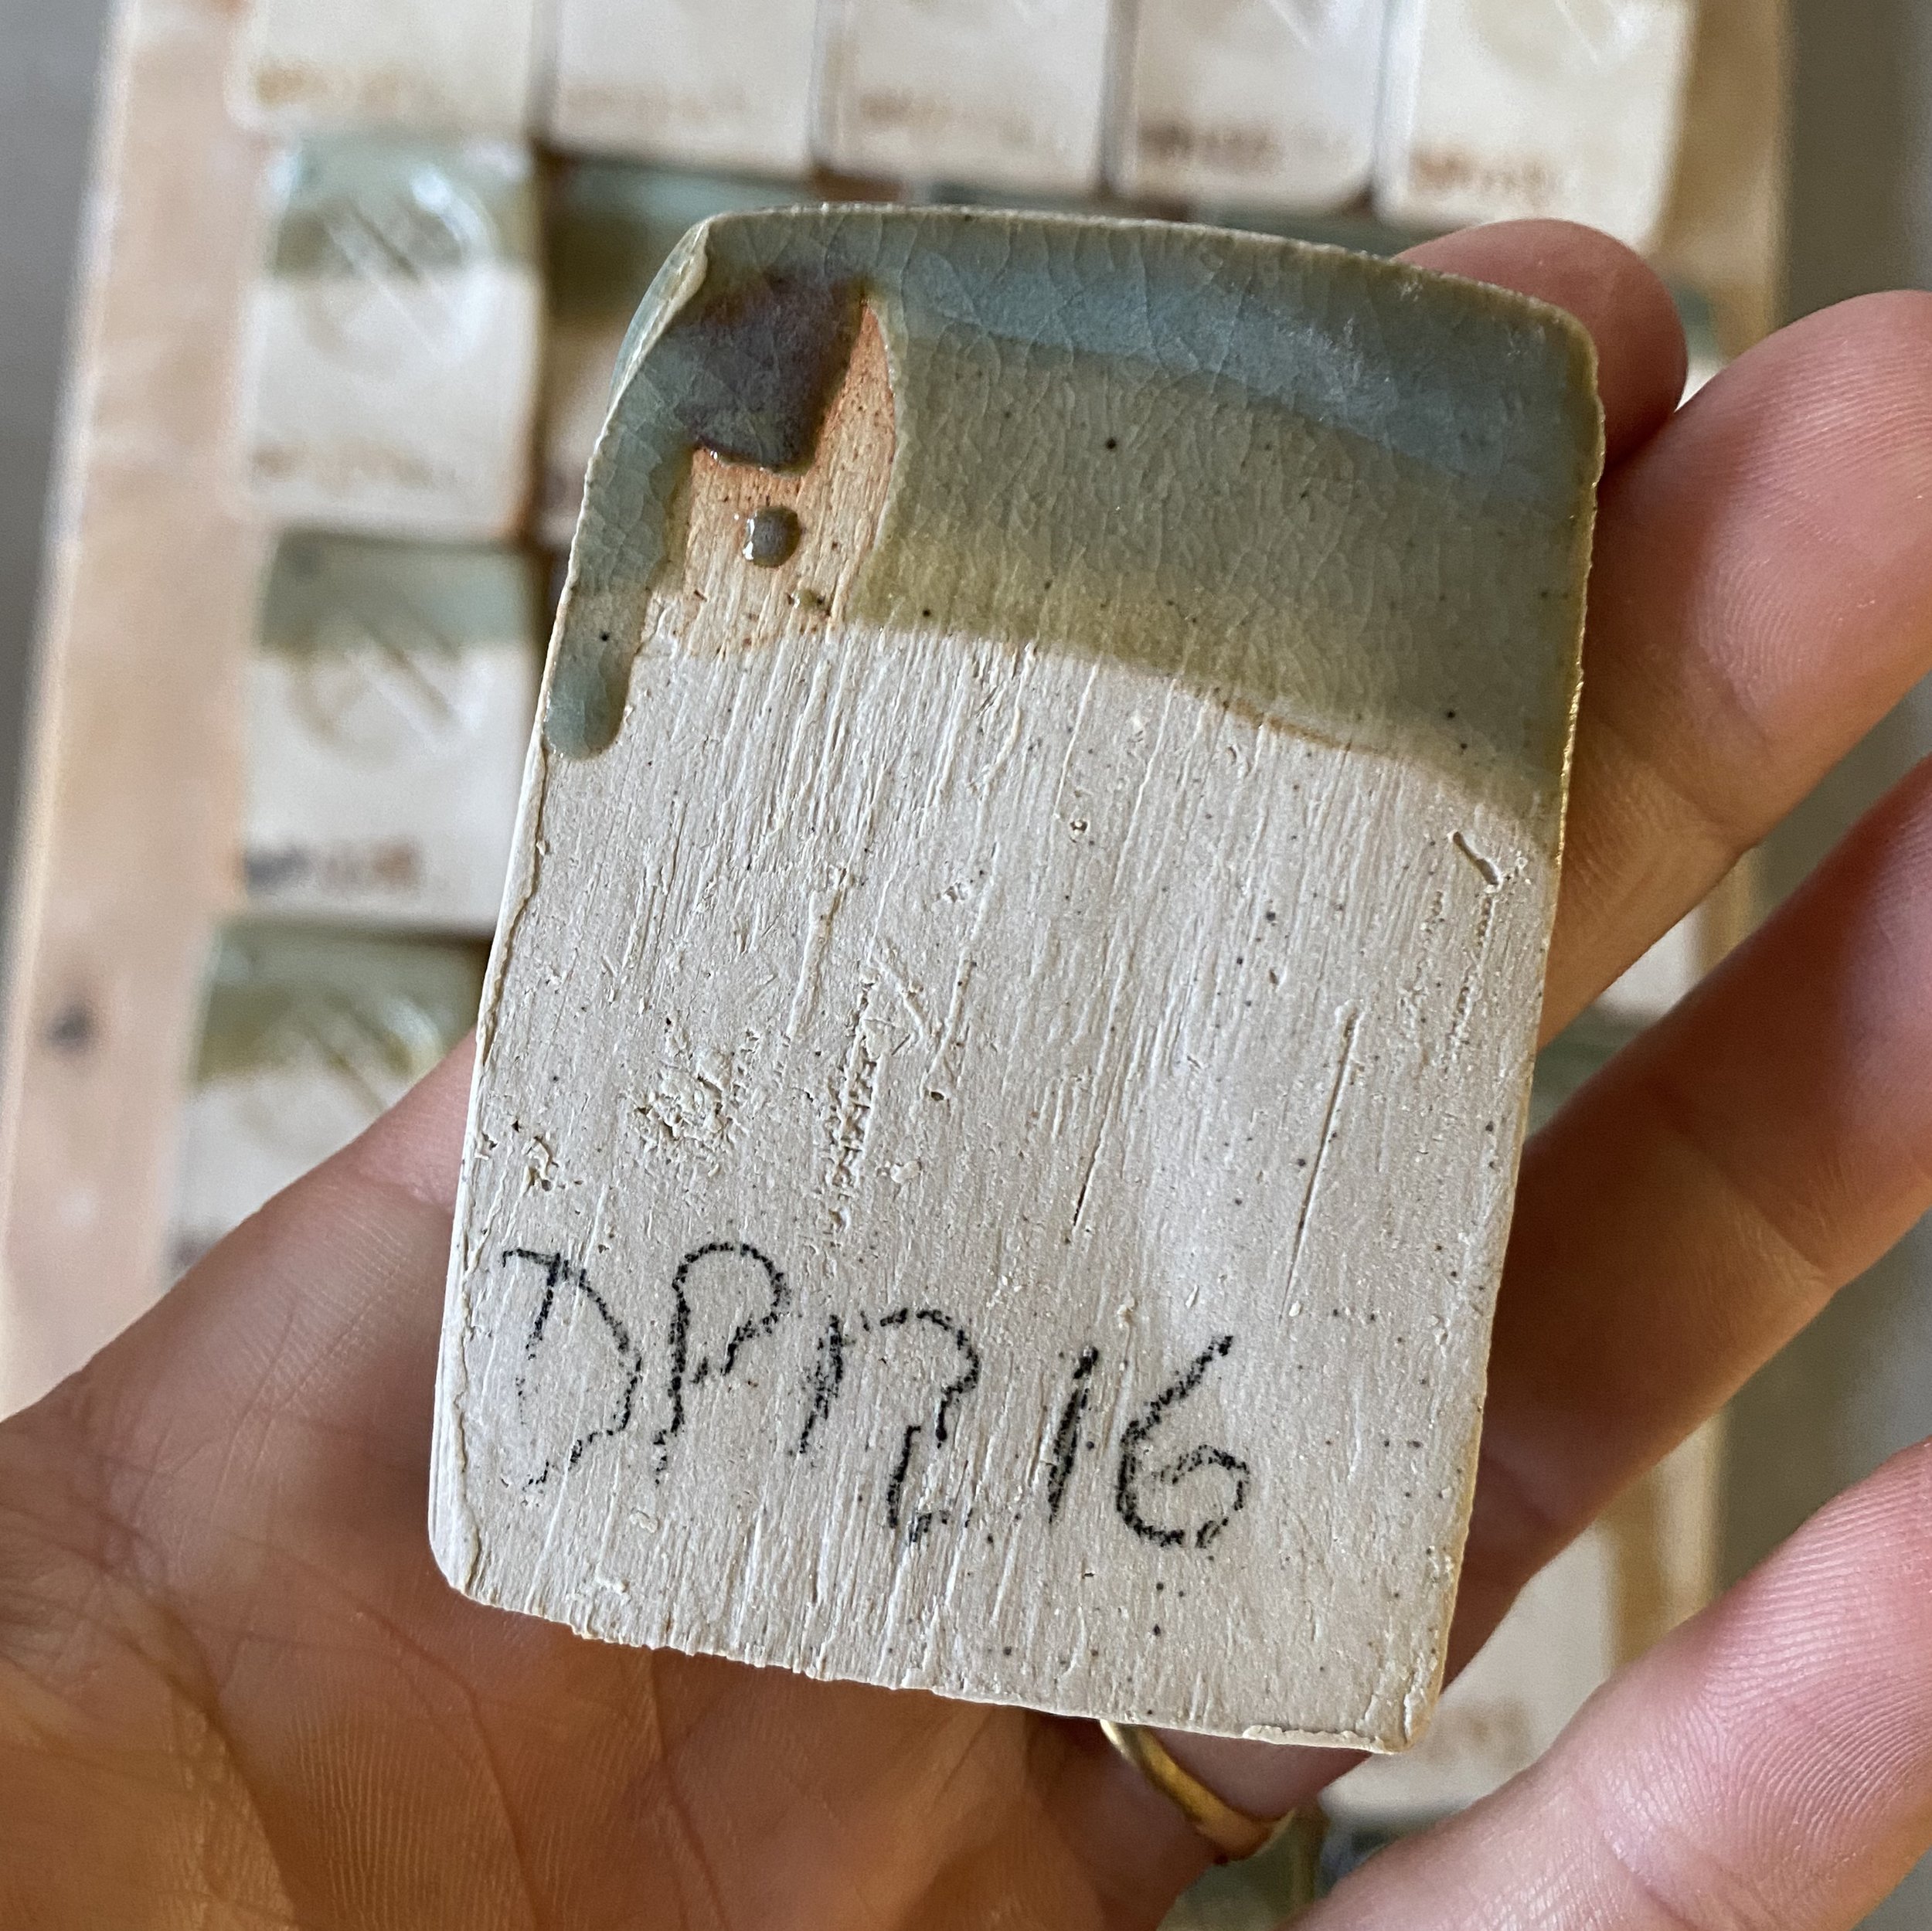
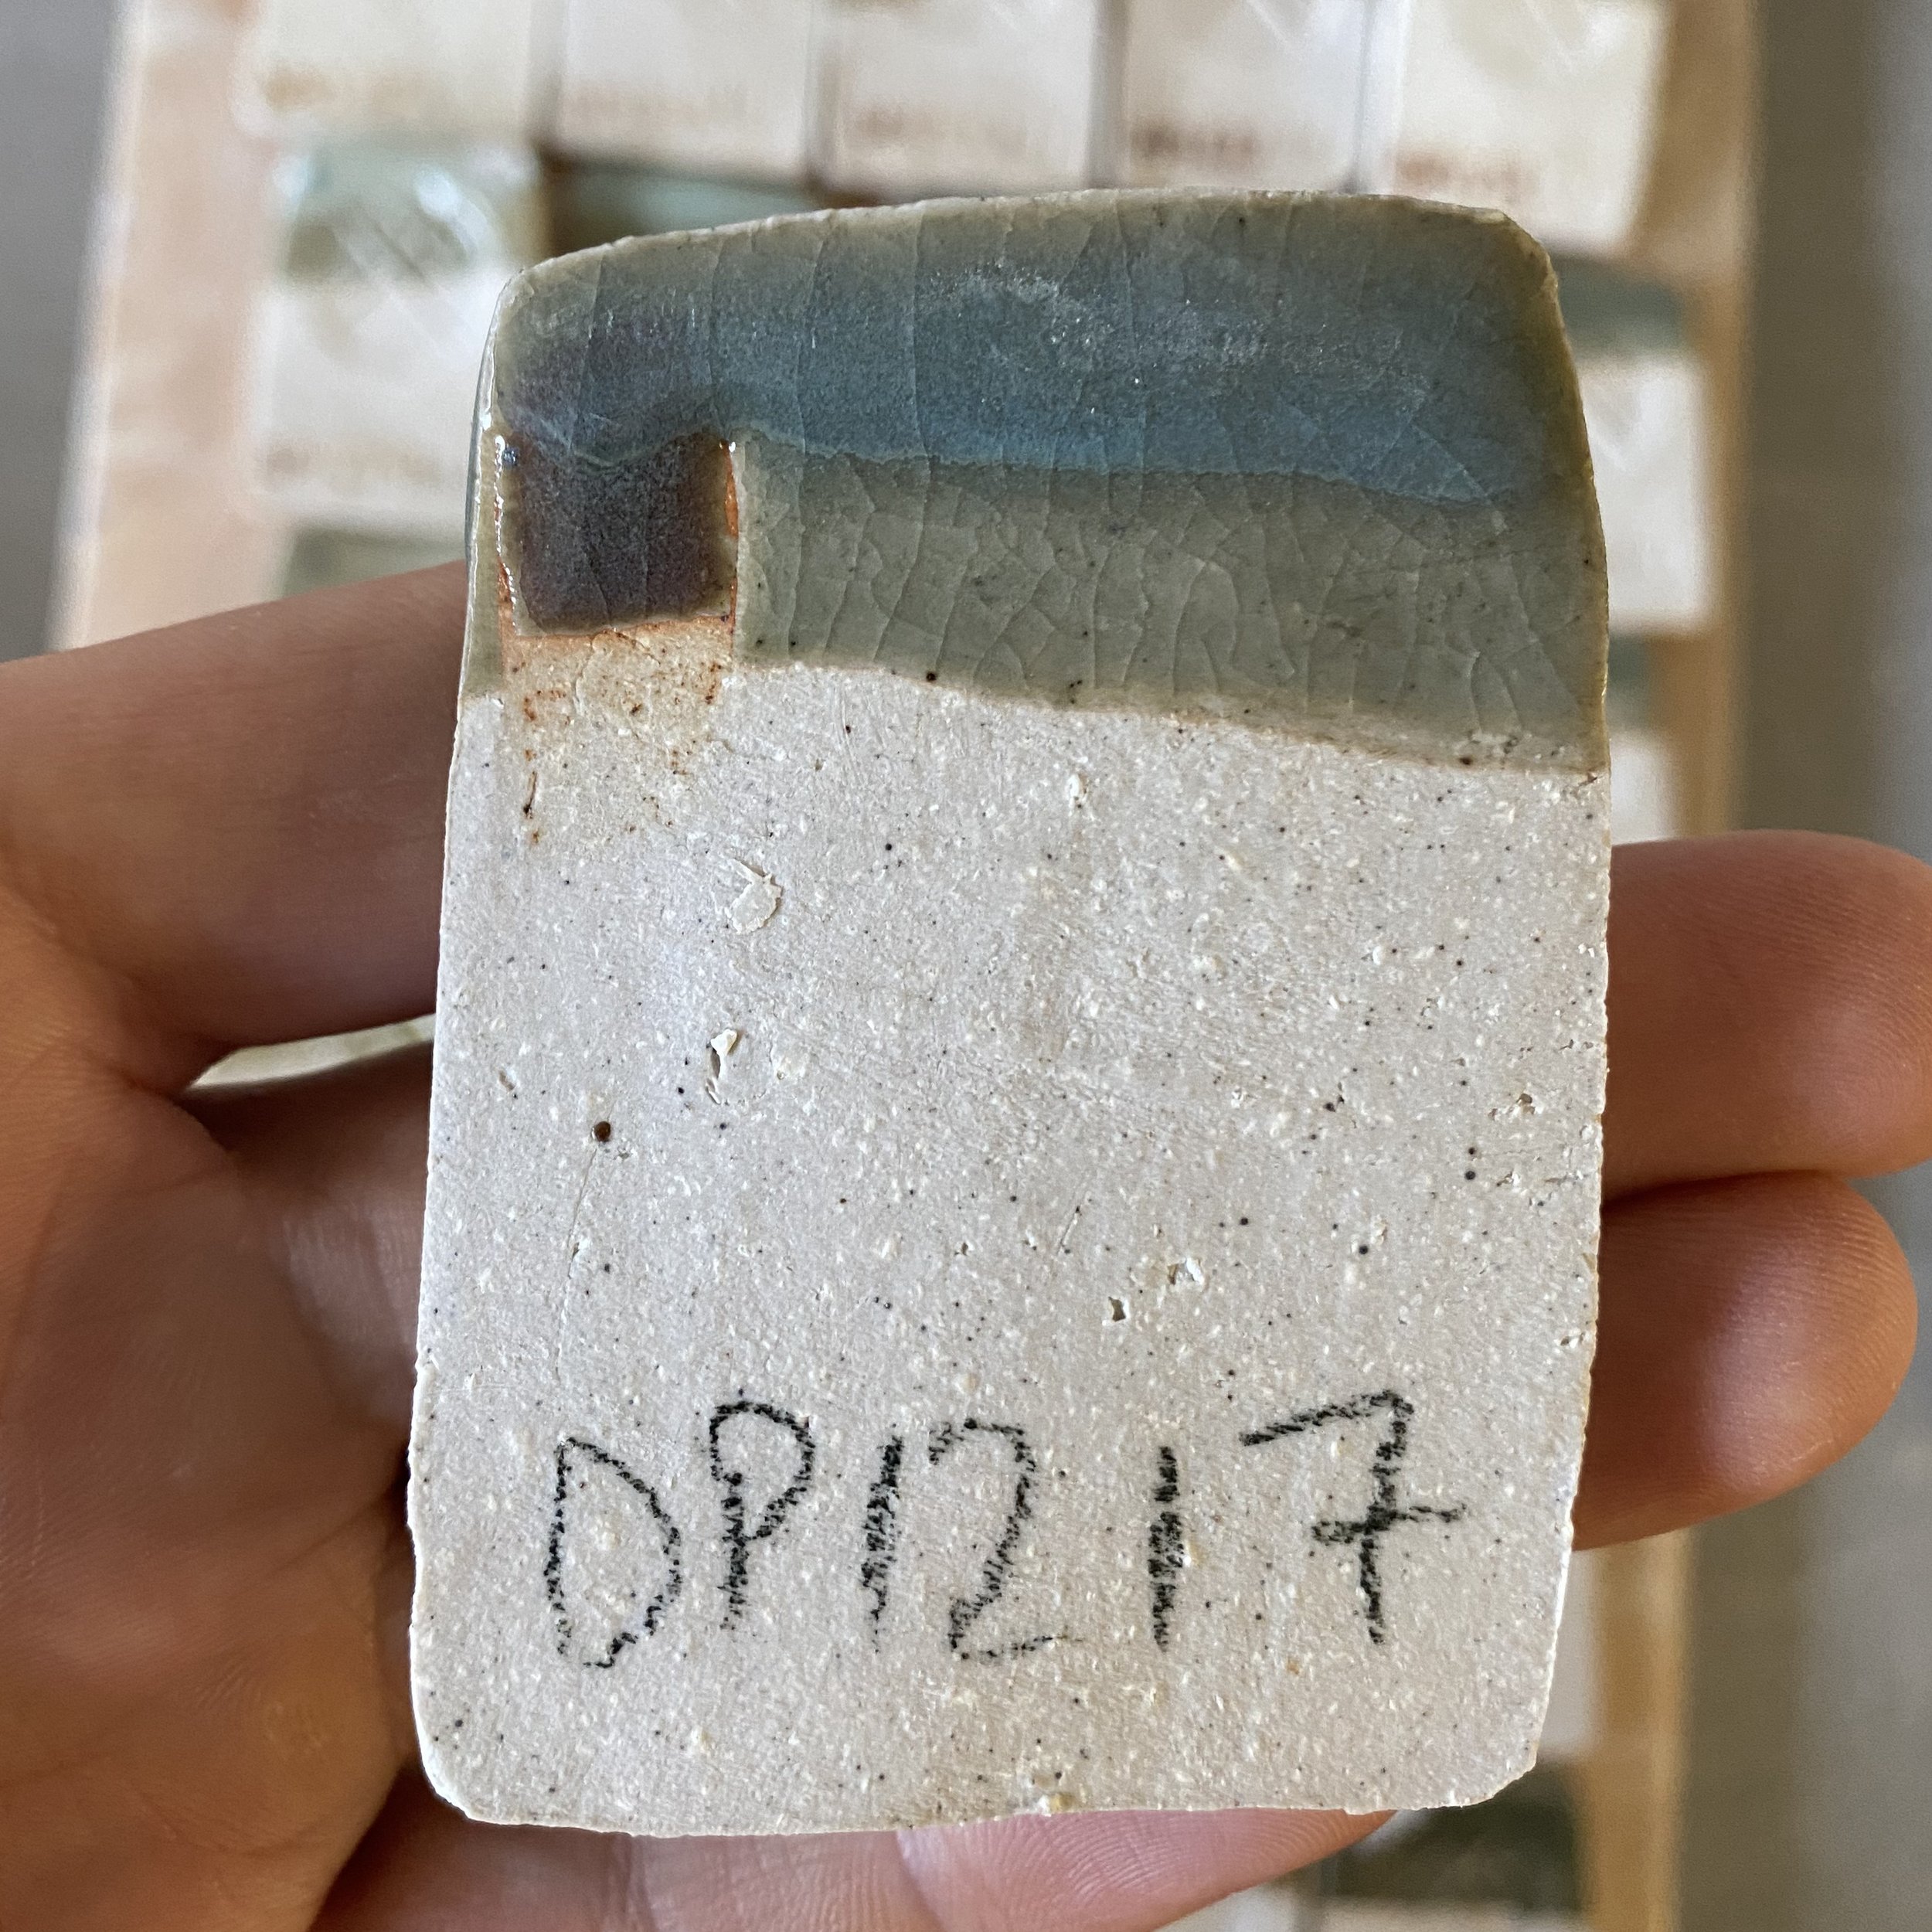
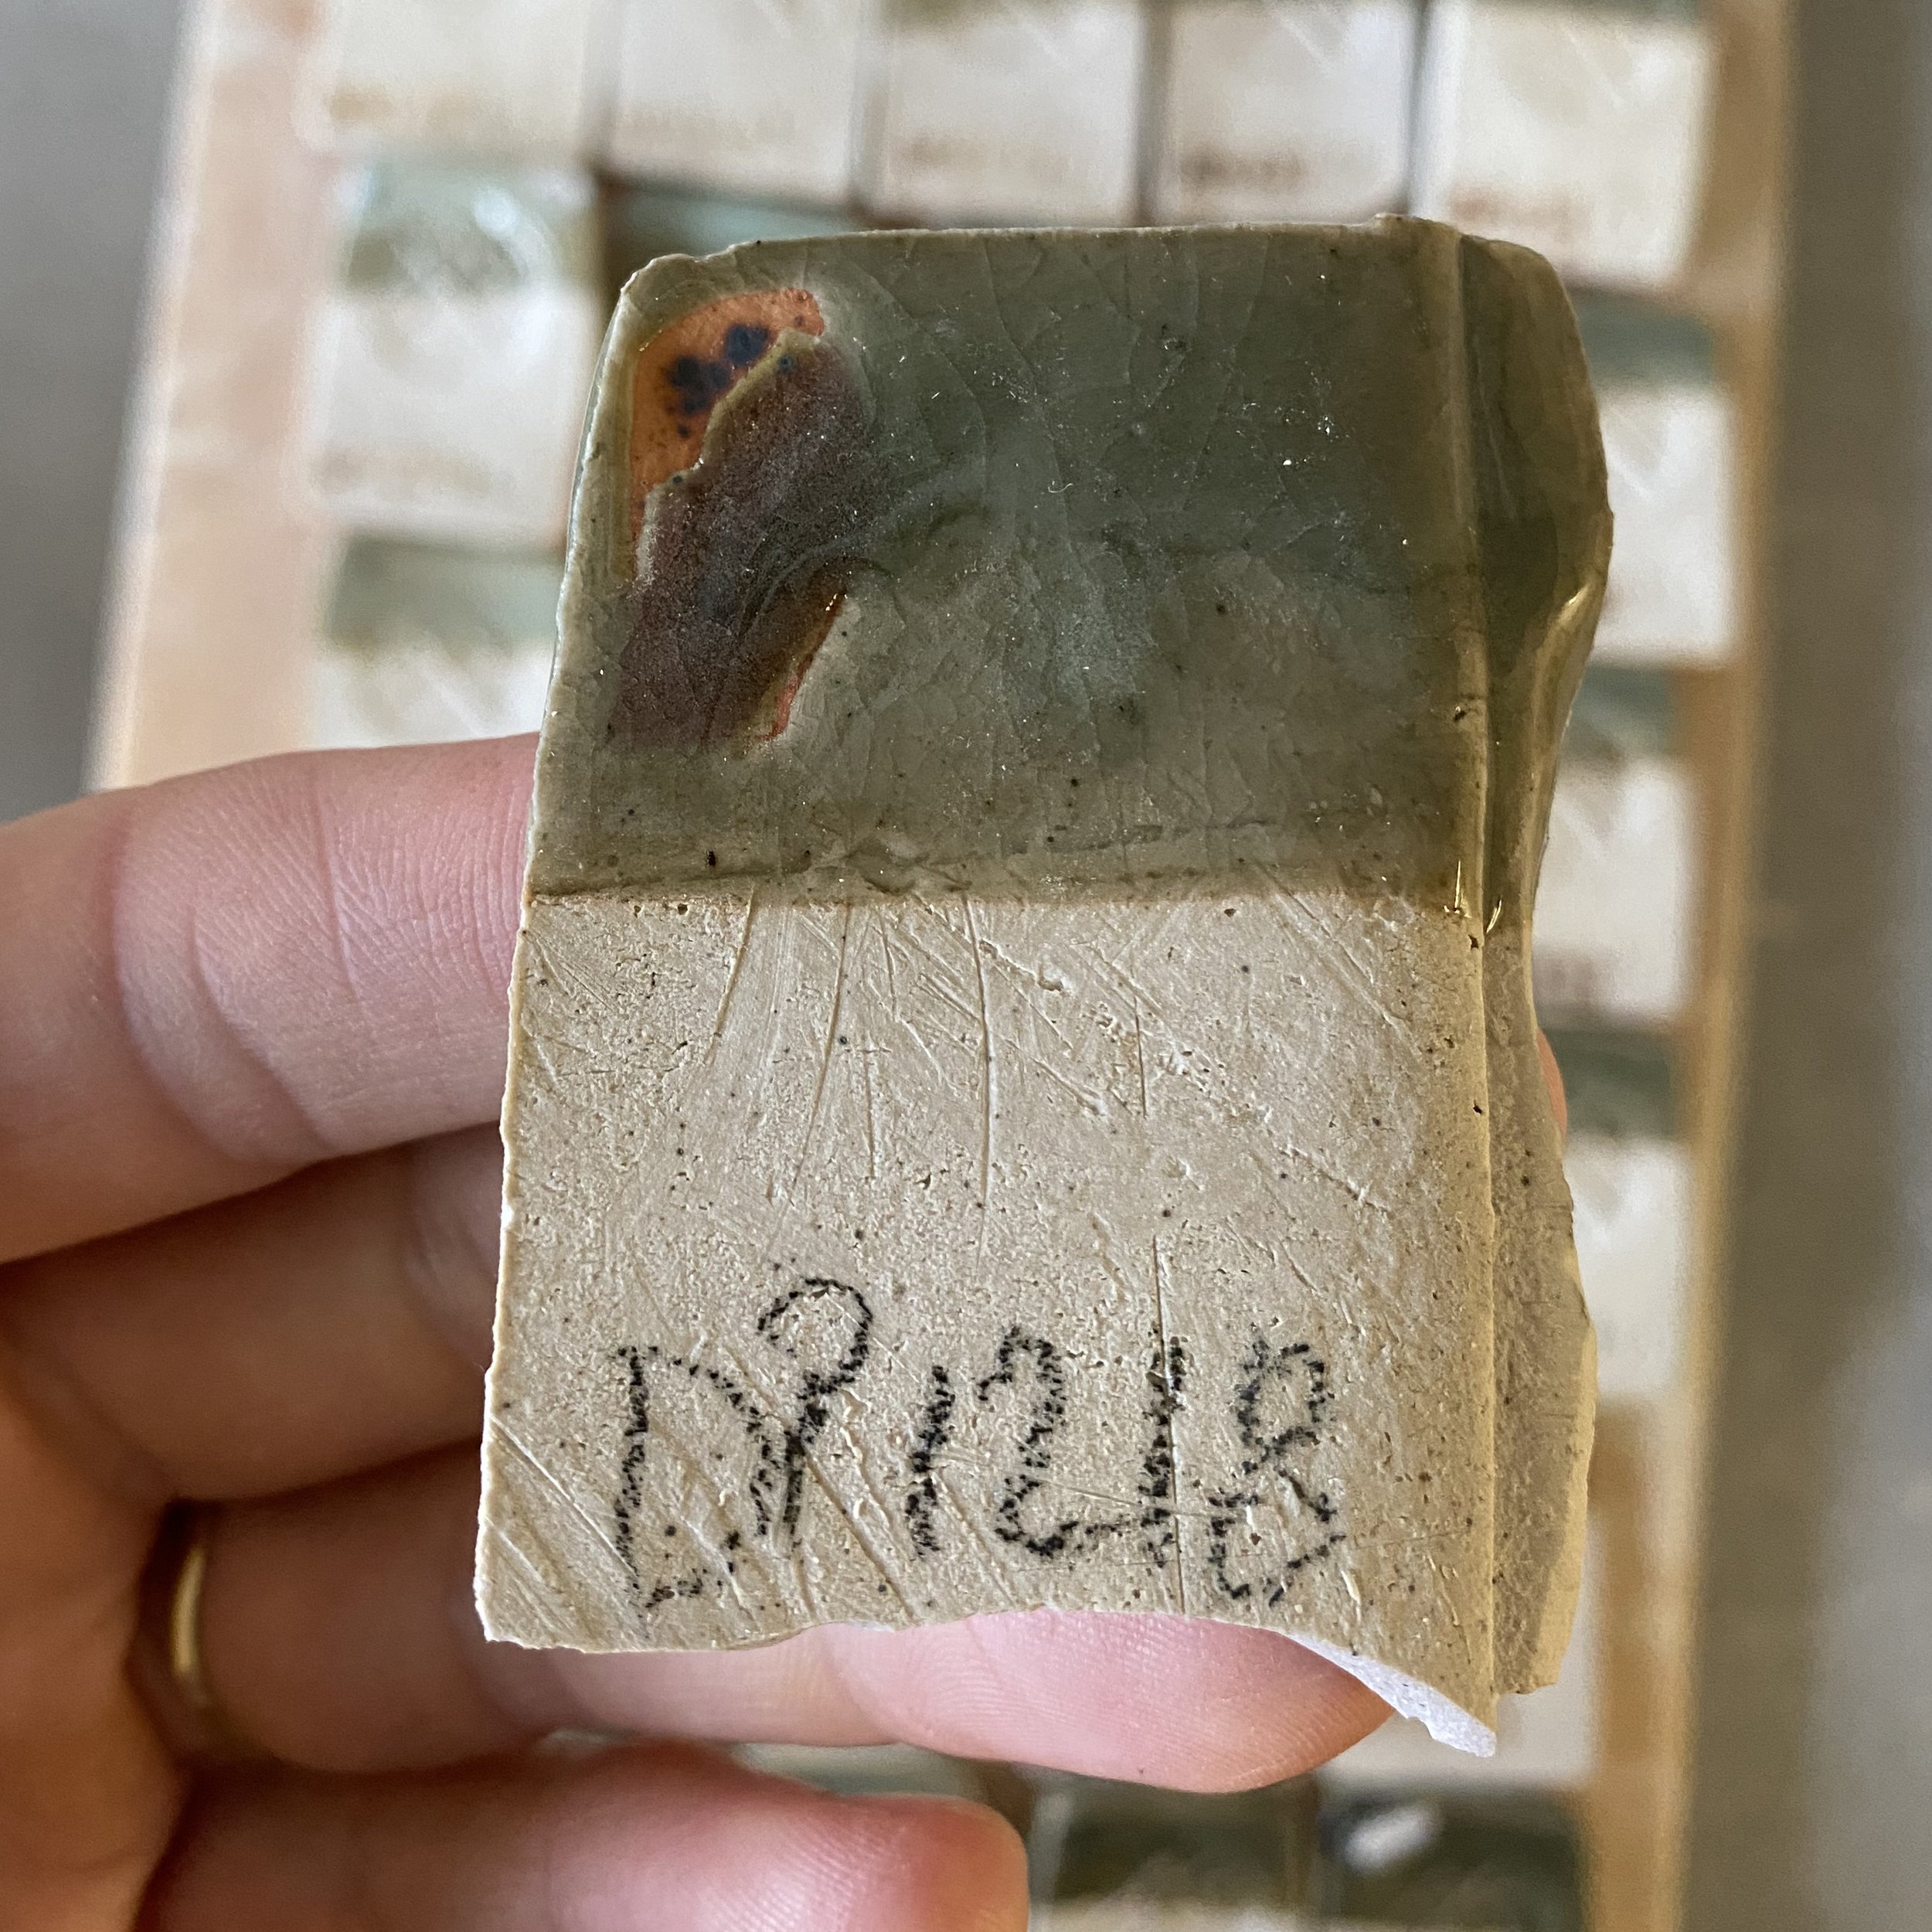
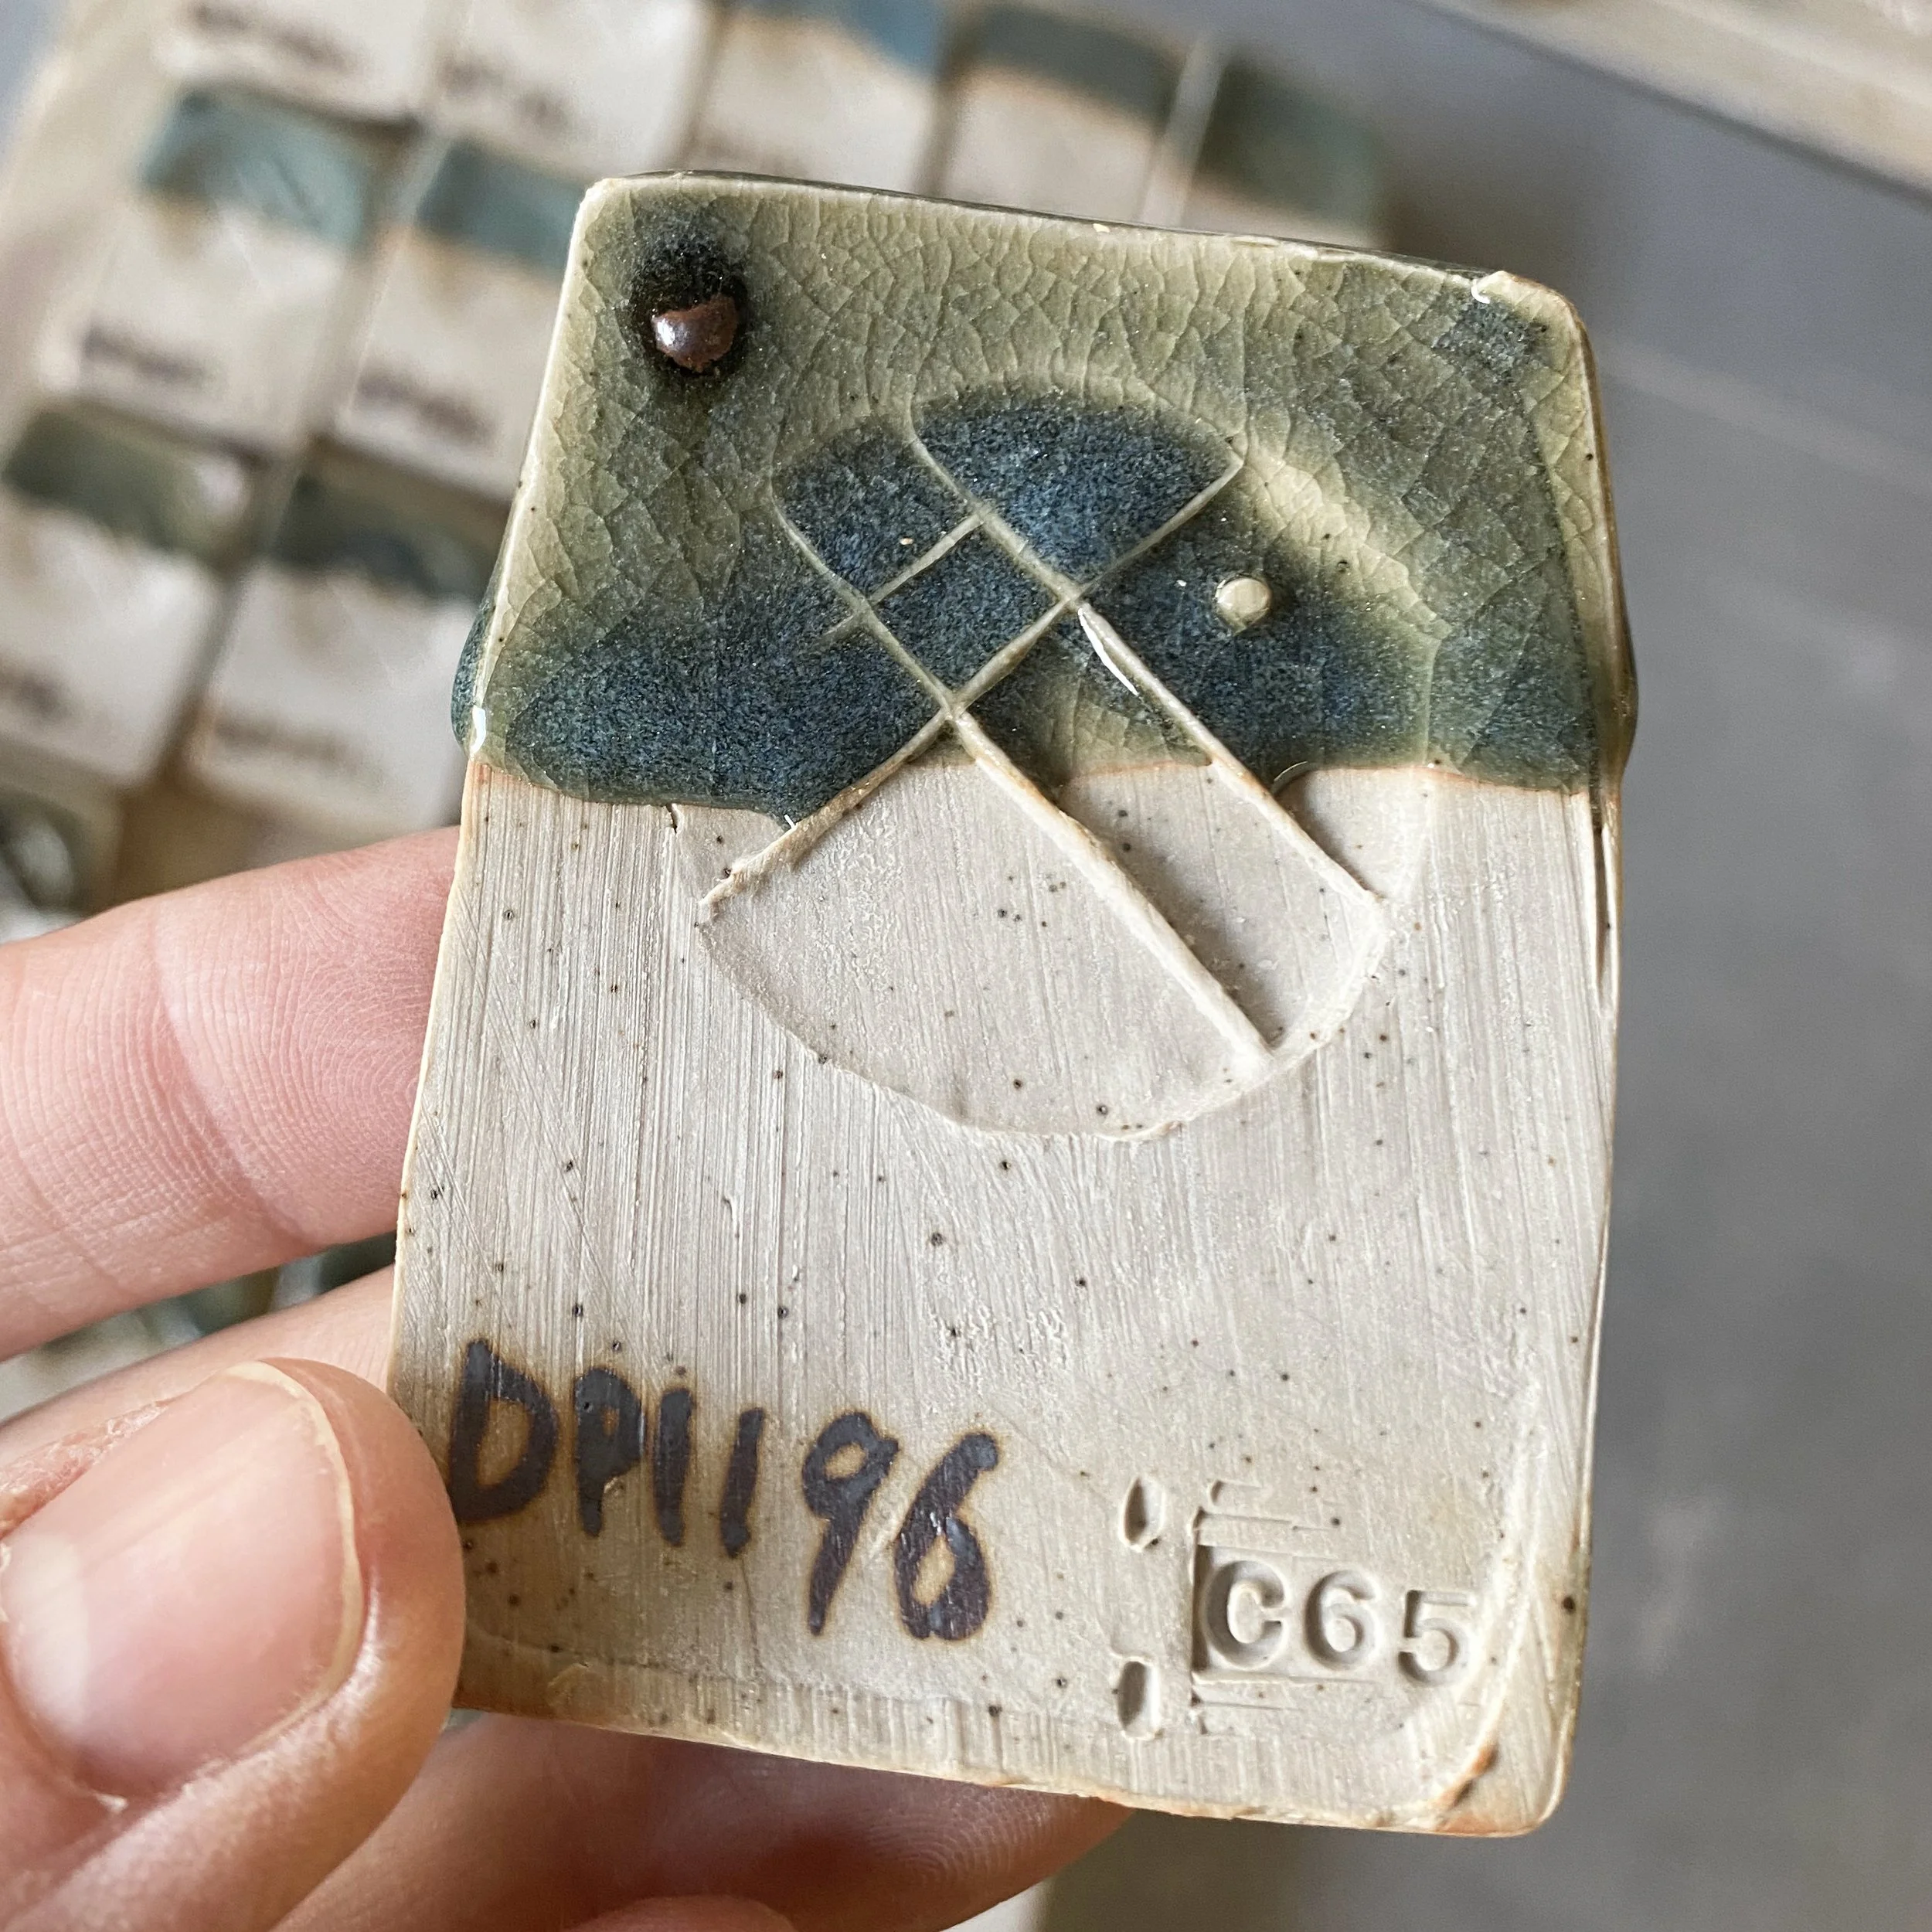
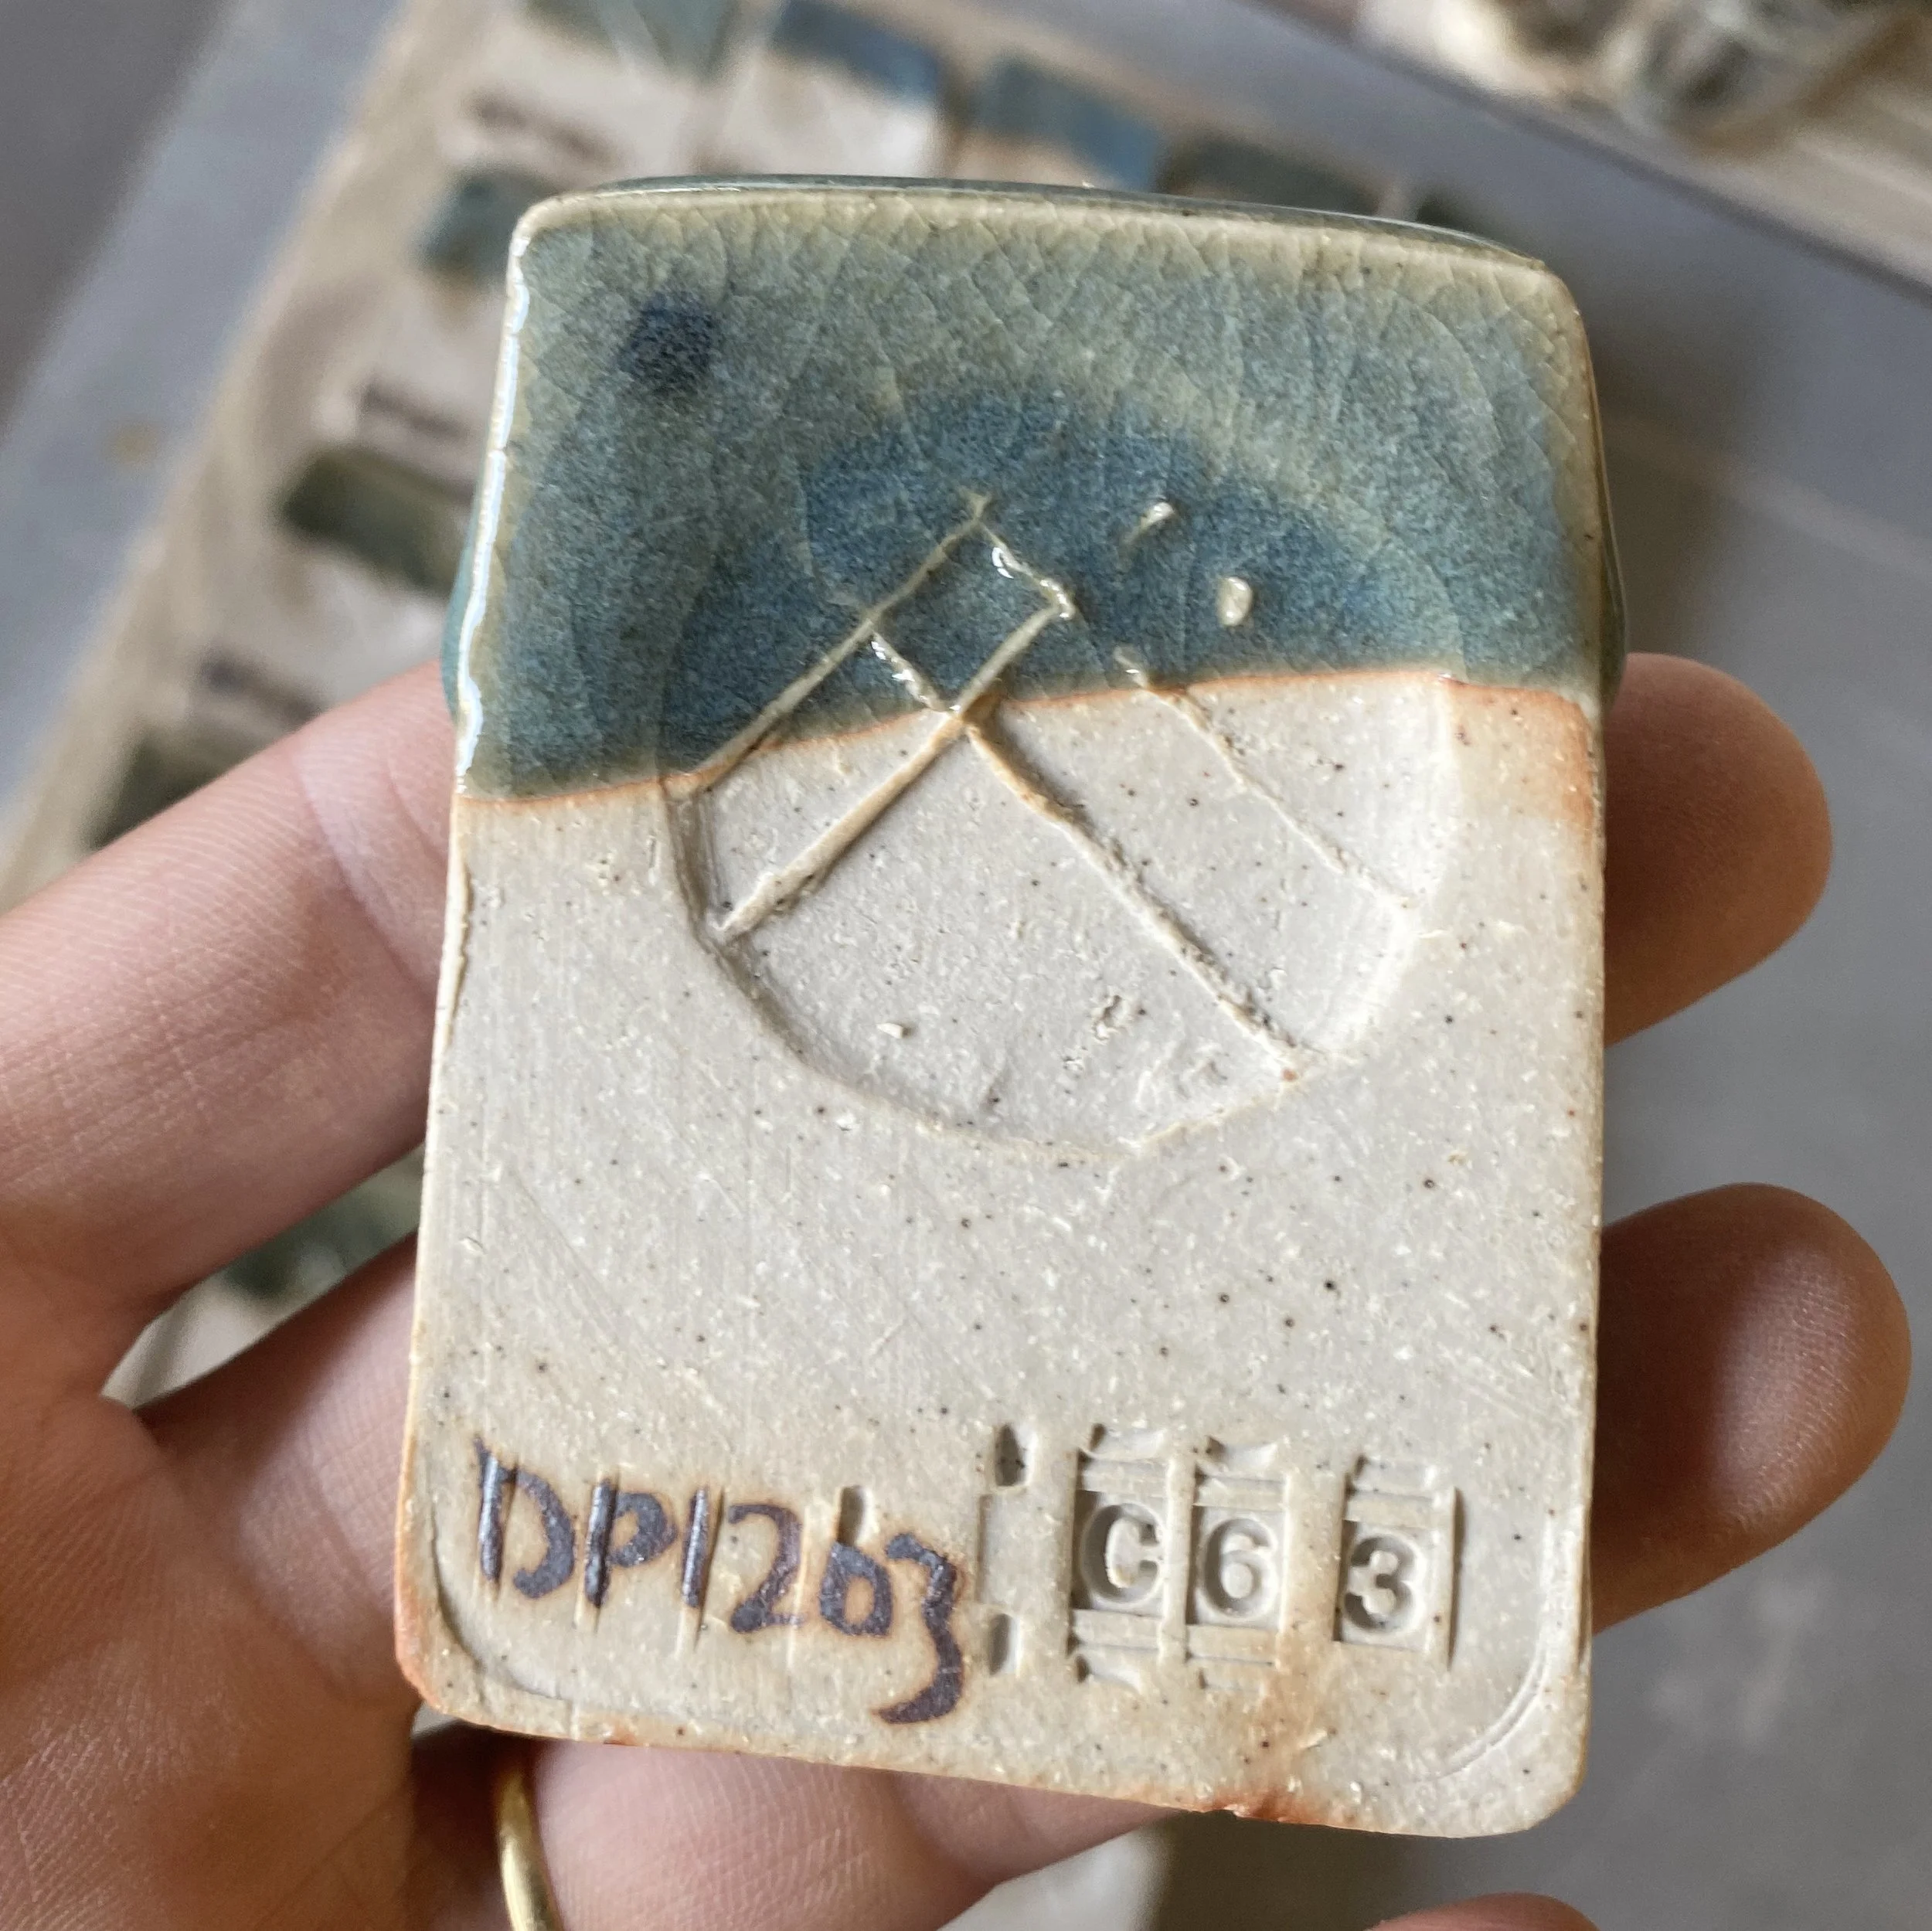
Here are the tests individually (click to enlarge). Front side:


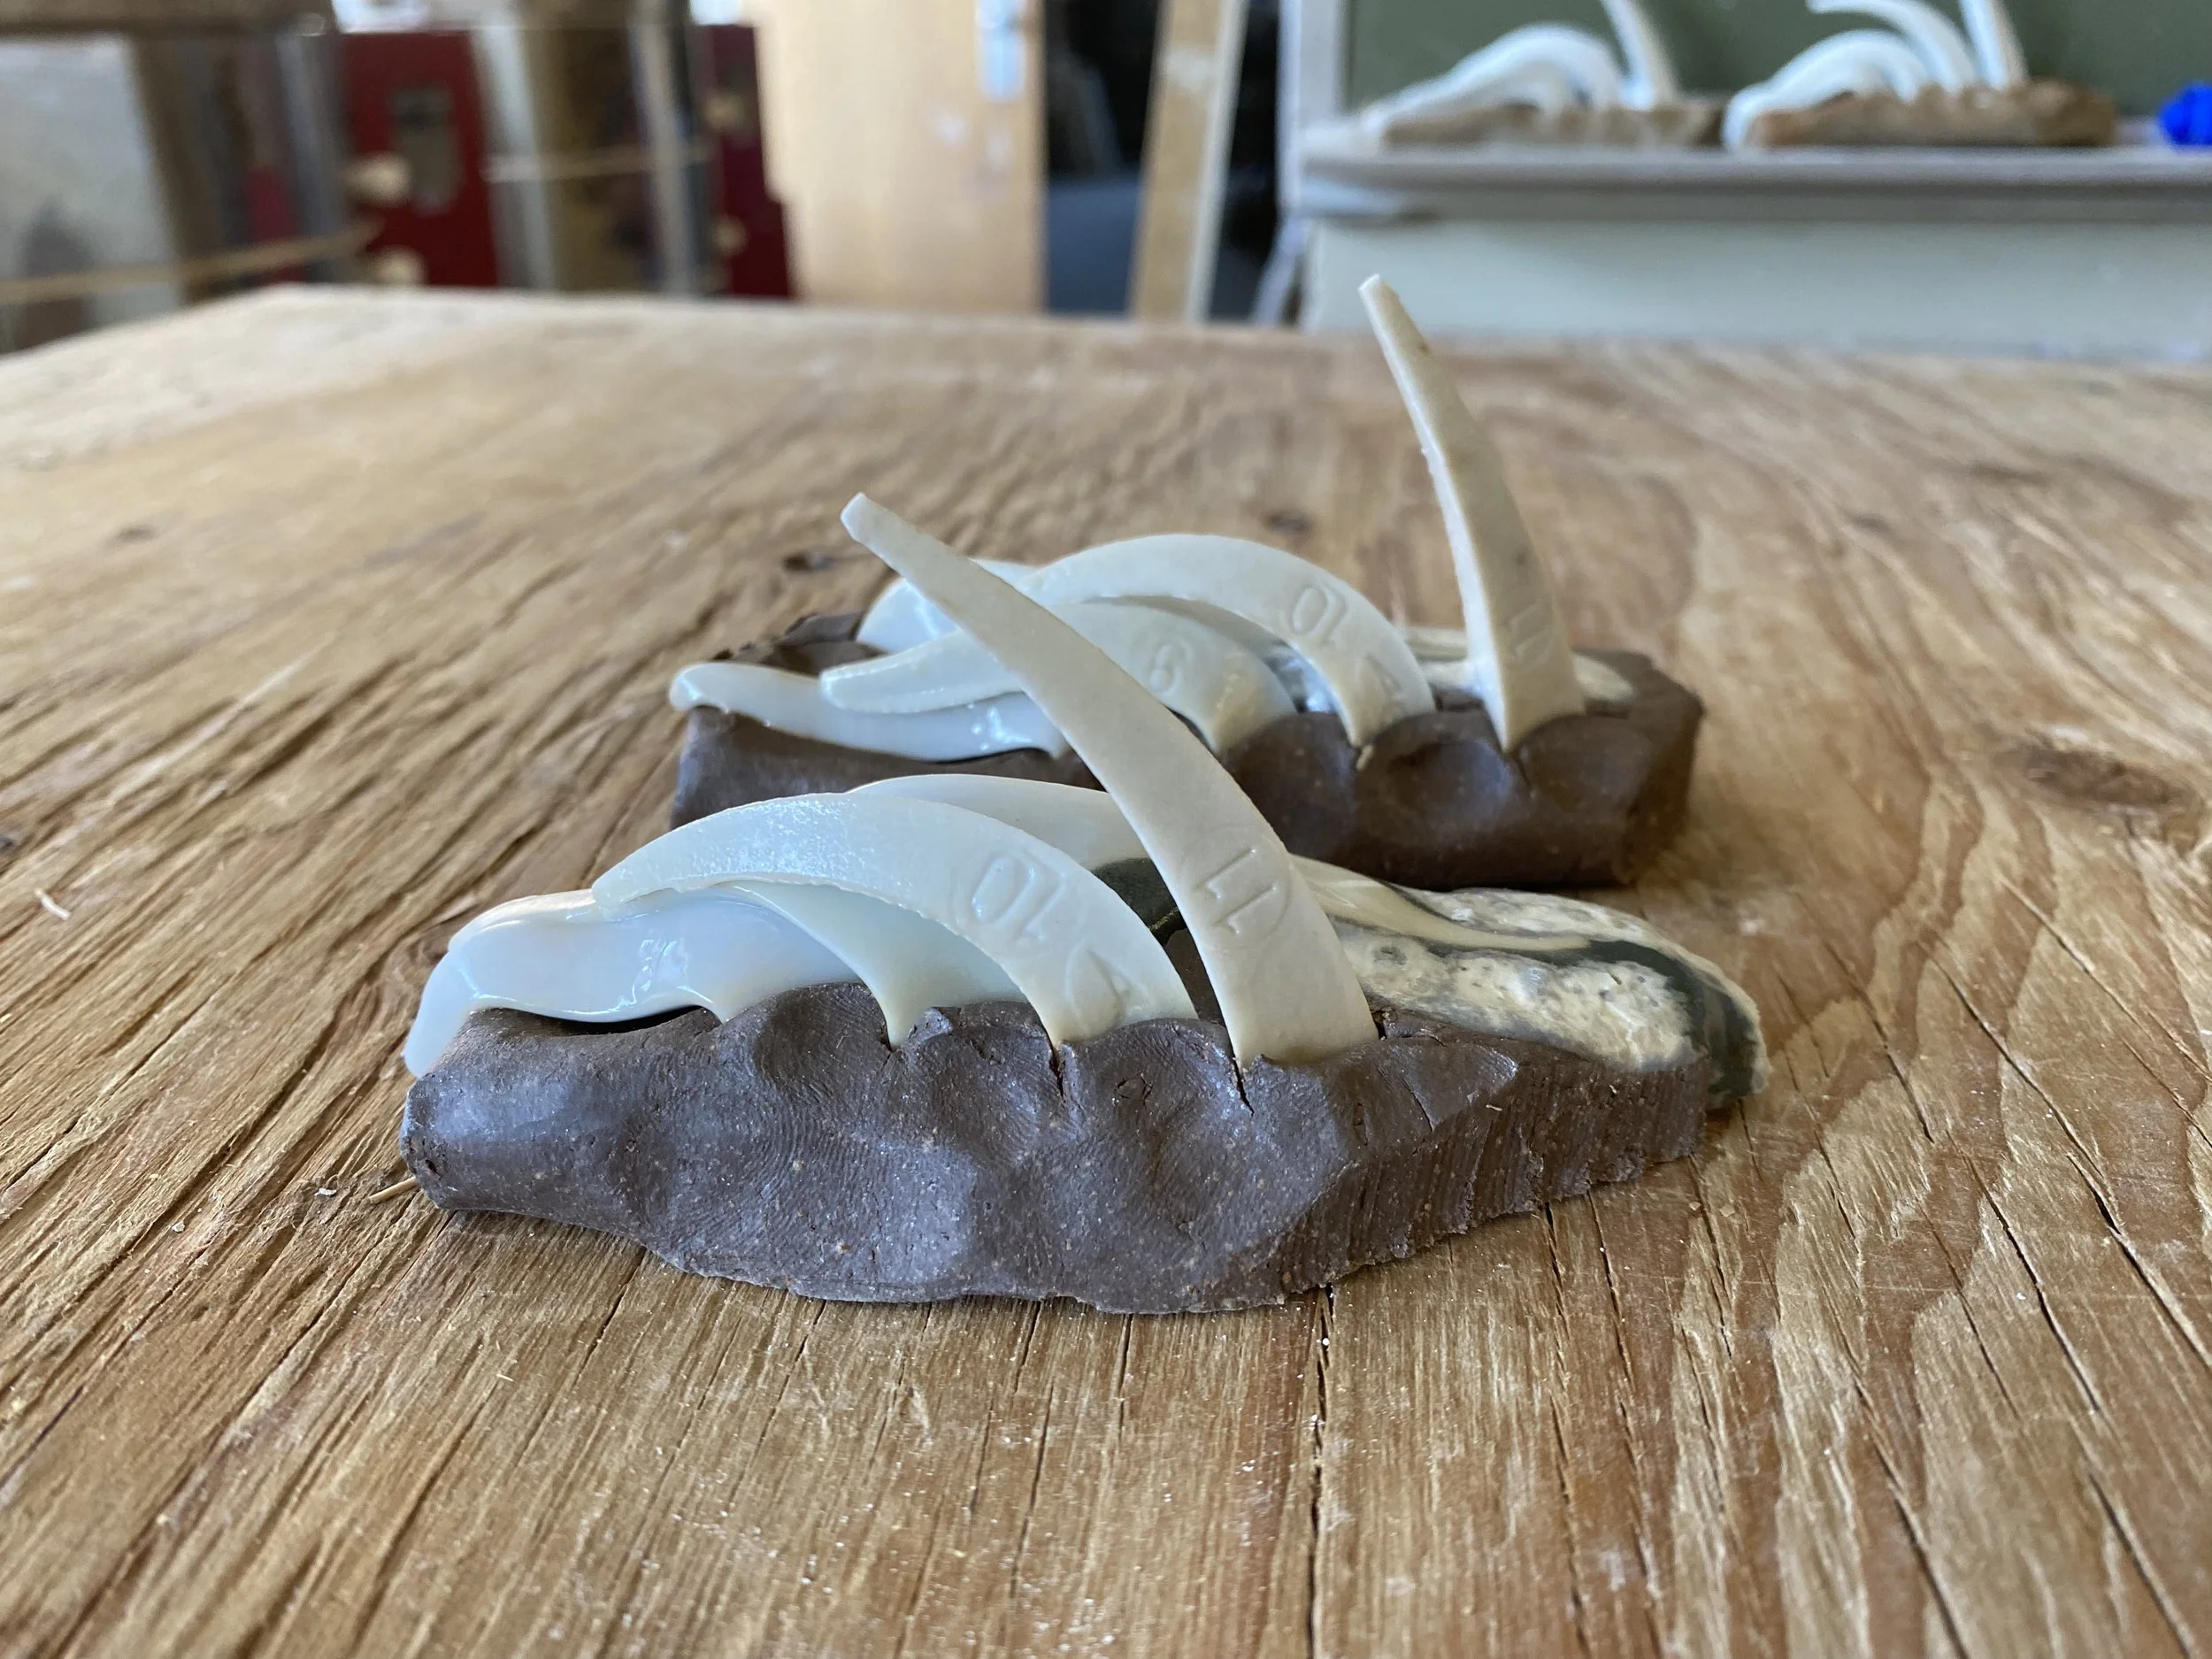
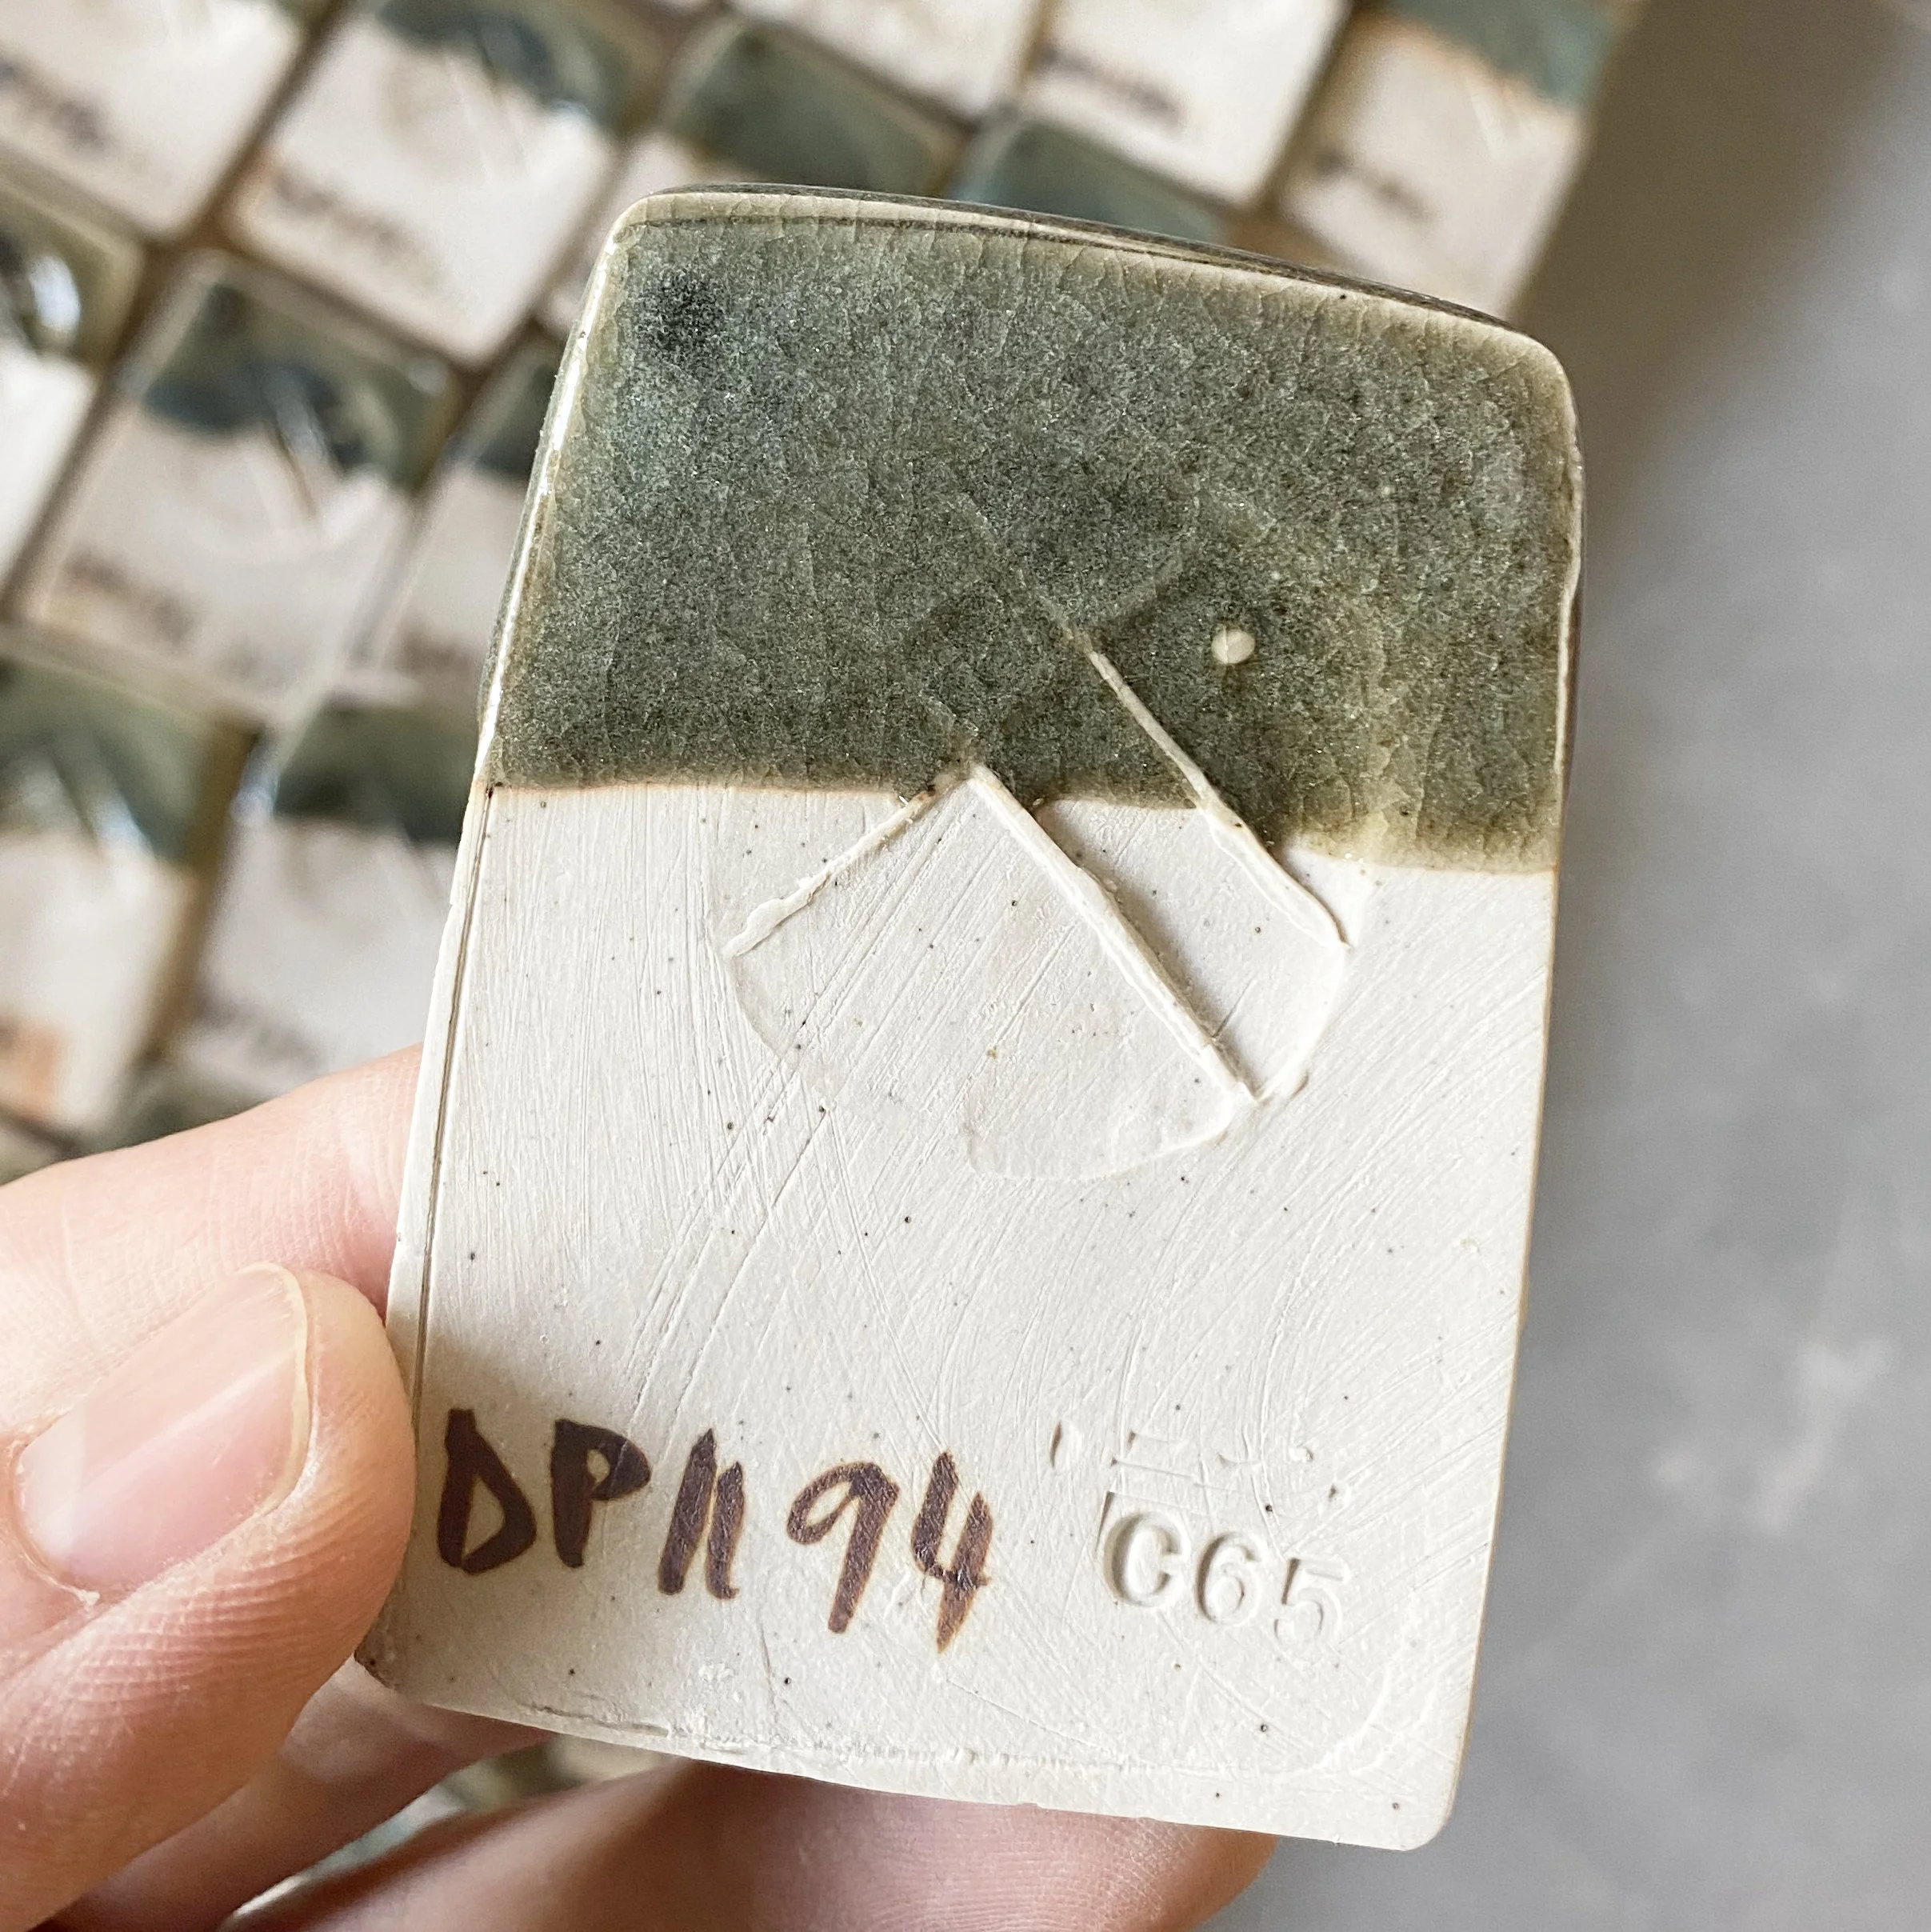
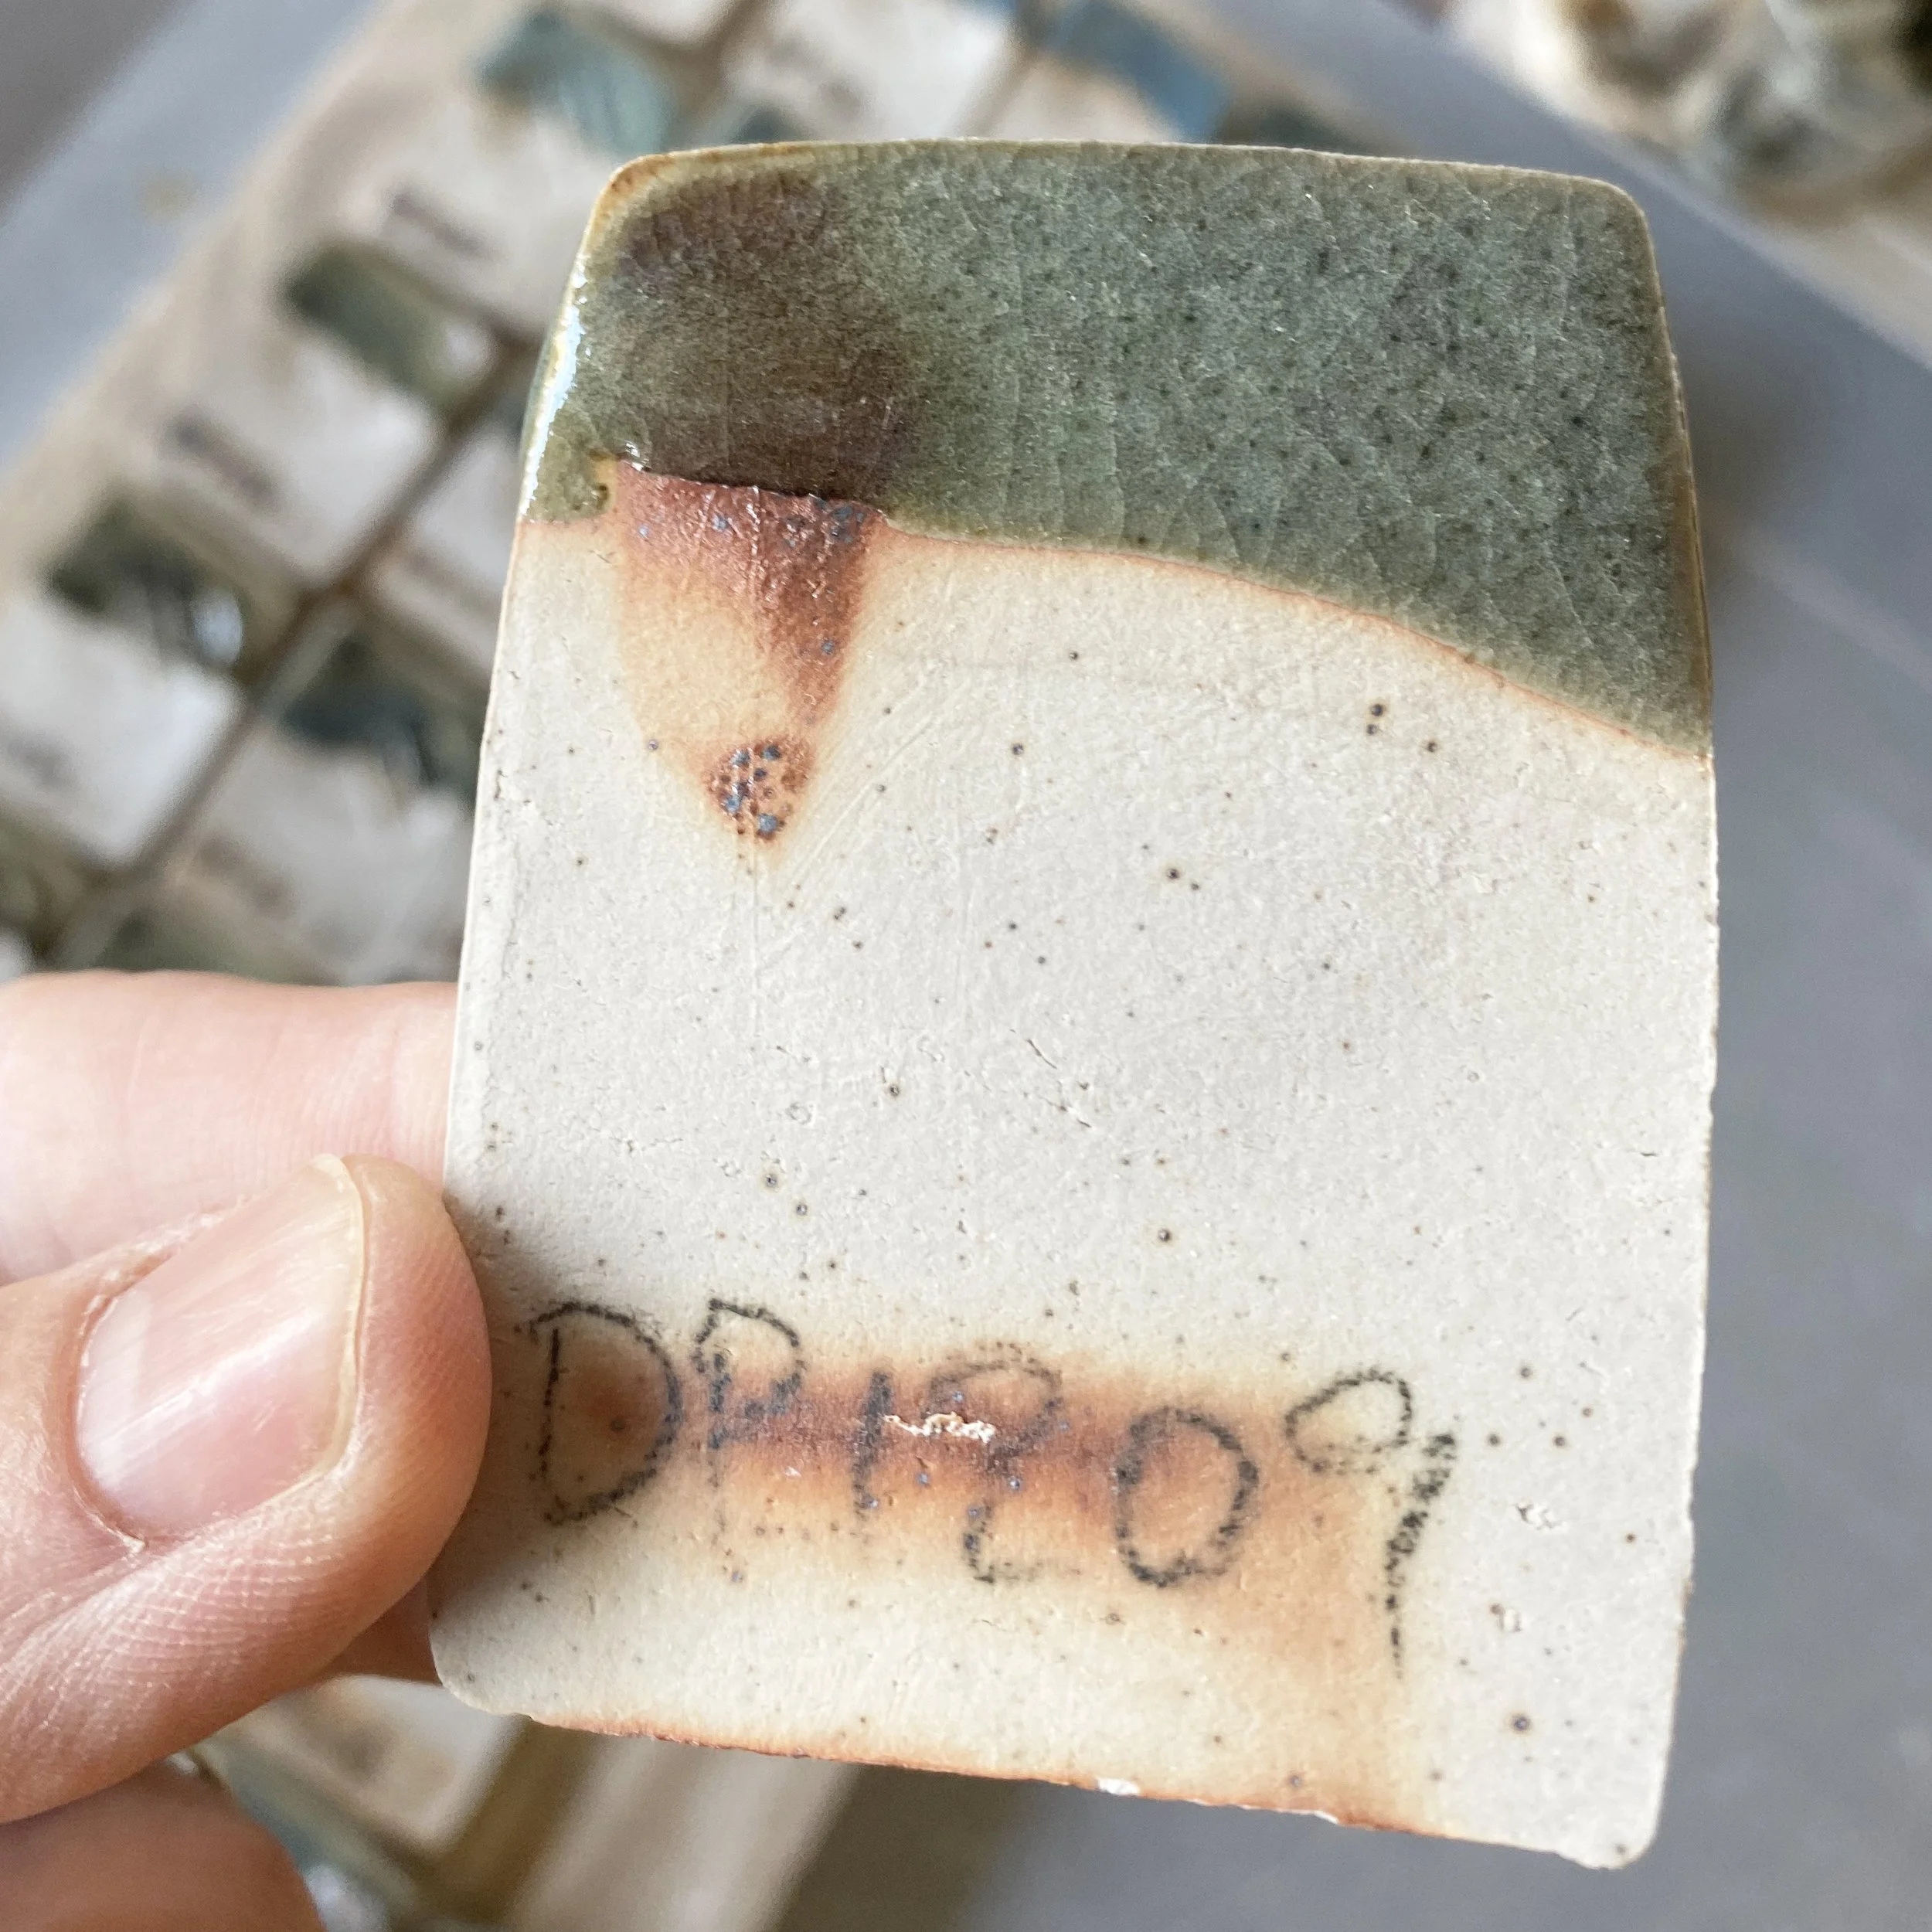
Back side of the tiles (with copper carbonate swatch on top left corner):


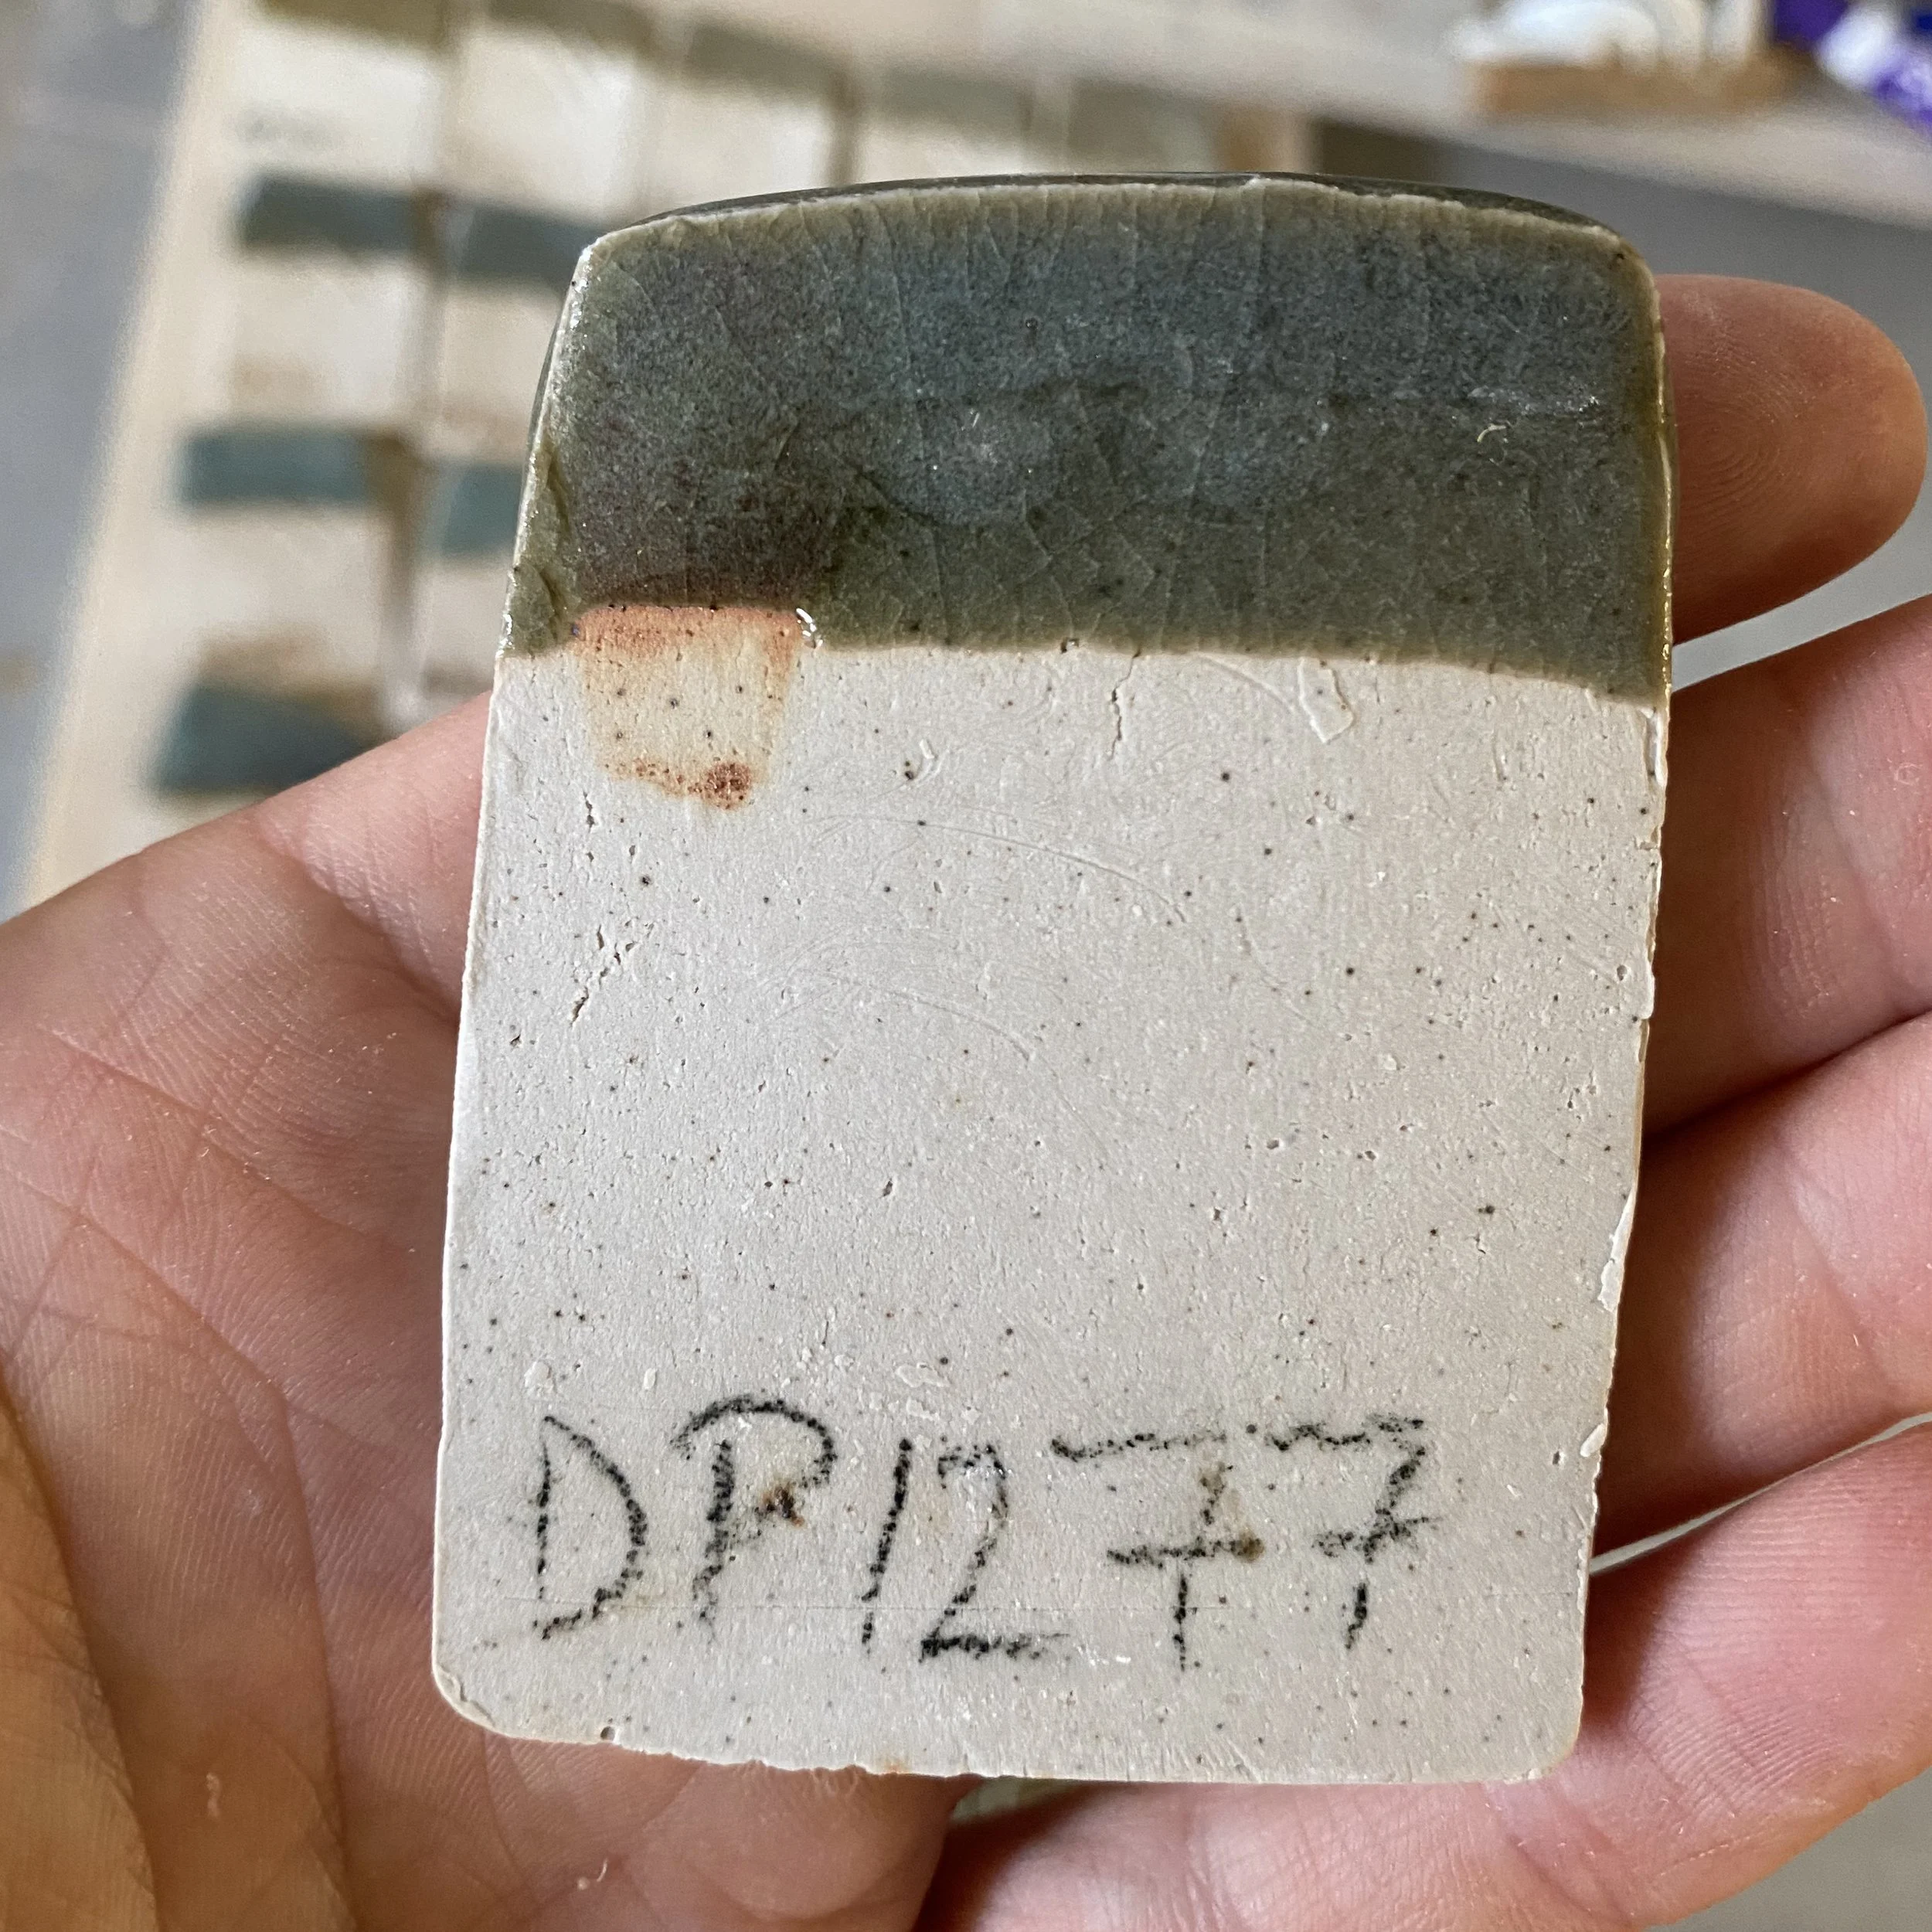


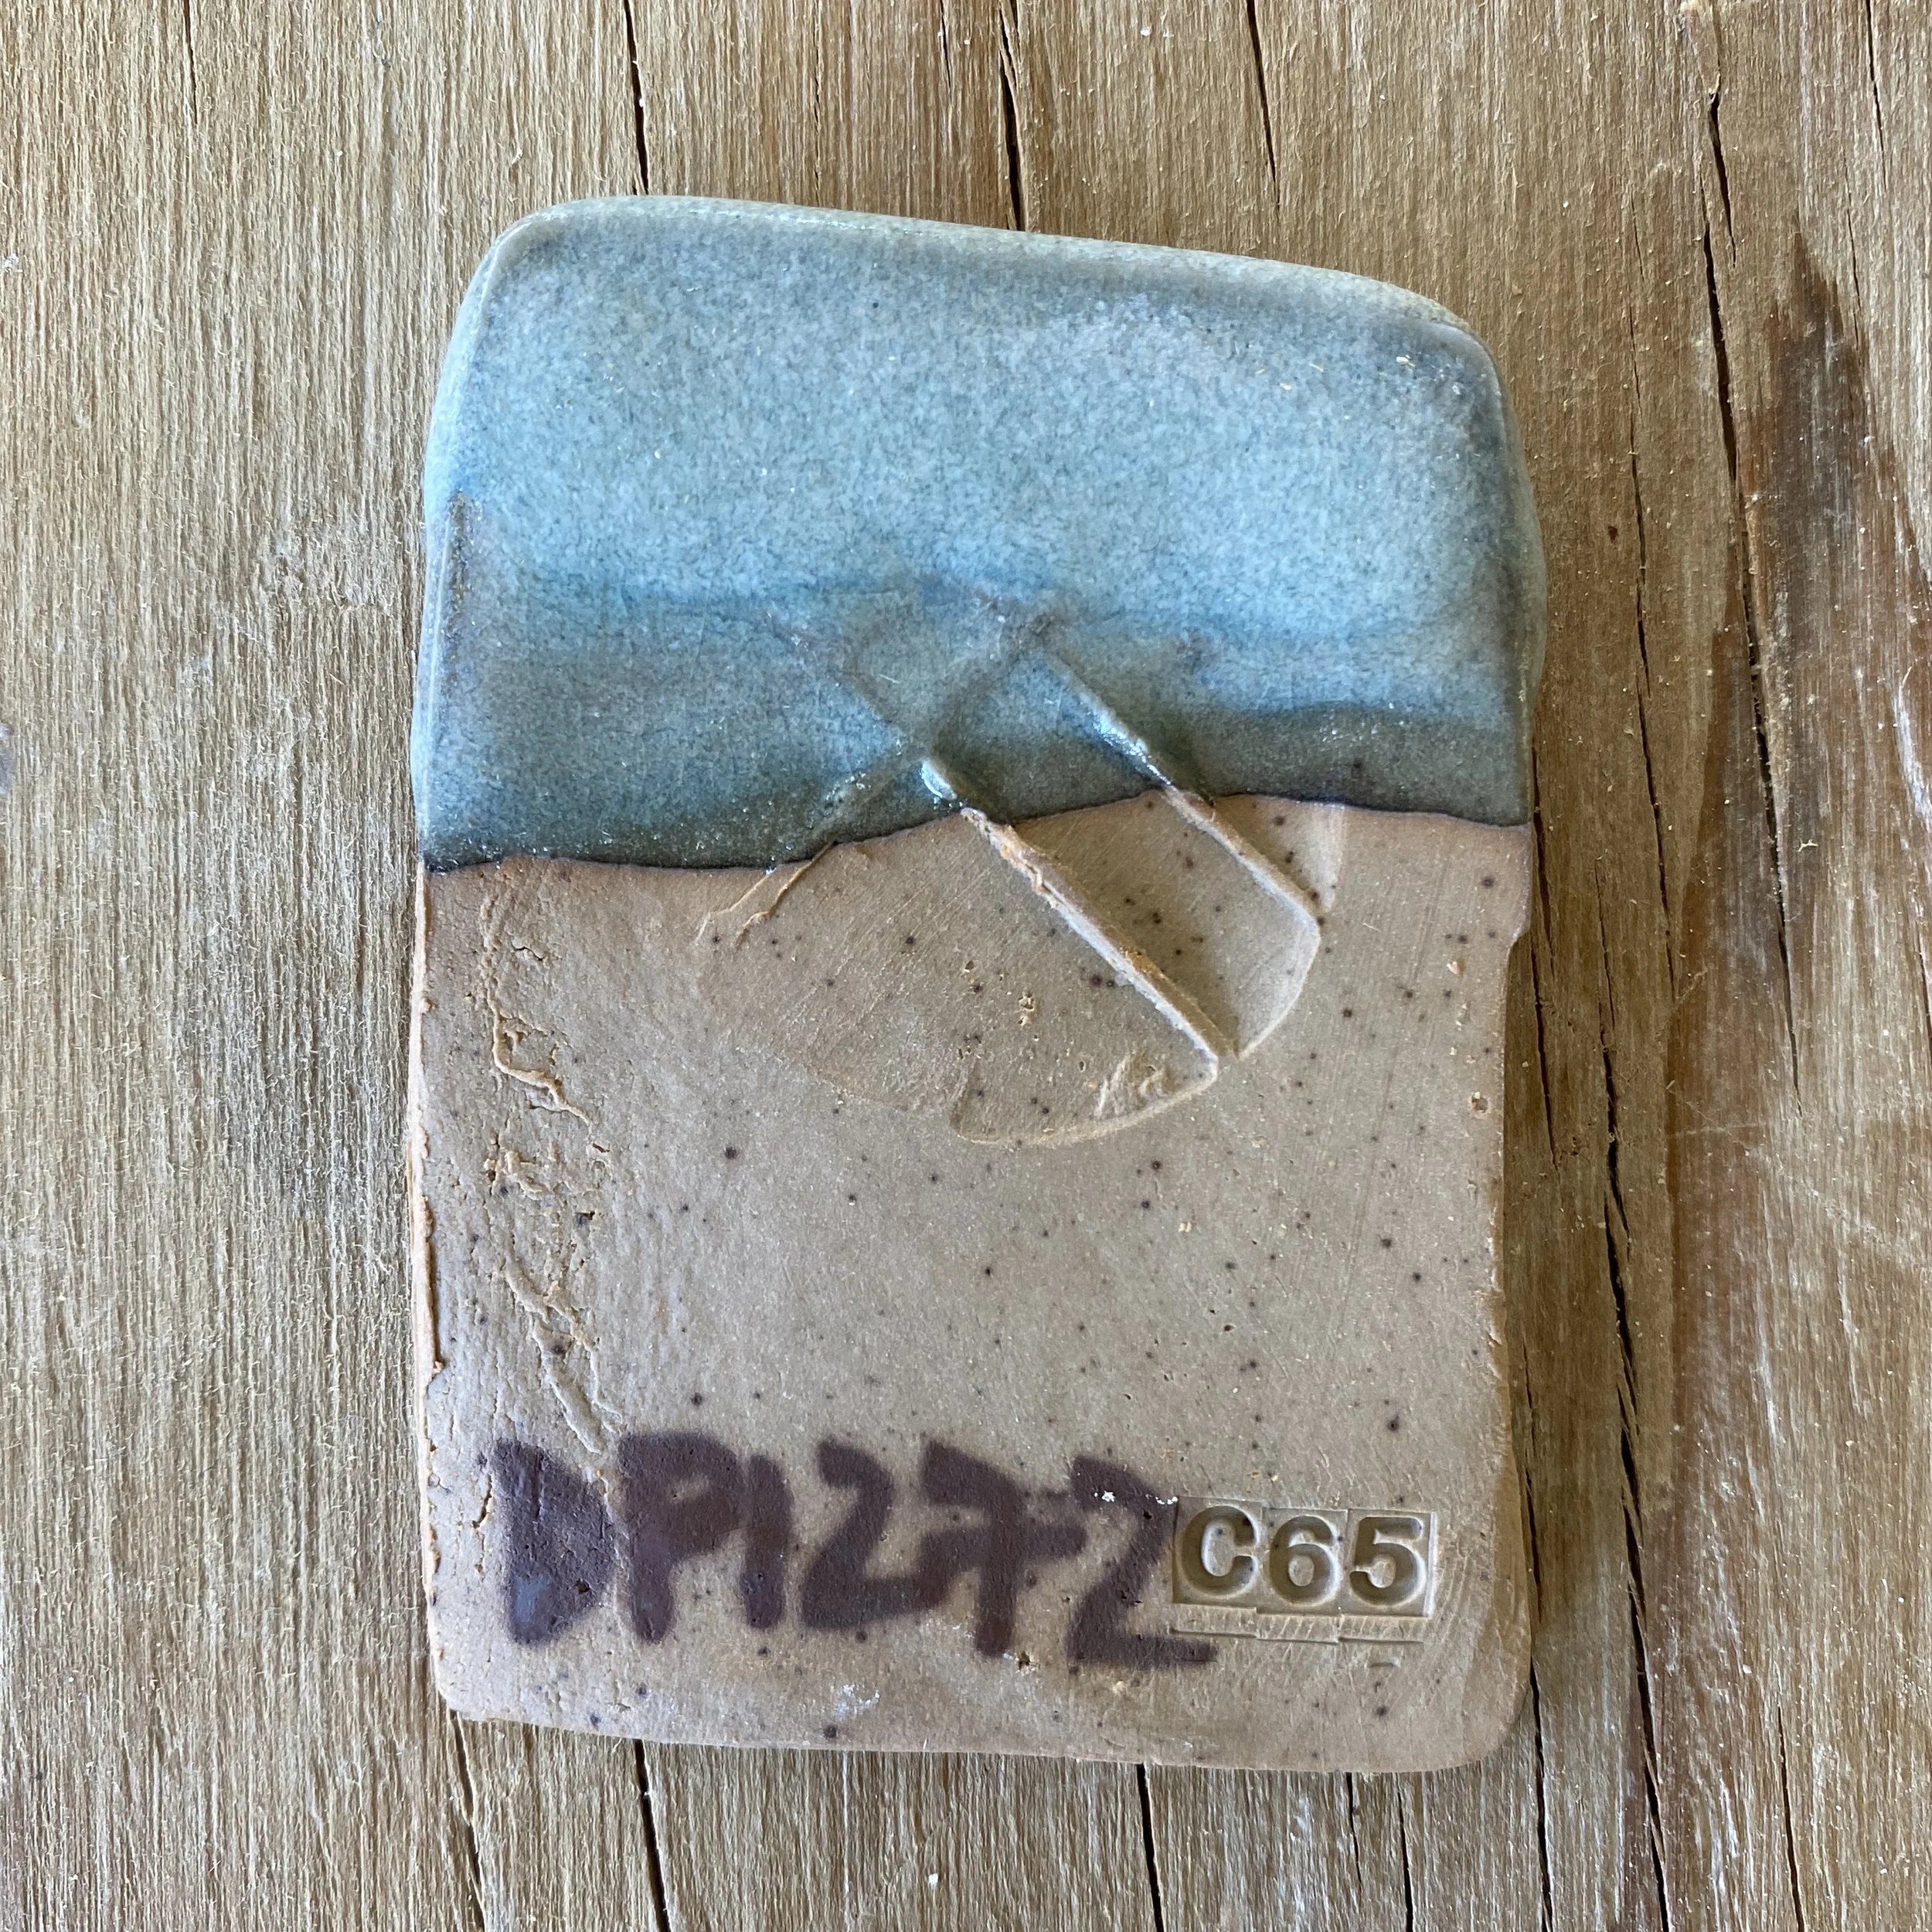
It looks to me like the glazes from DP1259 to DP1267, as well as DP1272, look the best. Let’s look at their composition…

DP1272 reads: 56.25 DP, 19.16 Wollastonite, 20.83 Silica, 3.75 Mahavir Feldspar, plus the 7% additions.
What can we conclude from this appearing to be the best zone? In all of them, the silica level is higher than the wollastonite, but they are pretty similar really. Let’s compare a few tiles: DP1259 which has 3.33% less wollastonite compared to silica, DP1264 which has equal amounts silica to wollastonite, and then DP1269 which has 3.33% more wollastonite compared to silica. In these three tiles, we have a nice little line blend. It seems clear to me that with the extra silica, the opalescent effect is stronger. DP1259 is the cloudiest, compared to DP1269 which is the most transluscent still. However, you can see the opalescent Jun effect on all of the tiles and I think if they were in a more reduced part of the kiln, DP1264 AND DP1269 would have come out more like DP1259.


This is not the most reliable test, as the placement in the kiln and atmosphere clearly played a big role.
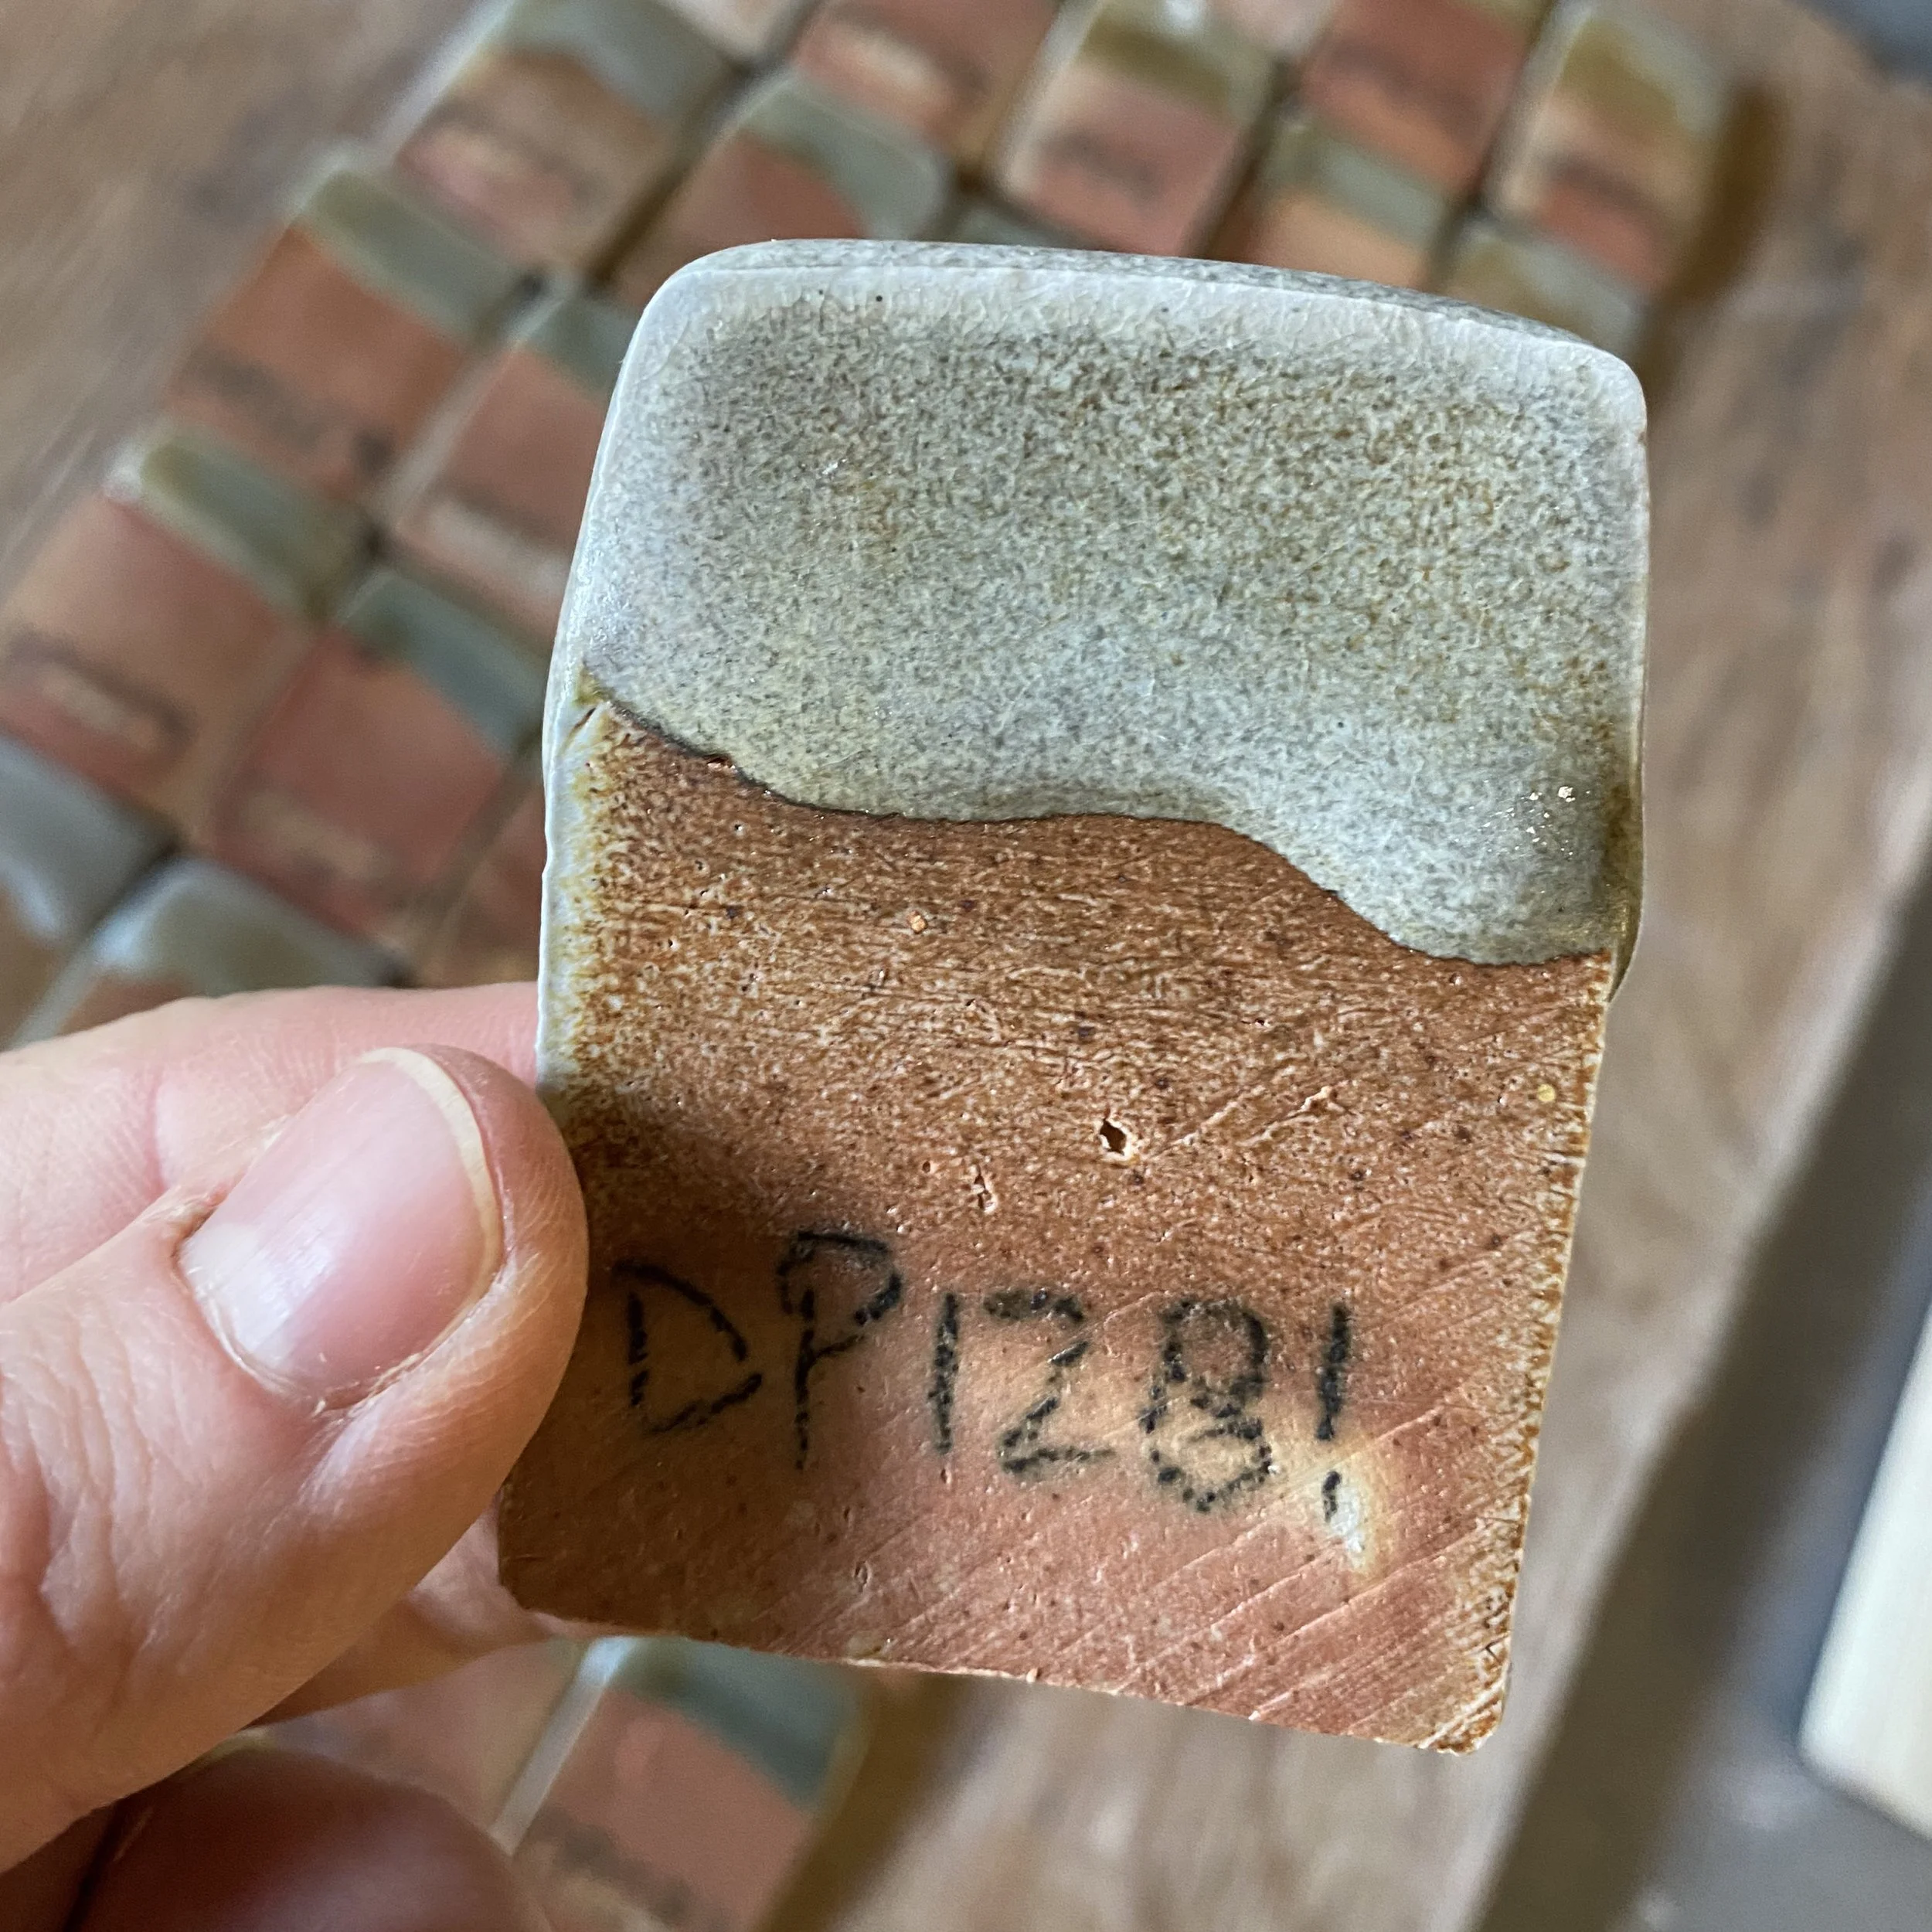
The oxidised tiles are green and do not show much opalescence, whereas the reduced tiles are quite promising, all across the grid. You can see on some of the tiles that half of the tile got more reduction than the other half, such as DP1266 here…


I also had a small test bowl glazed with DP1266 in the kiln which got properly reduced and came out nicely. Here it is…
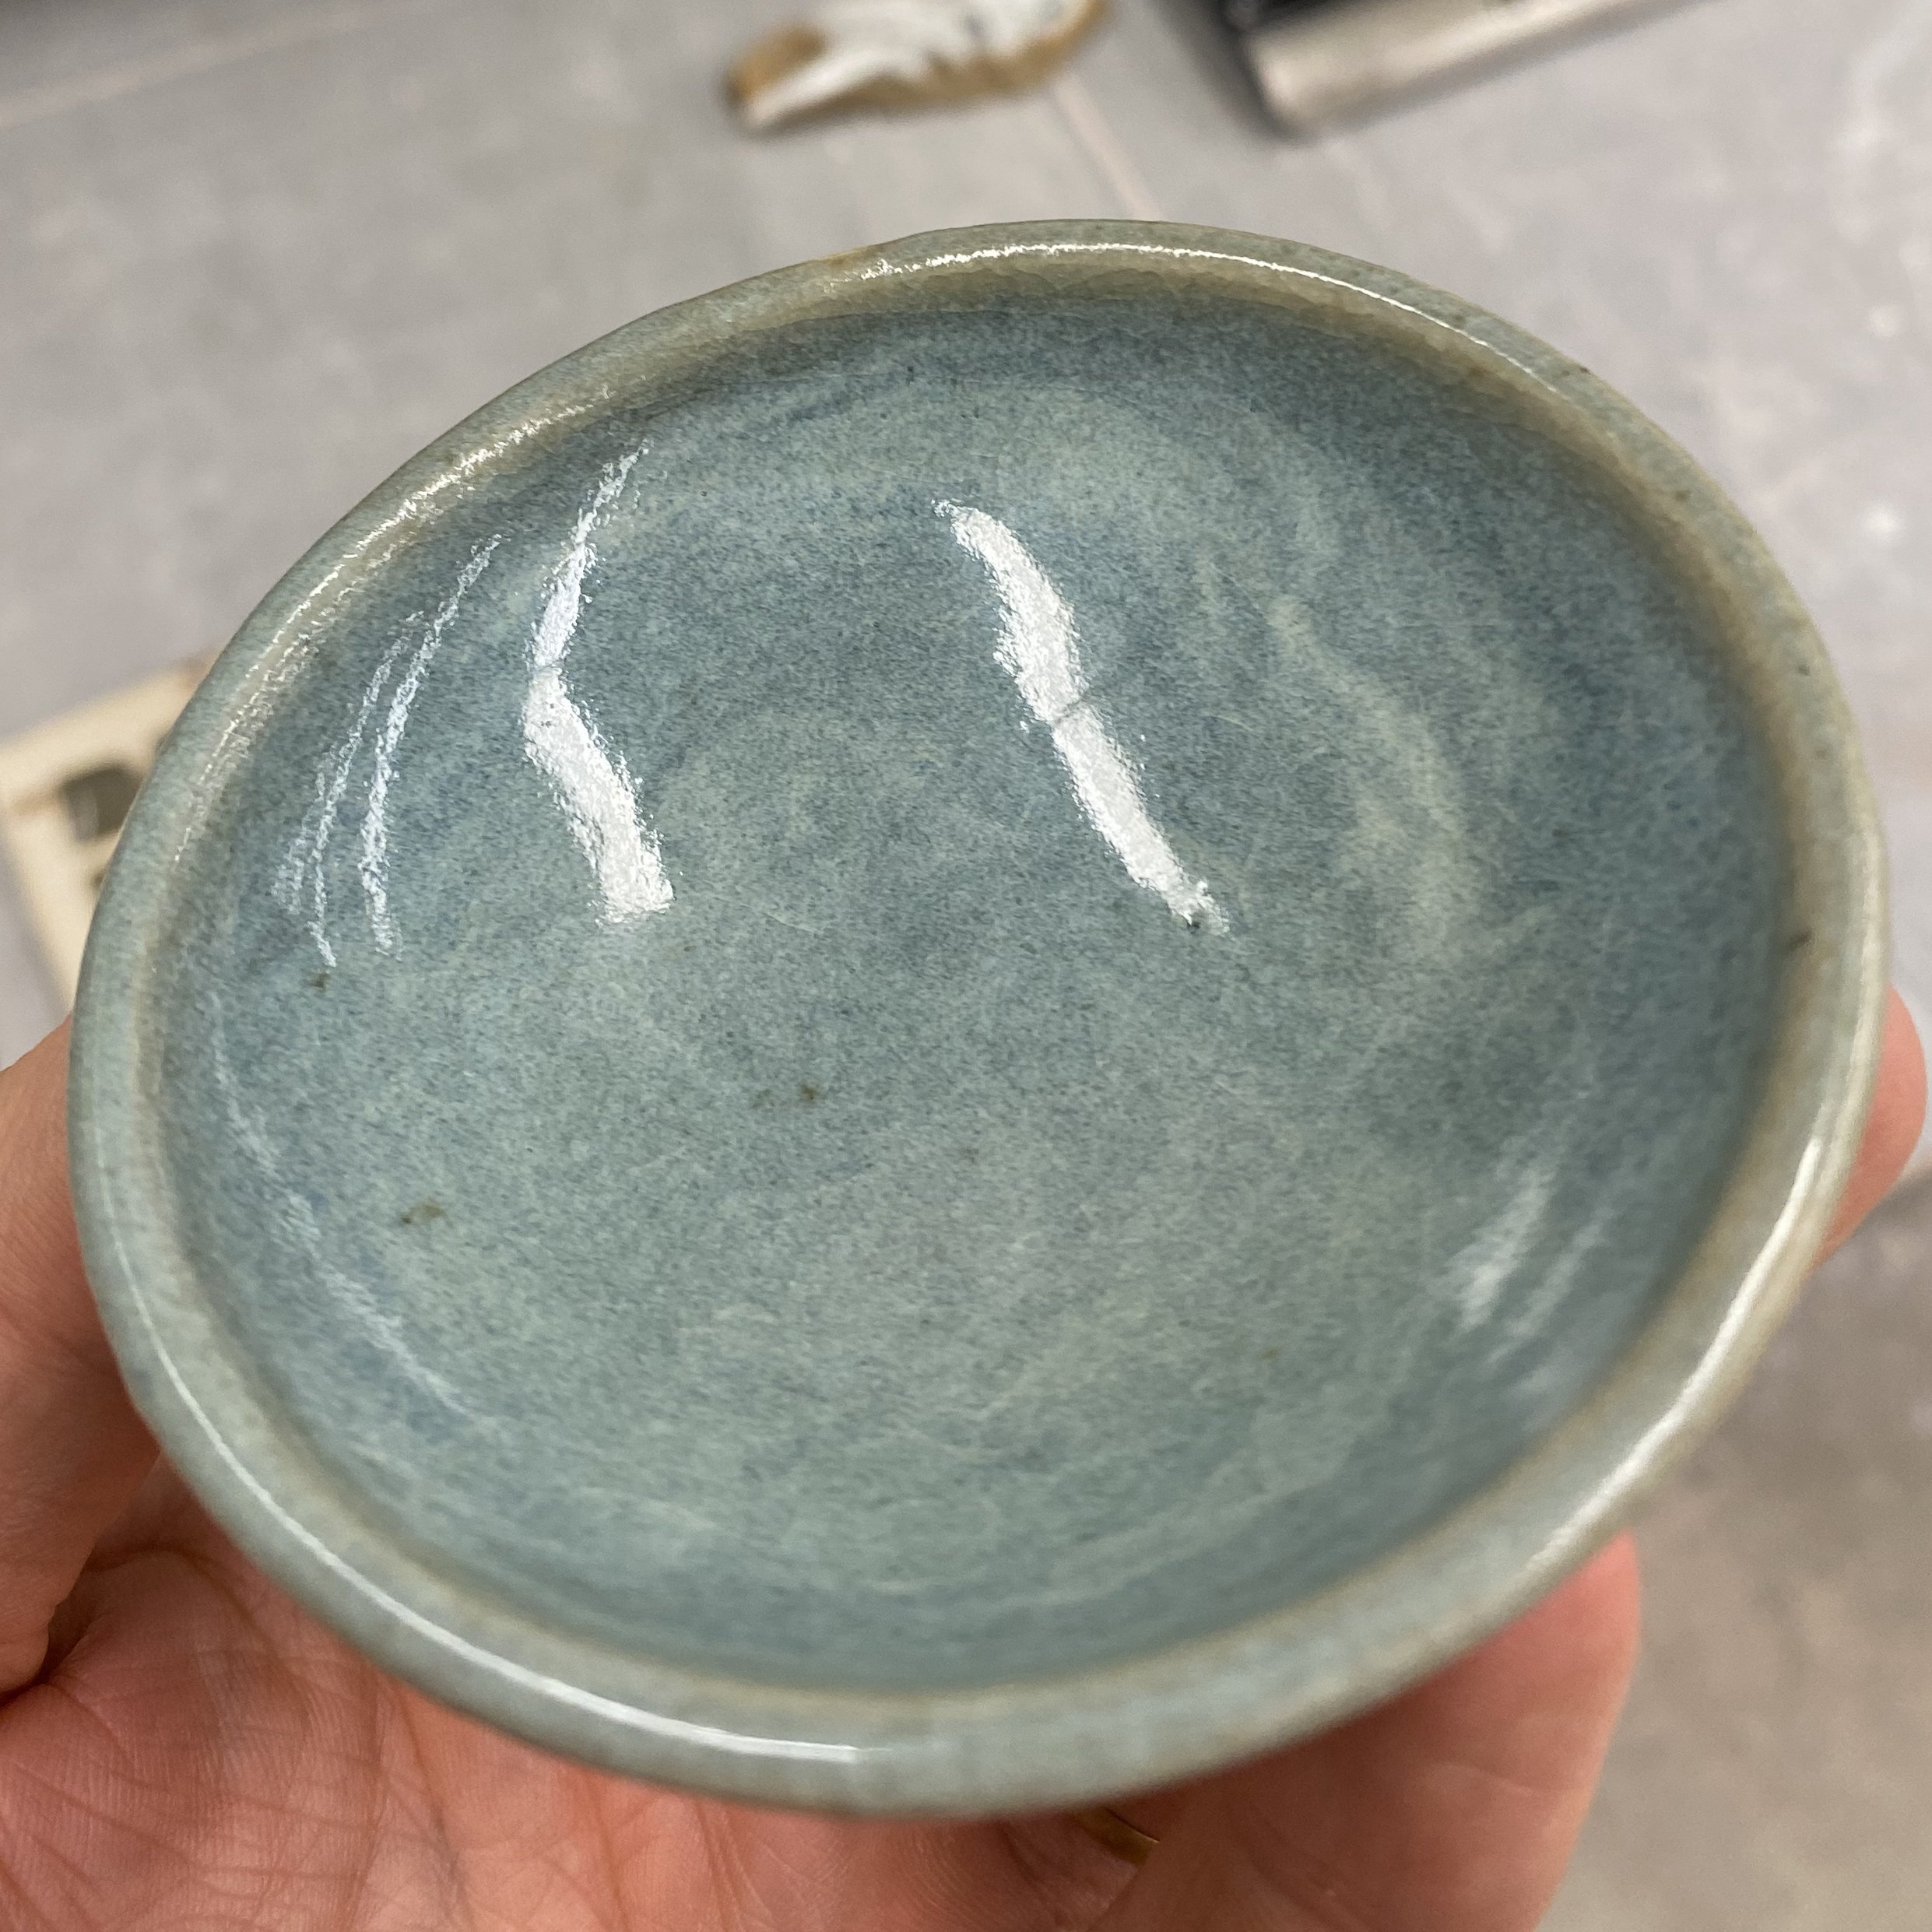
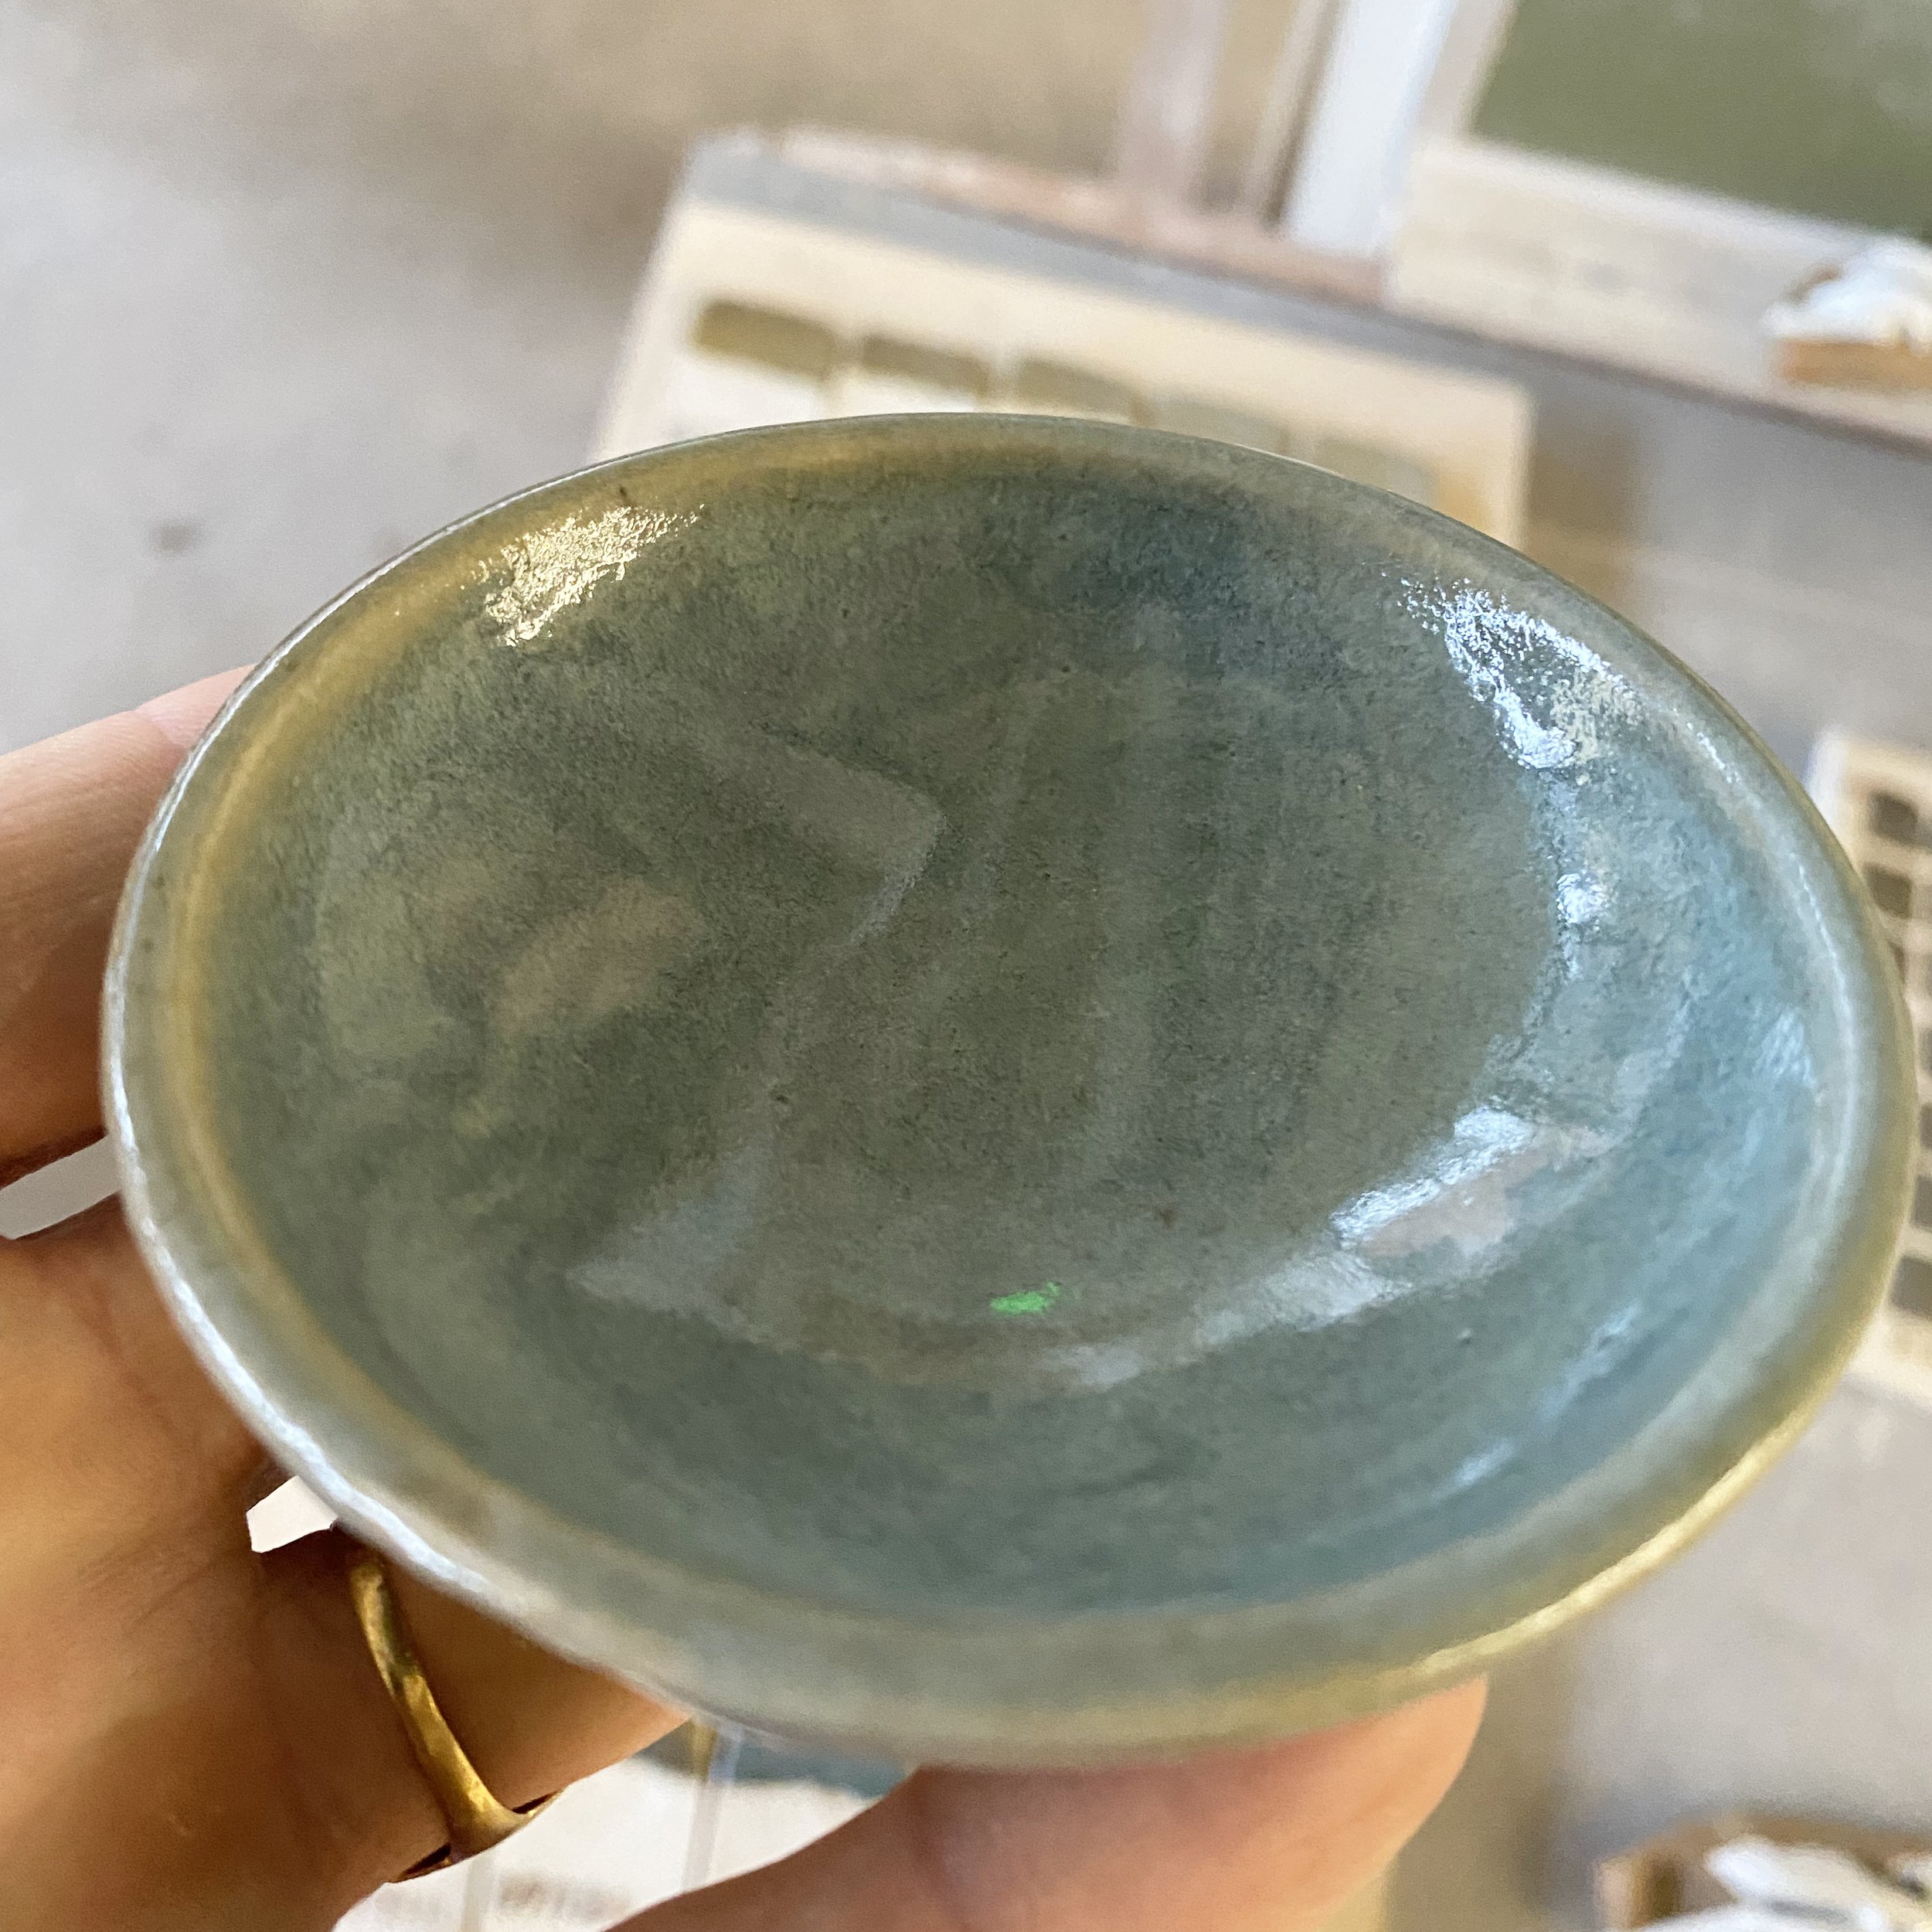
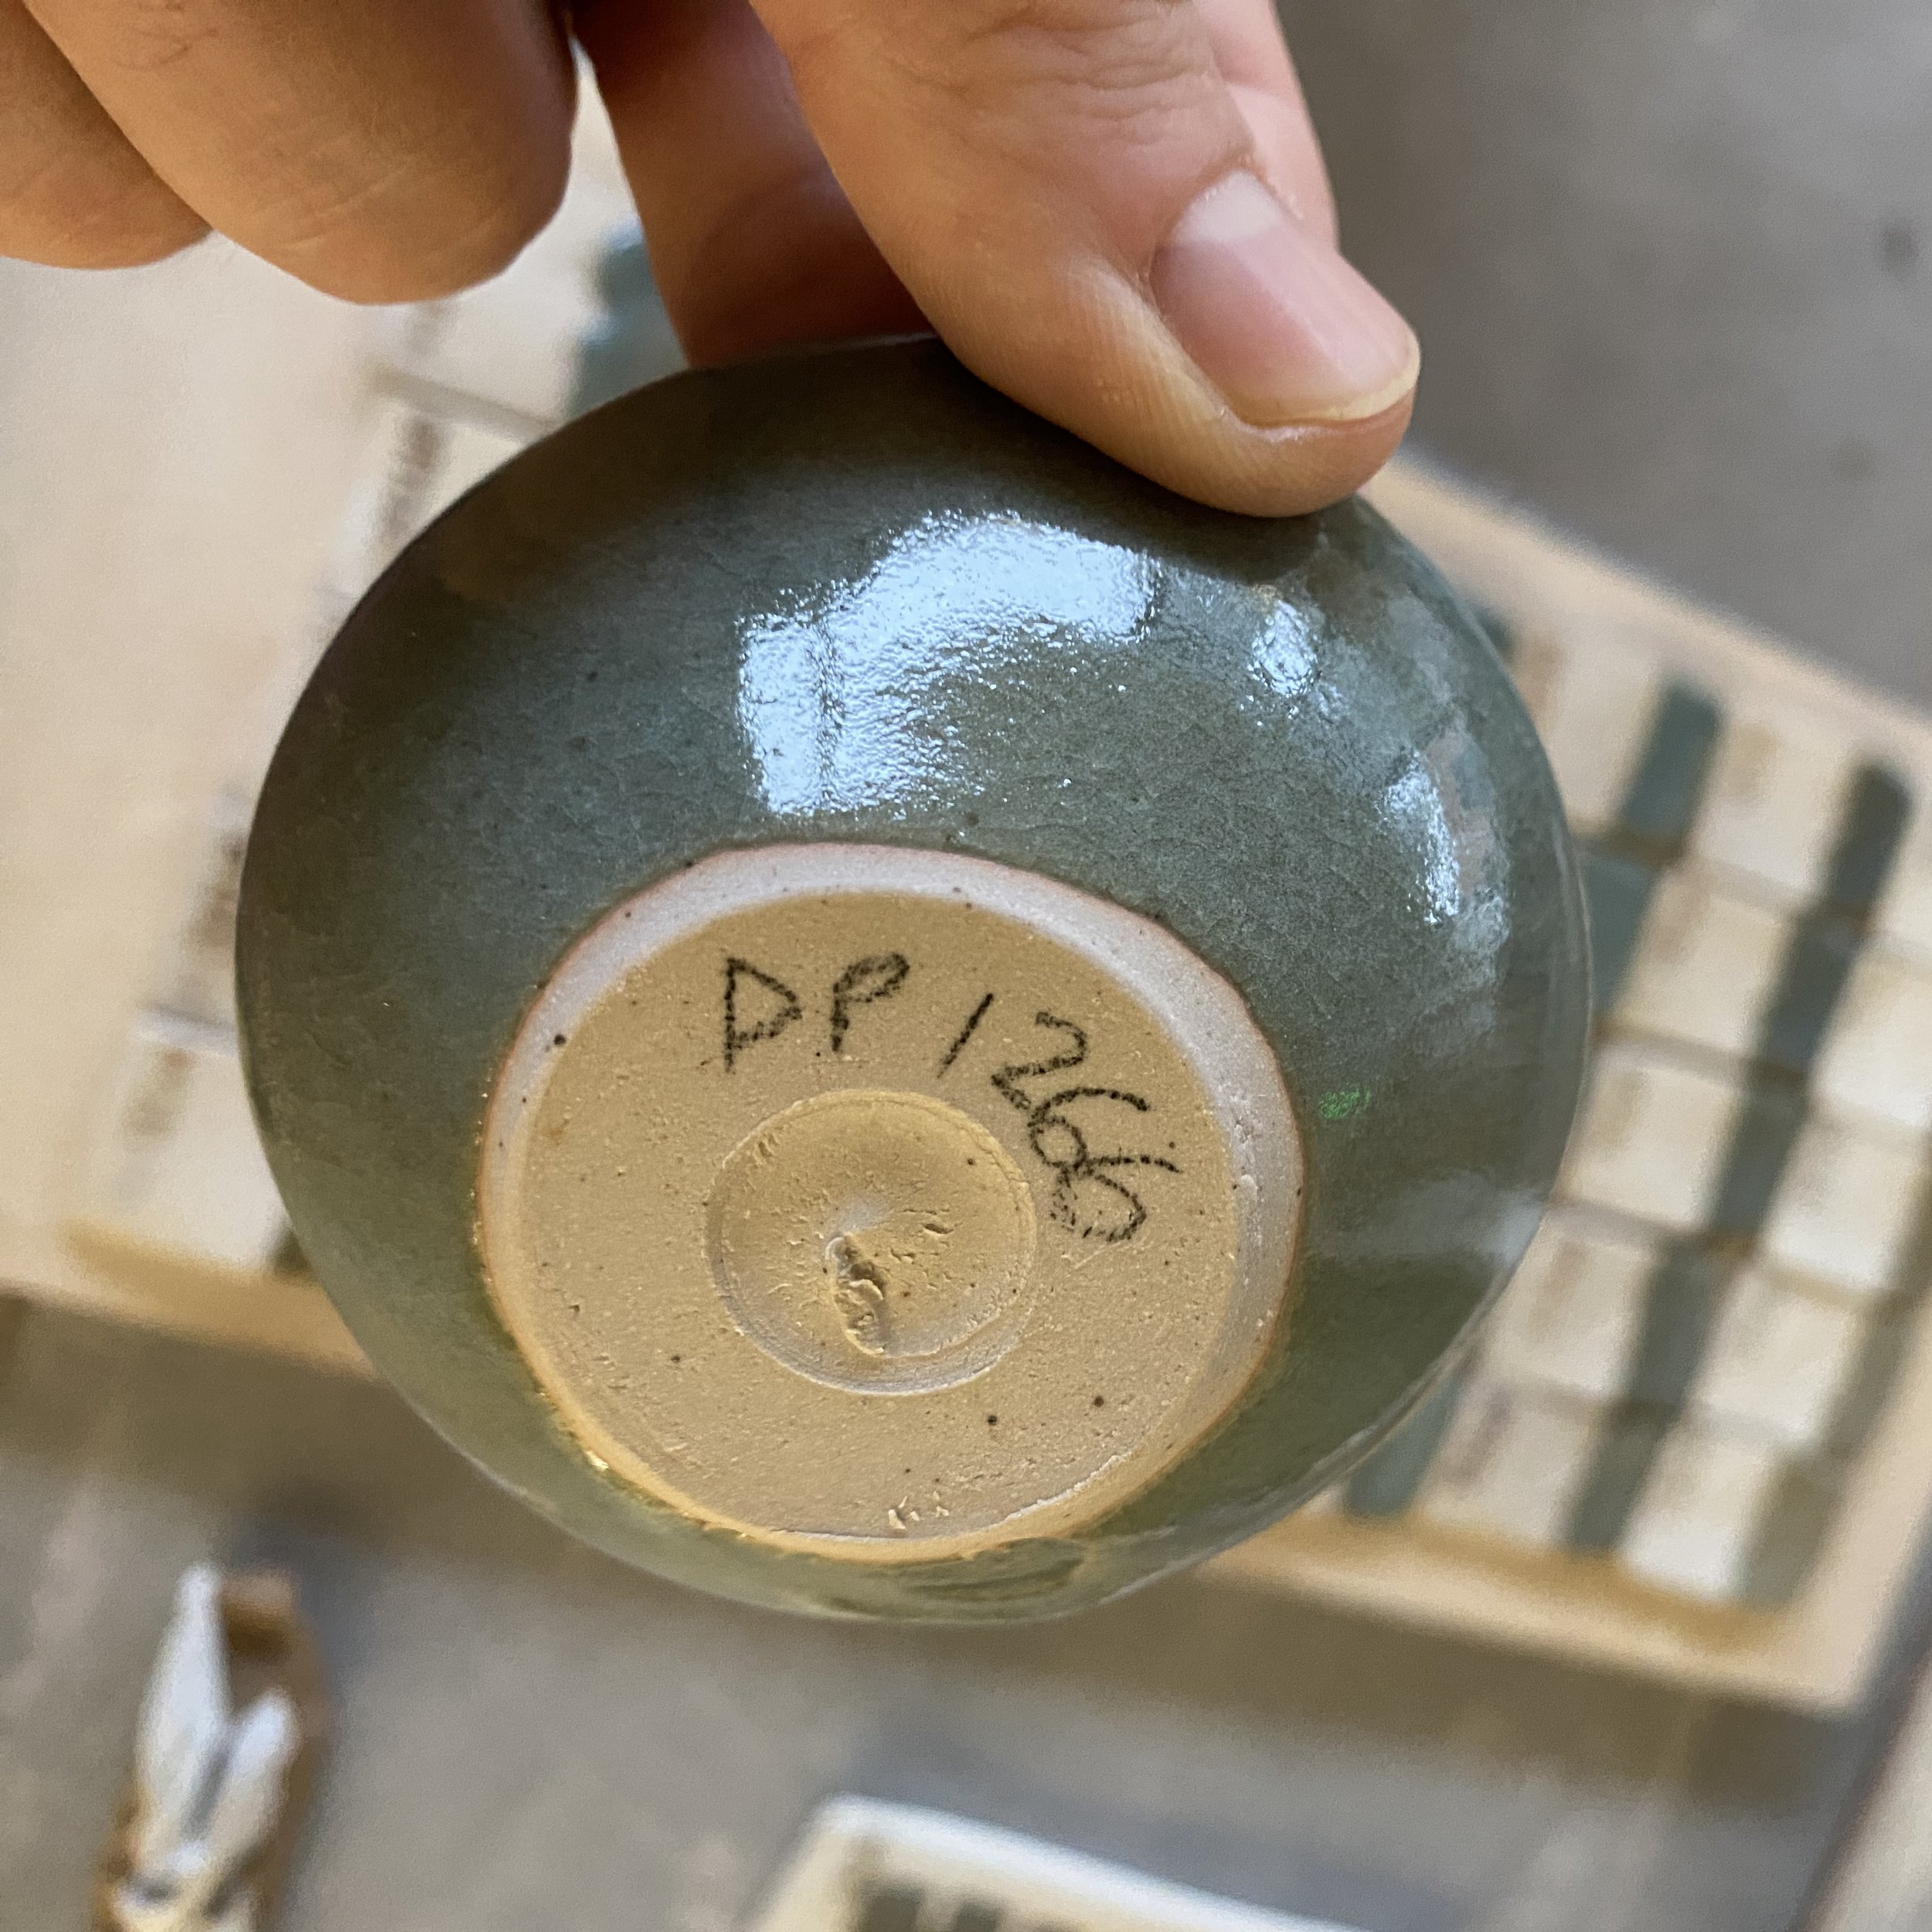
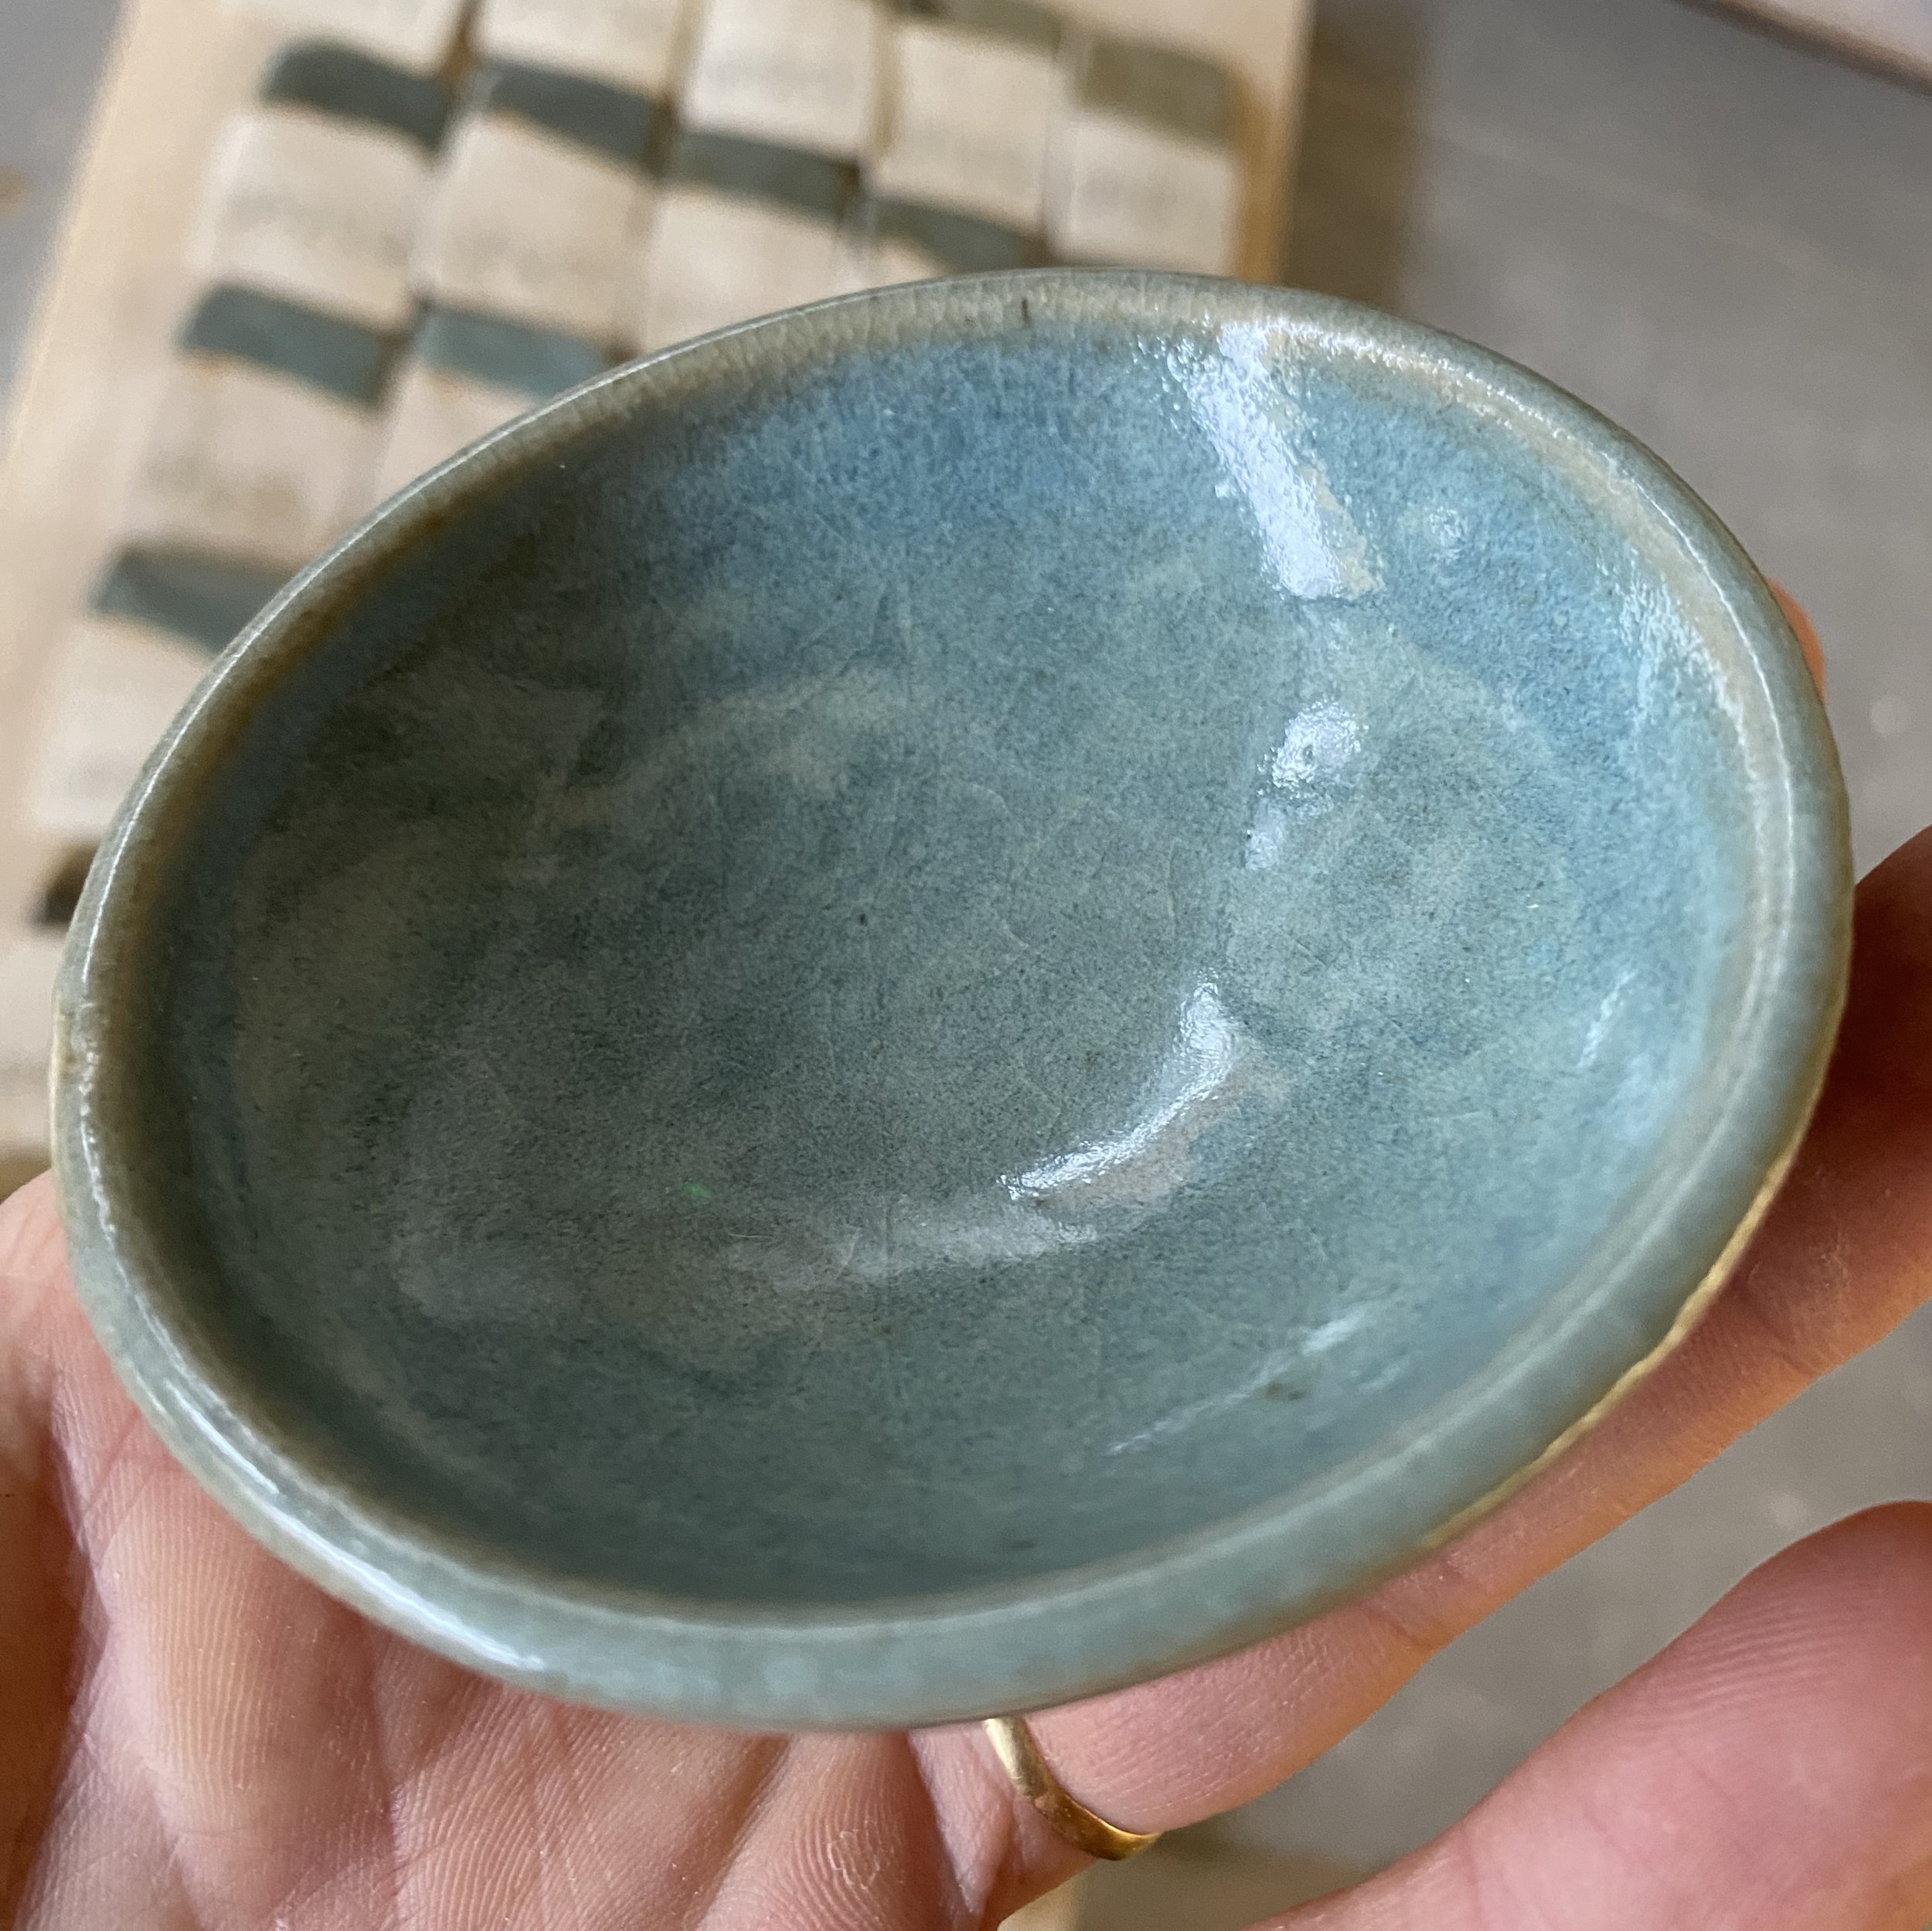
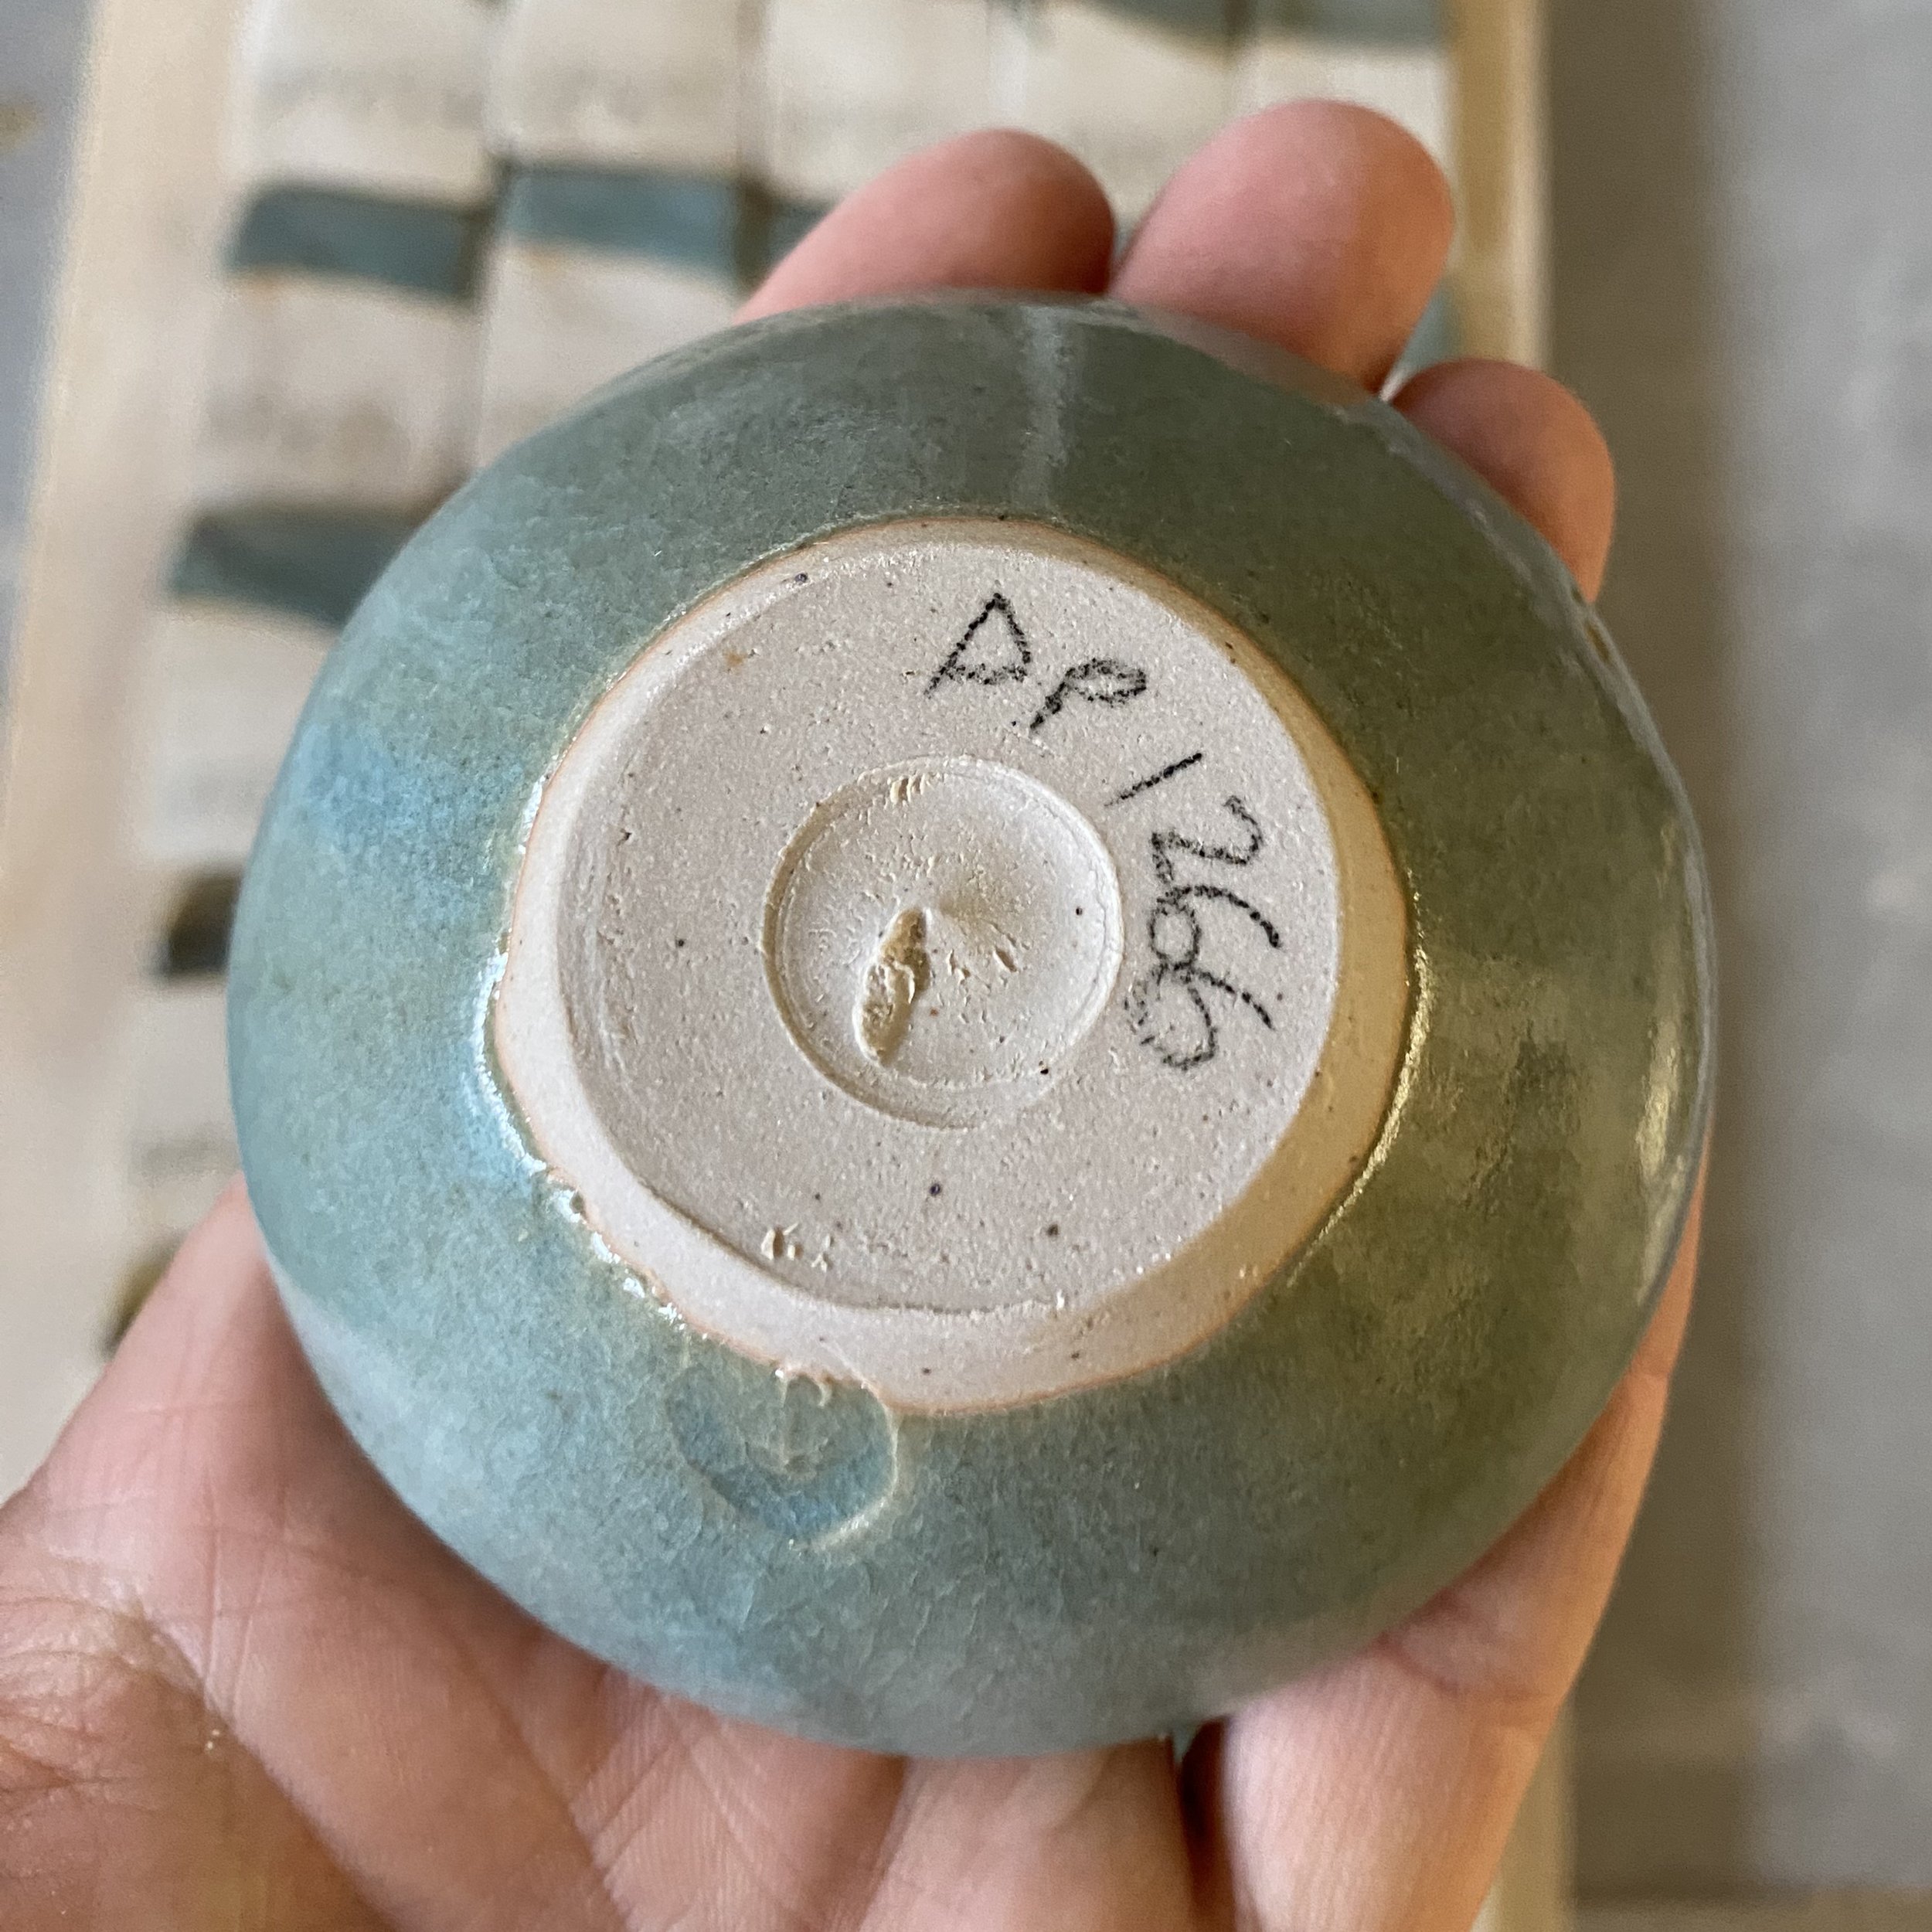
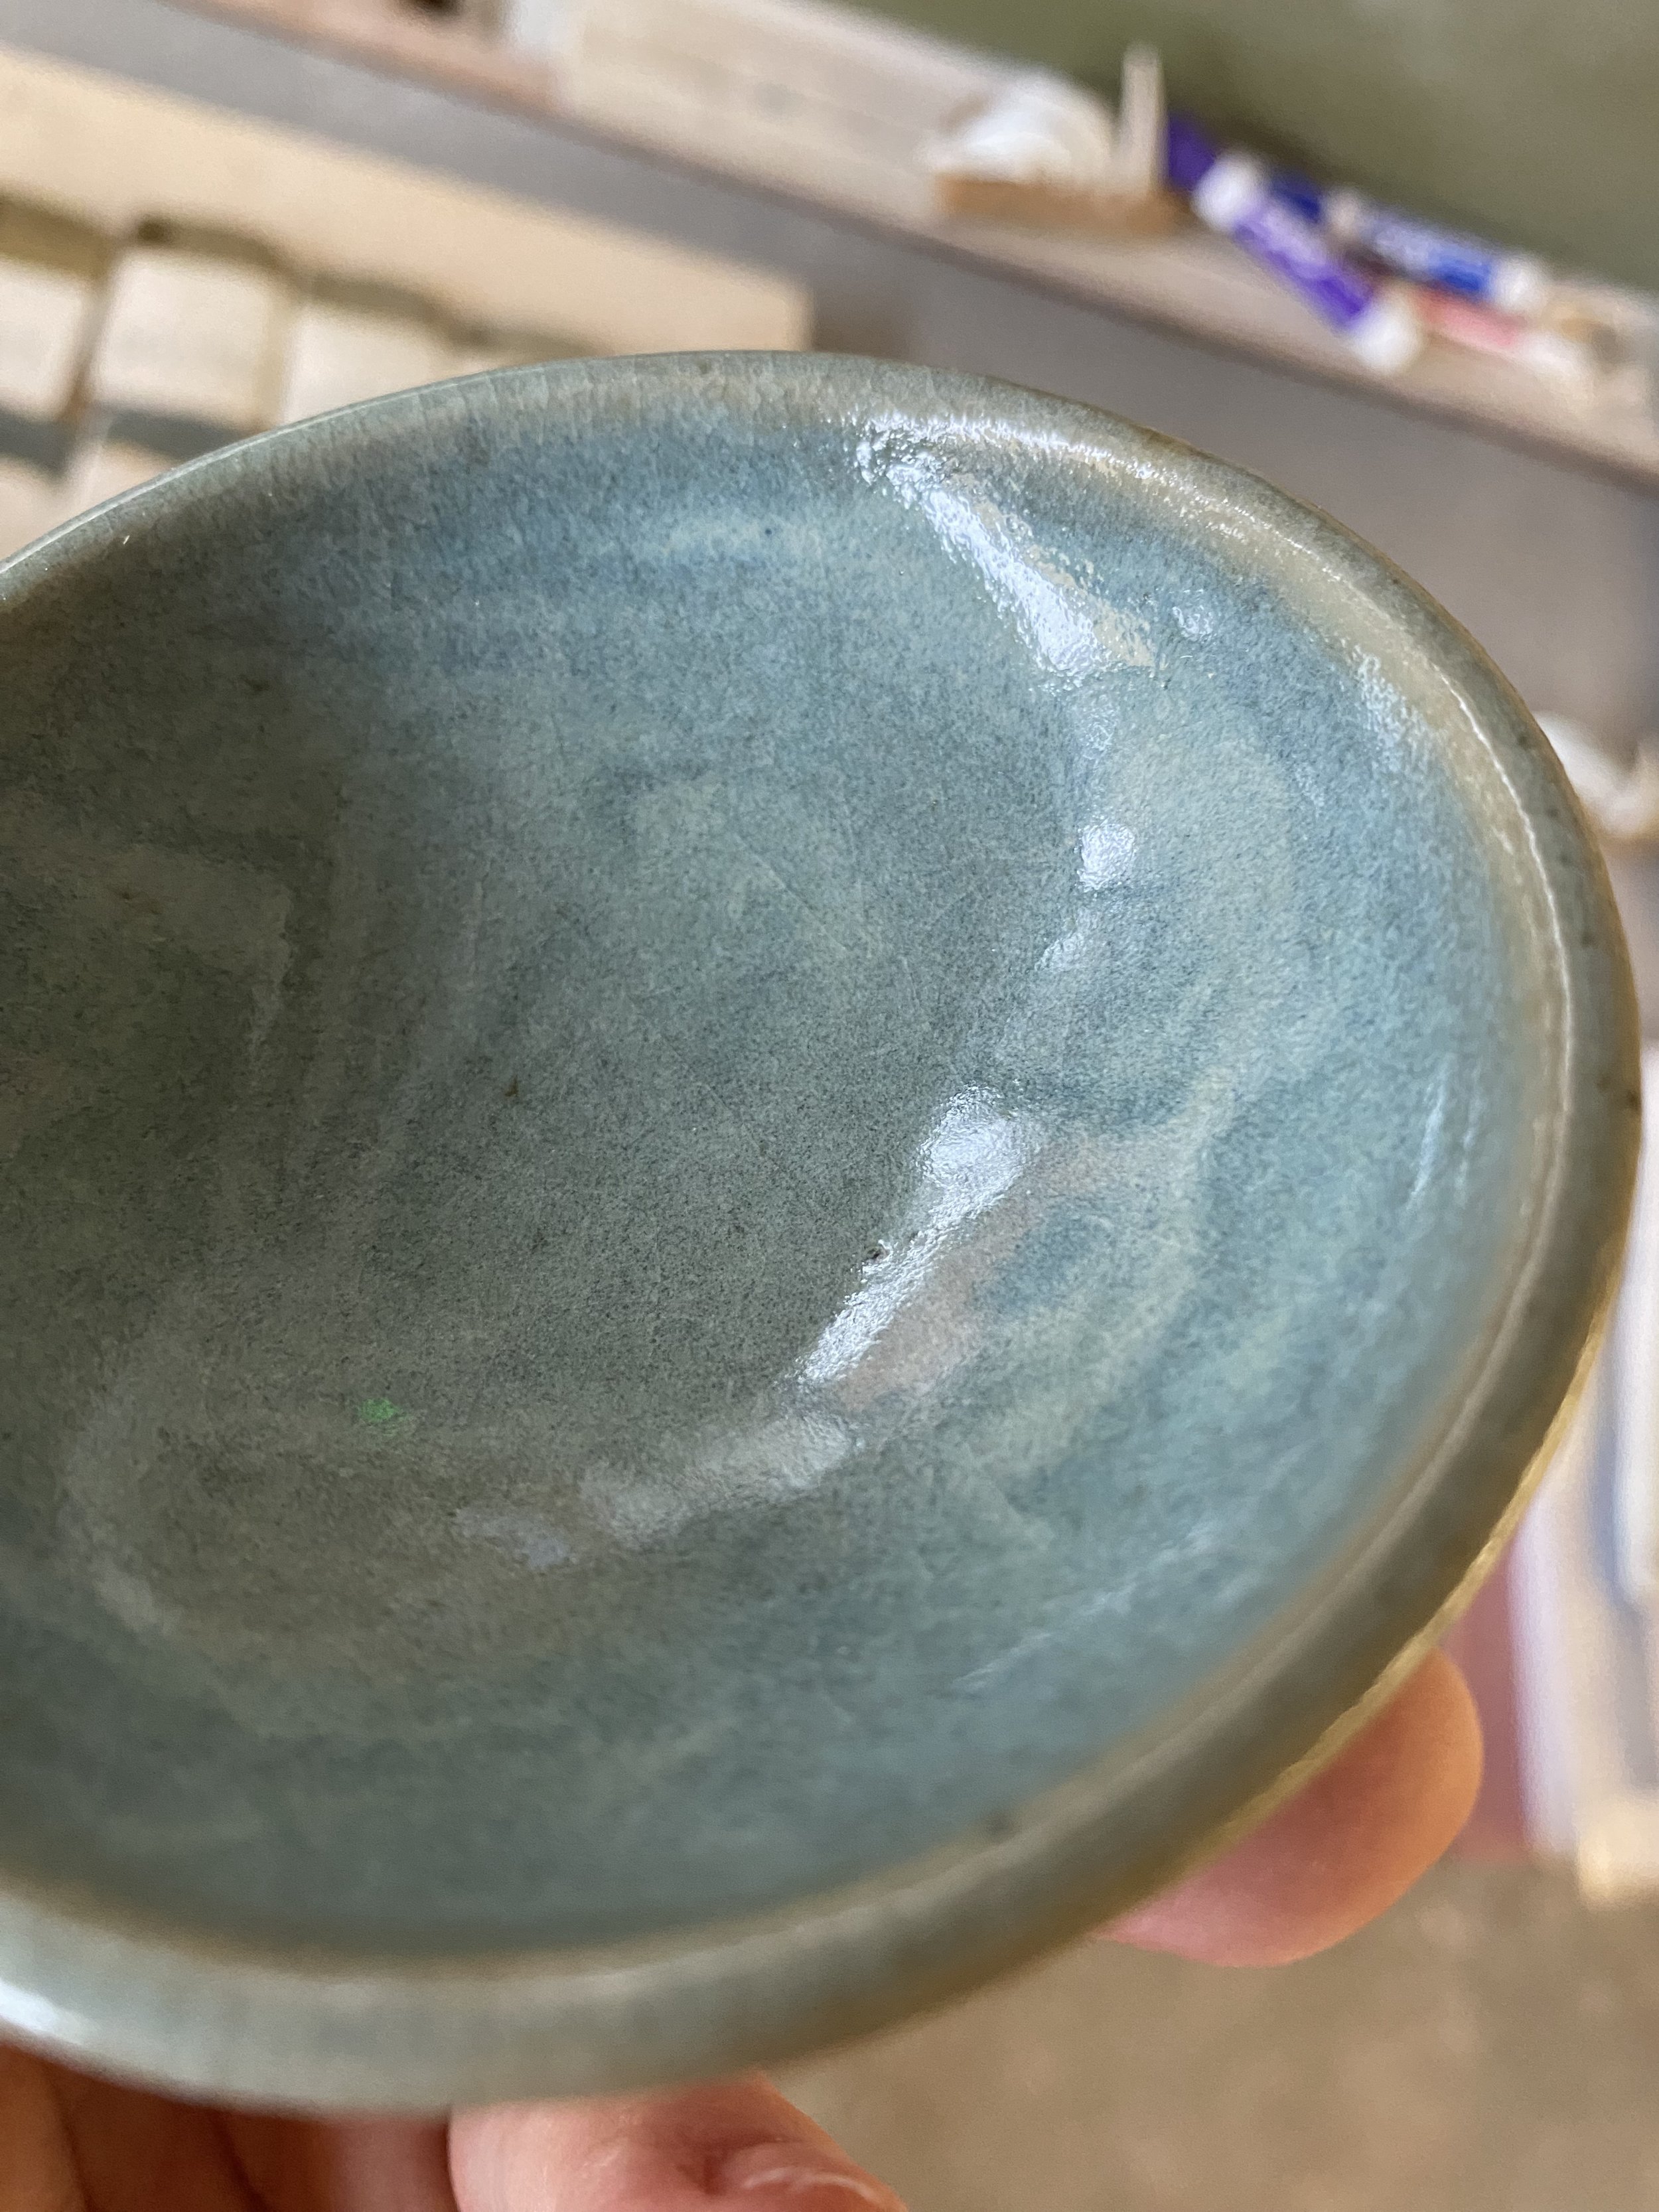
The difference in the tile to this dish shows the overall inconsistencies of this test and the elusiveness of the Jun glaze!
This grid set of tests led me to the conclusion that I am in the right zone, but a lot depends on the firing. This was fired straight up in what I thought was a medium-reducing atmosphere. The tiles show that it was not as reduced as I hoped, and the areas that weren’t did not develop the Jun opalescence.
I would also note that in most of these tests, the copper did not show up as easily as some of my previous tests. I am thinking of trying to apply the copper over the glaze to see if that works, and also trying to mix the copper into some of the glaze. But it might be a case where having less silica helps the copper come through.
Next firing, I will try to do a slow cooling and keep the kiln in a heavier state of reduction.
These results are very encouraging, though. Especially this little dish at the end.
Jun (Chün) glaze tests: grid test 2
After my first grid test, I saw that I was on the right track. The glazes around corner A of my grid test were particularly promising. This was the composition of Corner A…
Corner A = DP1180 (S:Al 15.11, R2O:RO 0.2:0.8)
50% DP granite
20% Silica
20% Wollastonite
7% Mahavir (potash feldspar)
3% Dolomite
+2% Bentonite
+2% Bone Ash
+1.5% RIO
For my next grid test, I decided to try to put this glaze in the center of my next grid, and move in various directions around it. Here is the breakdown of the grid…
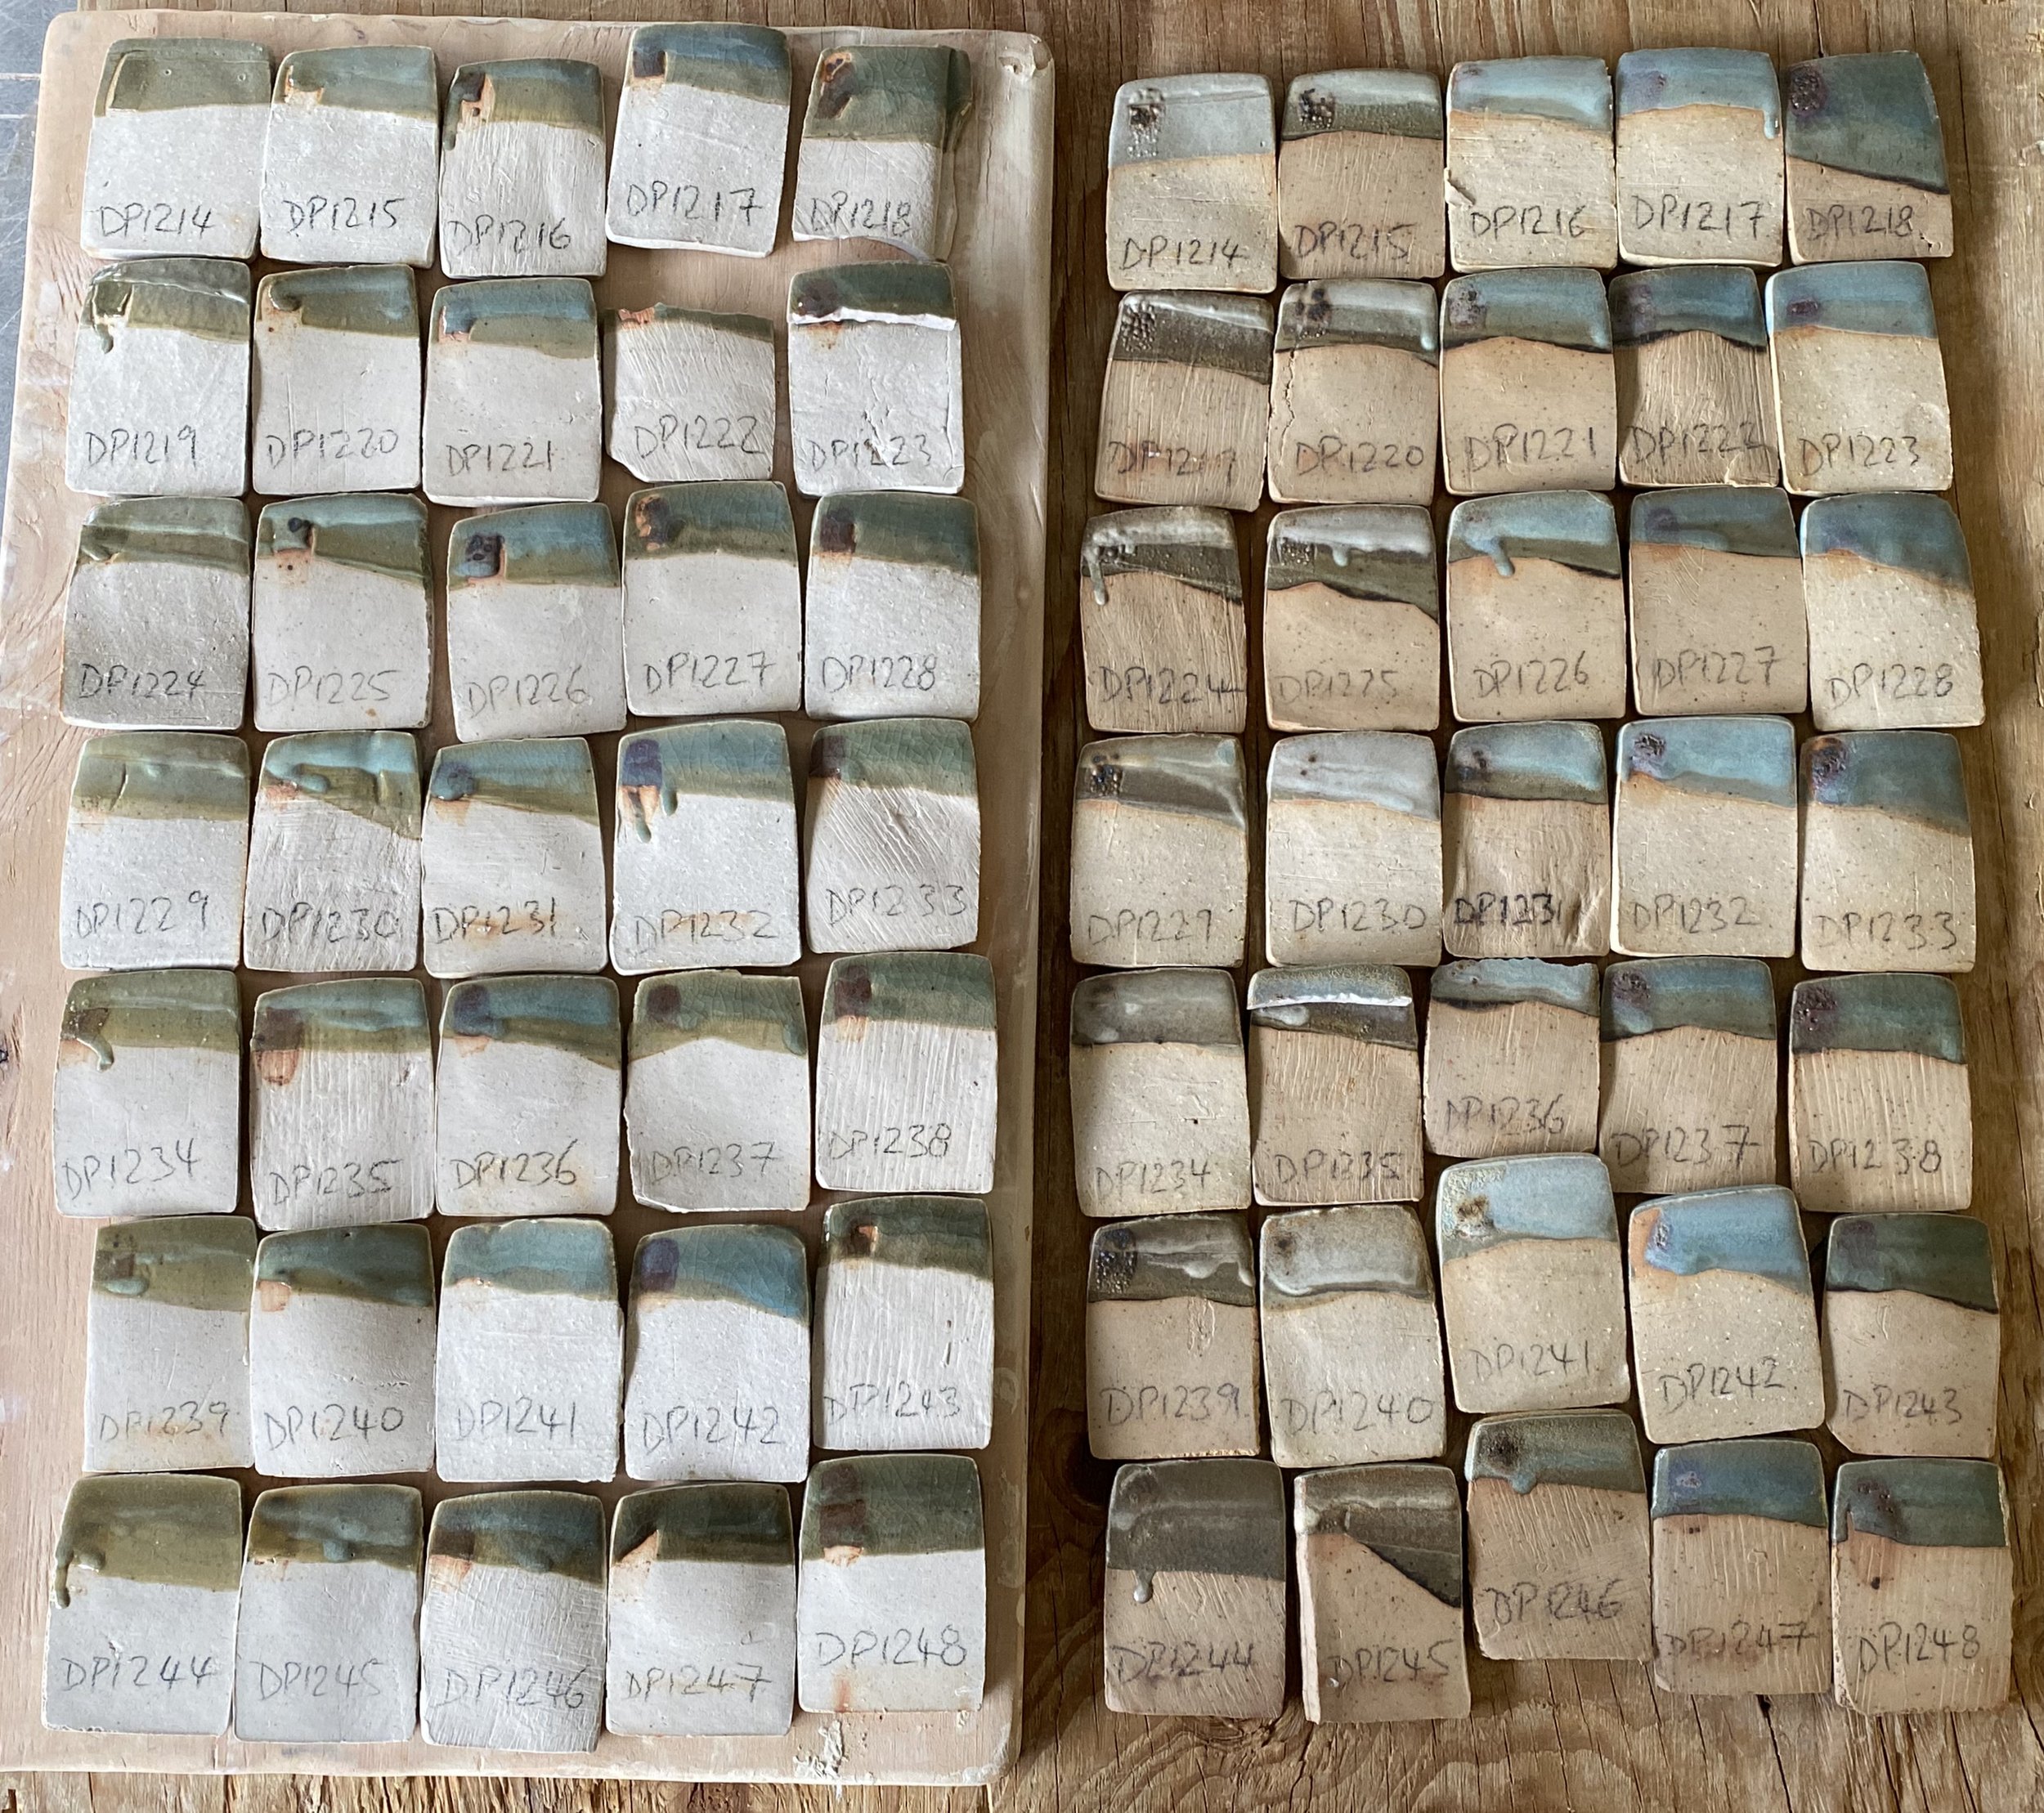
Here is the percent analysis of each corner of this grid test:
Corner A = DP 1214 : High Silica Corner
43% DP granite
30% Silica
20% Wollastonite
5% Mahavir (potash feldspar)
2% Dolomite
+2% Bentonite
+2% Bone Ash
+1.5% RIO
Corner B = DP 1218 : High Potassium Corner
45% DP granite
14% Silica
14% Wollastonite
25% Mahavir (potash feldspar)
2% Dolomite
+2% Bentonite
+2% Bone Ash
+1.5% RIO
Corner C = DP 1244 : High Wollastonite (calcia) Corner
45% DP granite
30% Wollastonite
18% Silica
5% Mahavir (potash feldspar)
2% Dolomite
+2% Bentonite
+2% Bone Ash
+1.5% RIO
Corner D = DP 1248 : High Devil’s Playground Granite Corner
70% DP granite
16% Silica
14% Wollastonite
2% Dolomite
+2% Bentonite
+2% Bone Ash
+1.5% RIO
Lets see what happened…
On first inspection I was kind of surprised at how linear this test seemed. The successful glazes all seem in the middle row and the one to its left, running down the grid. The left side row is obviously dry, with too much silica, and the right is more like a standard celadon.
It is hard to tell too much more from this grid test, though. I think part of the issue is that these grids are so small and are fired lying down. The vertical test tiles show us much more information.
One note about these tests is that I mixed the corner glazes a bit thin. I wish the application had been thicker on these tiles. The results would have been better and easier to read. Next time!


Let’s dig in to the results. First from corner A to corner B. This is from our high silica corner to our high potassium corner…


As we might expect, corner A is pretty dry, with too much silica. As we move towards C the glaze becomes more fluxed but not particularly Jun like.
Now lets examine corner A to corner C (click on the images to enlarge them)…


In these tests we move from the high silica corner at A, to the high wollastonite (calcia) corner at C. I would have expected a decent glaze in the middle of these. There is a hint of a Jun at DP1224 but it is quite pale.
Now corner C (high calcia corner) to D (high granite corner)…


Here we find DP 1245 and DP 1246 to be Jun like. The color is a bit dull but the Jun opalescent effect is present.
Now let’s examine corner B (high potassium corner) to D (high granite corner)…


In this run we see the glaze get darker towards corner D, but largely remain as a celadon glaze. No signs of Jun opalescence along this row.
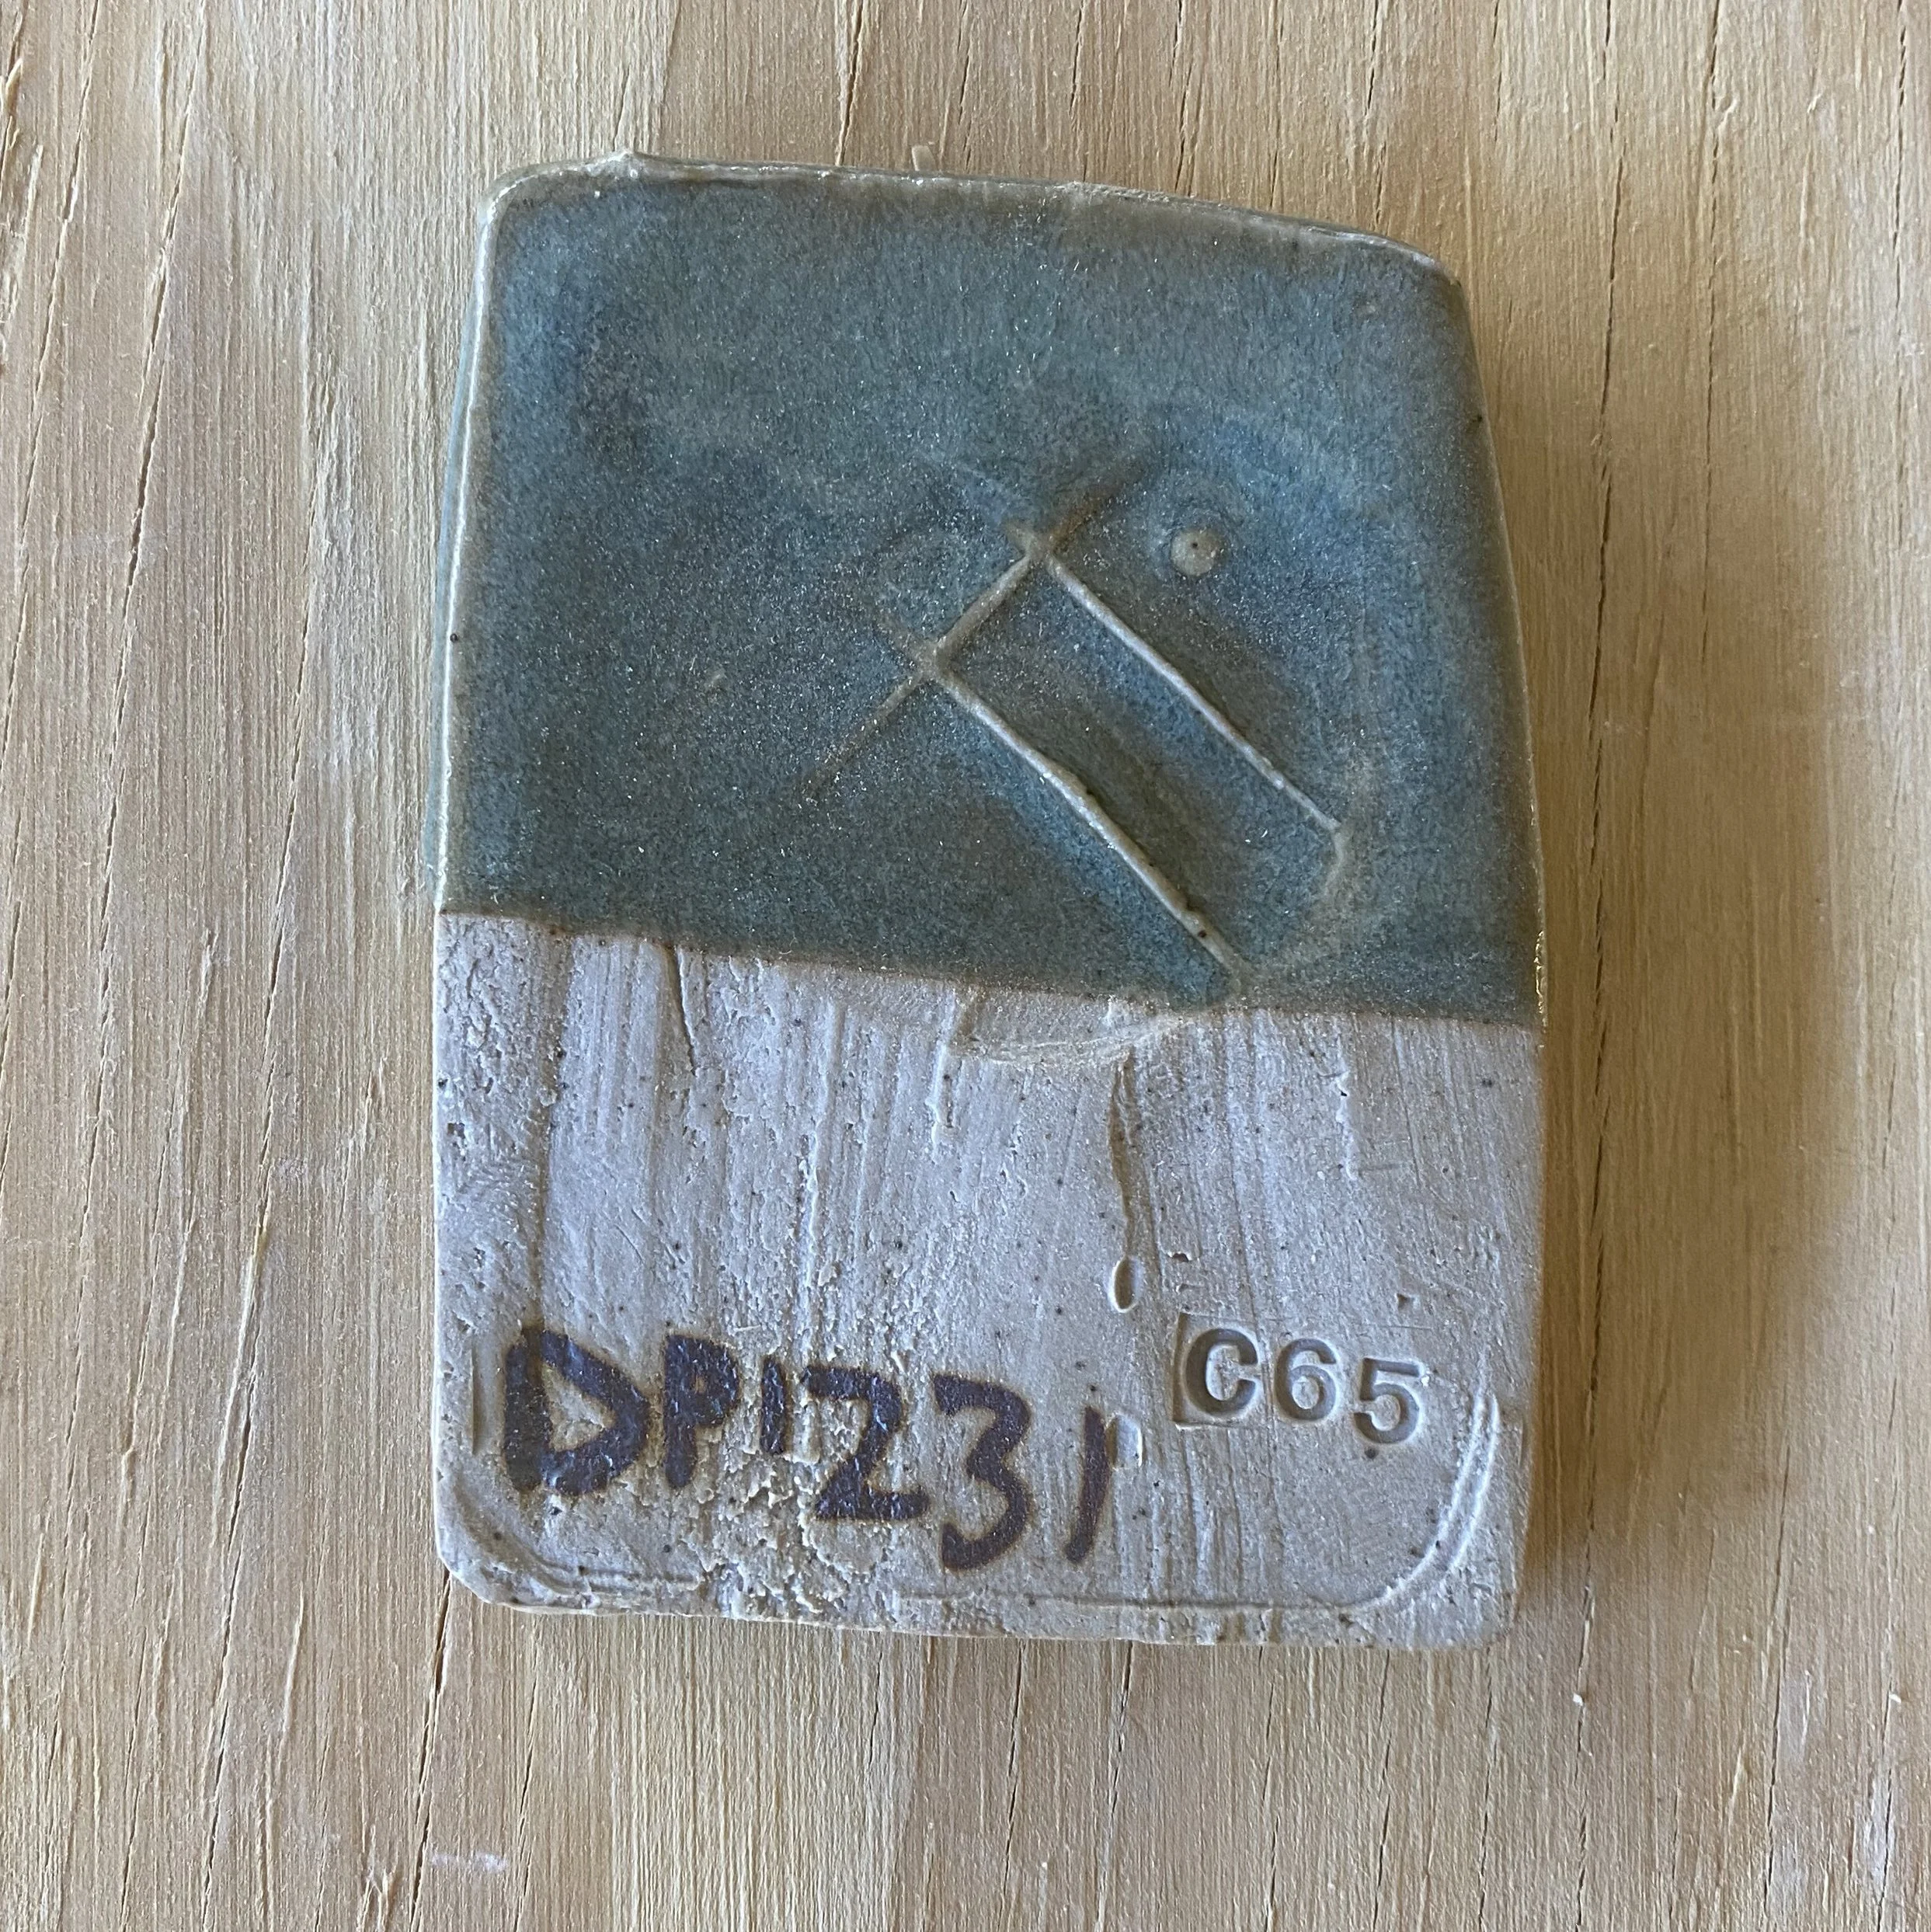
Now I will lay out the middle of the grid. Front of the tiles first and then the backs below.


Most of these glazes show signs of Jun opalescence. Most promising seem to be in the center of the grid, as I expected. DP1231 is composed of 50.75% DP granite, 19.5% silica, 19.5% wollastonite, 8.75% mahavir feldspar, 1.5% dolomite, 2% bone ash, 1.5% red iron oxide.
There were promising glazes around this, but in general the left side of the center was more promising than the right. This is the higher silica zone.
After this test, I could have picked one of these to work with and glaze some pots, but I wanted to hone in more tightly, to see if I could find a magic ratio of ingredients. One more grid test and I should have it!
Oh also, I should mention that these were fired to cone 10 (I could have taken it a bit further so cone 10 touched down but this is acceptable) with no special cooling. Here is the cone pack, and my notebook notes just to be thorough about it:


Jun (Chün) glaze tests: grid test 1
I knew before starting this endeavor that Jun glazes are notoriously tricky to achieve, but that has never stopped me before! In my initial set of Jun glaze tests I aimed at 12 likely glaze formulations using my local granite, based on glaze analysis and formulations by others. See my last post for more details.
The initial Jun glaze tests were not entirely successful. You never expect to hit the nail on the head first go but when I opened the kiln at first I was disappointed to see what appeared to be 12 celadons. But on closer inspection there were hints of Jun effects where the glaze pooled and was super thick. I was encouraged but also knew I needed to shift my tests significantly.
I went back to the literature and did a lot more reading about Jun glazes. See my last post for the research I did. It is a fairly deep dive into the science of how Jun glazes work.
Matt Blakely’s new book, Rock Glazes Unearthed was particularly helpful, giving practical advice for those looking to make Jun glazes with collected materials. He said that even though many Jun recipes have an alumina:silica ratio of 1:12 it may be necessary to push this higher when using granite as a base material.

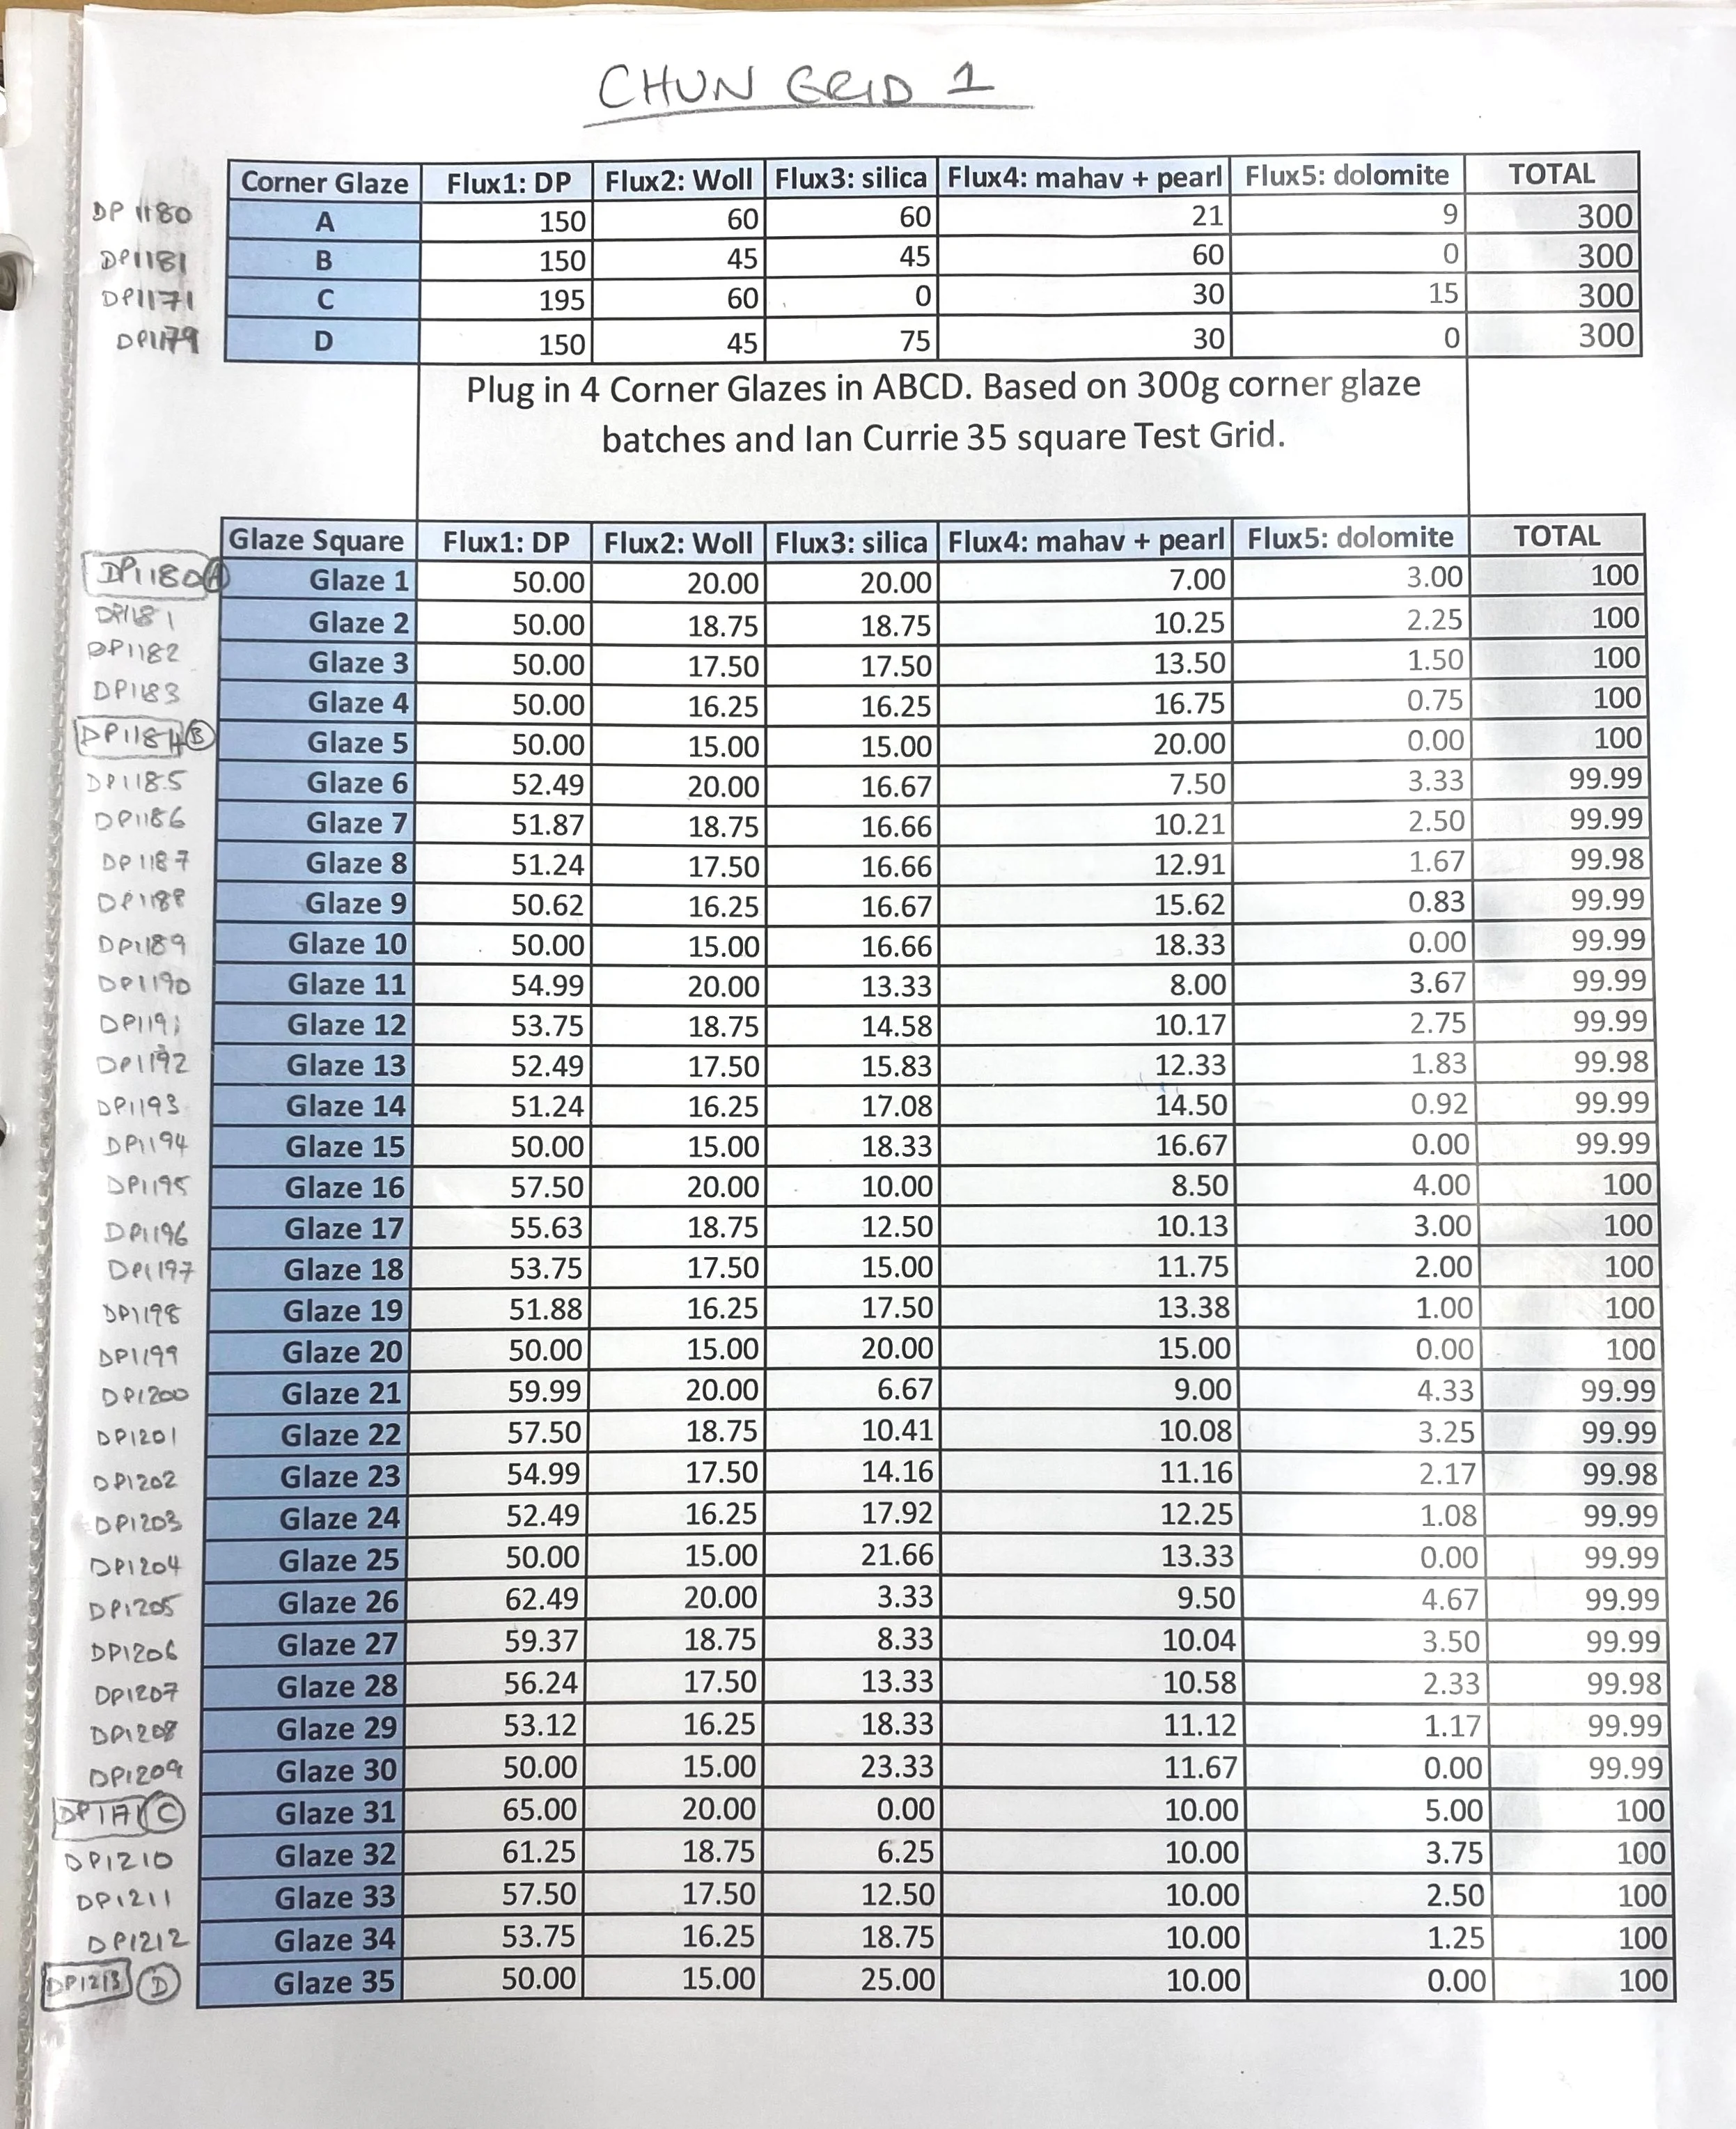
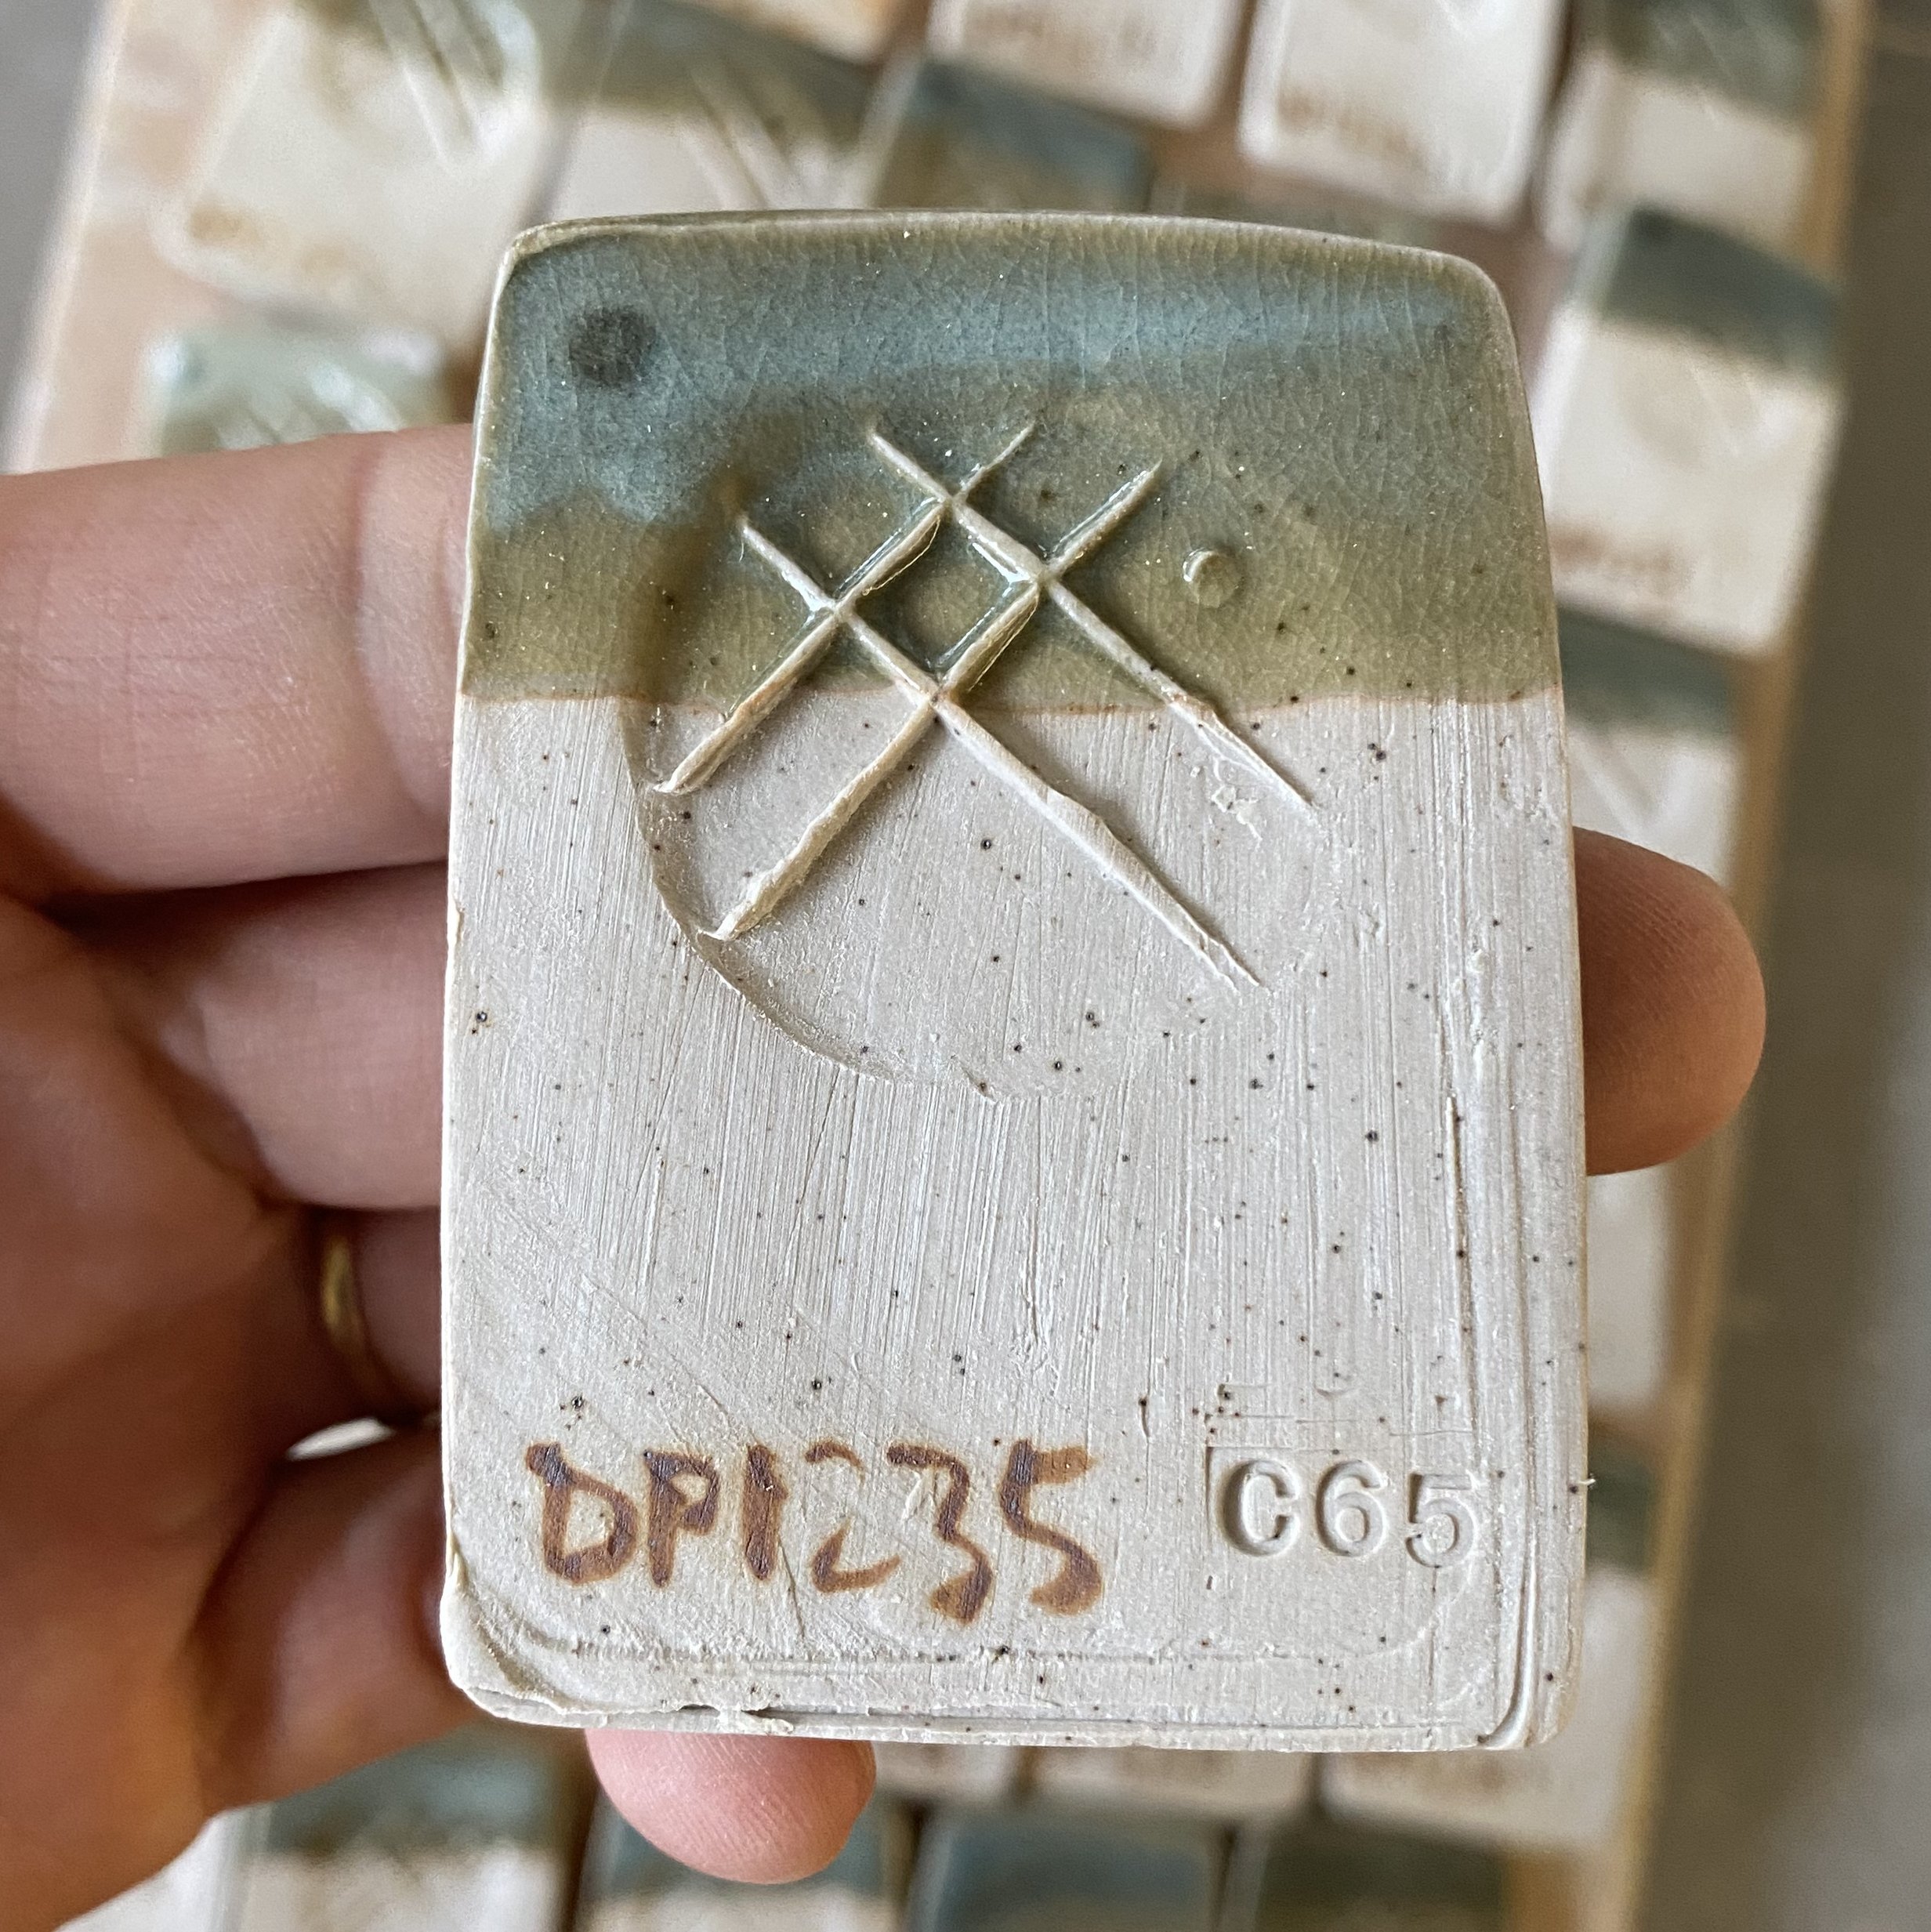
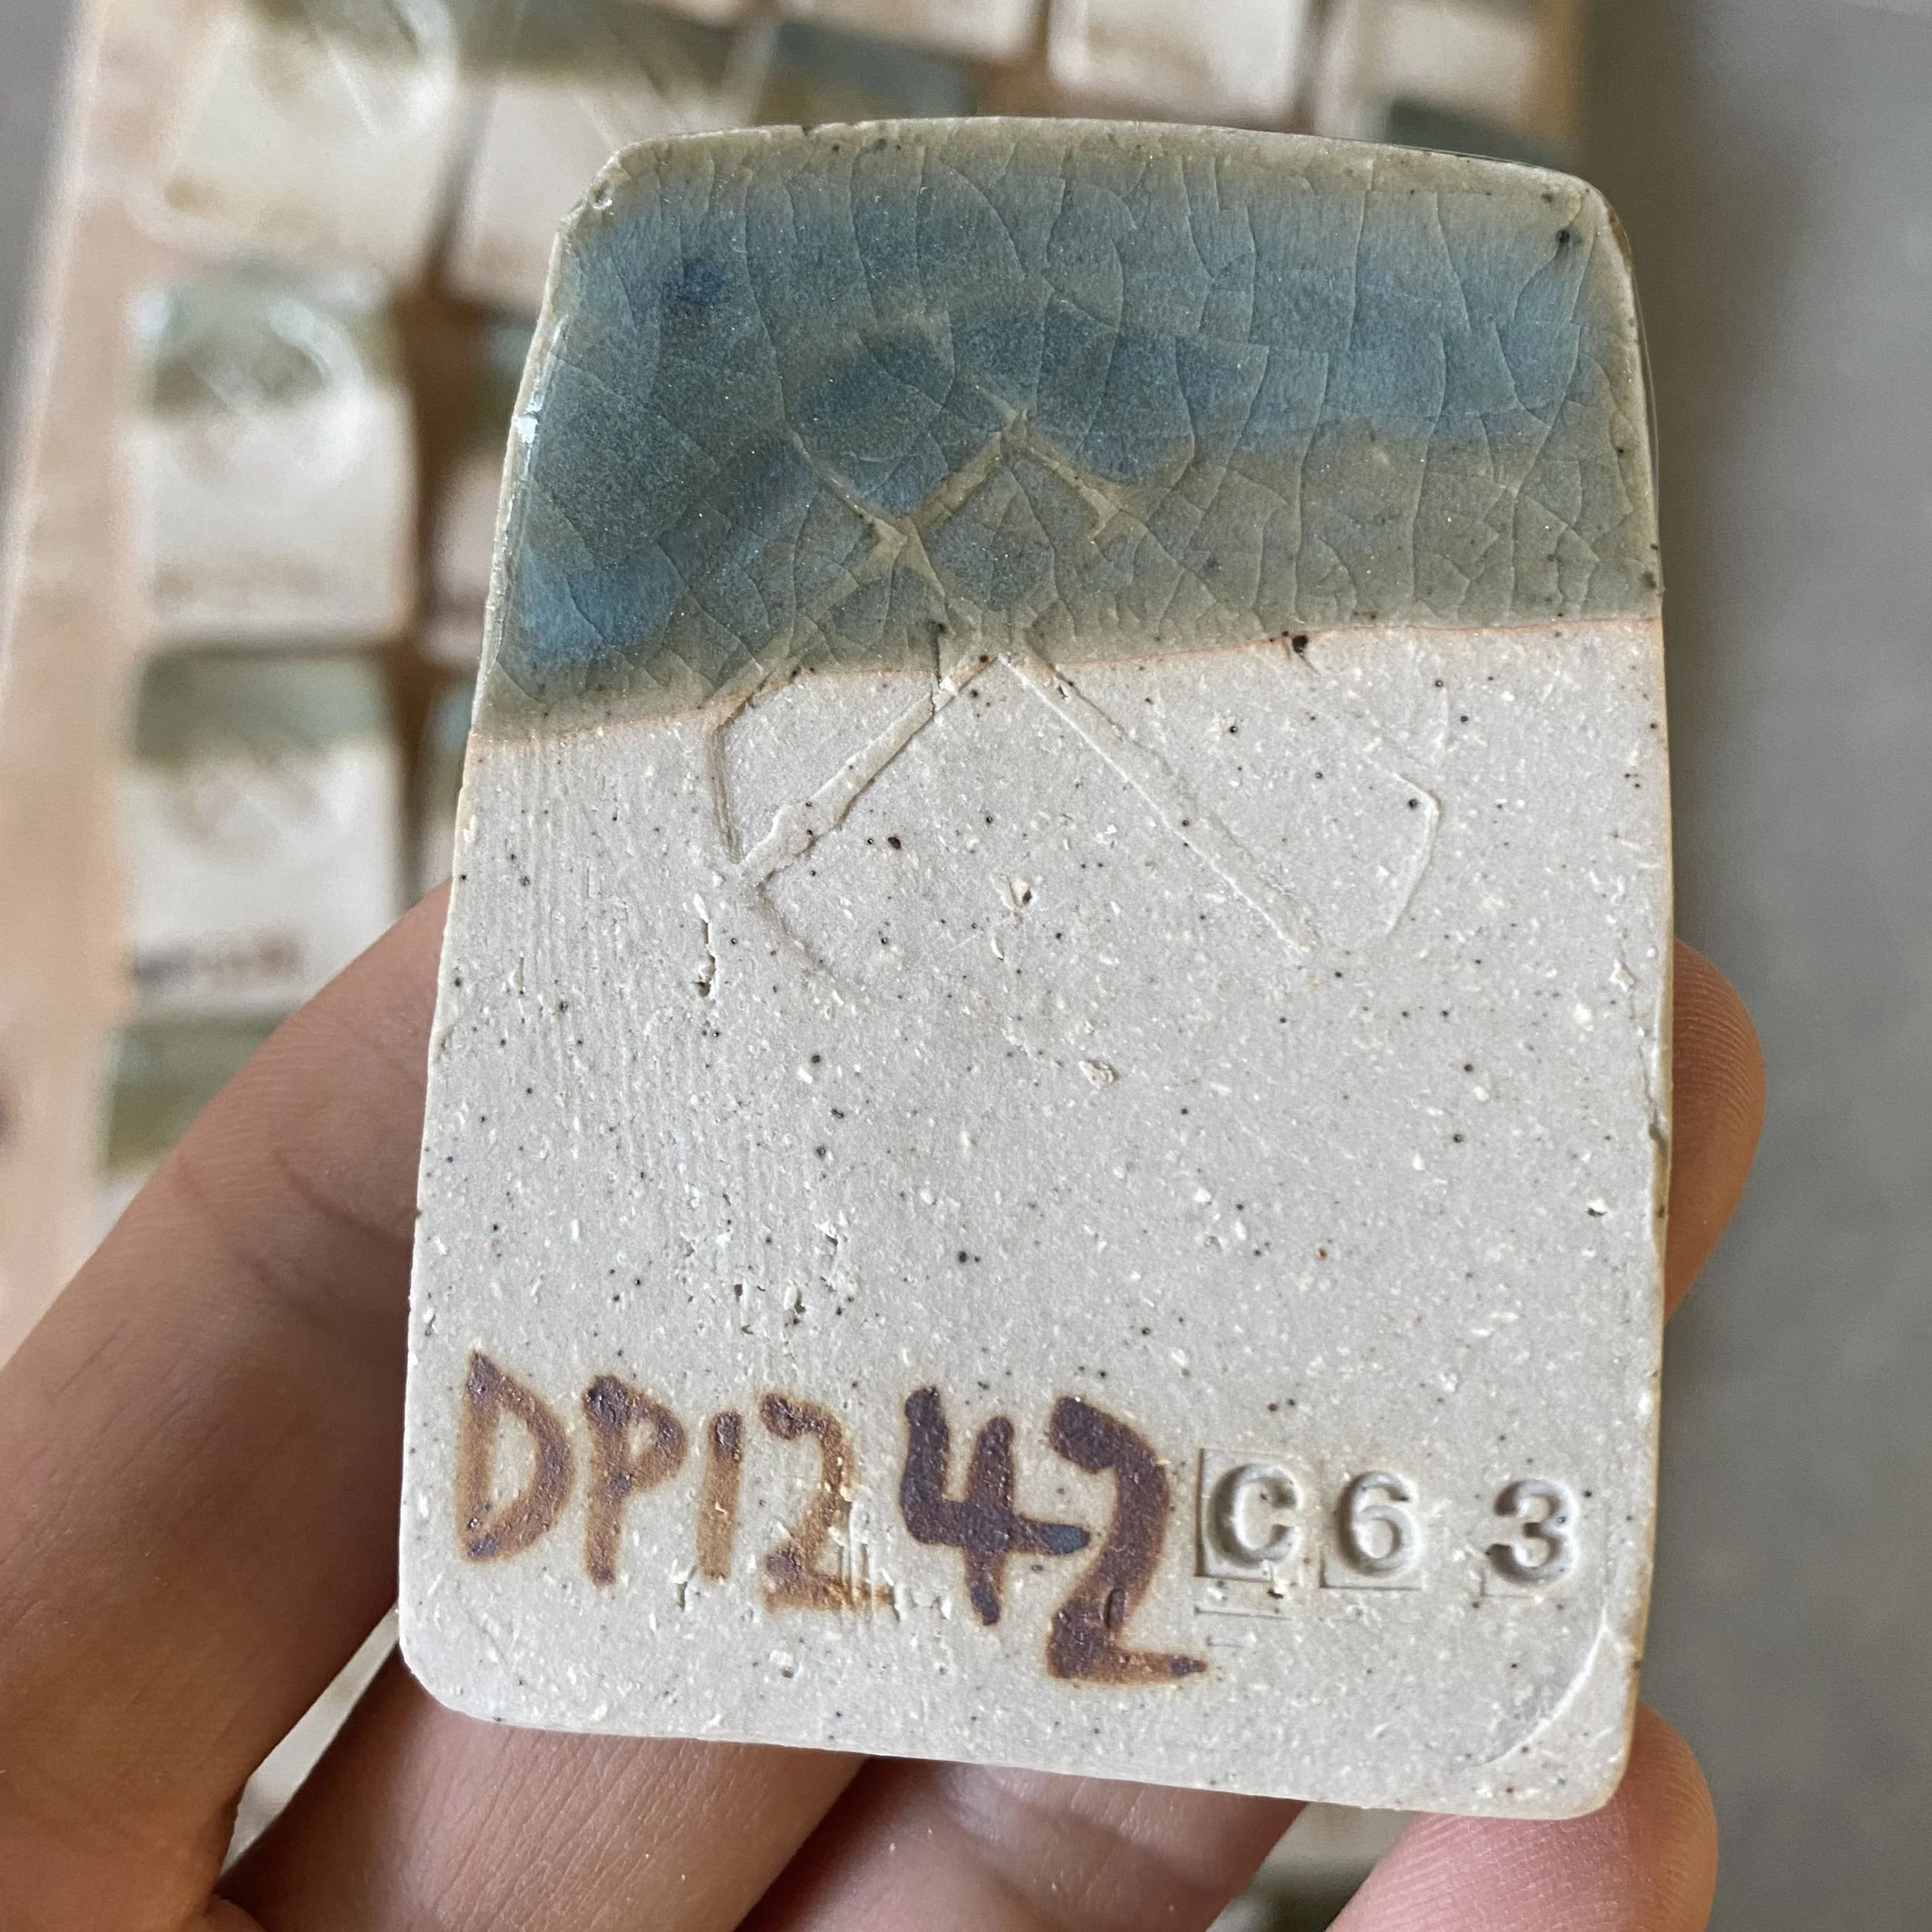
Getting down to business. This shows the tiles and cups laid out ready and the recipes for each of the corner glazes. Slightly confusingly I chose to use one of my previous glaze attempts DP1171 as Corner C. Just to make you aware of that. The other numbers continue increasing in a normal fashion-this is the only odd one out.


I measured out 500 grams of each corner glaze in materials, and then topped them up to 650ml. Each individual test gets 35ml so these measurements ensured I had a bit extra in each corner left over (in case things go wrong).
Corner A = DP1180 (high silica, high calcia corner) S:Al 15.11, R2O:RO 0.2:0.8
50% DP granite
20% Silica
20% Wollastonite
7% Mahavir (potash feldspar)
3% Dolomite
+2% Bentonite
+2% Bone Ash
+1.5% RIO
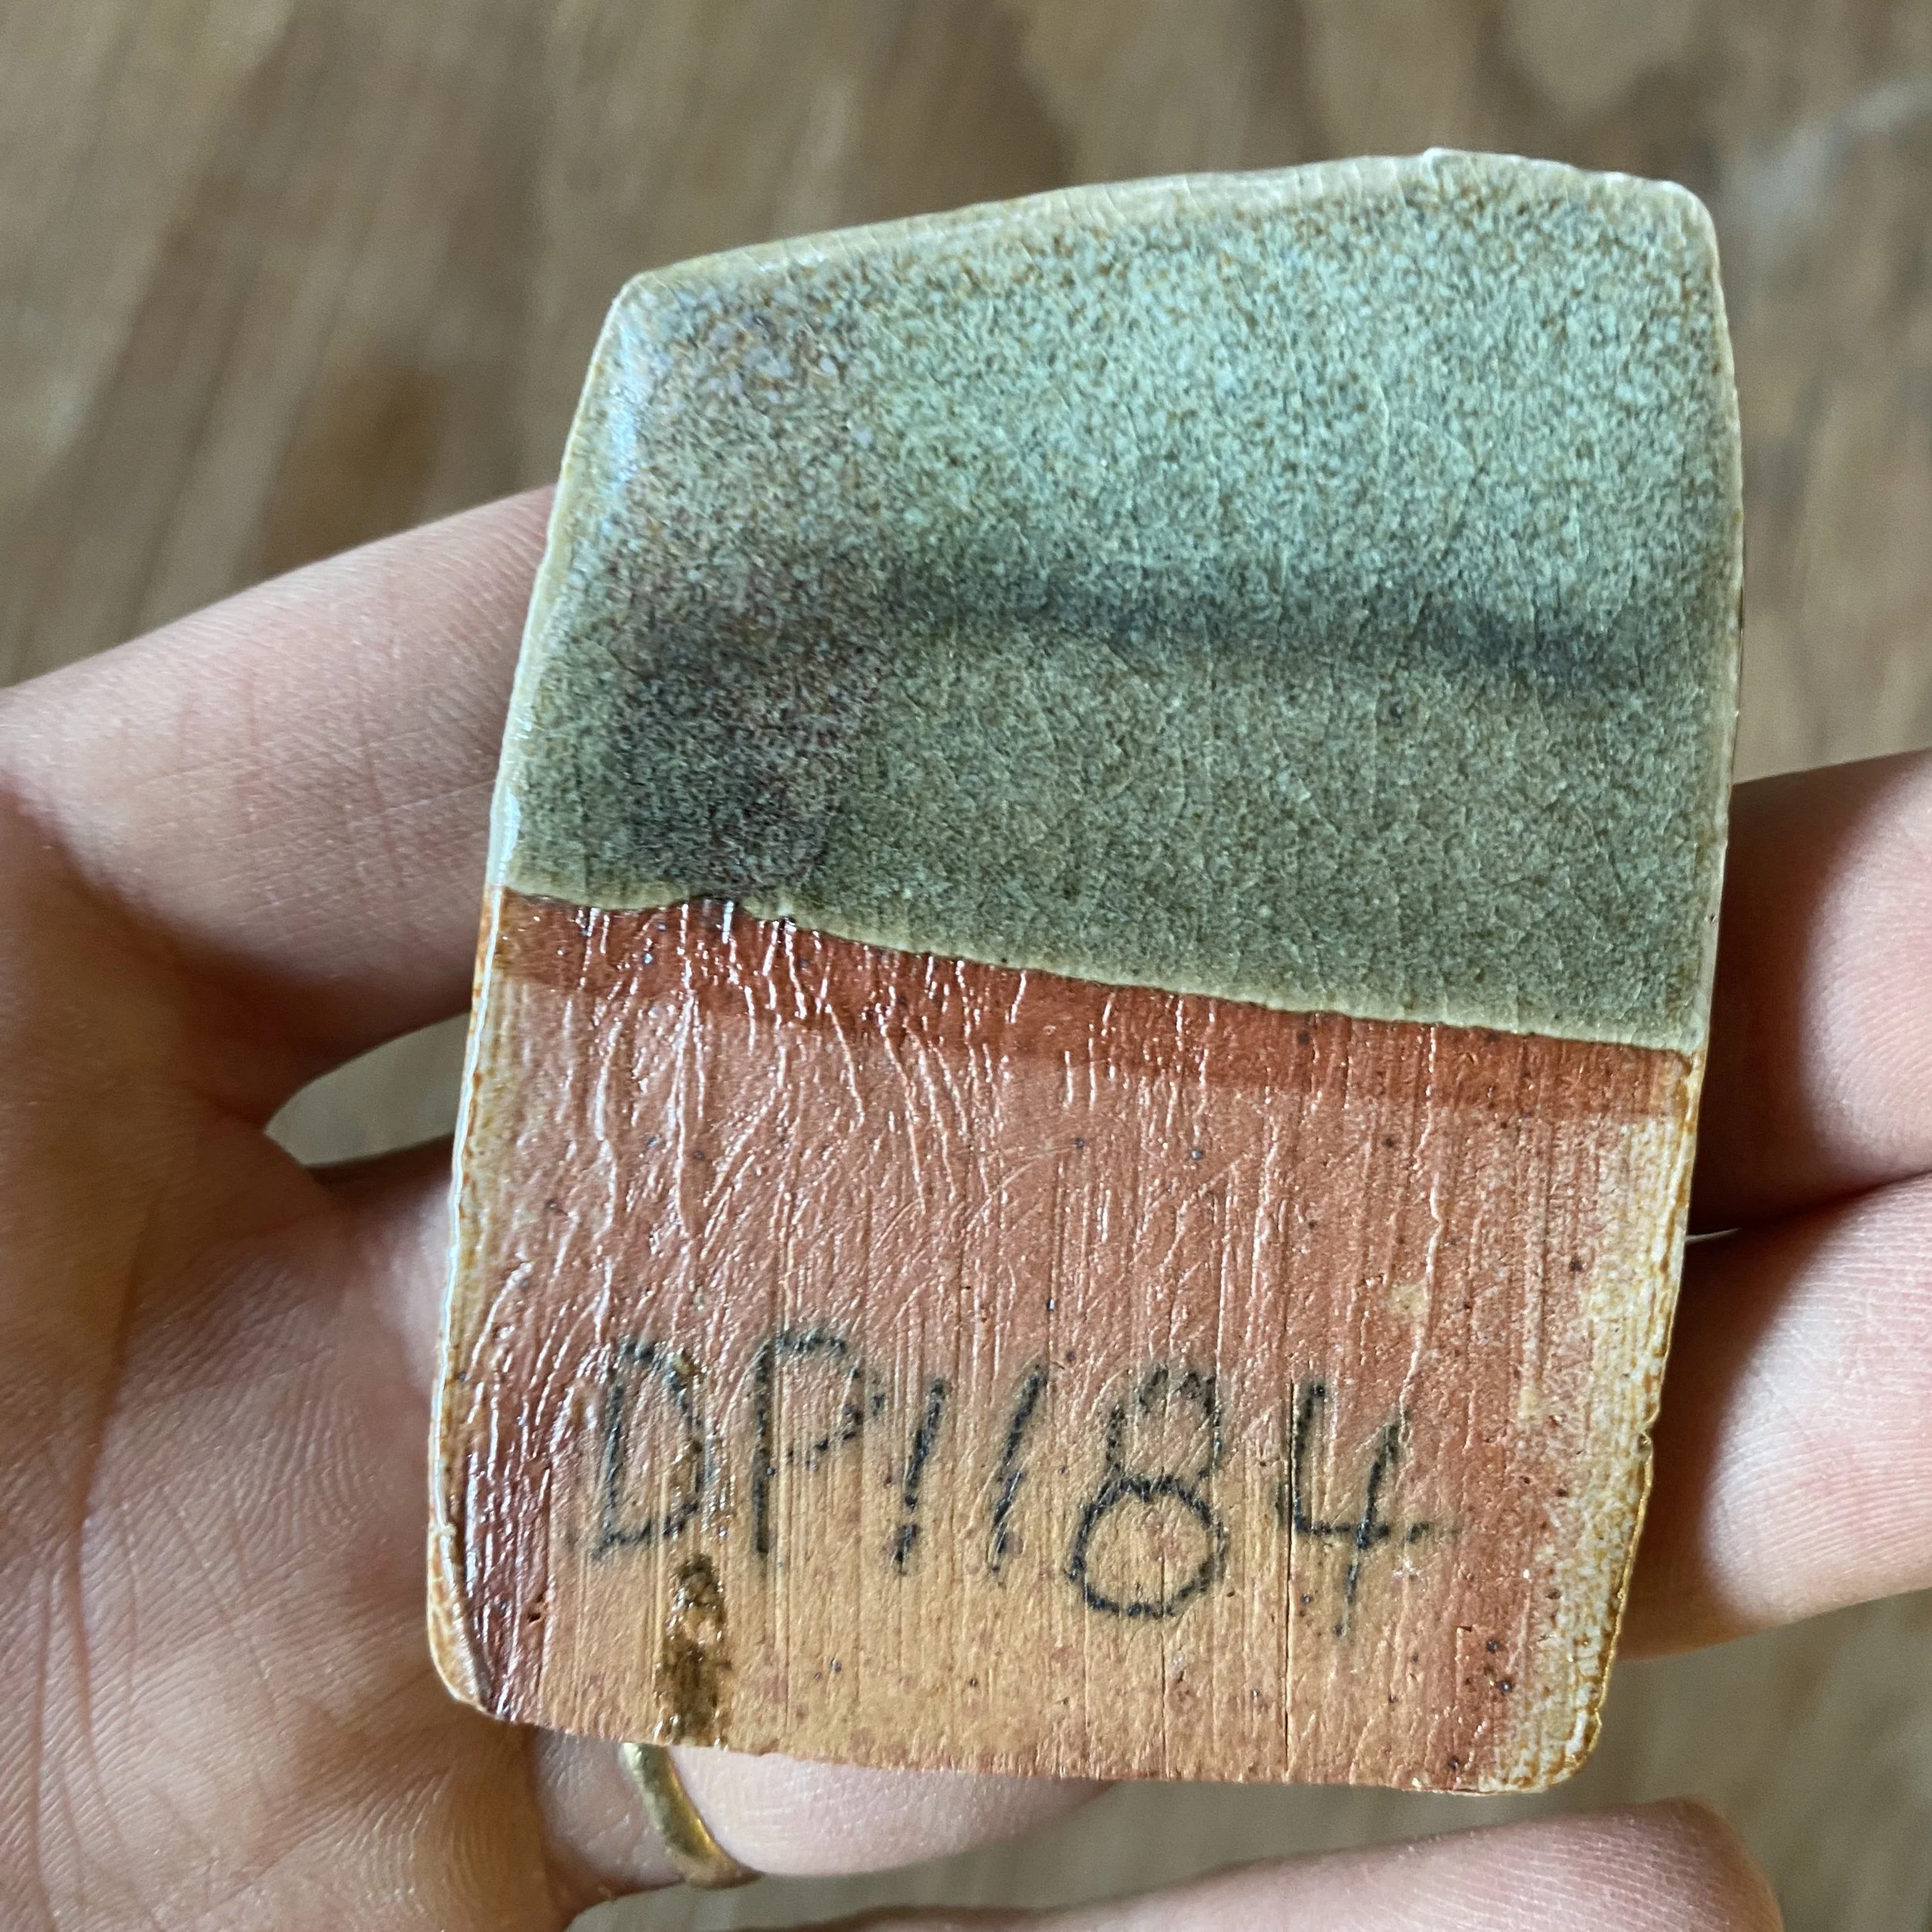
Corner B = DP 1184 (high potassium corner) S:Al 12.55, R2O:RO 0.4:0.6
50% DP granite
15% Silica
15% Wollastonite
15% Mahavir (potash feldspar)
5% Pearl Ash
+2% Bentonite
+2% Bone Ash
+1.5% RIO
Corner C = DP1170 (lower silica to flux corner, high Mg) S:Al 11.11, R2O:RO 0.21:0.78
65% DP granite
20% Wollastonite
10% Mahavir (potash feldspar)
5% Dolomite
+2% Bentonite
+2% Bone Ash
+1.5% RIO
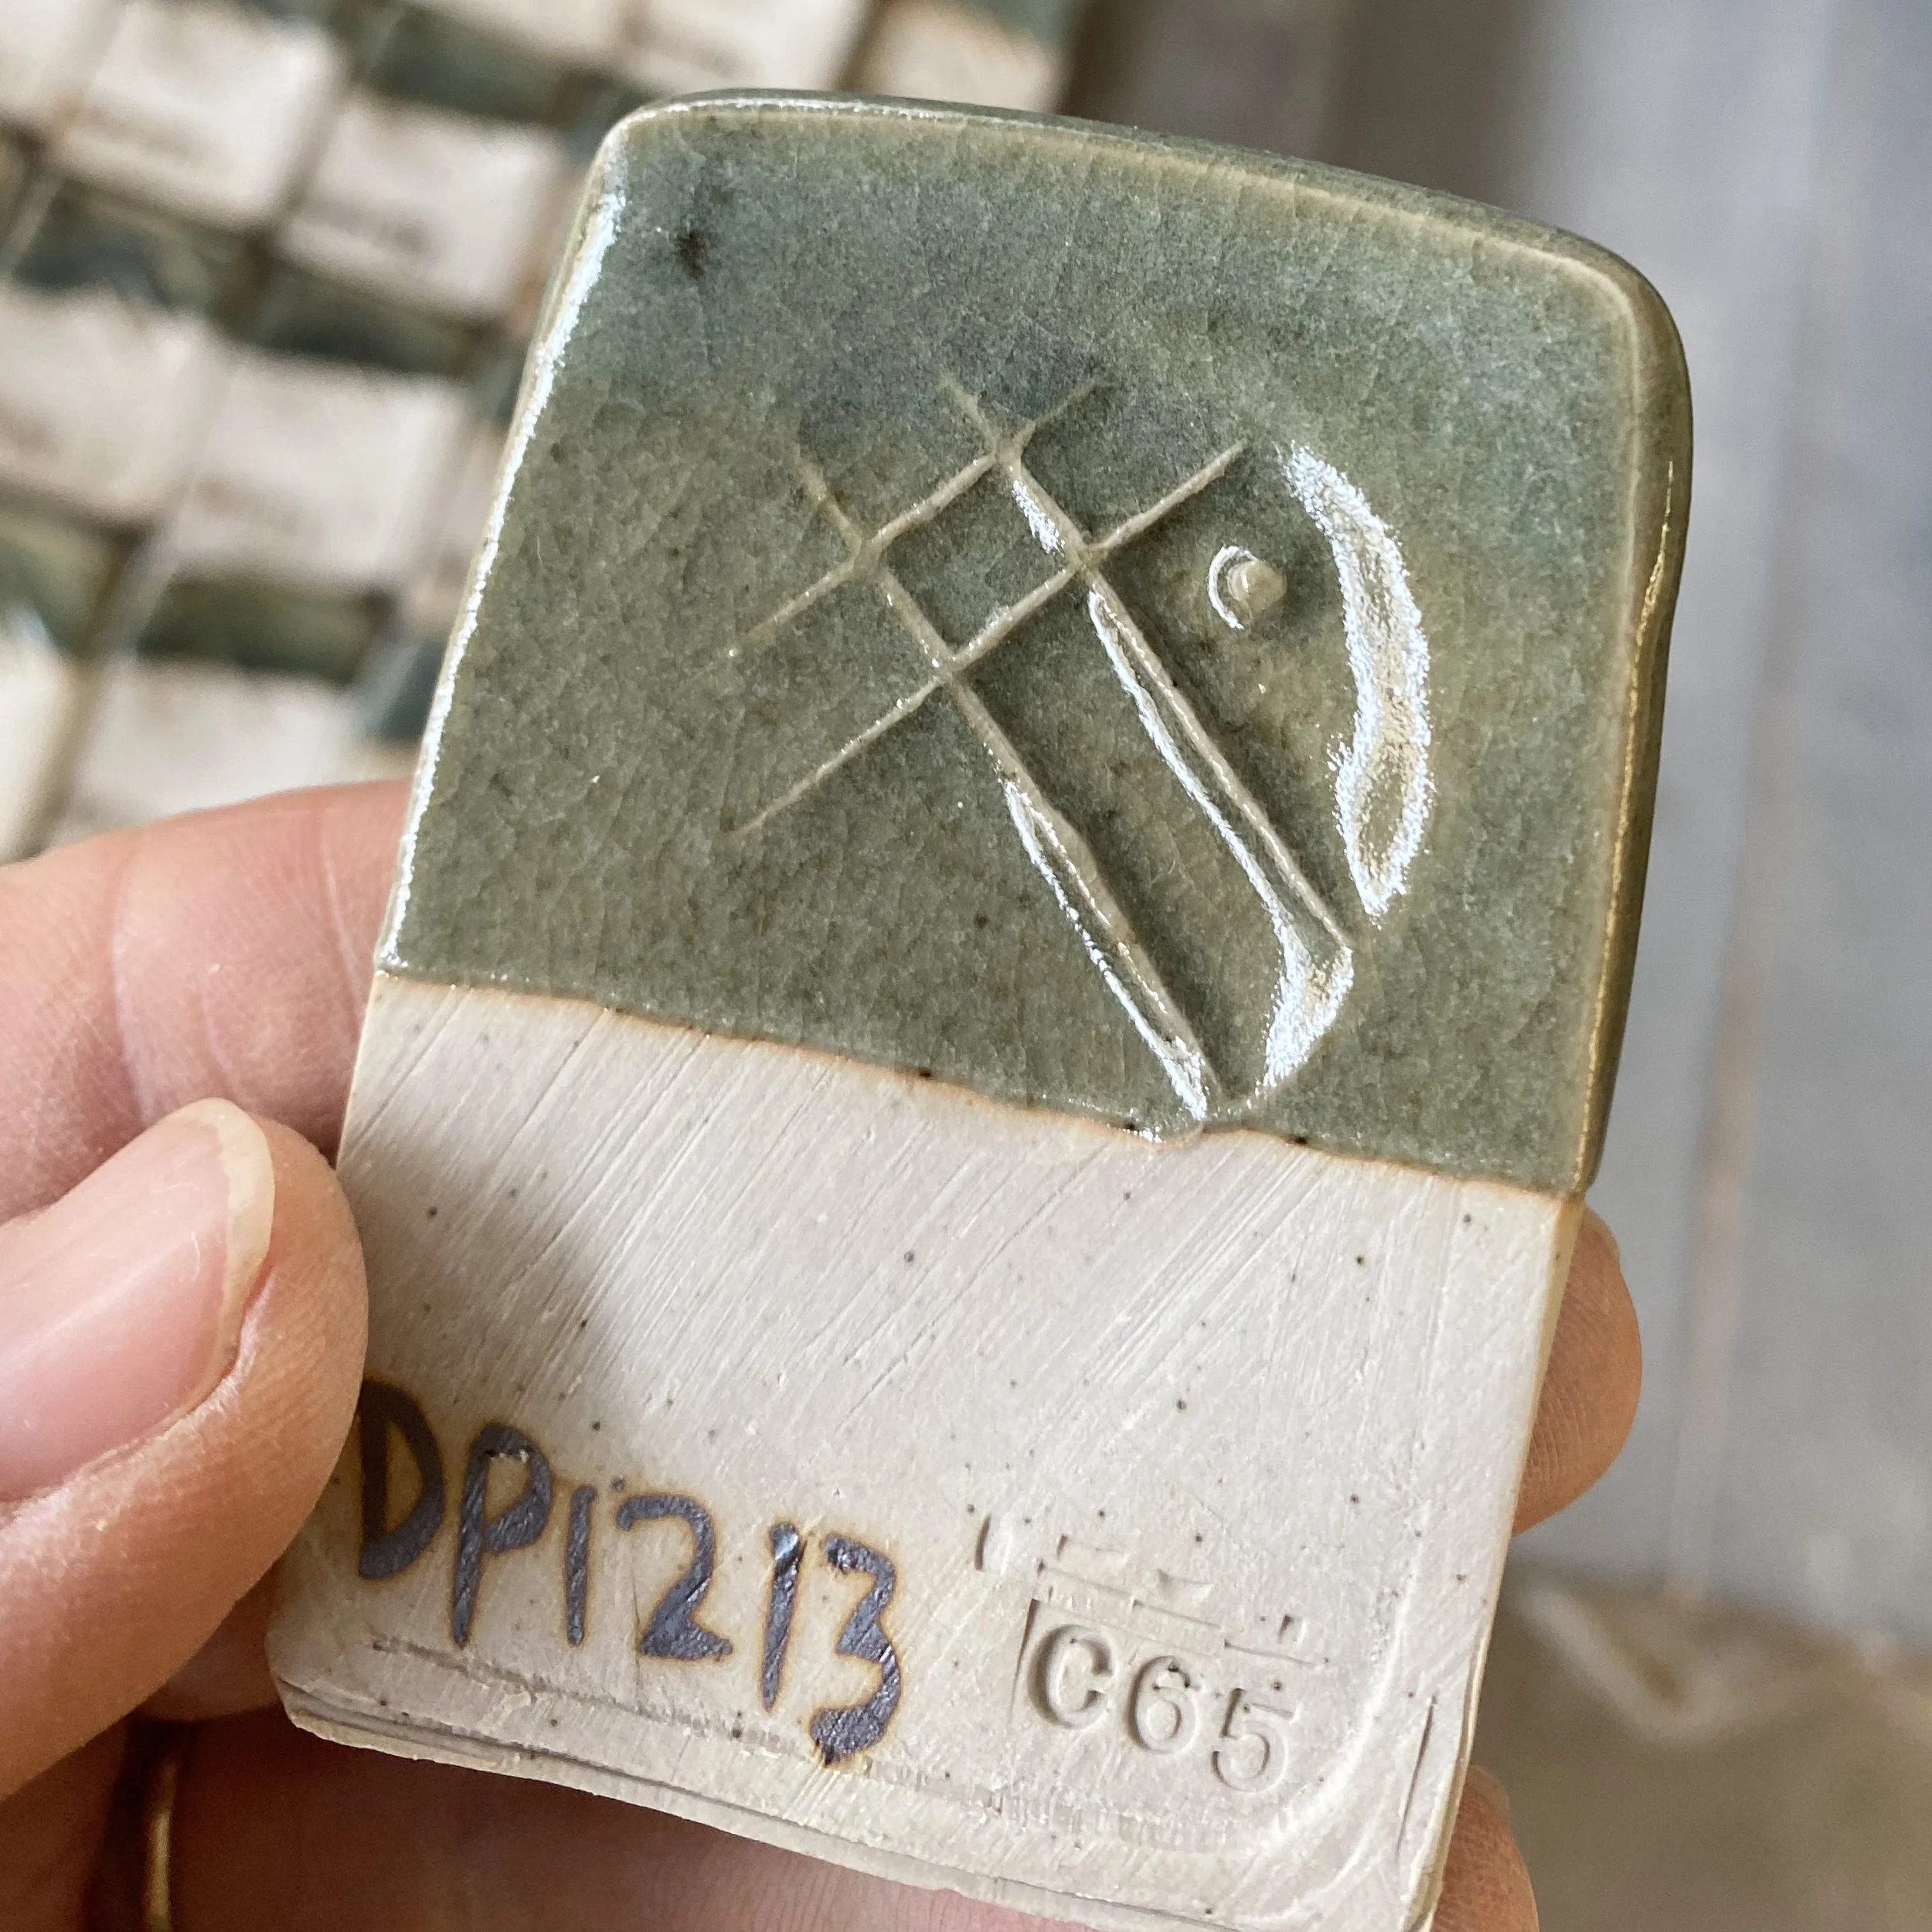
Corner D = DP1213 (high silica corner, no Mg) S:Al 15.07, R2O:RO 0.29:0.71
50% DP granite
25% Silica
15% Wollastonite
10% Mahavir (potash feldspar)
+2% Bentonite
+2% Bone Ash
+1.5% RIO
{Side note: One issue I found in coming up with my first set of glazes, based on chun cherd analysis from Nigel Wood’s book, was getting a high enough potassium content. My Devil’s Playground granite has some but not as much as needed. I therefore decided to use pearl ash in some recipes. You can see I use it in Corner B here. However… John Neely, my Professor here at Utah State University, told me that Pearl Ash is not a good source of potassium because it is soluble. This means it will move into the clay body, or onto the surface of the glaze… it doesn’t mix in to the glaze like other insoluble glaze materials}
Here is the test grid fresh out of its cone 10 reduction firing…

DP1180-1213
When I got this out of the kiln (still rather toasty) I was thrilled. There looked to be so many successful chun glazes. This grid test is a little deceptive though, simply due to its nature. Each of these grids has a thick layer button of glaze on it (thicker than you would normally glaze a pot, and as the grid is fired flat the glazes can’t really run anywhere. I know from my research that chun effects occur where thick and pooled, so its no surprise that they look so good.
However, I also dipped individual test tiles for each of the grid squares. These were fired vertically so the glaze had a chance to run if it wanted. I double dipped them so the top of each tile had a double thick layer of glaze. You can see them in the backdrop of this photo and then below.


I got much more information from these vertical test tiles. You can click on them to enlarge the image. You can see how much more variation in the glaze grid there are. Not all of the glazes that looked good on the flat grid test came out so well on these test tiles.
By the way, these were all fired to cone 10 in a small test gas kiln. I did a heavy body reduction for an hour and then kept the kiln in reduction to top temp of cone 10 (lessening the reduction as the firing went along to gain temp). No hold at the top and no intentional cooling; ie. they cooled very fast.


On the backside of each test tile I painted a strip of copper carbonate to see its response under the Jun glaze. It was exciting to see some of the colour responses.
The top left of the grid is clearly the most successful (closest to a chun):

Although these two glazes were in the zone too…

Now let’s look into the tests a little more closely (click on any of the images to zoom in).
Moving across the top row of the grid from Corner A to Corner B the glaze gets less chun like. Dp1180 is lighter than 1181 and 1182 but they all exhibit chun effects. DP 1183 and 1184 do not. In terms of the composition change we move towards more potassium and less silica here.


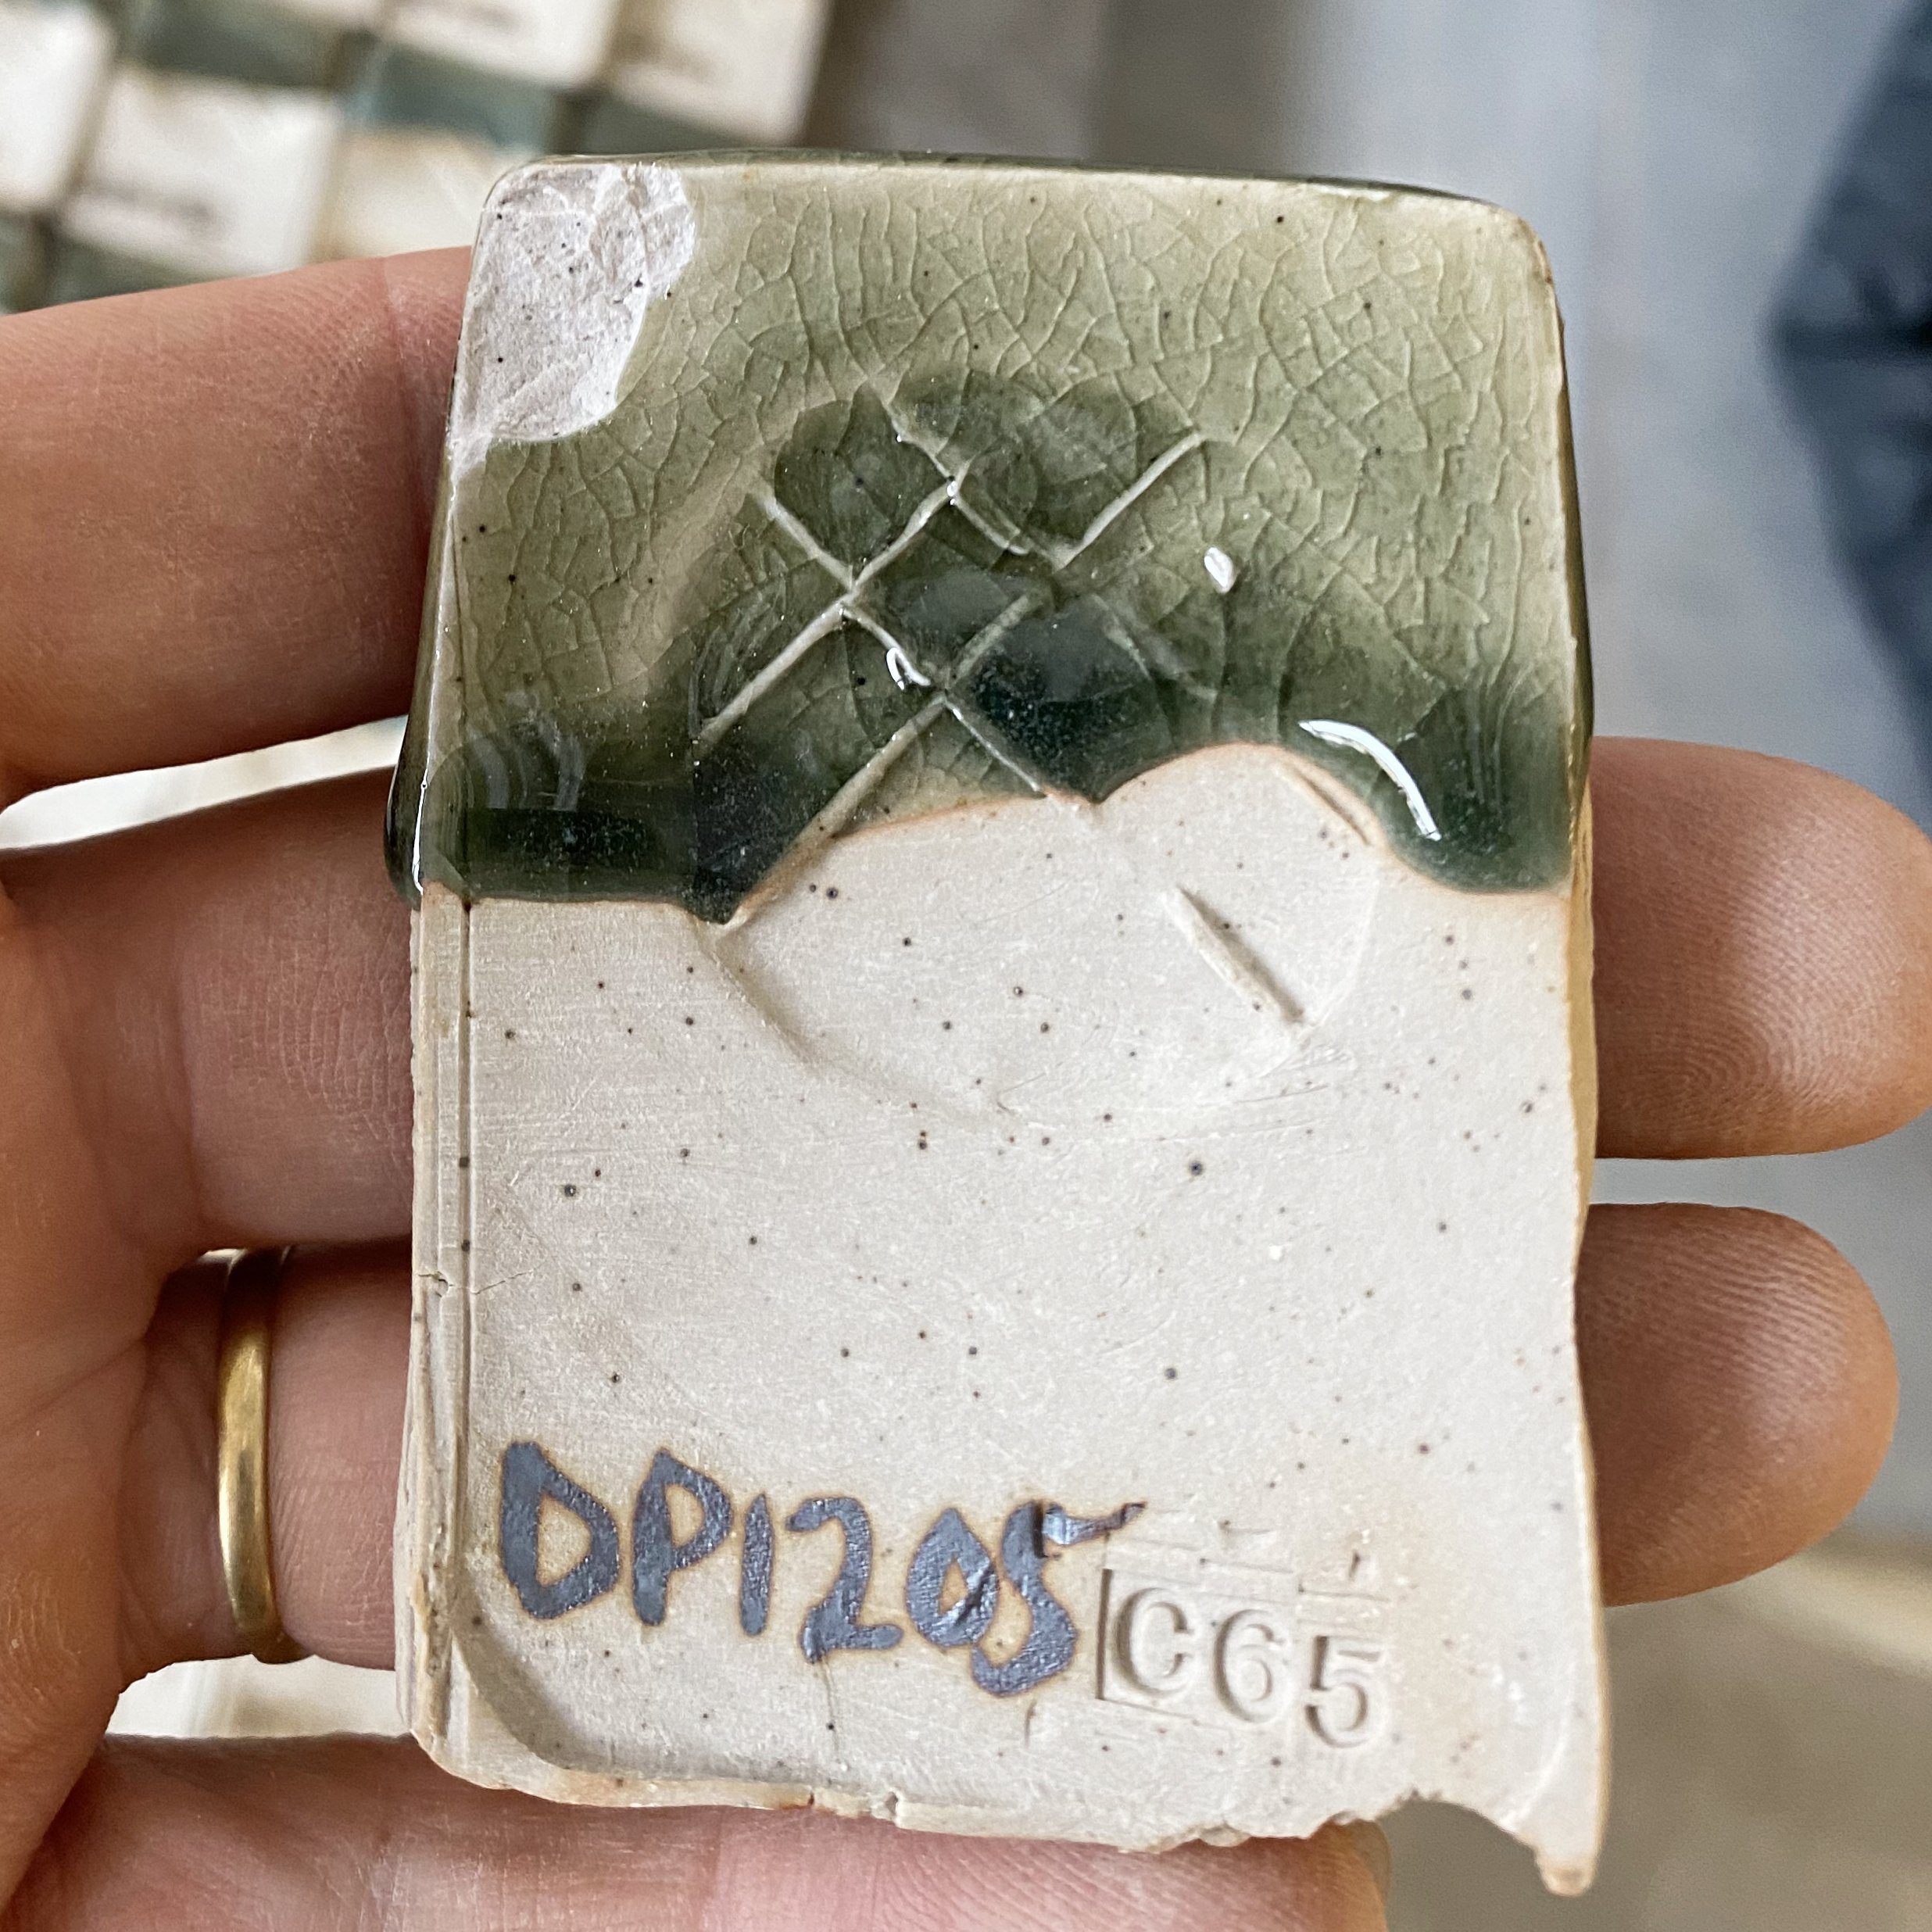
Moving from Corner A to Corner C the glazes get less chun like pretty quickly. Only DP1180 and DP1185 look promising. DP 1190 show some signs. DP 1205 is a full on celadon and looks like it wants to drip, no sign of chun features at all. In terms of composition this line blend moves to lower silica and higher magnesium. Frankly the composition change is not that vast which underlines the pointy that these chun glazes work in a very narrow sliver of glaze composition.
Here is the blend from Corner A-Corner C:


Now let’s look at Corner B to Corner D.


These are all kind of in the zone but not quite. The stand out in this row is DP 1204 (and its cousin next door at DP1203). What is special about DP1204? Lets look at its composition…
DP1204
50% DP granite
15% Wollastonite
21.66% silica
13.33% Mahavir (potash feldspar)
+ 2% Bentonite
+ 2% Bone Ash
+ 1.5% Red Iron Oxide
This is remarkably similar to the composition of the glazes in the top left of the grid that worked; DP1182 or DP1187 ish. This says to me I should do a new grid test where DP 1180 is in the center and I test around it.
Now lets examine Corner C to Corner D.
Neither of these corner glazes is particularly Jun like, interestingly DP1212 in the middle displays the most promise.


For the central area of the grid you can look and see what resulted. The second row up at the top was most promising: DP1186-8. But here are the middle tests laid out. I am trying to document thoroughly. Even the tests that I will not pursue. Click o an image to enlarge it.


Overall the zone in the top left of the grid, DP1180-2 and DP1185-86 were most promising. I will not pick one of these to move forward with at this stage, rather test more. But any of these could work I think. To my eye, if you held a gun to my head right now I would probably go with DP1186 (or DP1182, or DP1180. Don’t make me pick yet! Put the gun down!)
Here is the same grid test in cone 10 reduction compared to a more oxidised cone 11 firing. So different!

You can only really see the Jun effect in the top left corner of the oxidised and hotter grid. This tells me a couple of things. These Jun formulations prefer cone 10 to 11 and they want reduction. It also tells me that I should design my next grid test with DP1180 at the center, and see what happens as I move in various compositional directions… more silica one way, more potassium flux another, more granite another. My suspicion is that this glaze would like even more silica to be a more reliable Jun.
Here are the firing schedules from those two firings with their respective cone packs below them (cone 10 on the left, cone 11 on the right):


Finally, here’s my little helper in the glaze room at USU (my daughter Juniper: about 21 months old here!), then a bowl glazed with the central glaze in the grid, DP1197. You can see the Jun effect a little but it is still not quite there.


Until the next round of tests! Hope you are having a wonderful day!