
Four Inch Bowls, Step 6. Glazing.
Your four inch bowl is nearly a finished article!
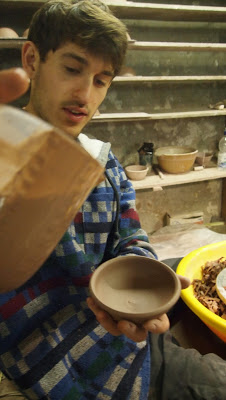
Once your pots have been bisquited you can glaze them. You want to do this at least the day before a glaze firing.
It is a good idea to sieve your glazes before using them. I did this a week or so ago to all the glazes.
Here is the video to accompany this process (it is actually the right way up to start with):
Once your pots have been bisquited you can glaze them. You want to do this at least the day before a glaze firing.
It is a good idea to sieve your glazes before using them. I did this a week or so ago to all the glazes.
 |
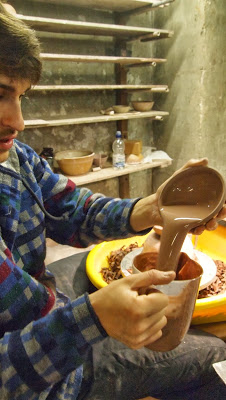
| Stir it up! John Forster likes to get his hand all the way in the bucket and stir by hand. This has the advantage that you get to feel how settled the mix is, but the disadvantage of a thoroughly coated arm. |
 |
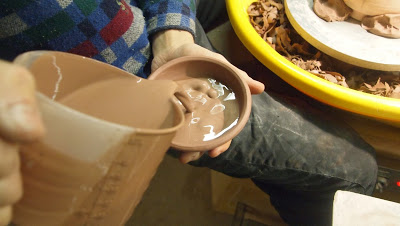
| Dip your jug in this mix. |
 |
| And pour it in. |
 |
| You don't need to go this high, I was etting carried away. |
 |
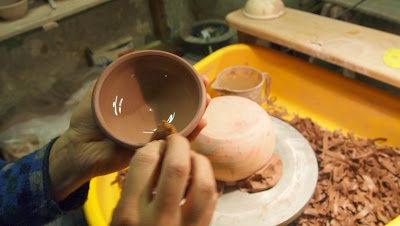
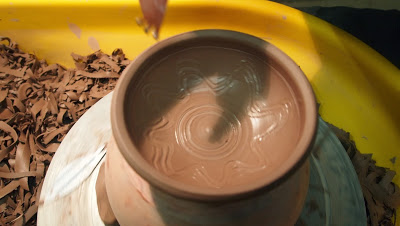
| Swirl the glaze around the bowl to cover the slip line. |
 |
| It does not matter if you drip a bit. |
 |
| Pour out. |
 |
| Quickly sponge off the excess. |
 |
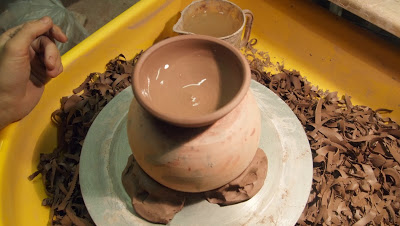
| Place to one side to dry out. It only takes a few minutes until the glaze has been sucked dry. |
 |
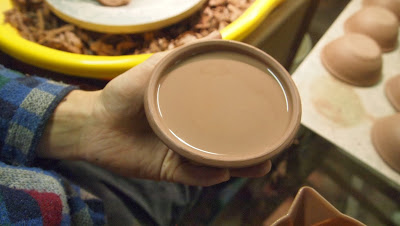
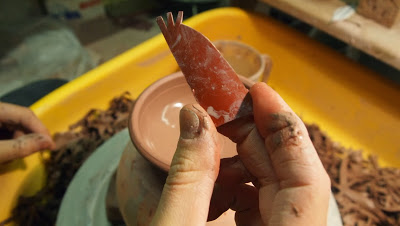
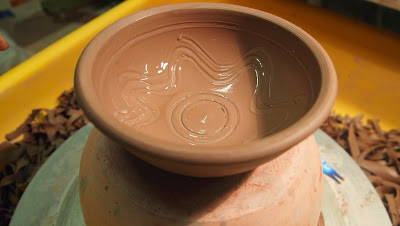
| Using a razor blade carefully slice a crisp line in the glaze. |
 |
| Use the corner of a sponge to clean off any excess glaze above the razor line. |
 |
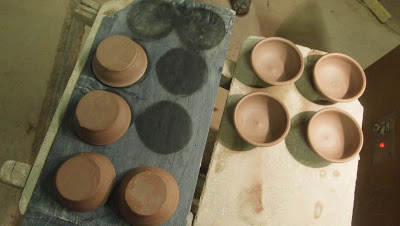
| Stack them up ready for the kiln! |
Four Inch Bowls, Step 5. Bisquit firing.
This post is a birthday edition! I am 24 today! My presents have included an apron with mushrooms on it, a loaf of bread, some underwear (I was in desperate need), a couple of books and lots of chocolate. And Lauren cooked us a wonderful dinner of grilled salmon (marinated in soy sauce, mustard and lemon juice) with lentils, corn and roasted tomatoes. Accompanied by a Kiwi Pinot Noir. Mmmm mmm mmmm.
But this is about step 5, bisquit firing. This stage depends on your kiln. The principle is essentially the same whatever kiln you have though. It is a low temperature firing which serves to drive most of the water out of your pots and make them easier to handle (stronger) when glazing.
Pots going into the bisquit kiln are very fragile. Mike Finch told me to treat them like eggs.
Here is a picture of the gas kiln at Winchcombe about two thirds stacked:
It depends on your kiln but this process should not take more than twelve hours. Try to let the kiln cool slowly and not be tempted to crack it prematurely. Loading and unloading are pretty easy, you just have to be extra careful not to knock the whole stack over by catching a shelf on your clothes or some such.
As there is no glaze involved you can have your pots touching any which way you like. It is best not to put too much pressure on any one point but within reason pots an be stacked densly and high. Bowls inside bowls inside bowls! Here's a tower of my four inchers:
Once they are out of the kiln you can move on to step 6 whenever time allows.
But this is about step 5, bisquit firing. This stage depends on your kiln. The principle is essentially the same whatever kiln you have though. It is a low temperature firing which serves to drive most of the water out of your pots and make them easier to handle (stronger) when glazing.
Pots going into the bisquit kiln are very fragile. Mike Finch told me to treat them like eggs.
Here is a picture of the gas kiln at Winchcombe about two thirds stacked:
 |
| Each shelf has three supports running from top to bottom. |
It depends on your kiln but this process should not take more than twelve hours. Try to let the kiln cool slowly and not be tempted to crack it prematurely. Loading and unloading are pretty easy, you just have to be extra careful not to knock the whole stack over by catching a shelf on your clothes or some such.
As there is no glaze involved you can have your pots touching any which way you like. It is best not to put too much pressure on any one point but within reason pots an be stacked densly and high. Bowls inside bowls inside bowls! Here's a tower of my four inchers:
 |
| These ones were fresh out of the bisquit kiln. You can see the clay has changed to a pinkish white. |
Once they are out of the kiln you can move on to step 6 whenever time allows.
Four Inch Bowls, Step 4. Slipping and combing.
Once the bowls are trimmed you let the sit out for a while
again. You do not want any white to be showing on the clay, that means they
are getting on for being too dry to slip. Slip is basically watered down clay
with an added colorant.
Here is the video to accompany Step 4:
Tips:
* It is important to get yourself set up before you begin. Always mix the glaze properly. Stir it up! Be sure to think of Bob Marley as you do it.
* The consistency of your slip should be something like single cream.
* If you mess up the combing it is no use pouring slip over it and trying again. It will show. As will any fingerprints or bits of slip you haven't cleaned off properly.
* A bendy tool for combing is much better than a stiff one.
These bowls are being slipped with a blue slip. It looks
grey now but will transform in the glaze firing. The blue comes from cobalt
oxide.
 |
| Find a bucket full of slip. |
 |
| The ladle is for stiring only! Don't be tempted to drink it. It is not soup. |
 |
| I like to attach a bisqued pot to the wheel in order to make combing easier. |
 |
| Pour your slip in. |
 | |||||
| Like so. |
 |
| Swish or swirl around the slip until it reaches just under the rim. |
 | |
| Tip the slip back into the jug. This naturally stirs it up and saves you going in the bucket again. |
 | |||
| Several shakes are necessary to make sure all the excess slip drips out. |
 |
| Wipe the rim with a sponge. |
 |
| Place it down to dry out a little. You don't want to comb it until the sheen has gone off. |
 |
| I always slip two so as to let the first go off and save time. |
 |
| Putting in the top line, just underneath the rim. |
 |
| A double line in the base of the bowl. |
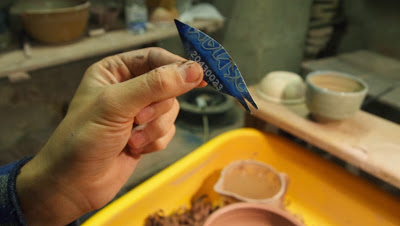 |
| My tool for this process; a cut up membership card from the picturehouse in Norwich. |
 |
| Ready for the wavy Winchcombe lines. |
 |
| Wheel turning slowly, hand moving up and down. |
 |
| Combing in action. |
 |
| My combing tool: a cut up rubber kidney. |
 |
| It is quite difficult to join up the waves but I managed it on this one. |
 |
| Now place on a board and get on with the next one. |
Here is the video to accompany Step 4:
Tips:
* It is important to get yourself set up before you begin. Always mix the glaze properly. Stir it up! Be sure to think of Bob Marley as you do it.
* The consistency of your slip should be something like single cream.
* If you mess up the combing it is no use pouring slip over it and trying again. It will show. As will any fingerprints or bits of slip you haven't cleaned off properly.
* A bendy tool for combing is much better than a stiff one.
Four Inch Bowls, Step 3. Trimming.
A lot of people call this process turning. I have tried to use this as a term but trimming seems so much more appropriate. You are removing the excess clay on the base of the pot to tidy it up and ensure it sits properly. The bases should be leather hard at this stage. Again the time will vary upon air conditions so keep an eye on the pots; prod them every now and then to see!
First thing to do is throw a pad of clay.
 |
| Centre a handful of clay. |
 | |
| Compress the clay with a slow karate chop motion. |
 |
| Pull out and press down with your finger tips |

 |
| Finish the pad by flattening it with a stick/wooden tool. |
 |
| Tear off a square of plastic, or even better thin wrapping paper. |
 |
| Place it over the pad and rip off stray bits. Some people do not do this but it helps keep the rims clean. |
 |
| Centre the pot and lightly press it down onto the pad. |
 |
| Use a tiny piece of plastic (old credit card) as a resting position for your finger. |
 |
| The plastic helps you avoid damaging the base with your finger/nail. |
 |
| Start trimming! It is quite easy if your set up is correct. |
 |
| If the clay is leather hard then you should see nice ribbons of clay stream off the pot. |
 |
| You can trim all the way to the rim, or not, depending. The shape should be almost there from the throwing anyway. |
 |
| When the sides are done think about the base. Sometimes the cut from the wire is clean enough to warrant no further attention. |
 |
| This one was a little bumpy so I used a sponge to finish it. You don't have to do this. |
 |
| Final touch is taking off the bottom edge. This is the band to be stamped. |
 |
| The Winchcombe stamp. |
 |
| Make sure to put it on the right way. |
 |
| The trimmed article! |
Other tips on trimming:
* Keep your tool sharp.
* Trim when the clay is ready; doing it too early or late can prove frustrating.
Here is the video to go along with this set of pictures:
Now leave the pots to rest a while longer till Step 4.
Four Inch Bowls, Step 2. Flipping.
Four inch bowls are not just a two or three minute creation. The throwing is merely part one of this seven part epic. Step 2 takes place an indeterminable space of time after the throwing. The bowls need to sit around for a while. It is important to let them relax back for a couple of days or more, until they have wilted like spinach hitting a hot pan.
The bowls shrink in size as water escapes. You have to keep an eye on them. Not in case they run away but because you never know how quickly they will dry out. It depends where you leave them. Pots in England take longer to reach Step Two than pots in L.A.
This may not seem like the most exciting step but it is a necessity. You need to look out for the moment when the rim will be able to take the act of turning it over. You can test it by lightly touching it. It should not be tacky to the touch. To get it off the board you twist gently and lift up. If you use a twisted wire to remove the bowl from the wheel then they lift off easier.
 |
| Step 2. Thrilling stuff. |
Tomorrow I will post Step 3. The bowls should be ready by then. How exciting to be writing this as it happens. Its like live TV but a lot slower and more boring.
Four Inch Bowls, Step 1. Throwing.
Further investigation into four inch bowls! I thought I would do a post describing the making process with pictures for each step. So here we are.
Start by making some balls. 9oz to be exact, although 8oz should be enough to get to the desired dimensions of 5" by 2". I have not included pictures of wedging/kneeding but will another day.
Start by making some balls. 9oz to be exact, although 8oz should be enough to get to the desired dimensions of 5" by 2". I have not included pictures of wedging/kneeding but will another day.
 |
| Weighing the clay. |
 | ||
| Pat the clay into balls. |
 |
| Many balls. |
 |
| Sit down at the wheel and get comfy. |
 |
| Plonk the clay in the middle of the wheel. |
 |
| Cone up the clay. |
 |
| Cone down the clay. |
 |
| Make sure the clay is centred by compressing and containing it. |
 |
| Start opening up. I use my right thumb. |
 |
| As you can see the opening does not need to be very deep. |
 |
| Open more and start pulling clay out of the base. |
 |
| Half way to its final height and width. (Hopefully when I have done a few hundred more I will only need one pull) |
 |
| Check the rim. Do this after every pull. Always. |
 |
| Pull up once more. |
 |
| Check the rim. |
 |
| Undercut the bowl so it comes off the wheel easier and needs less turning. |
 |
| The final move is running your fingers from the top of the rim, inside the bowl to the base. This should complete the curve, making the inside resemble half a tennis ball. |
 |
| One final check of the rim. |
 |
| Wire it off with your thumbs pressing the wire down onto the wheel head. Wheel slowly turning. |
 |
| Gently slide it off. (Mike Finch would not approve of this, he prefers to pick them off the wheel, but I've found that I damage them less by sliding them). |
 |
| And onto a board. |
 |
| Now make another one. |